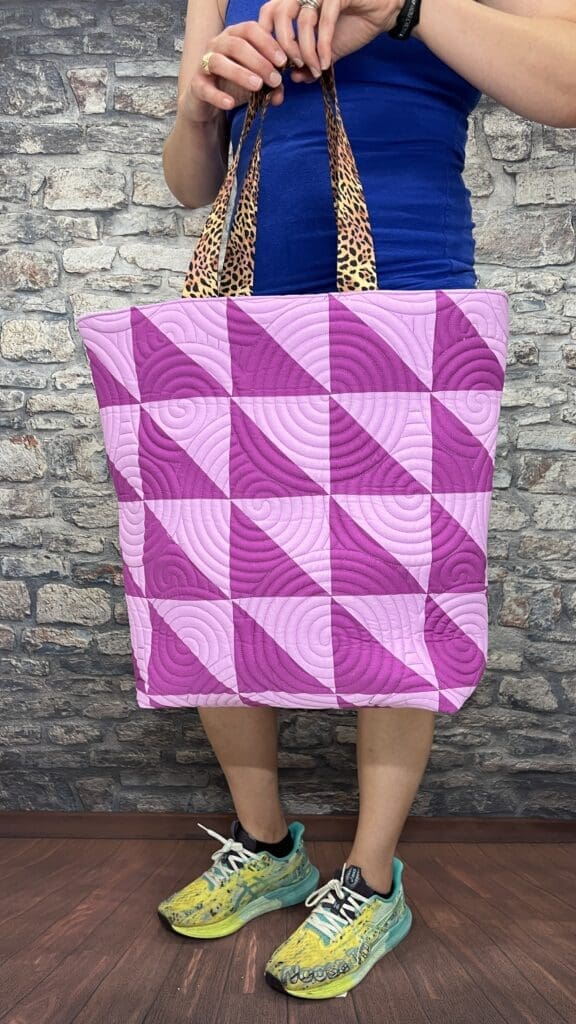
Love the look of a sleek, modern tote? I’ve got you. The Florence Market Tote pattern is a large carry all bag with a simple, but modern design to really upgrade your basic tote. It’s great for trips to the library, farmer’s market, or wherever you need to load up on supplies. The standard pattern tells you how to piece the exterior with Half-square triangles using the 8 at a time method to save time. This is great for the two color samples I have sewn up–or alternatively, you can grab some fabric scraps and make your individual half square triangles.
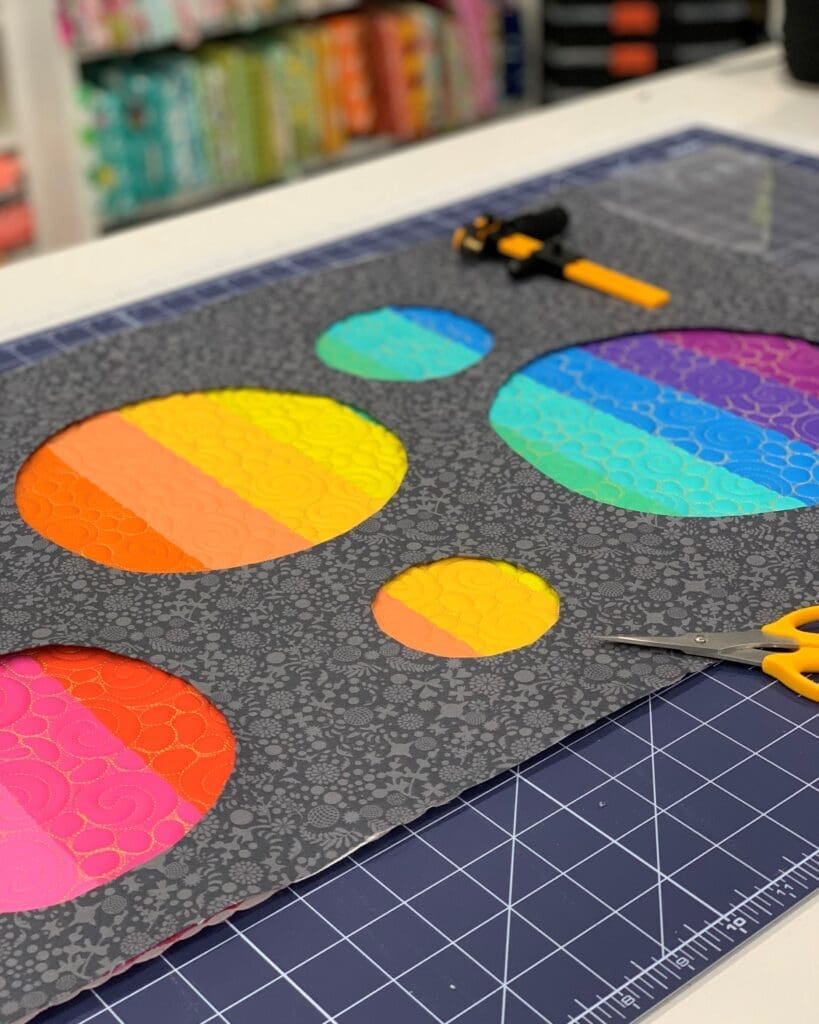
I’m so thrilled to share my OLFA Creator project with you today! The Sunshine Tote PDF Pattern is here! I’m a sucker for oversized tote bags and I love creating details that will really make a tote POP. So I’ve gathered together some of my favorite OLFA tools to put together the Sunshine Tote. I used the OLFA Circle Rotary Cutter to cut out the circles on by tote. It makes for some really cool reverse applique. This was such a great project that lifted my spirits during sewcial distancing.
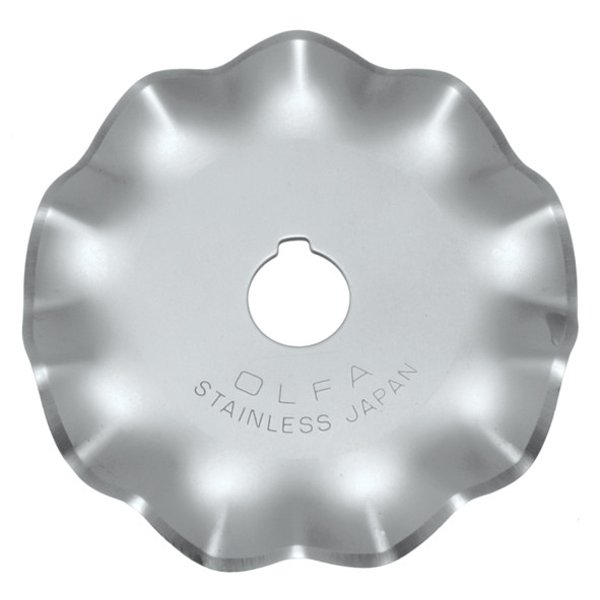
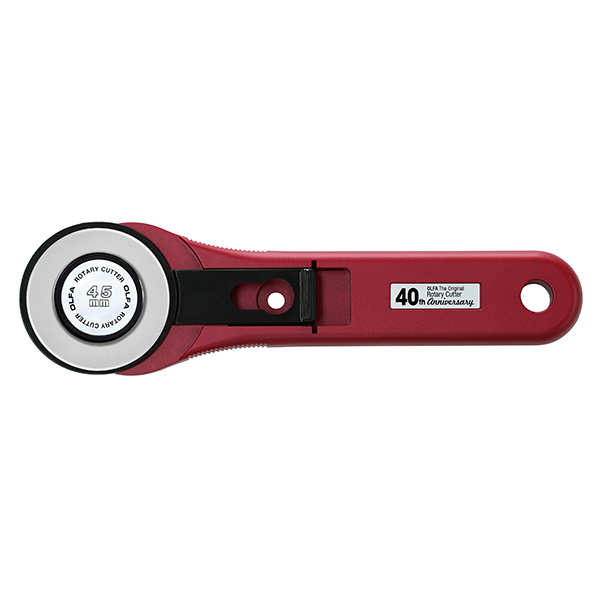
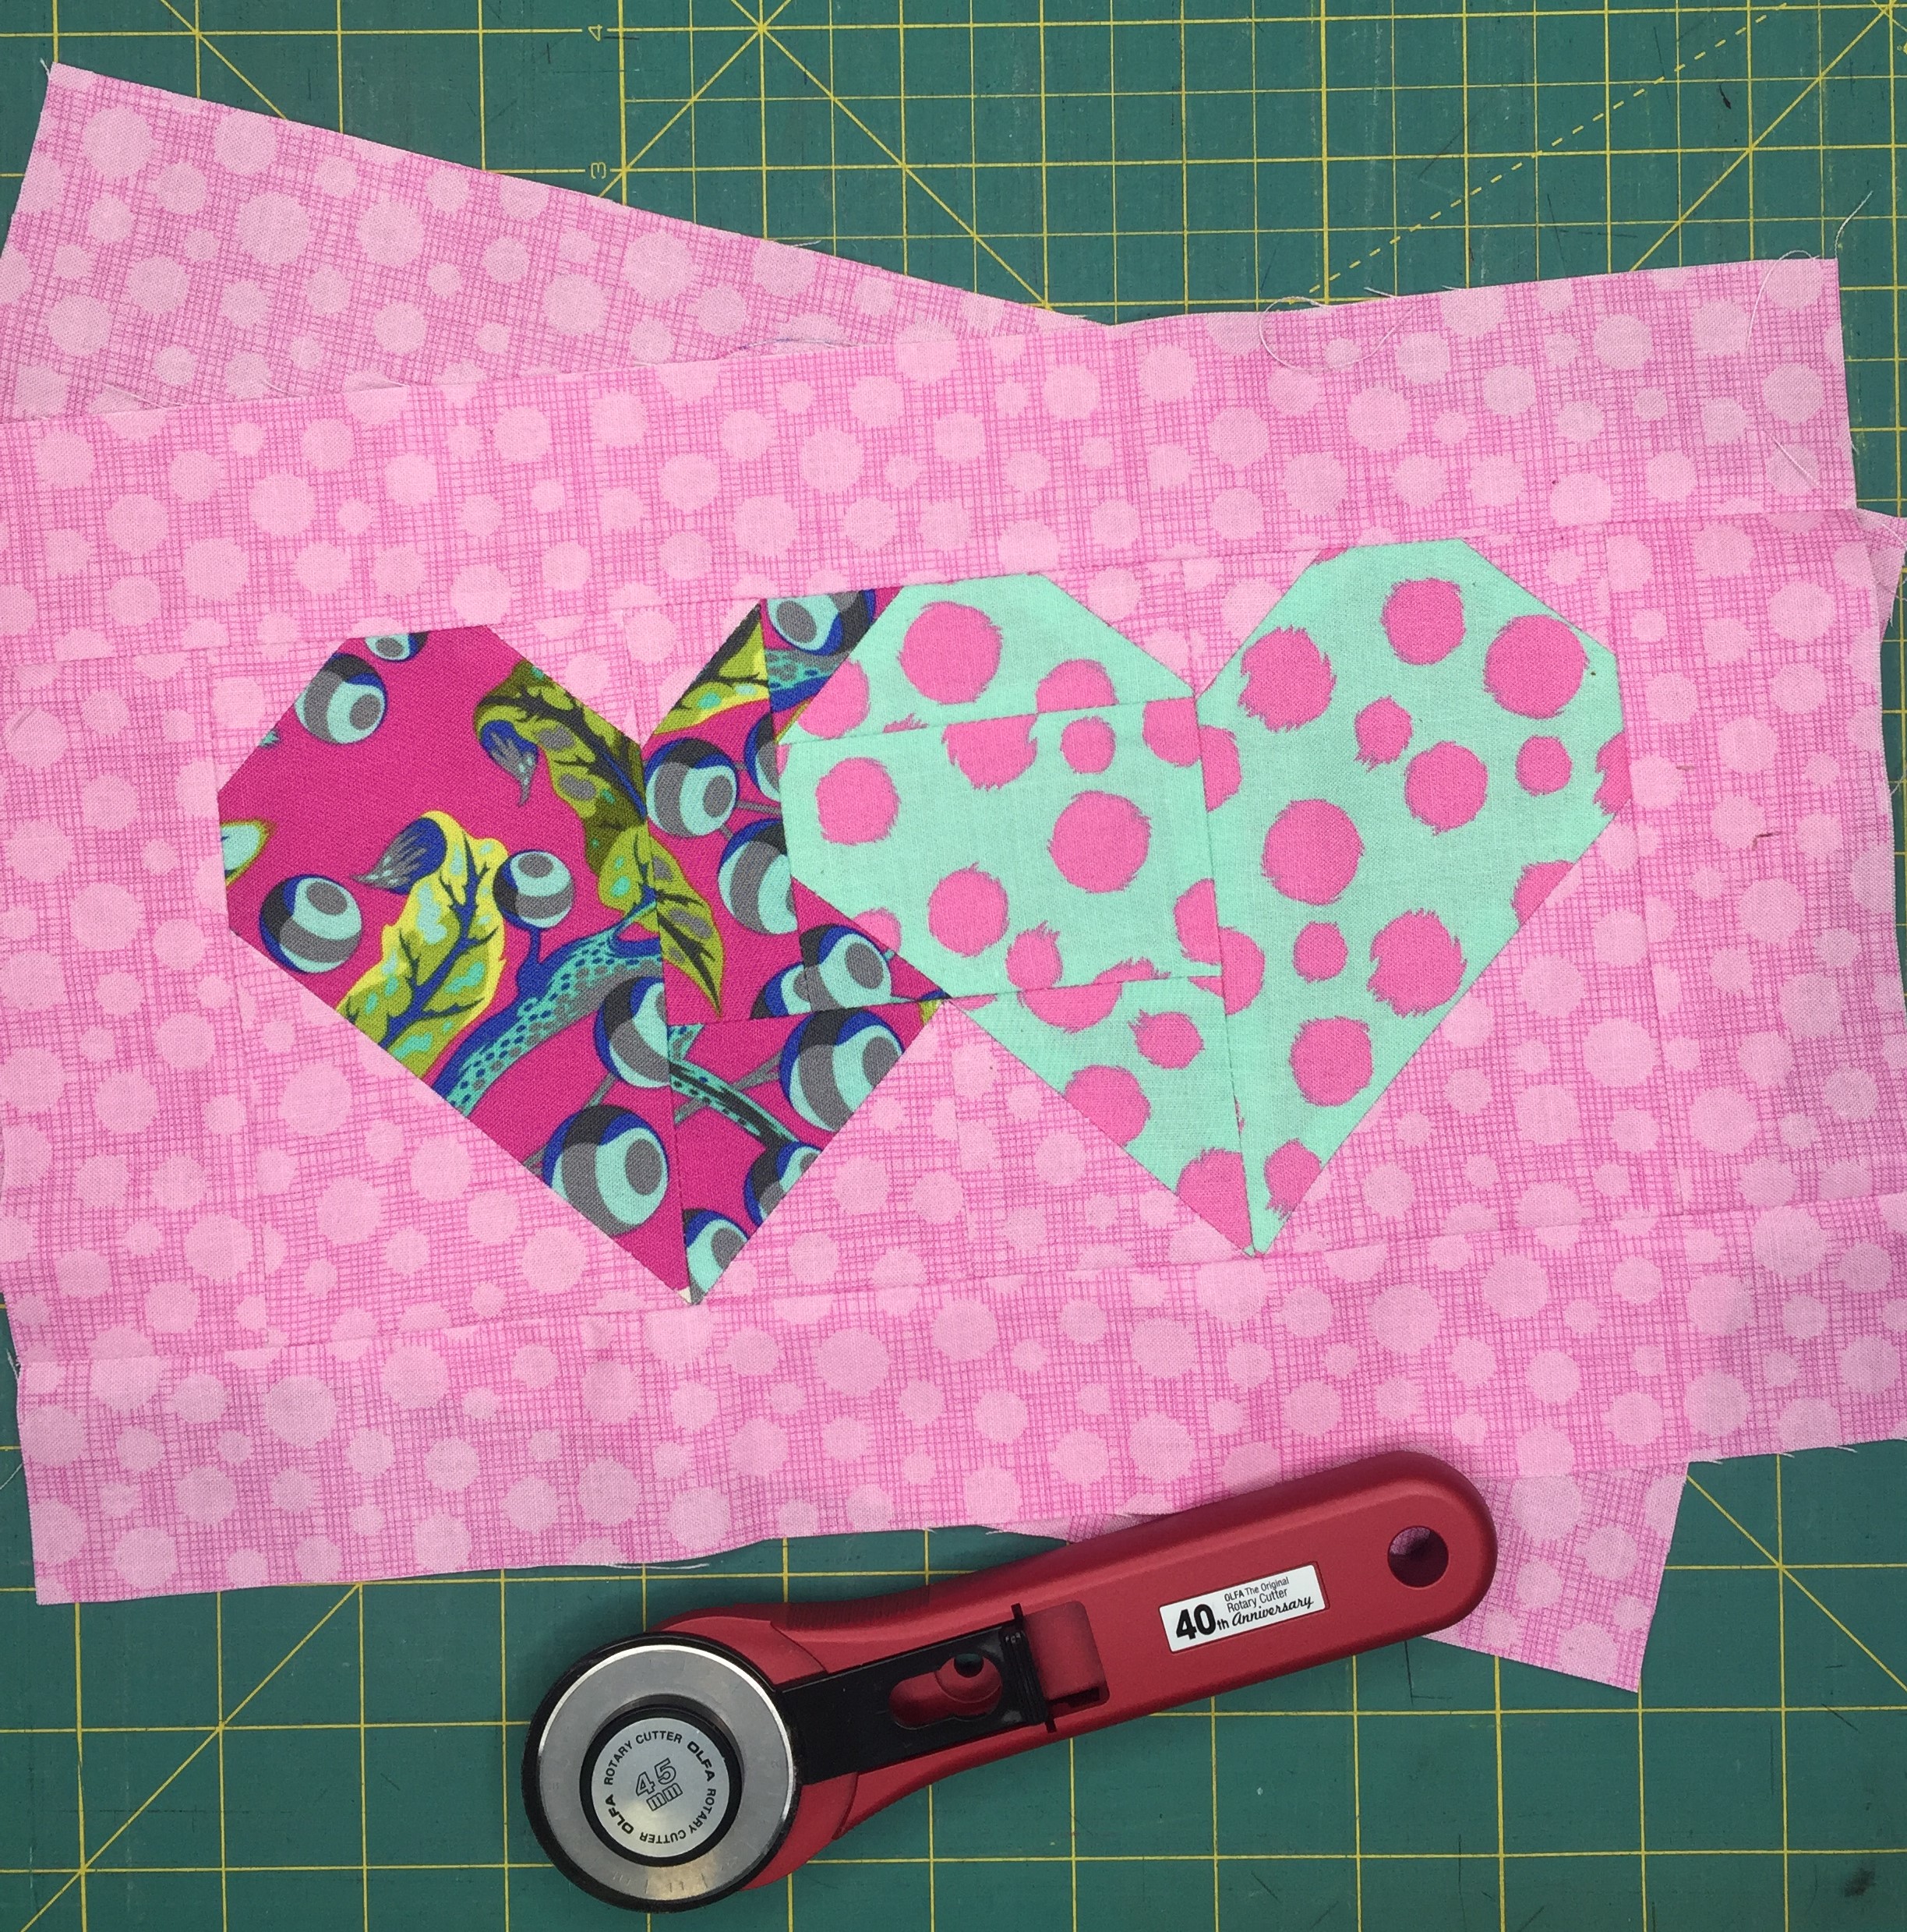
OLFA is celebrating their 40th Anniversary this year and has teamed up with Aurifil to create the Slice and Stitch Challenge! I was asked to be part of the challenge, and I’m so excited to included in this talented group of makers, showing you how to use handy tools to create things you’ll love :). I don’t know about you, but if you sneak into my sewing room, you’re sure to find several OLFA tools (and cutting mats) and LOTS of yummy Aurifil thread. Some of my favorite (and quite possibly underappreciated) tools are specialty rotary cutter blades. You can (carefully) pop one of these blades into your regular rotary cutter and quickly achieve a decorative finish that will look like it took you forever to cut…but that can be our little secret! I also just LOVE the new OLFA RUBY rotary cutter…I use it daily (photos below are from OLFA’s website). For the Slice and Stitch challenge, I saw those decorative blades paired with Aurifloss and knew immediately I just had to make a zip pouch!
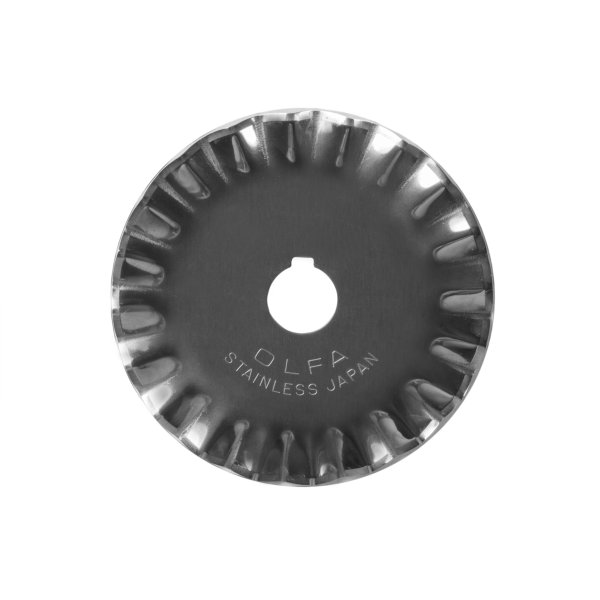
Pinking blade
Scallop blade
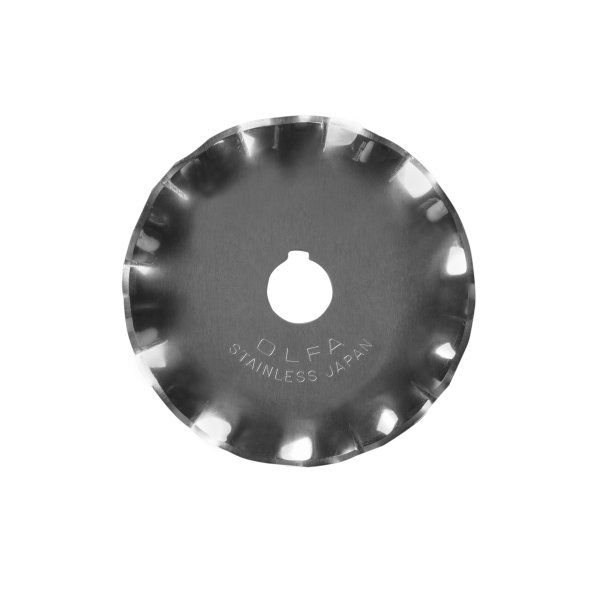
Wave blade
Ruby Rotary Cutter
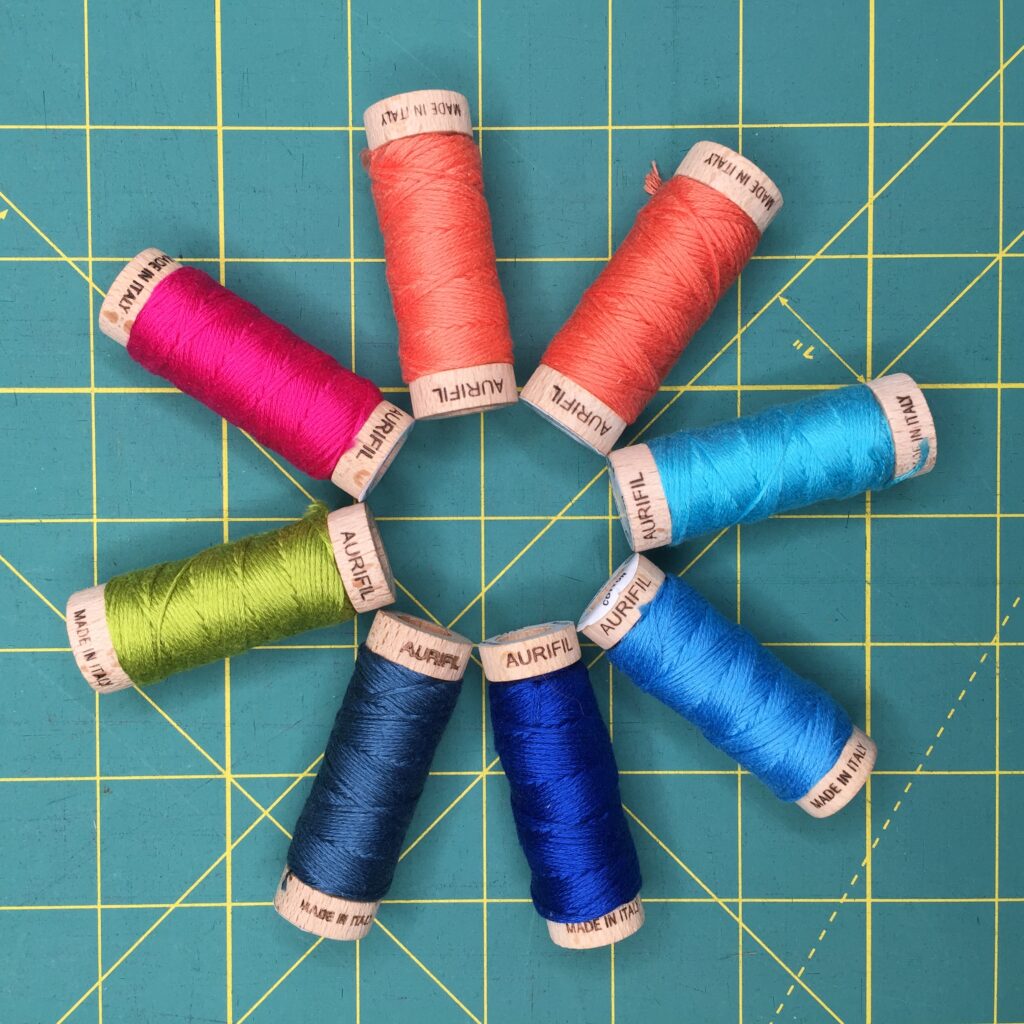
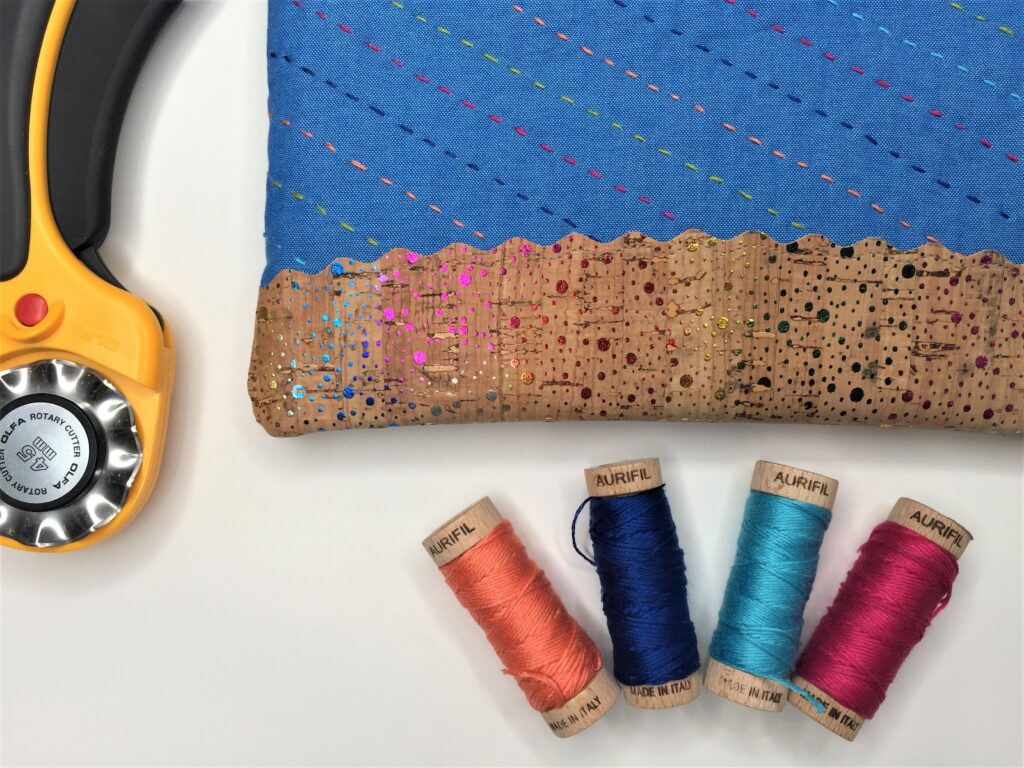
You can see the dreamy Aurifloss colors I chose for the hand quilting on my zip pouch. Love those blues with a punch of bright colors! Let’s get moving and start sewing up your own zip pouch!
Aurifloss in your favorite colors (I used #1320 Bright teal, 2225 Salmon, 2220 Light salmon, 4020 Fucshia, 5005 Bright turquoise, 2735 Medium blue, 1147 Leaf green, and 4644 Smoke blue)
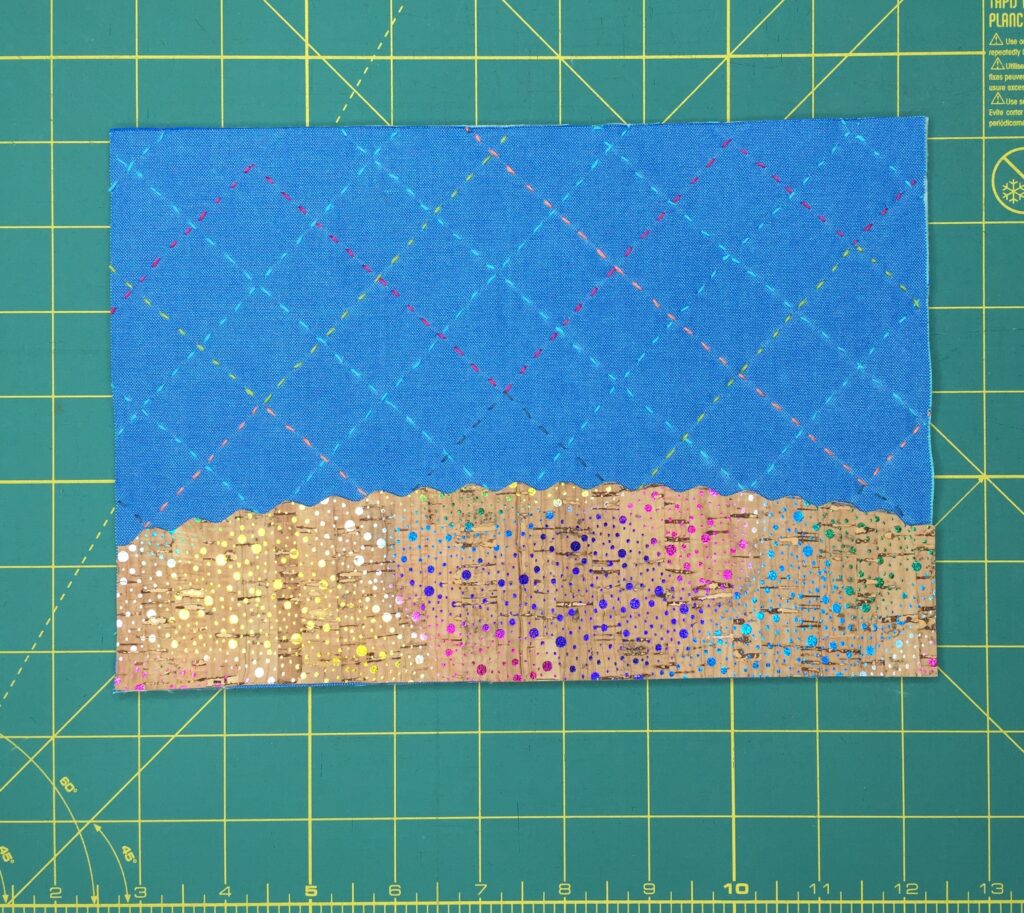
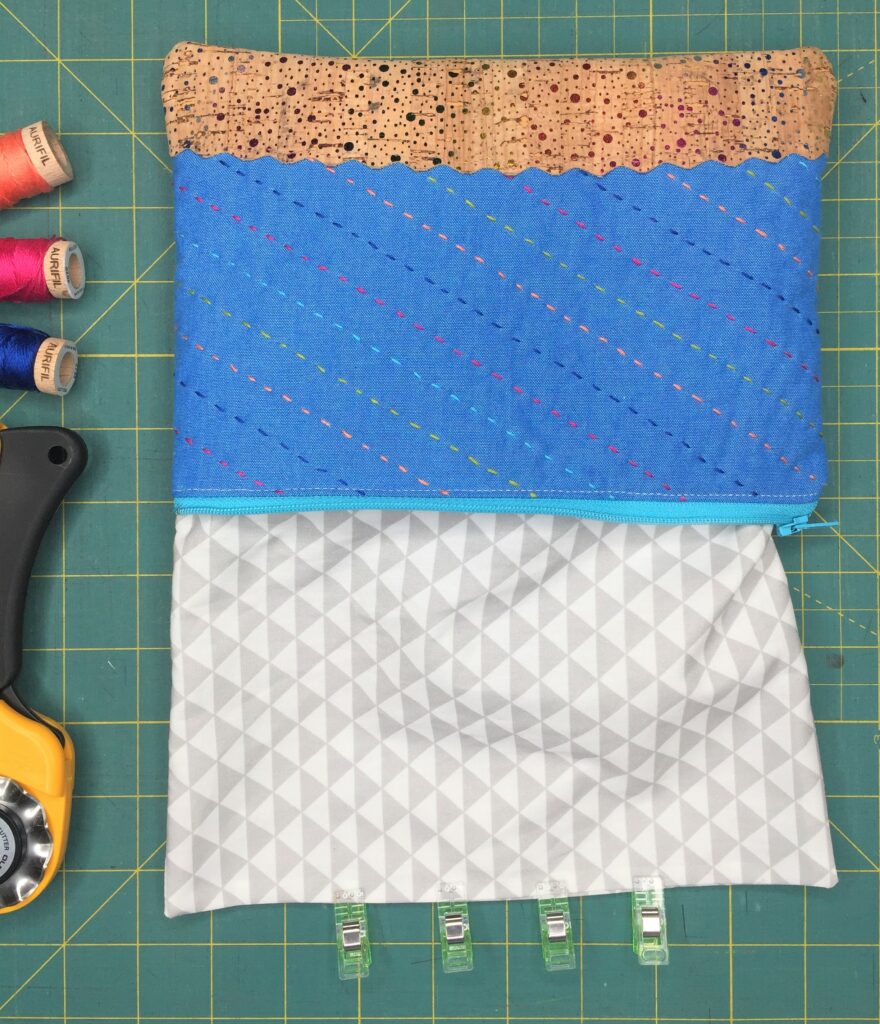
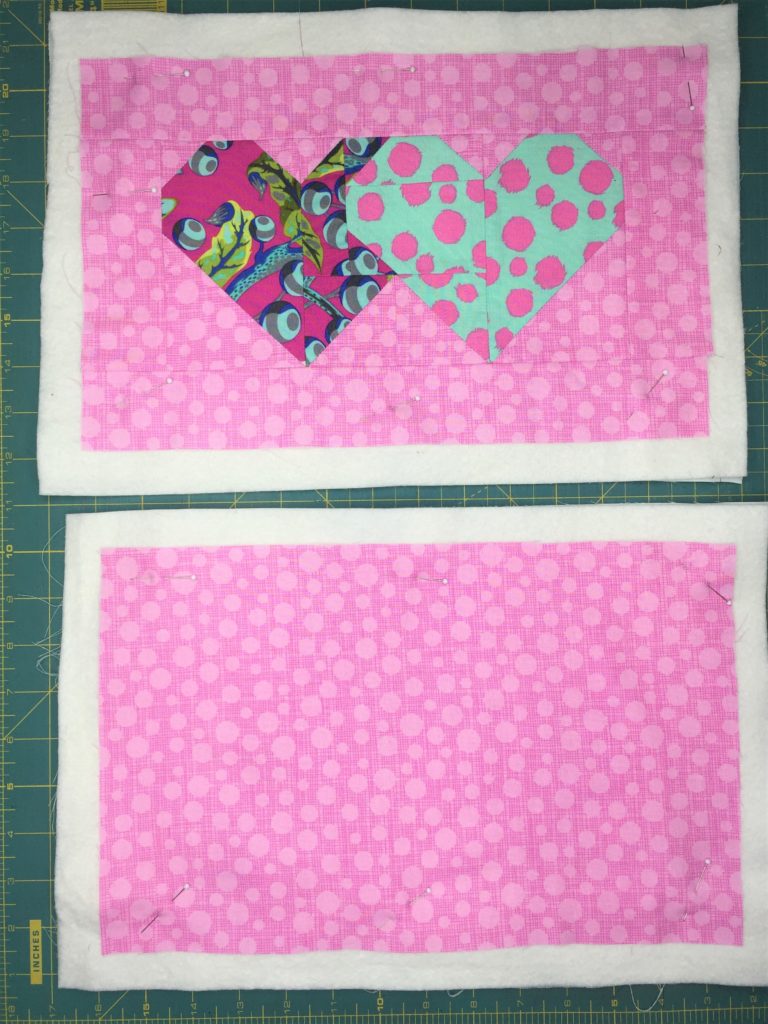
To begin, you’ll need to take the two exterior pieces of fabric cut at 6.5″ x 9.5″ and center each one on top of a piece of batting. Use a Hera marker or chalk pencil to mark your hand quilting lines, then hand quilt a pattern or random stitches onto each exterior piece. I like to make my stitches about 1/4″ in length, and spaced the same distance apart.
Grab your template:
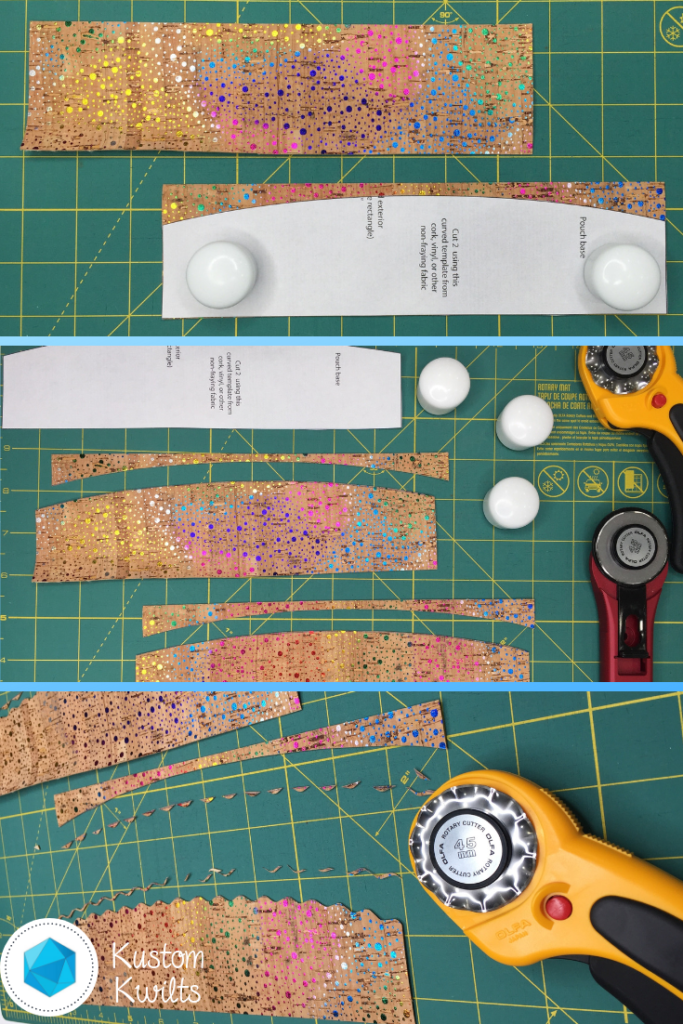
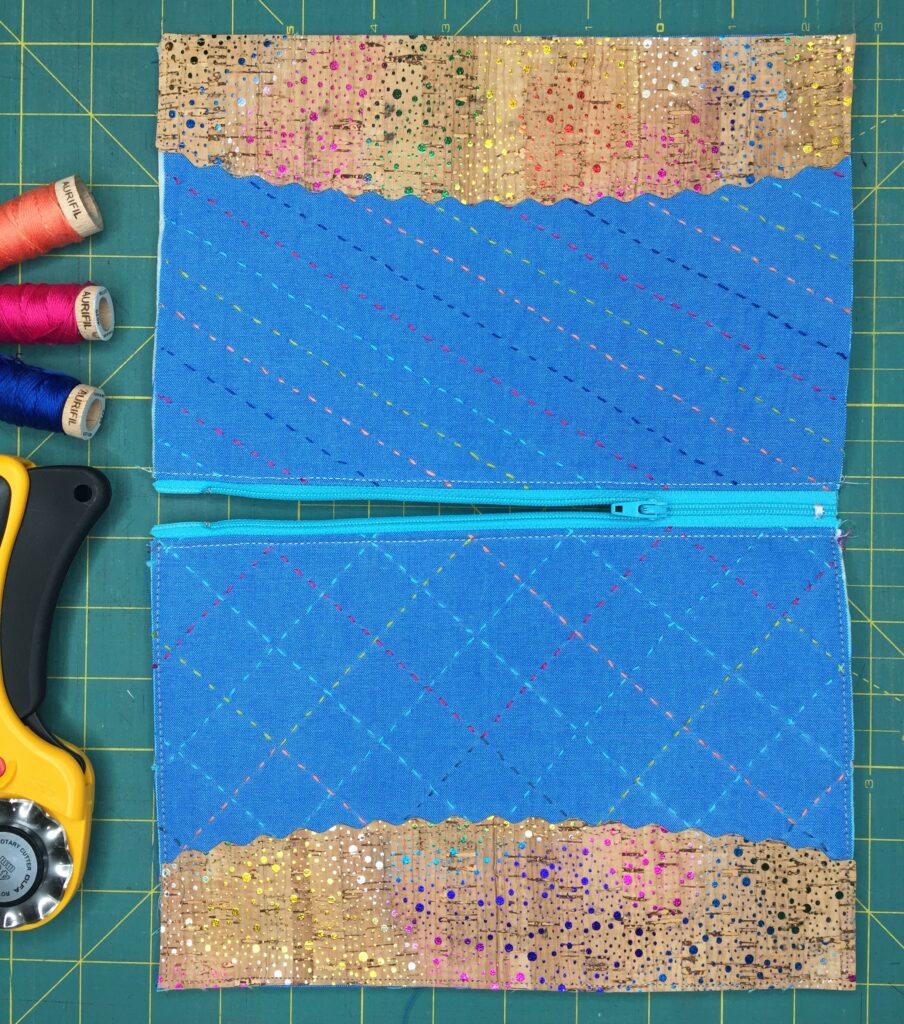
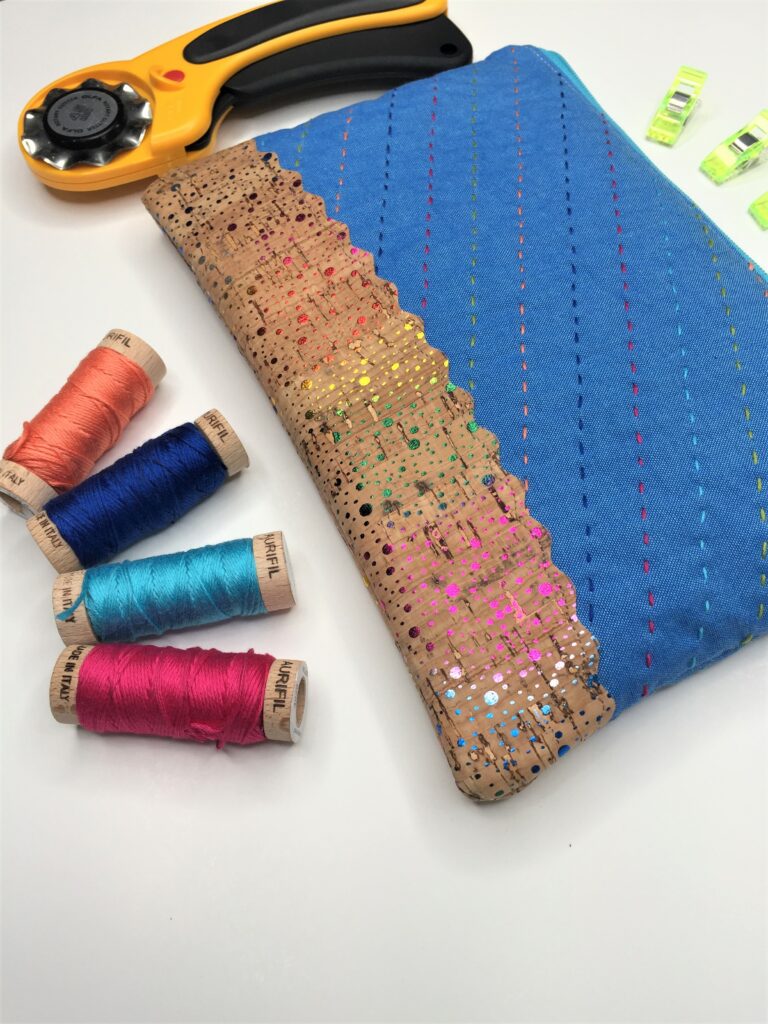
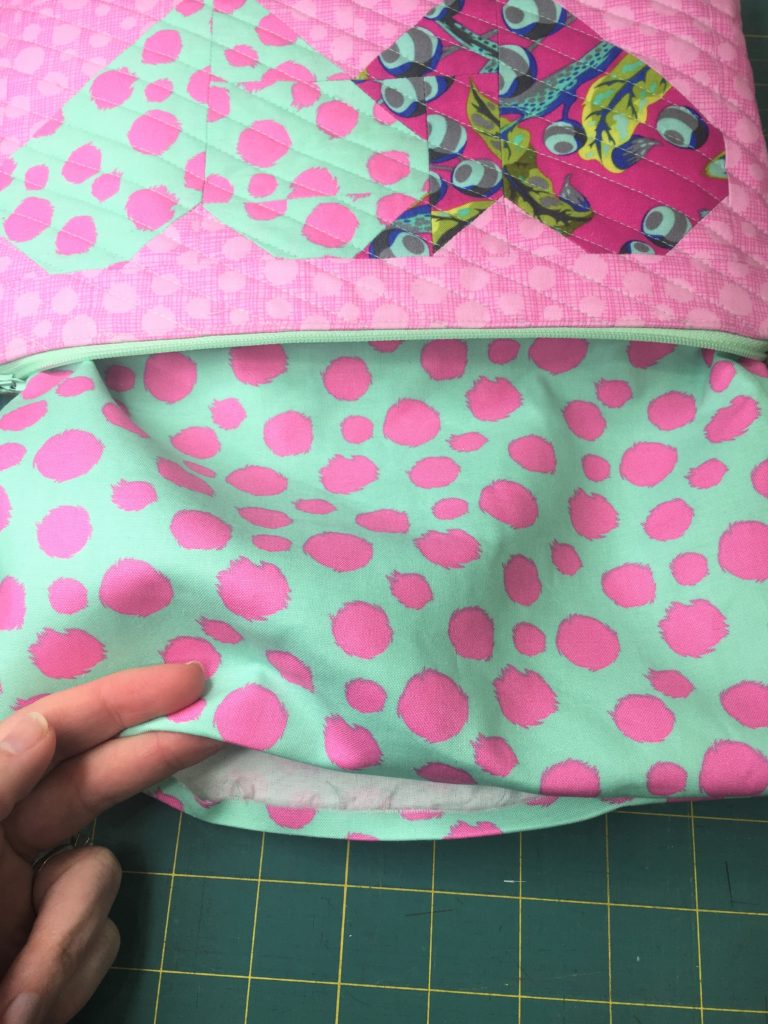
Now you’ll take the cork pieces, and the bottom portion of the template printed from your supply list and line the template up along the bottom 9.5″ of the cork. Use a standard OLFA 45 mm Rotary blade to trim along the curved edge. I used my OLFA Ruby Rotary Cutter for this part. Once you’ve trimmed the curved portion, take the Wave Rotary blade and trim just along the curved edge to leave a cute wavy edge.
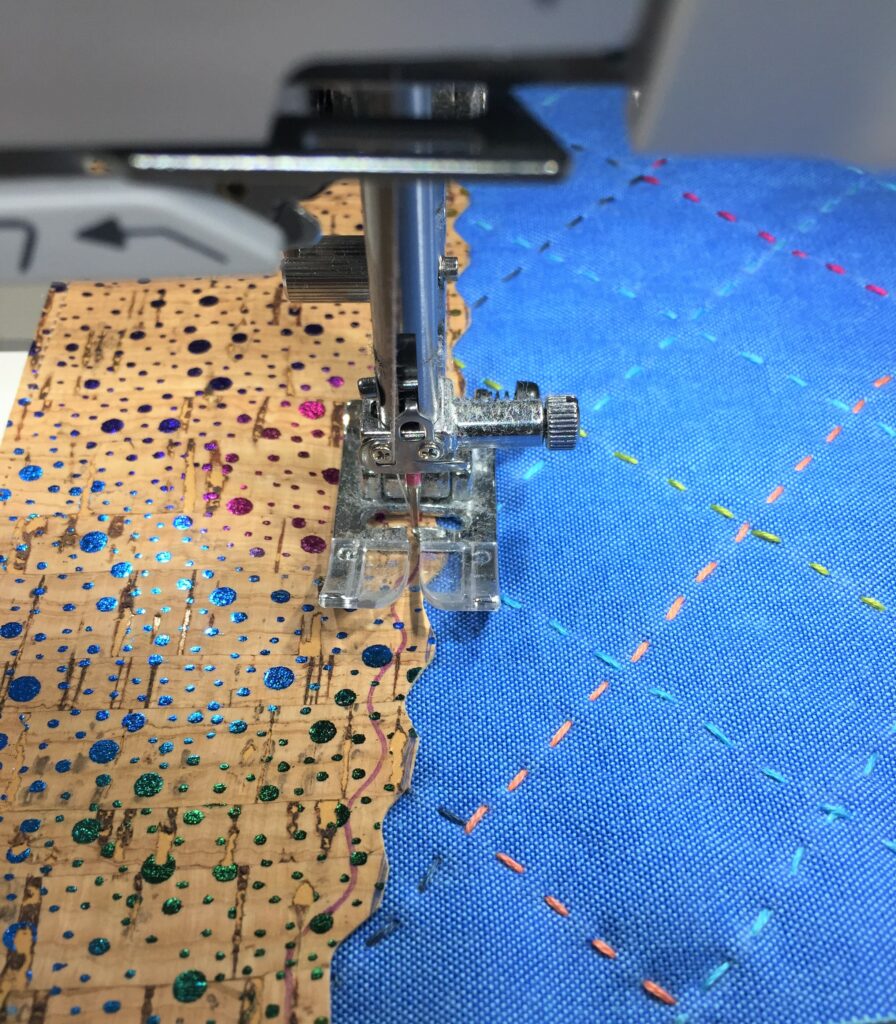
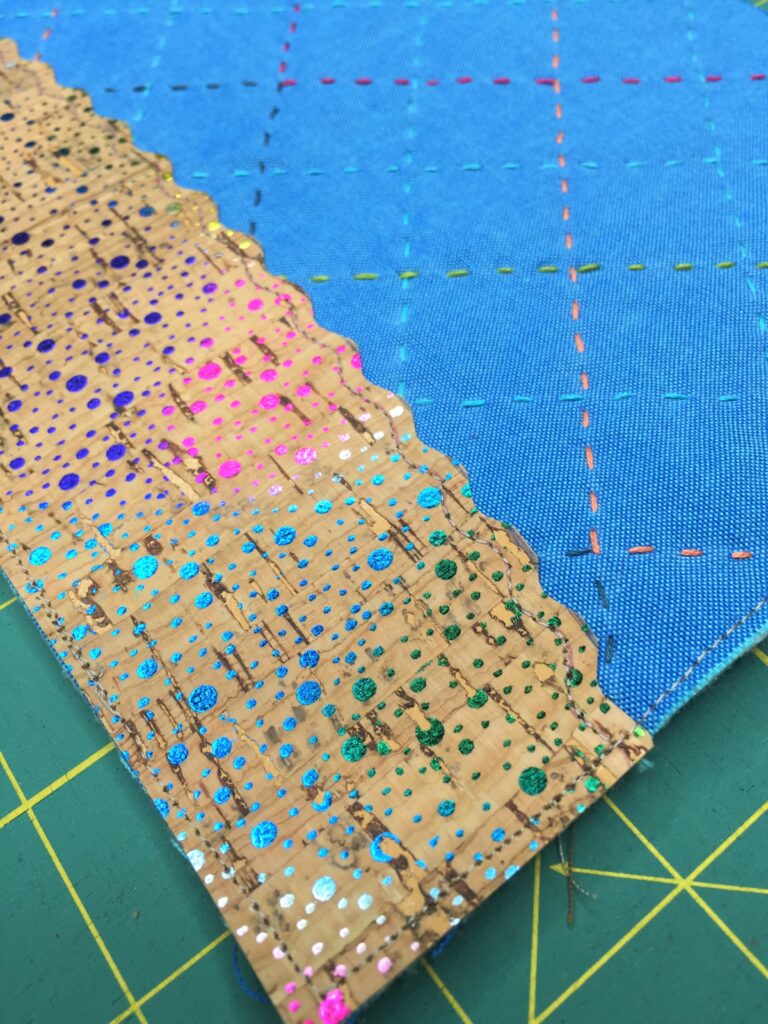
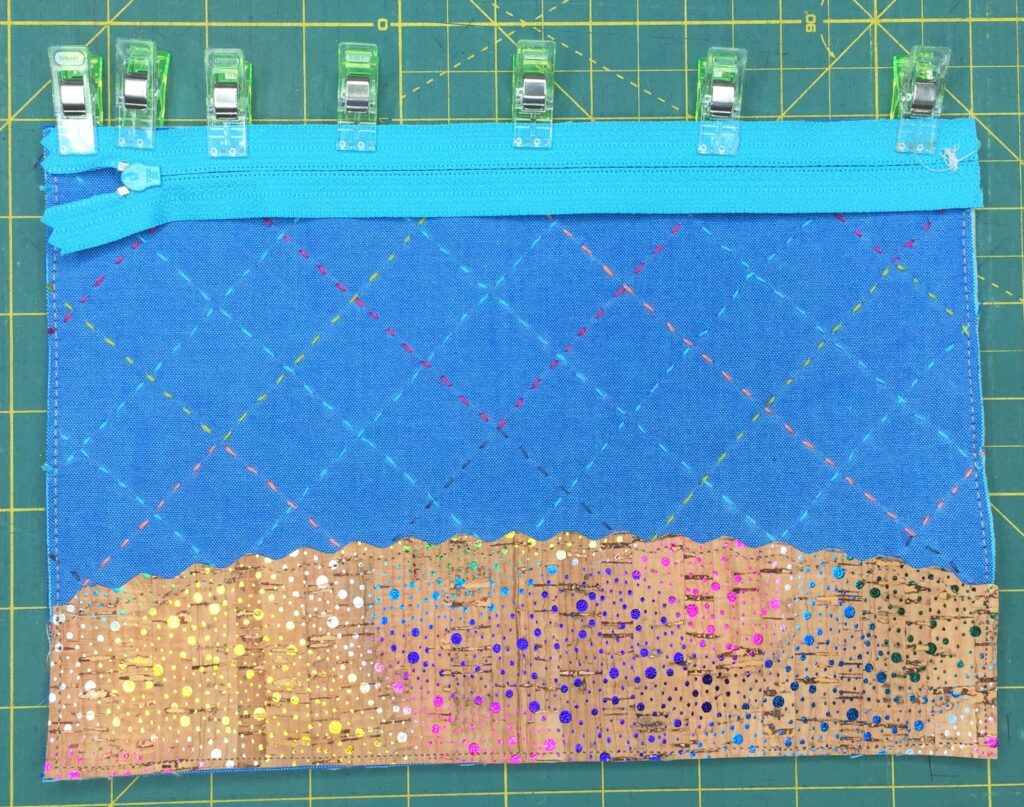
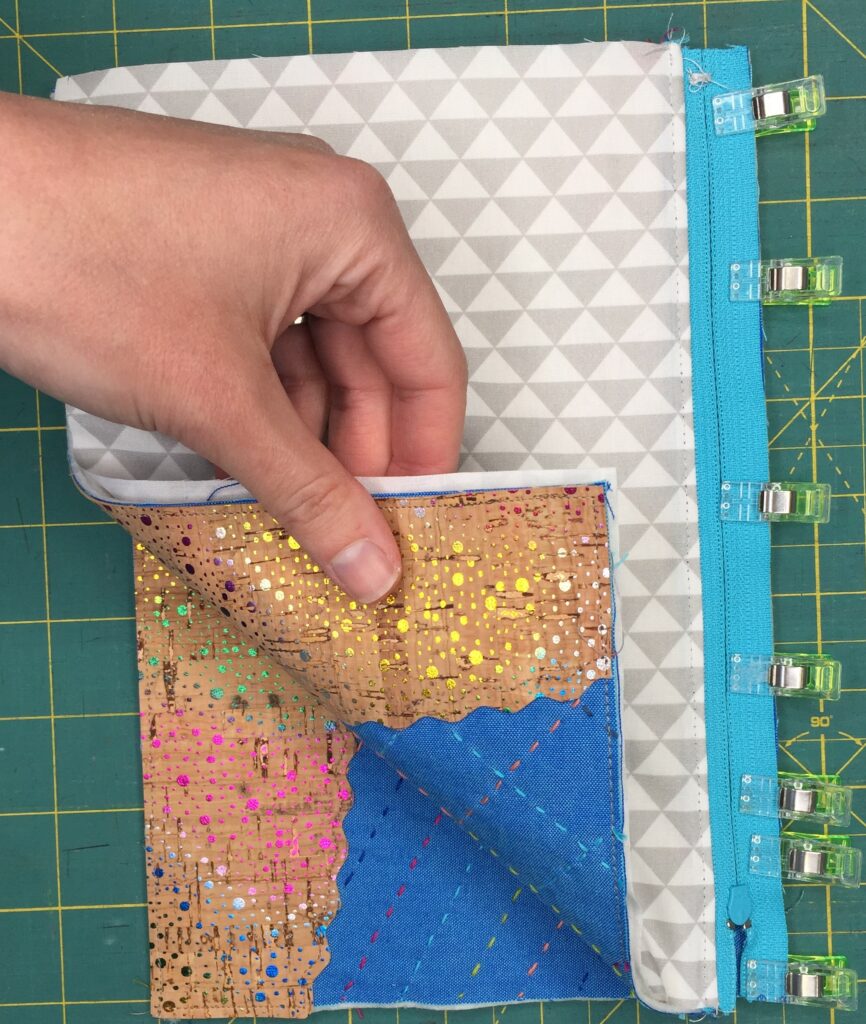
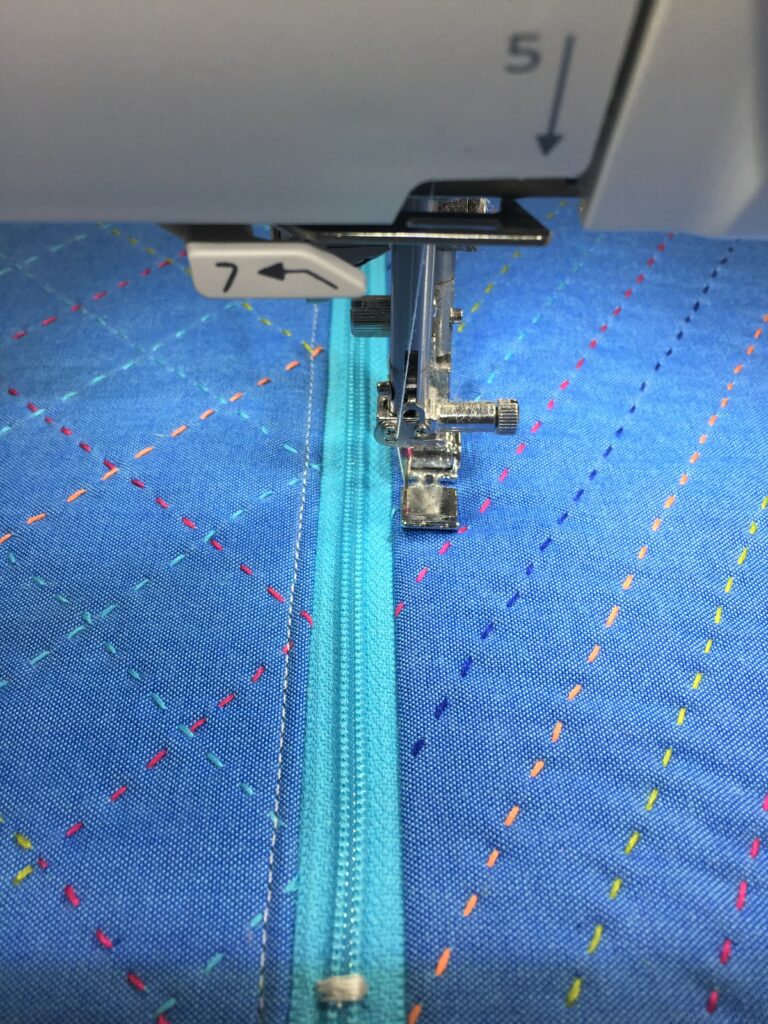
Take one of the quilted exterior pieces and place the decorative cork on the bottom 9.5″ edge. Use clips to hold in place, or use some wash away hem tape to secure. At this point, I like to take an air erasable marker and echo the line of the wave just below the wavy edge of the cork – about 1/8″ from the curvy edge – as a stitching guide. Take this piece to the sewing machine and topstitch along the guideline you drew with a coordinating thread. Then stitch around the remaining edges of the cork, about 1/8″ away from the raw edge to secure it in place. Don’t worry — the cork won’t fray, so it’s great for special decorative finishes with the OLFA rotary cutter!
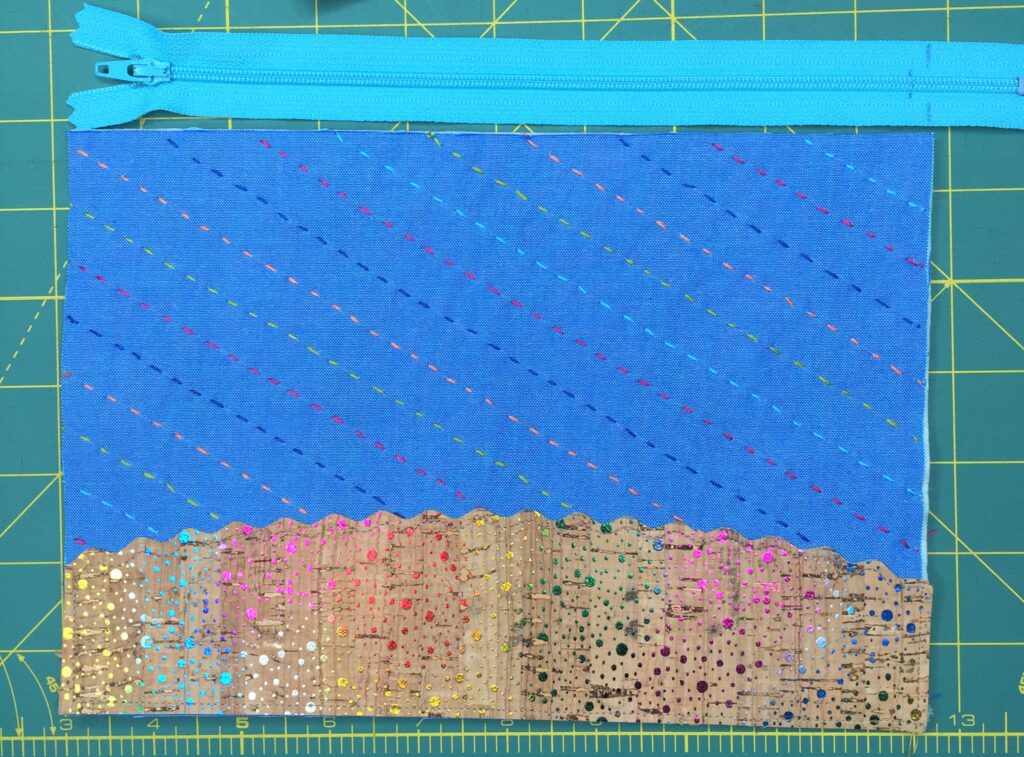
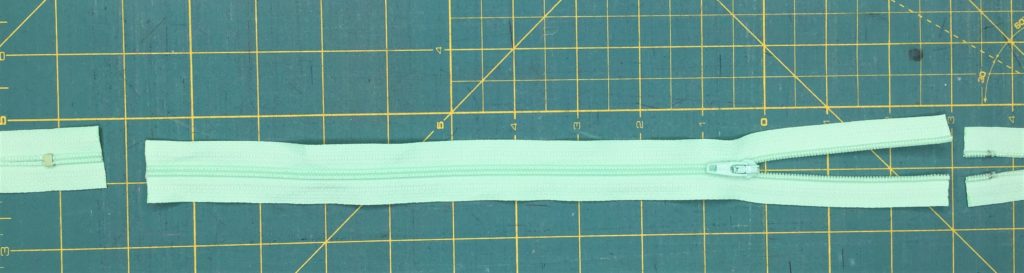
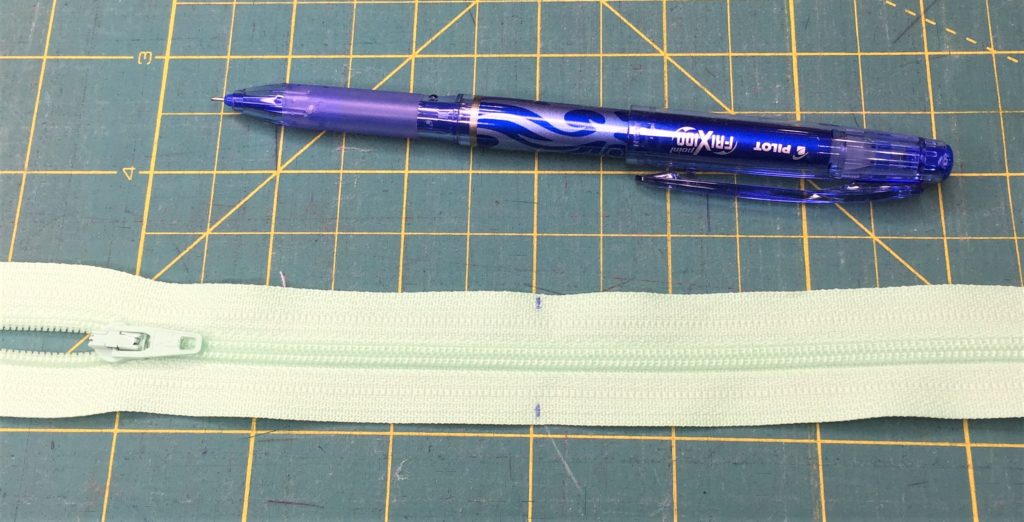
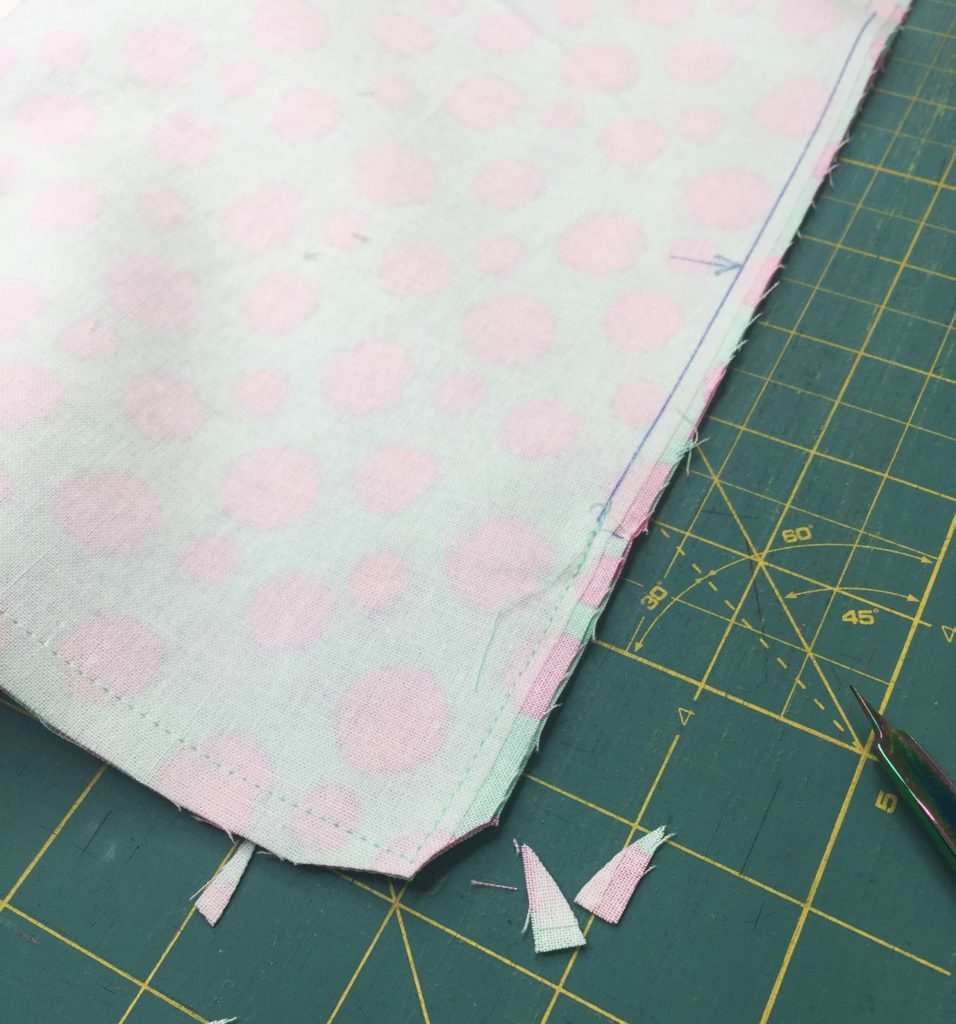
Take your zipper and place it lined up with the top edge of one exterior, as shown in the picture below. Mark the end of the zipper (the end with the metal stopper) where it meets the end of the right side of the fabric, then mark about 1/4″ in from that mark as well. Take the zipper to the sewing machine and use a zig zag stitch to sew a new zipper stop on the mark furthest in. Trim away the rest of the zipper on the outermost mark.
Install the zipper
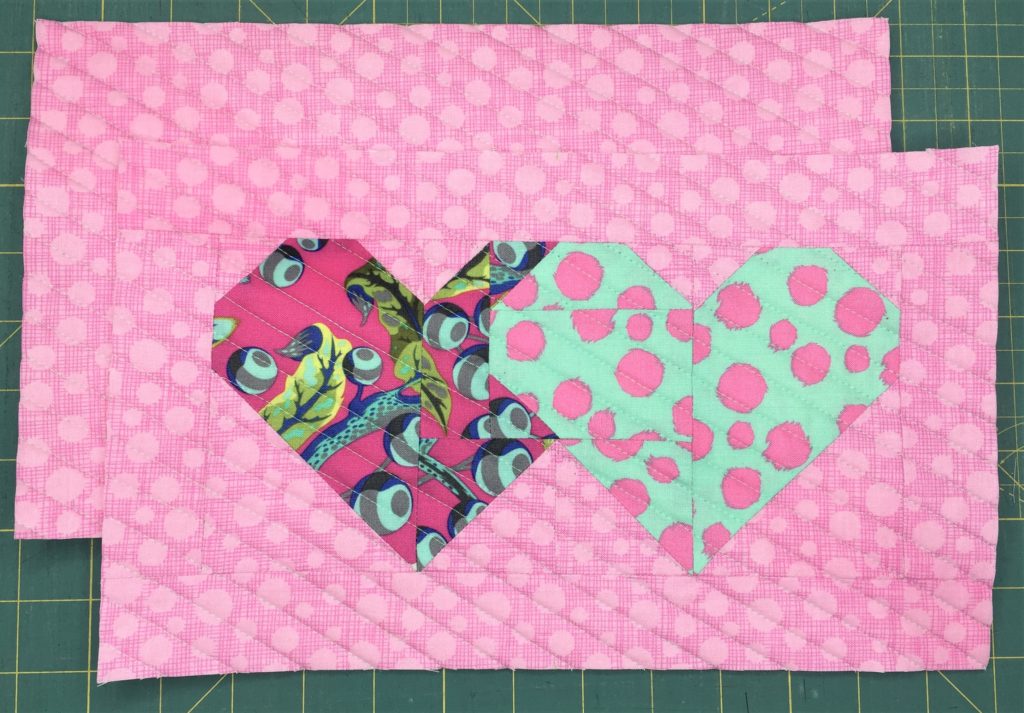
I opted to quilt each exterior a little differently 🙂
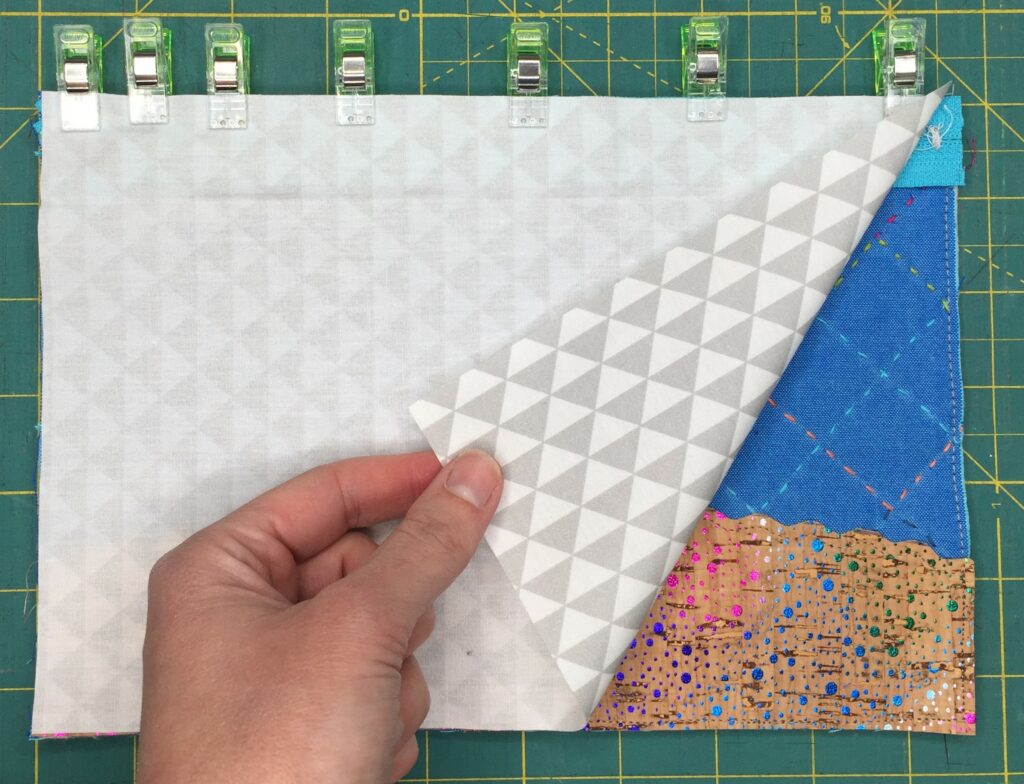
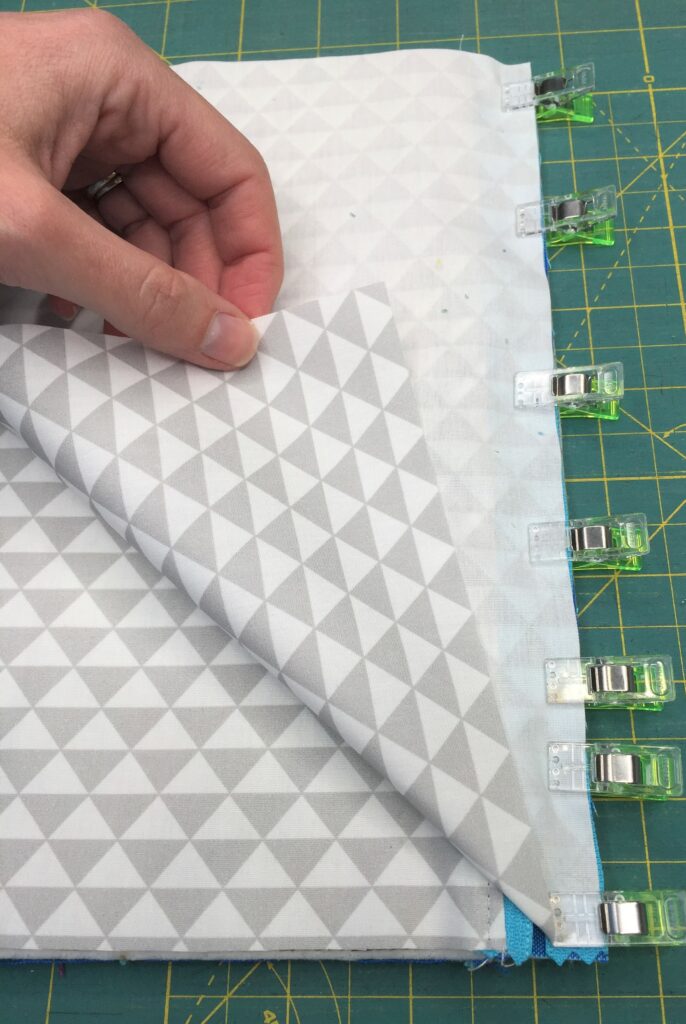
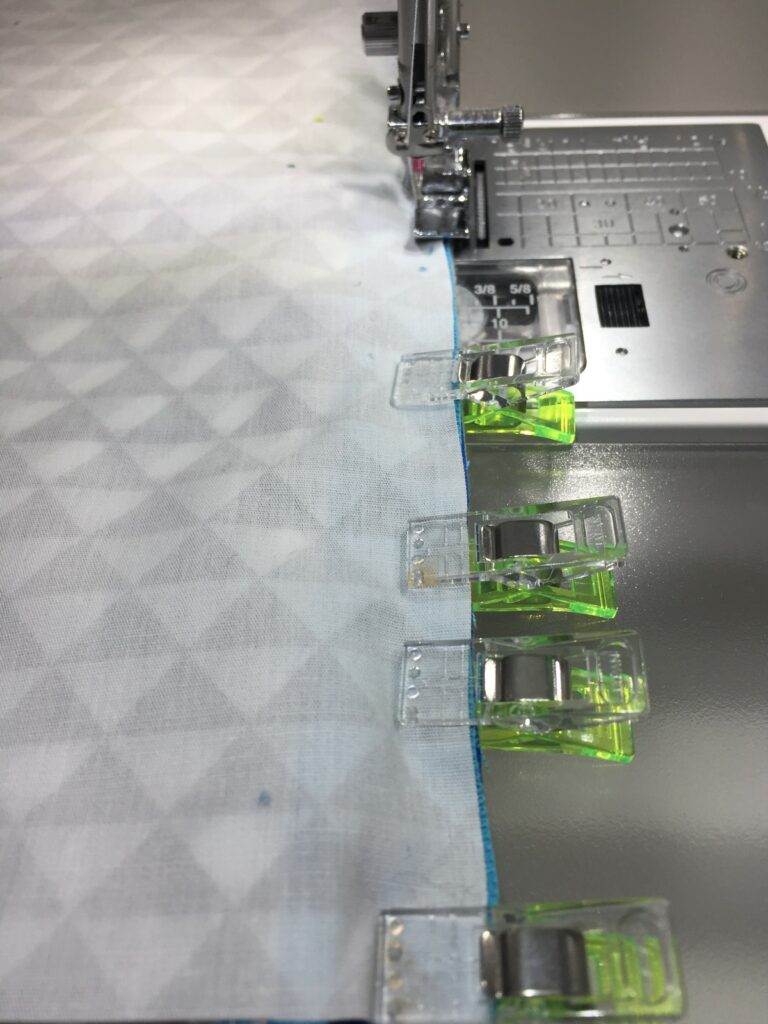
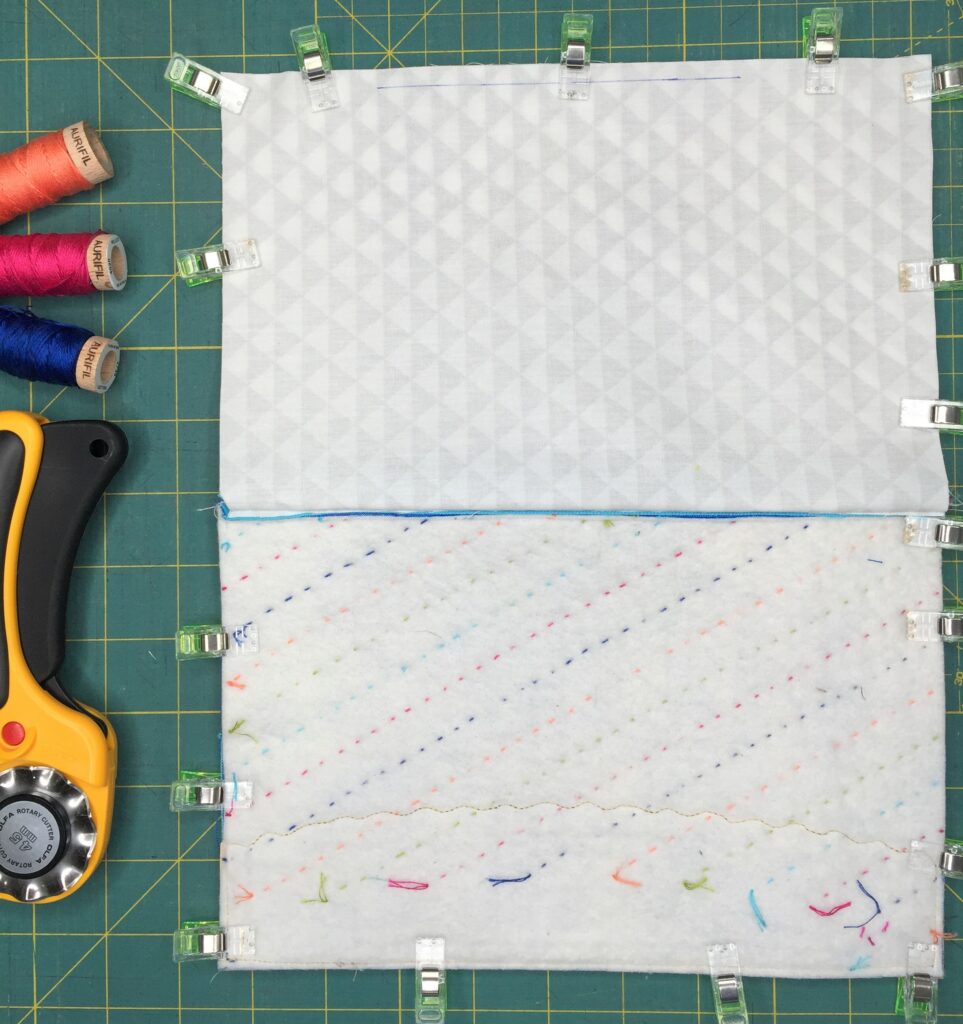
Take the newly trimmed down zipper and place it RSD on top of one side of the hand quilted exterior. Use binding clips to clip the zipper in place. Take one of the lining pieces and place it RSD on top of the zipper, the replace the clips to include all three layers. Use a zipper foot to sew through the three layers with a 1/4″ seam allowance, beginning at one end of the fabric and sewing to the opposite end, all the way to the edge of the fabric.
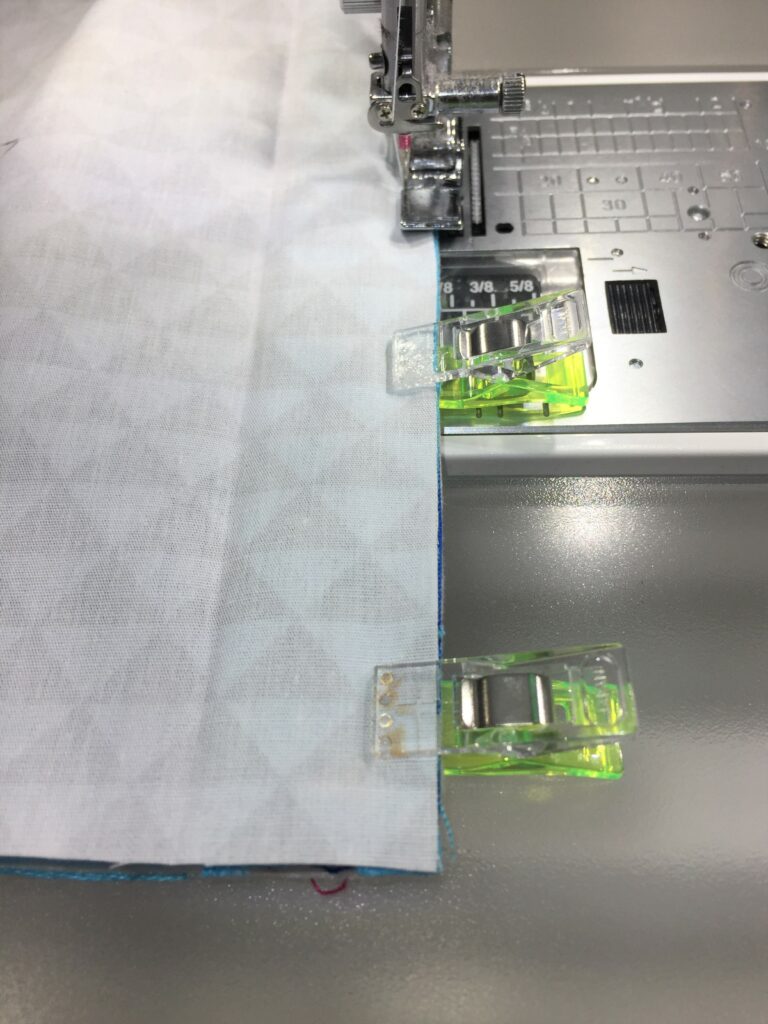
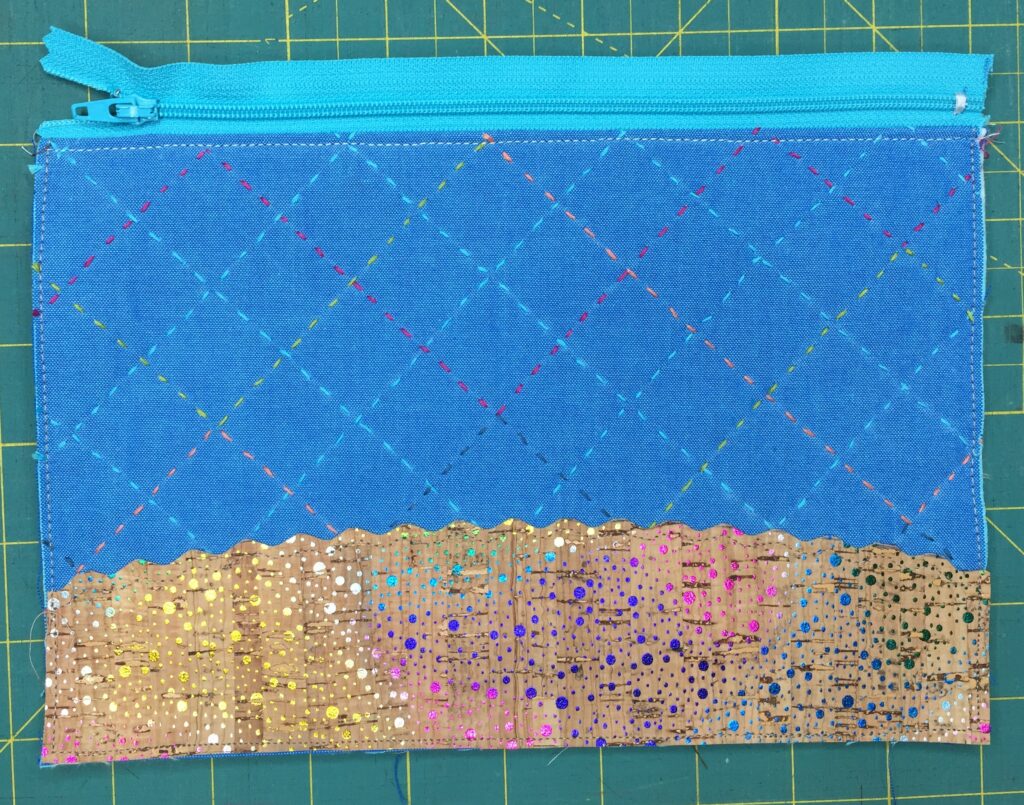
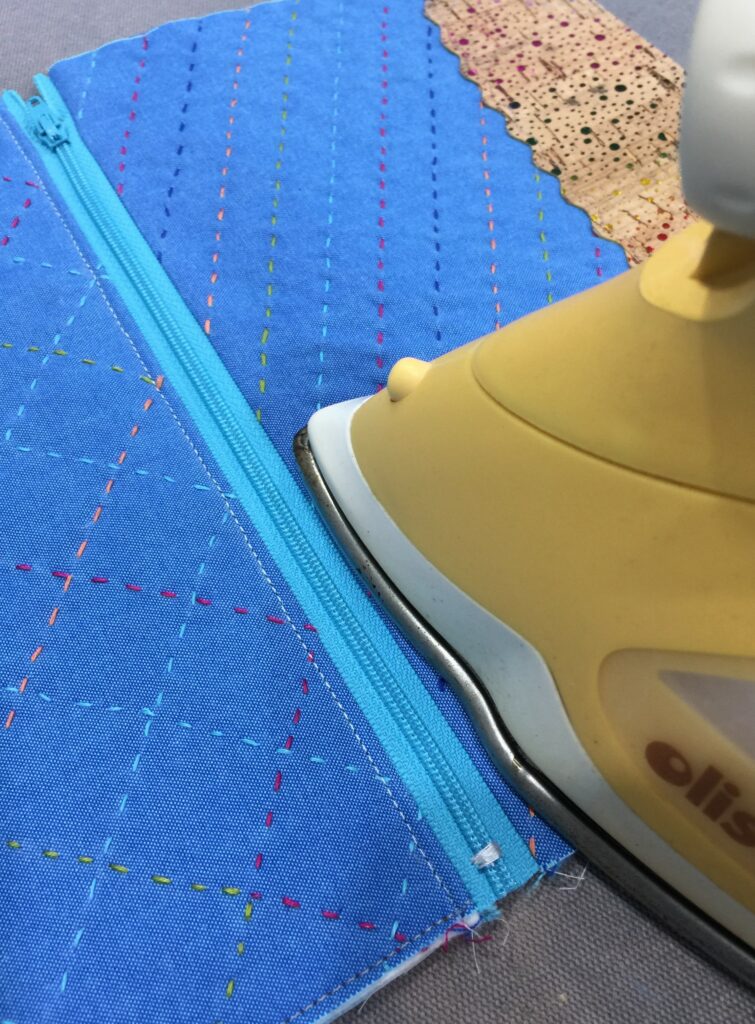
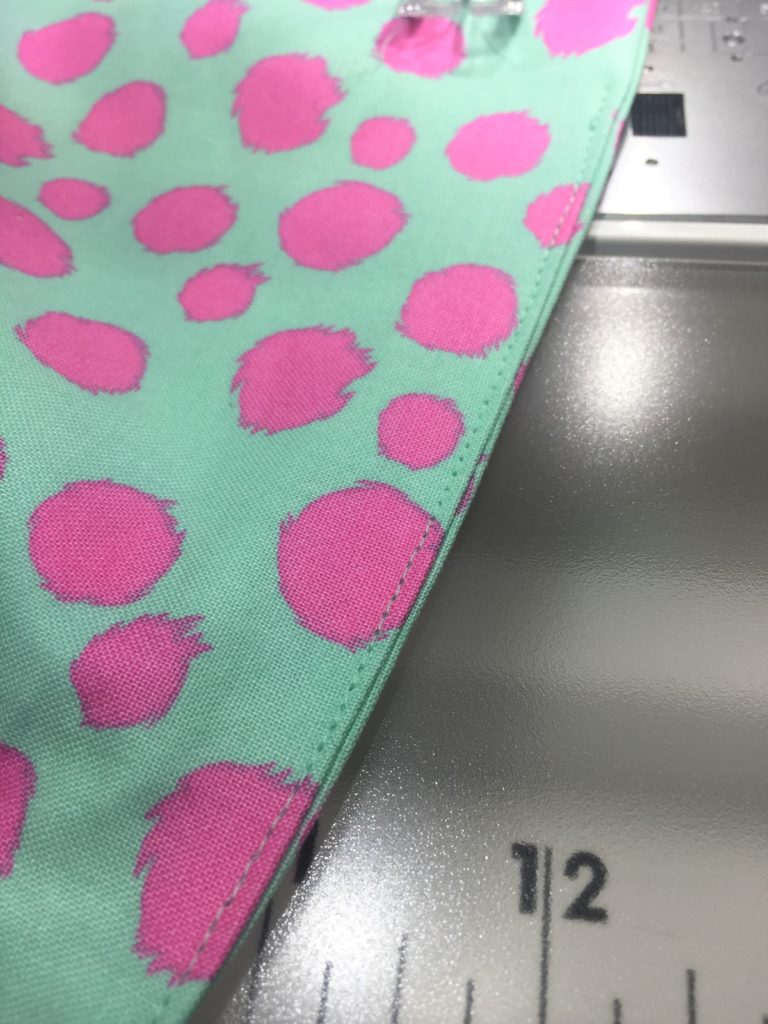
Press the lining and exterior away from the zipper with your iron, and topstitch 1/8″ away from the folded edge of the fabric.
Repeat the steps above with the remaining exterior and lining pieces.
Assembling the zip pouch
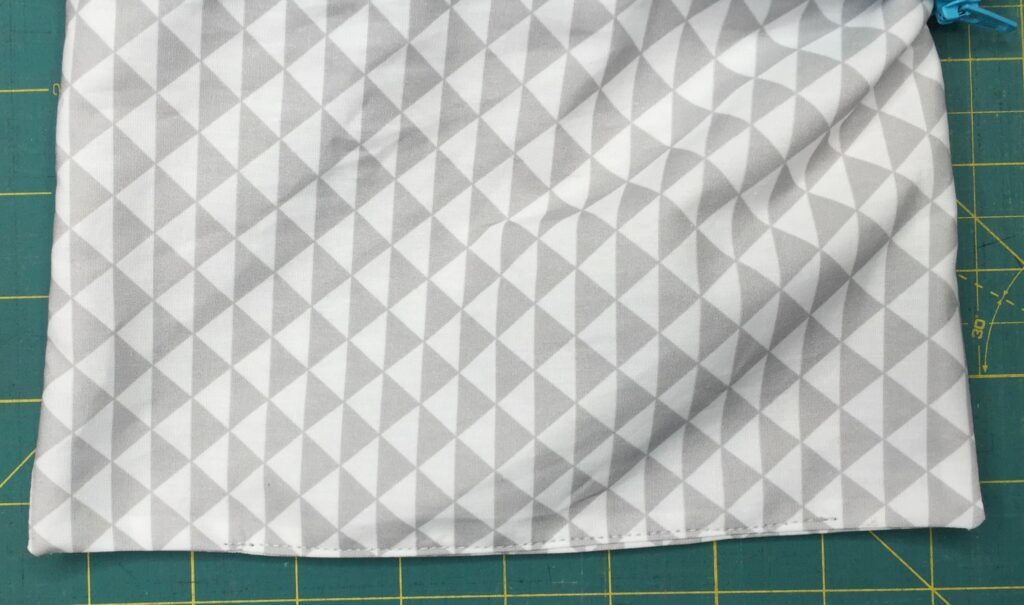
Open the zipper part way, then match the exteriors, placing them right sides together. Pull the linings together and match them, right sides together. Pin or clip in place, and mark about a 5″ opening along the bottom center of the lining to leave open in the next step. Pull the zipper pieces towards the lining, as shown below.
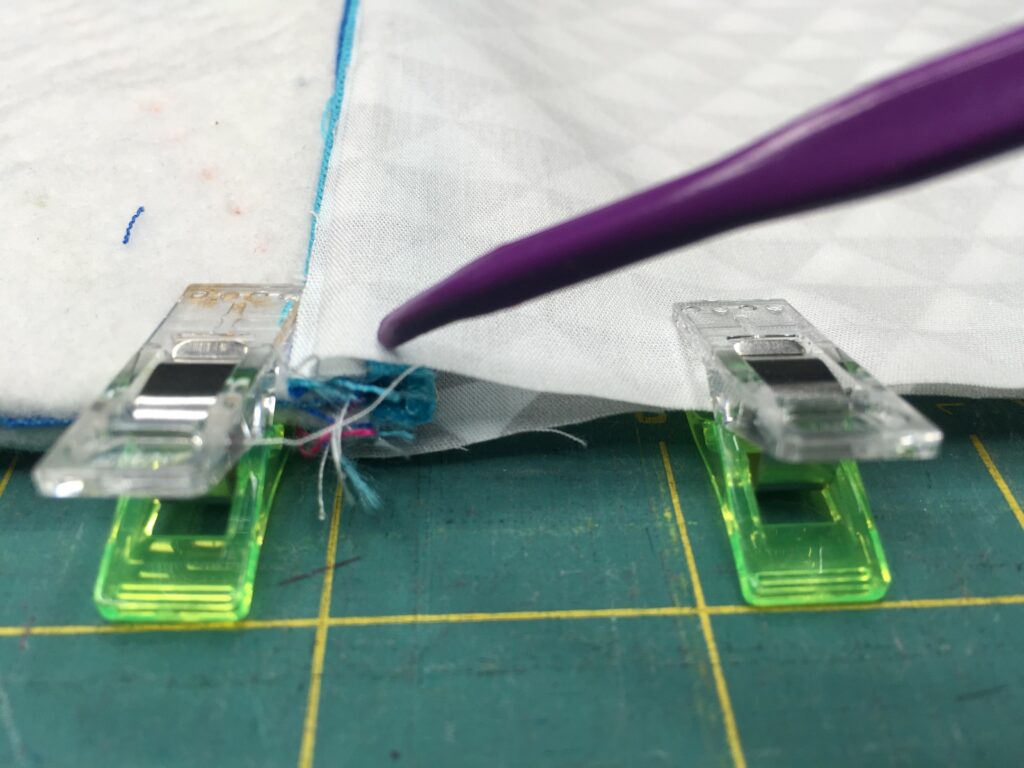
Sew all the way around the perimeter of the zipper pouch, leaving the 5″ opening unsewn. Clip the corners for crisp turning. Turn the zipper pouch right side out through the opening in the lining. You can use a turning tool for crisper turning, if needed. Fold the opening of the lining in 1/4″ and press. Clip in place. Topstitch the opening closed, then push the lining down inside the pouch.
And you’re done! Fill this pretty pouch up with all the sewing things you need on the go 🙂
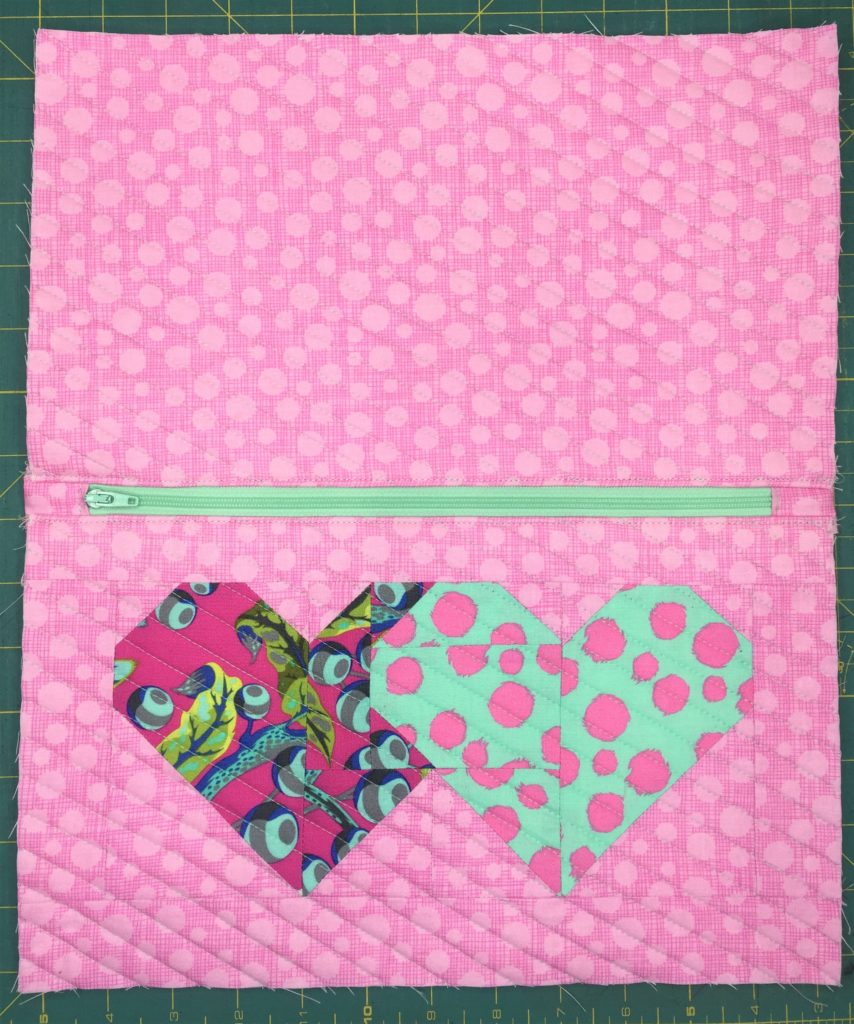
Grab your copy of the Total Eclipse Heart Block and check out this free zip pouch tutorial to turn it into a quick and easy zippered pouch for some serious cuteness!
Total Eclipse Heart Block in Tula Pink’s Tabby Road and Michael Miller Hashdot
Supplies
Supplies/fabrics listed in the Total Eclipse Heart Block pattern – we’ll be making the 7″ x 12″ block.
Additional fabric cuts:
(2) 1.5″ x 4″ zipper ends cut from exterior fabric
(2) 7.5″ x 12.5″ lining for zip pouch
(2) 7.5″ x 12.5″ pieces of SF101 fusible interfacing for the lining
(1) 7.5″ x 12.5″ for Exterior back of pouch (cut this at 8.5″ x 13.5″ if you plan to quilt it, then trim down to 7.5″ x 12.5″. You may also want to alter your border pieces on the Total Eclipse Heart Block and cut them at (2″ x 5.5″ and 2″ x 13.5″) if you’re quilting the front exterior or the quilt block.)
If quilting, you’ll also need (2) 10″ x 15″ batting pieces.
If not quilting, cut (2) 7.5″ x 12.5″ pieces of SF101 fusible interfacing for the exterior.
14″ closed end nylon zipper
Erasable marking tool (I like to use Frixion pens)
Turning tool or chopstick
Instructions
To begin, follow the instructions in the Total Eclipse Heart Block pattern to make the 7″ x 12″ block. You’ll need to decide if you want to quilt your zipper pouch or not.
If quilting – cut the border pieces at (2) 2″ x 5.5″ and (2) 2″ x 13.5″, instead of the 1.5″ width to give a little extra room for shrinkage. Then sew the pieces on as directed.
Make a quilt sandwich, using 2 pieces of scrap fabric (these won’t be seen in the finished pouch) measuring 10″ x 15″ as the back of your quilt sandwich. Place the scrap piece wrong side up, place the batting piece on top of that, then center the 8.5″ x 13.5″ block on top of that and baste the layers together using your favorite method. Make another quilt sandwich with the 8.5″ x 13.5″ Exterior back piece. Quilt as desired, then square up the quilted pieces to measure 7.5″ x 12.5″.
If not quilting – Follow the cutting/sewing instructions to make the block, then apply the fusible interfacing to the wrong side of the 7.5″ x 12.5″ quilt block, following the manufacturer’s instructions. Do the same for the 7.5″ x 12.5″ Exterior back of pouch.
Apply the fusible interfacing to the wrong side of each lining piece.
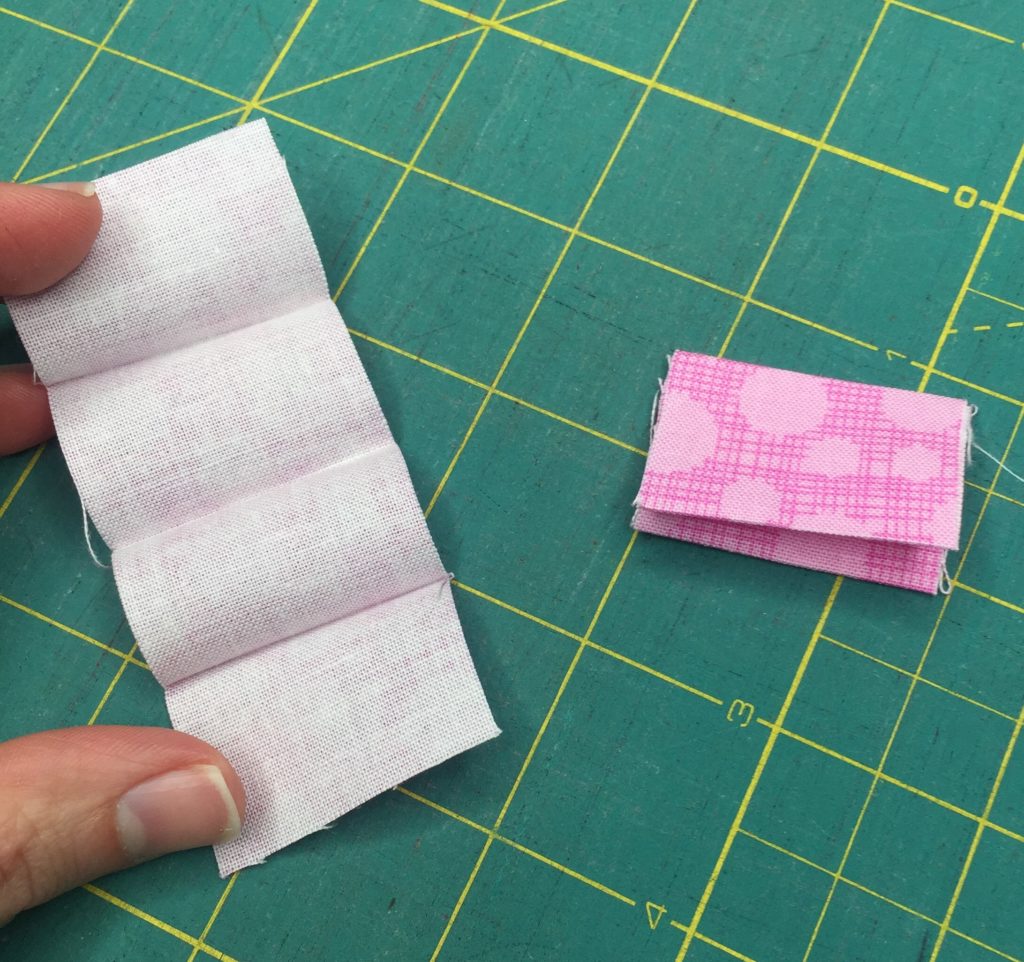
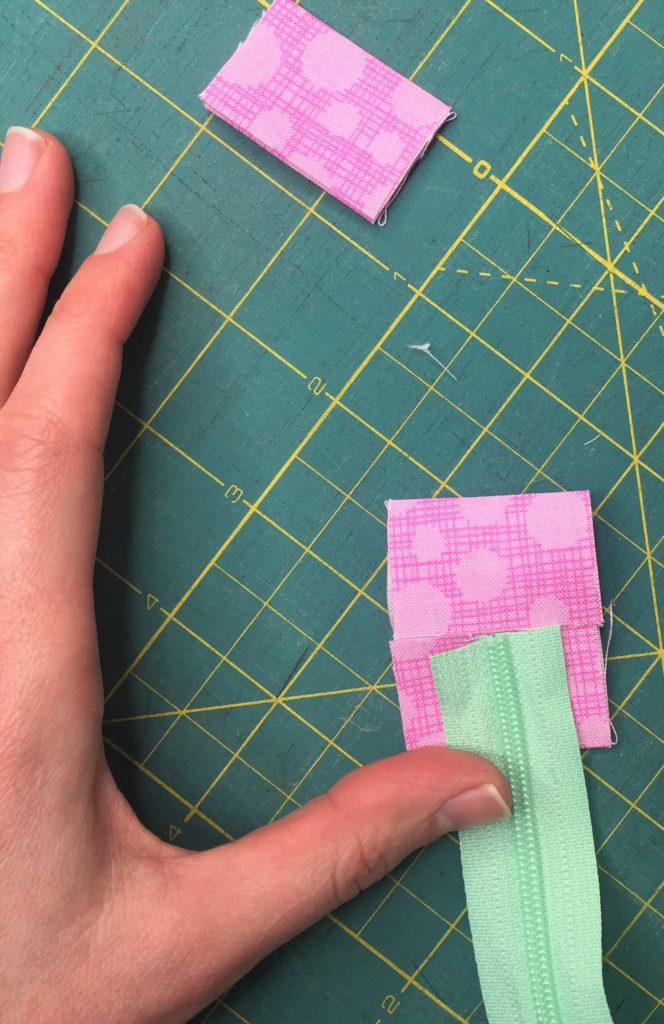
Take the 1.5″ x 4″ zipper end pieces and fold the 1.5″ ends to meet in the center. Press. Fold them in once more to conceal all raw edges and press.
Take the 14″ zipper and move the zipper pull in away from the metal teeth a little. Trim your zipper down to measure exactly 12.5″, and make sure you trim the metal bits off when you trim it down. Be very careful to not pull your zipper head off.
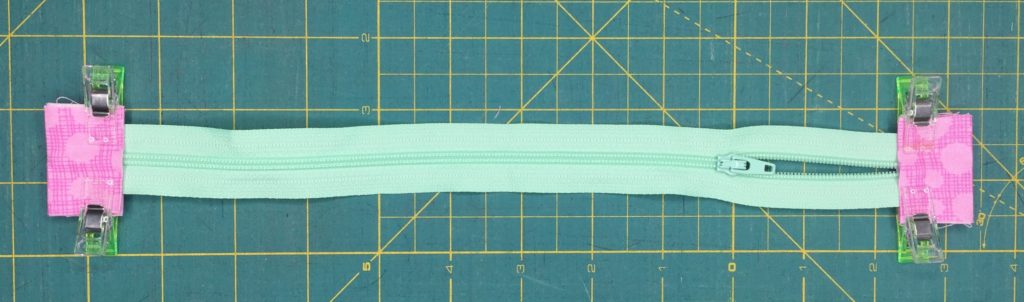
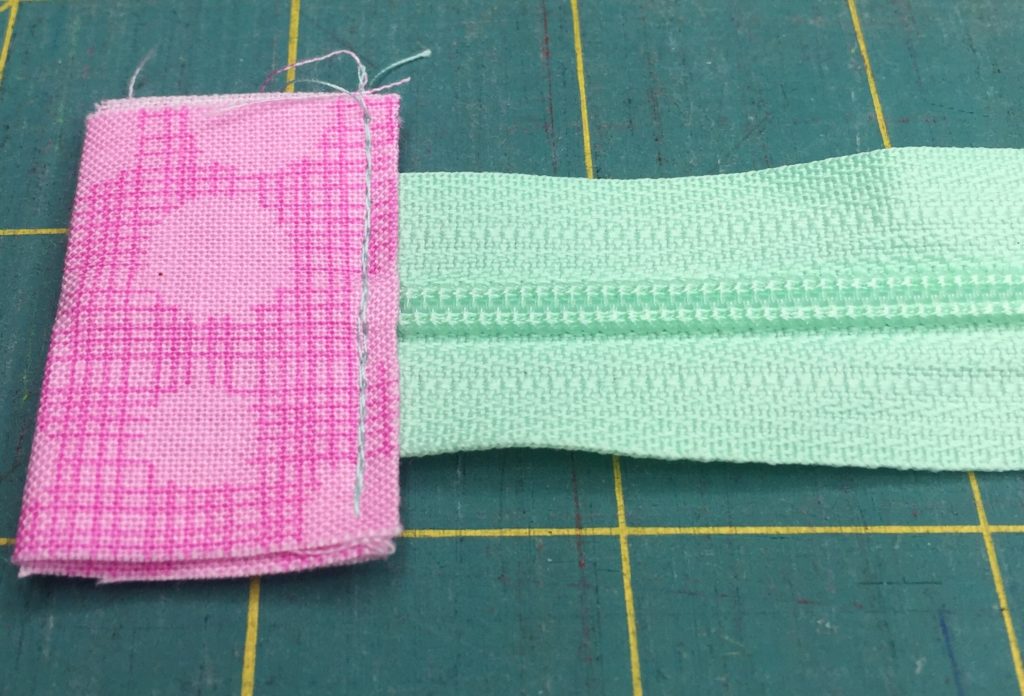
Take the zipper end pieces and place one end of the zipper butted into the middle of the folded piece. Use clips or pin in place. Repeat for the other end of the zipper. Take to your sewing machine and topstitch 1/8″ from the folded edge to contain the zipper. Trim away the edges of the zipper pieces so they’re even with the zipper tape.
Measure and mark the center top 12.5″ edges of all 4 of your fabric pieces. Measure and mark the center of the zipper.
Assembling the Zipper pouch
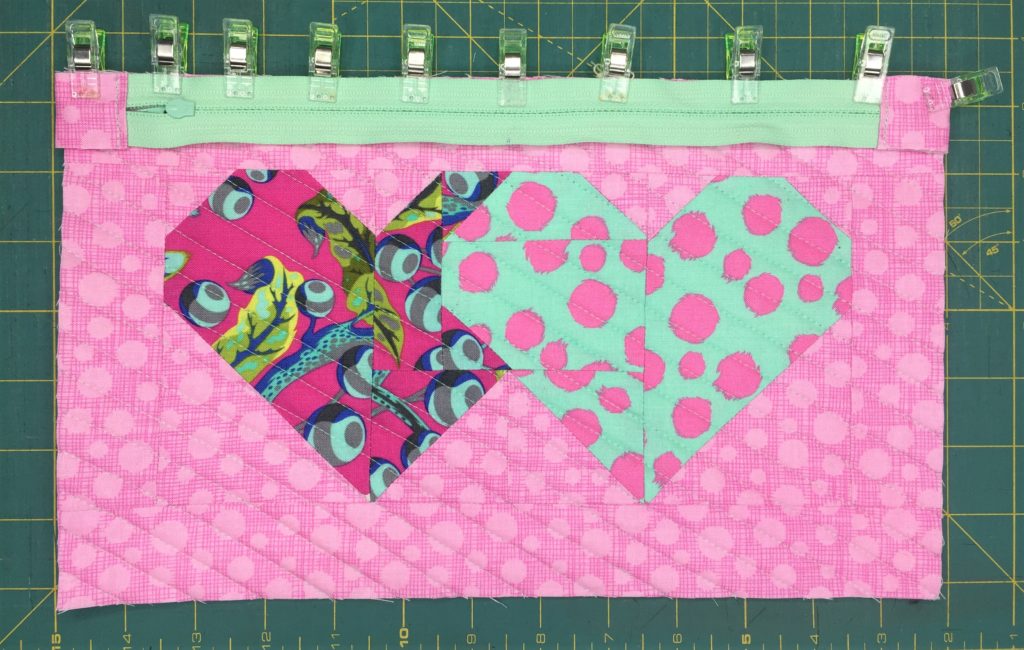
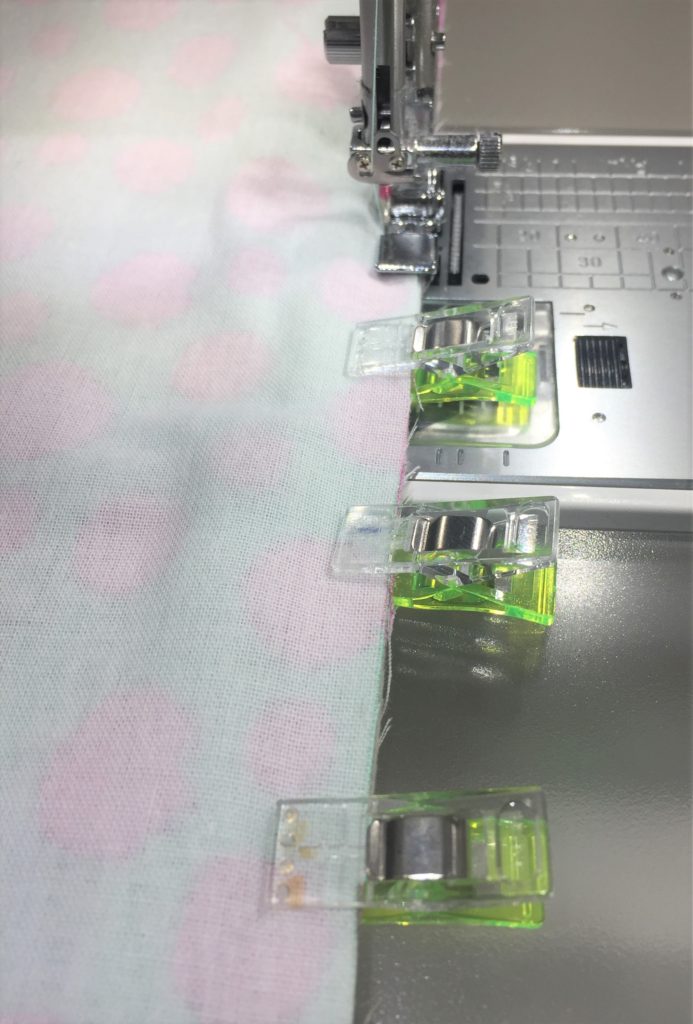
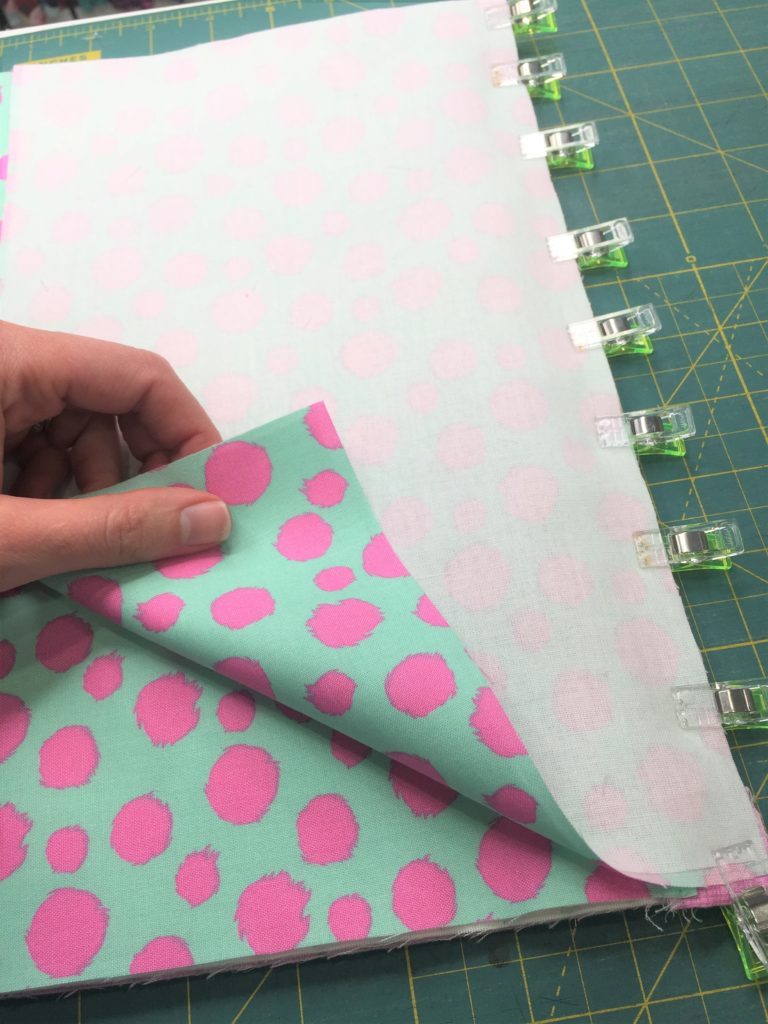
Take the assembled quilt block (quilted or not) and place it right side up. Take the zipper and place it right side down, lining up the centers and the edge of the zipper tape to the top edge of the block. Use clips or pin to secure. Place one lining piece right side down on top of the zipper, sandwiching the zipper between the two layers and matching the centers again. Clip or pin in place. Use a zipper foot to sew through all three layers with a 1/4″ seam allowance. Press the fabrics wrong sides together away from the zipper and topstitch 1/8″ from the folded edge of the fabric.
Place zipper RSD on block
Place lining RSD on zipper
Use a zipper foot to sew through all three layers
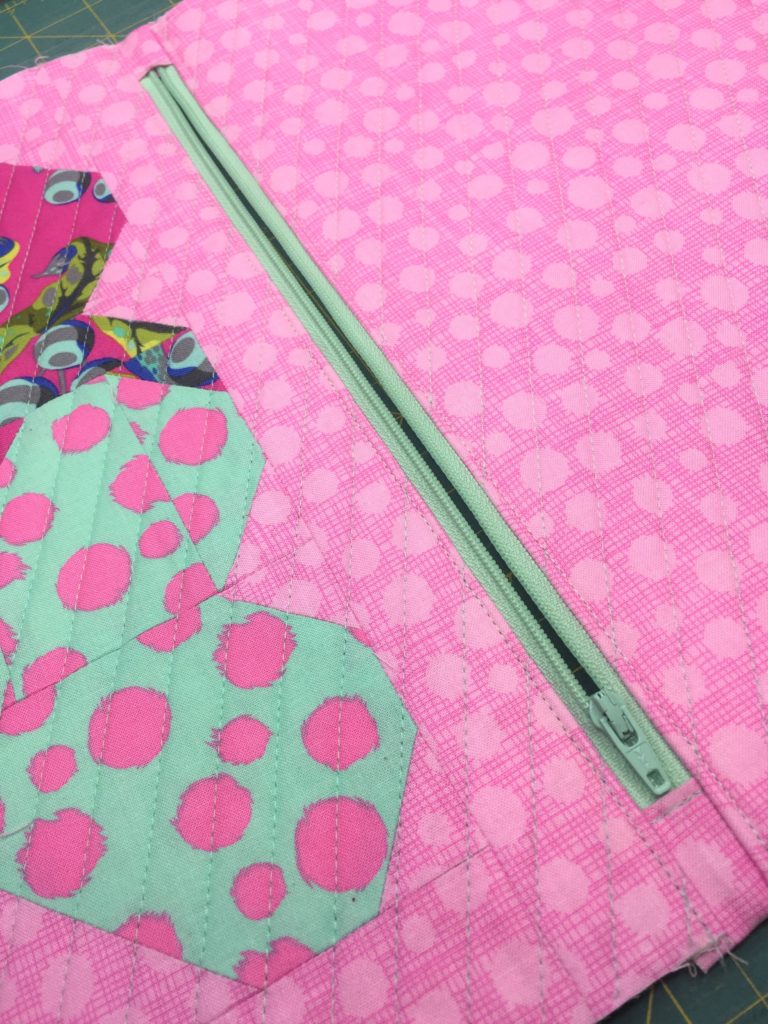
Press the lining and block wrong sides together, away from the zipper and topstitch.
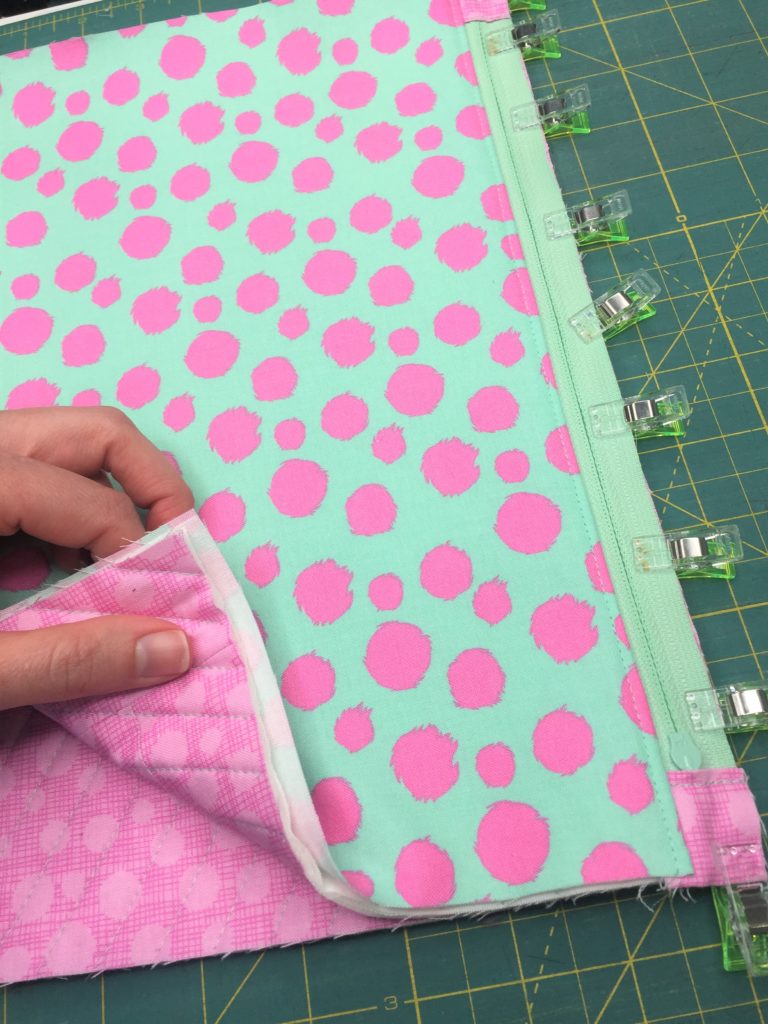
Take the exterior 7.5″ x 12.5″ piece (quilted or not) and place it right side up. Take the zipper (now attached to the quilt block) and place it right side down, lining up the centers and the edge of the zipper tape to the top edge of the block. Use clips or pin to secure. Place the remaining lining piece right side down on top of the zipper, sandwiching the zipper between the two layers and matching the centers again. Clip or pin in place. Use a zipper foot to sew through all three layers with a 1/4″ seam allowance. Press the fabrics wrong sides together away from the zipper and topstitch 1/8″ from the folded edge of the fabric.
Exterior back RSU, zipper right side down
Remaining lining piece, right side down
Press fabrics away from the zipper and topstitch
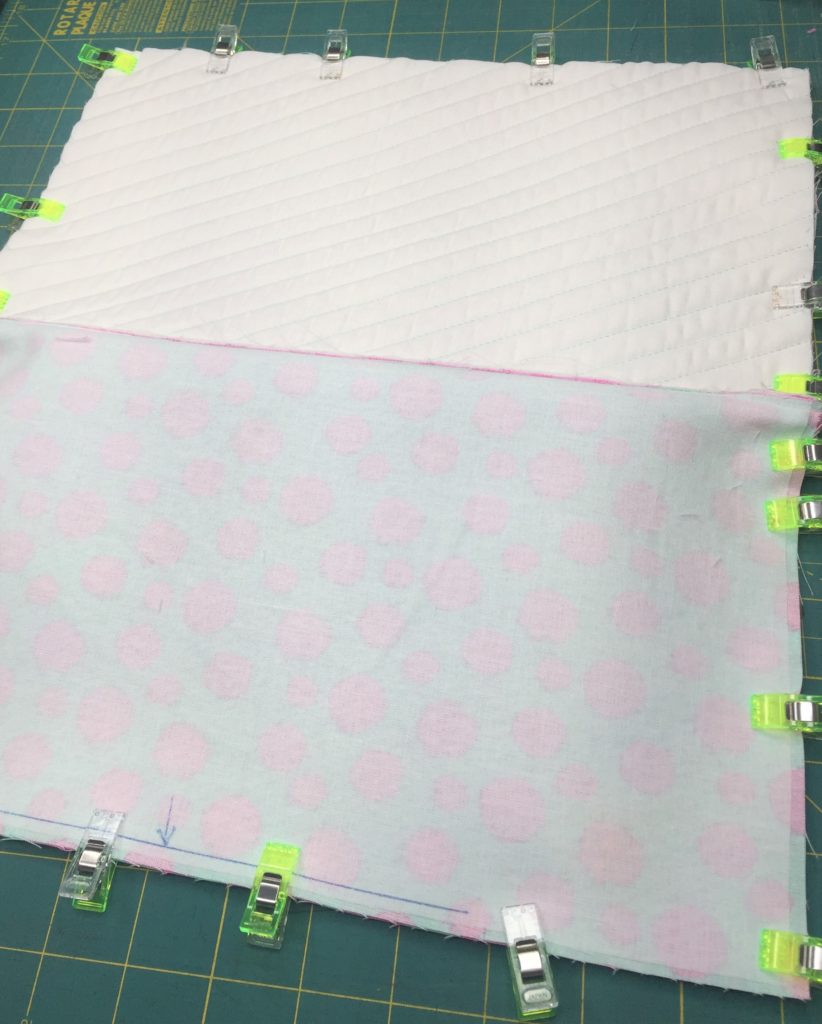
Open the zipper. Pull the exteriors and linings apart from eachother and pin the edges of the exterior RST. Do the same with the lining pieces. Pin or clip in place. Mark a 5″ opening centered on the bottom of the lining. This will be left open for turning. Start sewing with your regular pressing foot, and sew all the way around the zip pouch, leaving the opening unsewn.
Open the zipper
Place Exteriors RST and linings RST, and clip/pin. Leave a 5″ opening along the bottom of the lining pieces.
Trim the corners away being careful not to clip the stitches. Turn the bag right side out through the opening in the lining and push the corners out with a chopstick or turning tool.
Fold the raw edges of the opening in by 1/4″ and press. Clip the folded edges together and topstitch or whipstitch closed to close the opening. Push the lining down into the bag and you’re done! Fill that cute little zip pouch up with some goodies and it’s ready to be gifted.
This has been such a busy and exciting week for me! I had a little time away from sewing celebrating the Christmas season with our family (and our daycare was closed for almost two weeks–insert the screaming face emoji here ;). All joking aside, it was wonderful to get to spend so much time with the family and remember what’s important in life! I hope you were able to rest, recharge, and be around the people you love.
One thing I’m super pumped about is Amanda Leins and Bill Volckening’s new book Inspired Free-Motion Quilting. The book is described as “90 Antique designs reinterpreted for today’s quilter”. I do a lot of custom quilting, and this book is really inspirational, as far as brainstorming designs goes. There are pages of antique quilts with really amazing quilting designs, along with step-by-step instructions on how to execute and master each design. It’s a great reference for seasoned quilters and beginners alike. I’m so excited to be a part of the Inspired Free-Motion Quilting blog hop and team up with Mandy Leins and C&T Publishing to give away one free PDF copy (that means the giveaway is open internationally!!!) of this awesome book! Read to the end for details on how to enter.
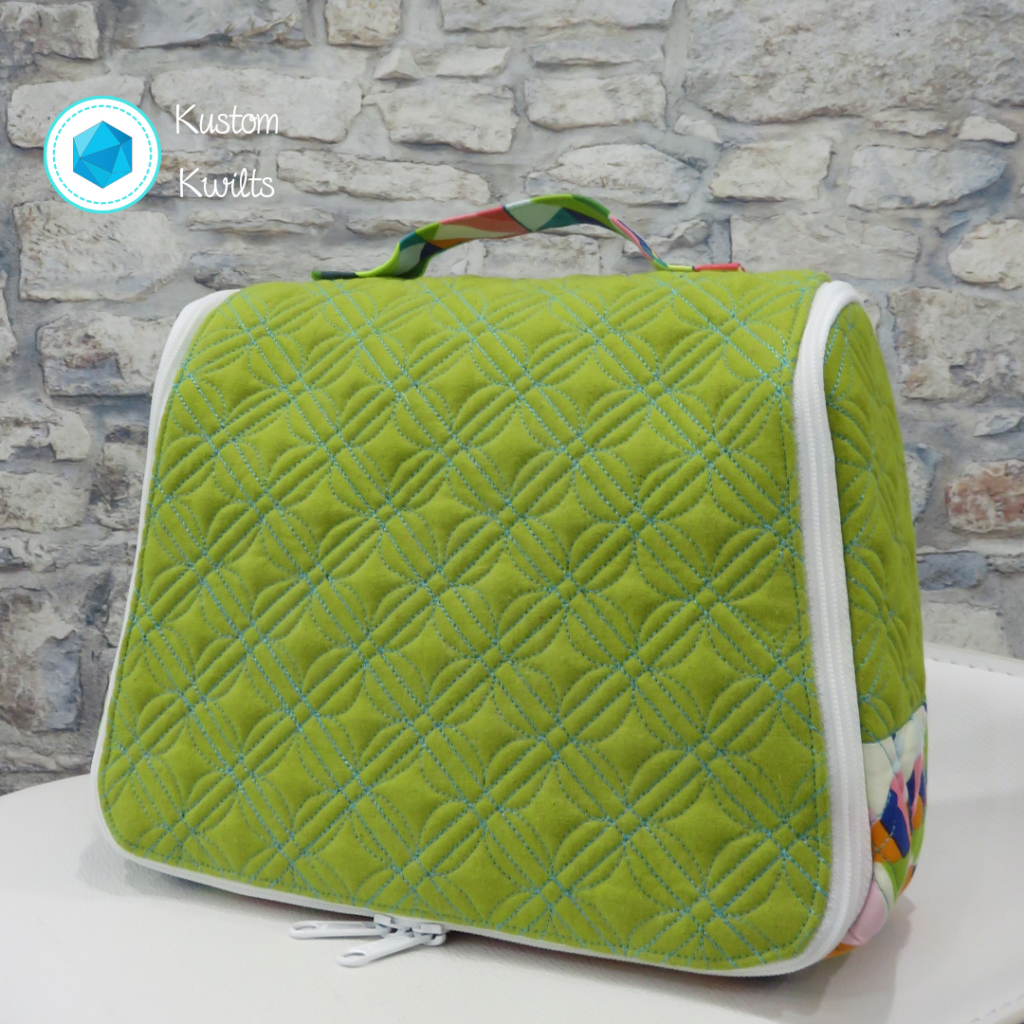
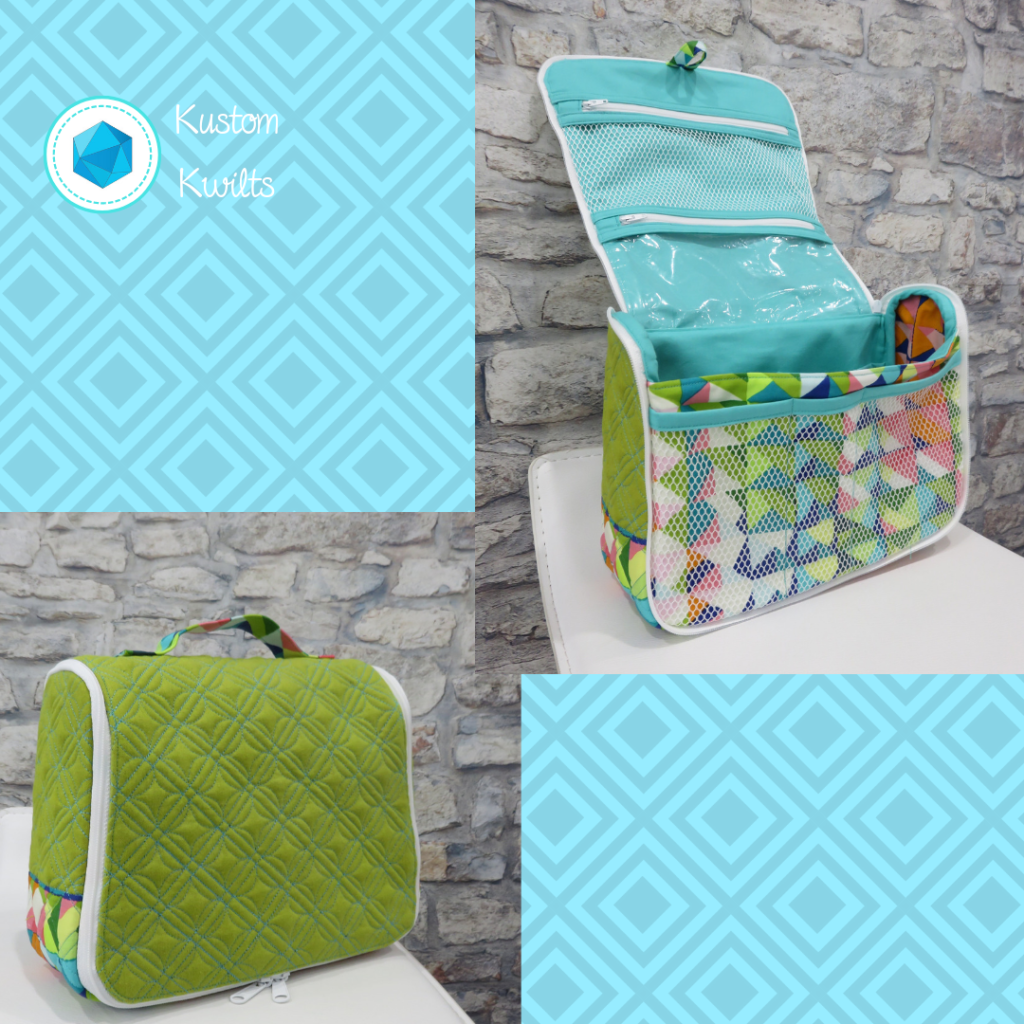
As soon as I was able to flip through Inspired Free-Motion Quilting, two designs immediately caught my eye that I knew exactly what I wanted to use them for. My two favorite motifs from the book are “Double lines and orange peel” and “Echoed Crosshatch”. I really enjoy making bags (in addition to the quilting I do), and I like to add a bit of decorative quilting to the exterior of the bag, if I’m able to. I had a new pattern I was really excited to try–The Gloss Cosmetic Bag by Sew Sweetness (Sara Lawson). The pattern is available with purchase of the Minikins Season 2 pattern bundle on Sara’s site.
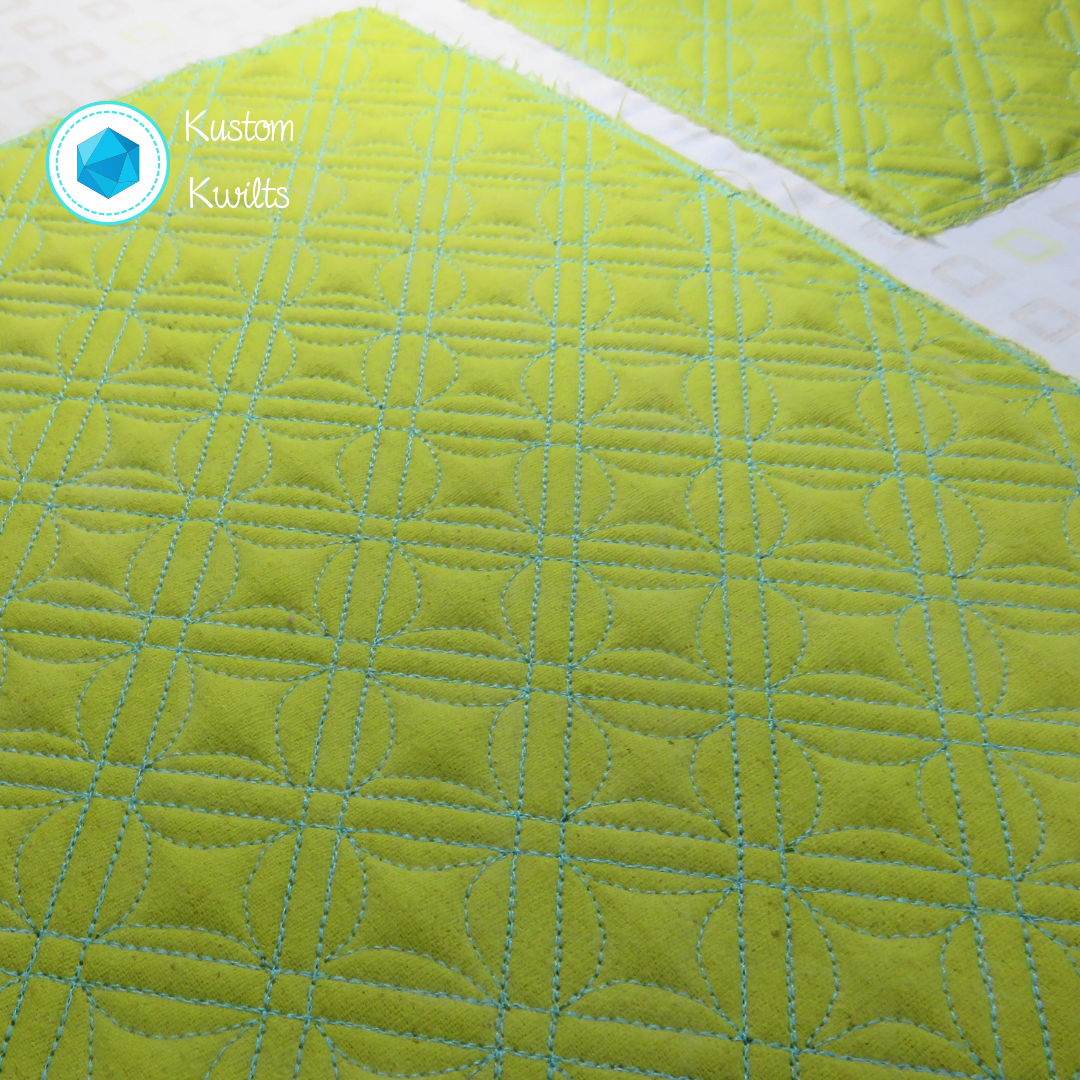
This is a really great way to spice up some solid fabric–and solid colors show off the quilting with less distractions than prints. I cut the green linen-canvas fabric I had slightly larger than the pattern called for and quilted it prior to assembling the pattern. I loved the instructions and diagrams that are included with the book–they really leave no room for error, even if you’re just starting out. I’m really thrilled with how impactful the design is that I selected from the book. I chose “Double Lines and Orange Peel” for a classic motif that would really look great on a cosmetic bag. I love the definition and texture it gives the solid–in what would otherwise be a really boring cosmetic bag. It’s not as easy to see in the picture, but I opted to skip the orange peels on the patterned fabric on the bottom of the case, and only quilted the echoed crosshatch.
I quilted the bag components on my longarm, but it would be easy to do this sort of quilting on a domestic. Just pop on a walking foot and measure out your straight lines, and follow the simple instructions for free-motion quilting the orange peels between the lines to finish up. I used a slightly contrasting thread color for a little pop, but I’m dying to make another in black canvas with black thread for subtle texture and style.
Amanda and Bill do a fantastic job of sharing some amazing antique quilts and their in depth knowledge of how to reproduce the motifs, and I highly recommend Inspired Free-Motion Quilting as a must have reference for quilters! Make sure you read below to enter the giveaway, and check out the other blog hop participants’ posts for more chances to win!
Here’s what you came for!! C&T Publishing has so generously allowed me to give away one PDF copy of Inspired Free-Motion Quilting. All you need to do to enter is like my Instagram post and tag a friend in the comments OR leave a comment on THIS blog post telling me why you’re excited to get a copy of this book! The giveaway is open internationally and will close Sunday, January 13, 2019 at 6:00 PM, CST. The winner will be notified by me soon thereafter. Good luck!!!
So I know what you’re thinking…this blog is called “Kustom Kwilts”…what gives with the oilcloth?
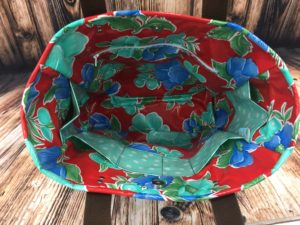
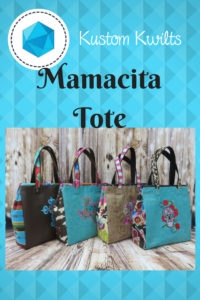
There are so many skills in sewing and quilting that can be transferred to other things-garments, bags, household and decor items. If you can sew a straight line, there are so many other amazing things you could be creating if you’re willing to do a little exploring. I just released my new Mamacita Tote pattern, which is a perfect fit for using quilting cotton AND alternative fabrics! The pattern suggests using oilcloth for the lining, and I don’t want to leave you hanging on how to do that (you can also use quilting cotton). I love to quilt, but I also adore sewing clothing and bags. I hope I can share some of that love with you!
Mamacita Tote in Quilting Cotton
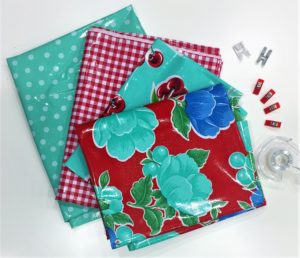
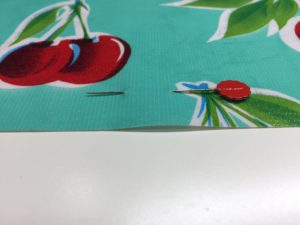
What do I mean by alternative fabrics?? I’m talking about vinyl, leather, faux leather, and one of my personal favorites, OILCLOTH. I’d love it if you were willing to read on and open yourself up to some great new possibilities for yourself!
Some of my favorite oilcloth prints 🙂
Let me break it down for you: A lot of the things you need to know about oilcloth also goes for other vinyl fabrics and faux leathers. Here are some things you need to know before buying your first yard of oilcloth–
It’s water resistant/doesn’t absorb water.
It’s relatively inexpensive.
It is super-duper easy to clean. All you need is a wet paper towel and you can wipe off pretty much anything.
It doesn’t fray.
It’s more stable than quilting cotton, so most of the time it doesn’t need extra interfacing when used in bags.
When you use it as a purse lining, it wipes clean and is SO easy to maintain!
Mamacita Tote with an Oilcloth lining
I’m sure I’m leaving a few important things out, but these things alone are pretty fantastic. There are some things you’ll want to know about sewing with oilcloth and what you want to do a little differently than if you were sewing with regular quilting cotton.
Here are my Top Tips for sewing with OILCLOTH~
Don’t ever use an iron to get the wrinkles out! You will melt the fabric, and more than likely ruin your iron. I like to either use a blow dryer on low heat to relax wrinkles , or lay the fabric out in the sun on a flat surface for a few hours (I live in Texas, so sometimes it doesn’t take long!)
The holes your needle makes in the fabric are permanent. That means you want to use a longer stitch length (somewhere around 3.5) so you have less perforations in the fabric. If you’re using a teeny tiny stitch length, your needle is making a ton of holes that’s making your fabric weaker.
Don’t use sewing pins! The holes they make will be permanent. When securing oilcloth, use clips instead of pins.
Pins and oilcloth are a big No-No! Don’t do it!
Use a Teflon or non-stick sewing foot to help the oilcloth slide under your foot with ease. If you don’t have a Teflon foot, you can also stick a piece of satin scotch tape under your sewing foot, and that will help ease the fabric instead of sticking to it. You can also use tissue paper between the presser foot and the oilcloth, then tear it away when you’re done.
Since oilcloth is a little thicker than cotton, try using a slightly larger needle, like one suited for leather or denim. If you try a smaller needle and it works okay for you, stick with it–because that means the holes the needle makes will be smaller :).
I buy all of my oilcloth at Jack’s Country Store (not an affiliate link). It seems like an unlikely place to get it, but it’s a pretty fun site, and they have tons of options and cheap shipping.Are you ready to try it? Go ahead, be brave! I have a total oilcloth addiction now, and it’s so easy to work with. I’d love it if you gave it a go and shared with me how you used oilcloth in your next sewing project! Happy sewing 🙂
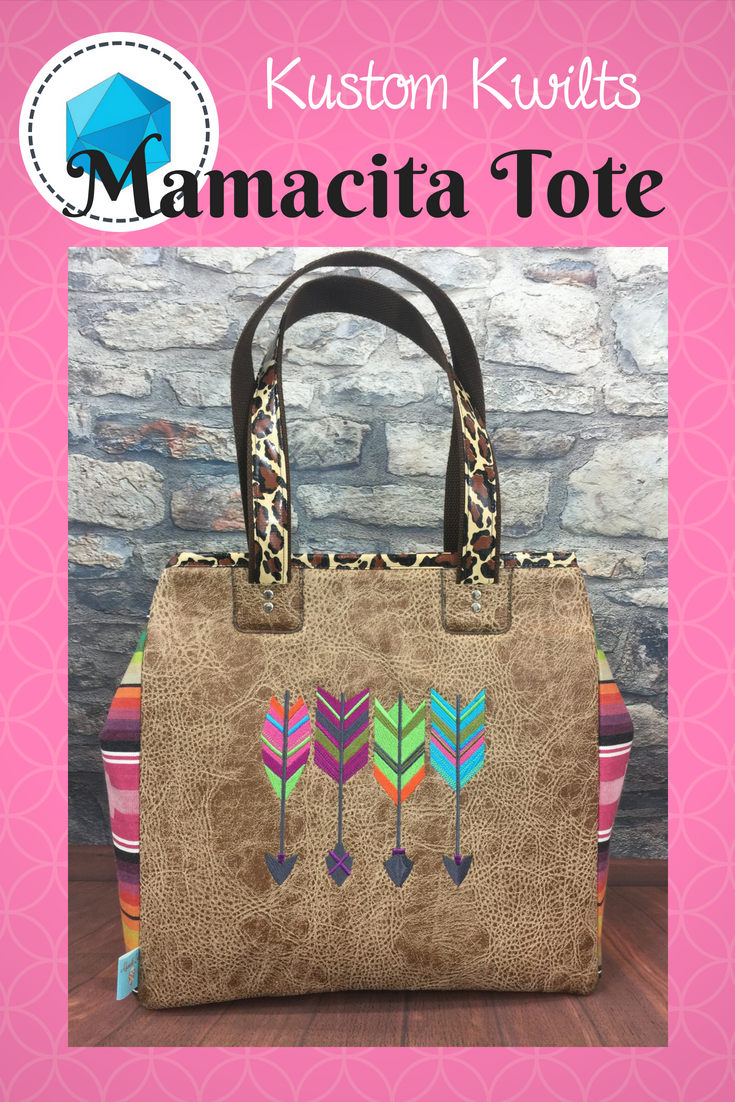
Today is the official release day for the Mamacita Tote Pattern! Hip hip hooray!!! I’d love to tell you the story behind this pattern and why it’s so dear to me.
Mamacita Tote with Serape
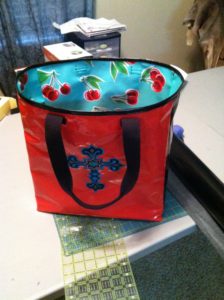
When I first started sewing, I loved to make things that were useful (that still applies today). I love the feeling I get when I plan a project and sewing that last stitch, and the overwhelming feeling of pride I get when I know I made something that I love (or someone else will love). I loved quilting, but I loved making bags even more. I used to be an agriculture science teacher, so my purses were always getting filthy from being at stock shows and around livestock all the time. I did some research on fabrics that were easy to clean, and I came across oilcloth. Long story short, oilcloth is a wonderful fabric that doesn’t fray, wipes clean, and, in my experience, has a ridiculously long life. So I’m going to show you my very first go at what evolved into today’s Mamacita Tote:
My very first oilcloth bag
It isn’t exactly swoon worthy, but I loved it. I used this bag for about a week before I realized the importance of interfacing and stabilizer in a bag this size, and made from all oilcloth. It didn’t stand up on its own and was pretty floppy. Also, when you sew with oilcloth, the holes made by the needle are permanent. That means if you don’t lengthen your stitches, you’ll get lots of perforations that will weaken the fabric. Hence, sewing the straps directly to the oilcloth where all the weight will be stressing the fabric = terrible idea. I still have this bag in my sewing room and love to bring it out and see how far my design has come since January 2013. That’s right. This pattern has been FIVE YEARS in the making.
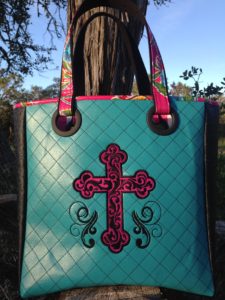
I needed a better way to attach the straps and I wanted a more stable, sturdy bag. So another year of trying out different things and I came up with using large drapery grommets as the strap attachments. I really loved this, but after I got a package of grommets from the manufacturer and they were all cracked from shipping, it was time to rethink using them. I couldn’t risk having one break and then go through the hassle of replacing them all the time. Quality supplies are my top priority.
The second generation Mamacita Loca bag
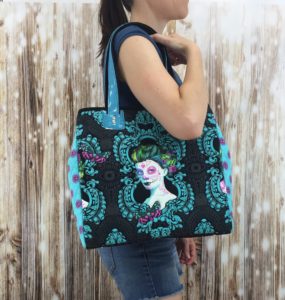
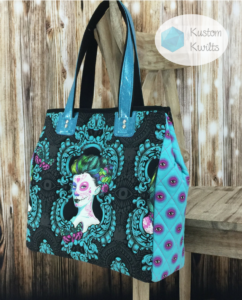
I really like embroidering the vinyl or quilting it (or both!) and adding unique embellishments to make each bag unique. Late in 2017, I have the absolute best version of this bag that I could dream of. I’ve made over 200 of these bags, and even sell custom Mamacitas on Etsy. They have an updated strap attachment that is stylish and functional, and I love the look of them. I recently made my favorite Mamacita Tote EVER from Tula Pink’s latest line- De La Luna in quilting cotton. Although I really like using oilcloth for the lining since it’s so easy to clean, I love the bright and vibrant colors in Tula’s line, so I’ll sacrifice the wipability for that, and just try really hard to keep my 1.5 year old from spilling her milk in it 😉
Mamacita Tote in De La Luna
The Mamacita Tote has been my ultimate labor of love, and I know this pattern by heart. I love that the lining keeps me organized with all the pockets, and that I can still be stylish or trendy with my fabrics. Every time I make one, I remember how much I’ve grown as a sewist and how much I’ve learned from all my trial and error and fearlessness as a novel sewer. I’d love to see your take on the Mamacita Tote and I hope you’ll share your creations with me (use the hashtag #mamacitatote or tag me @kustomkwilts) so I can see the amazing work you’ve done!
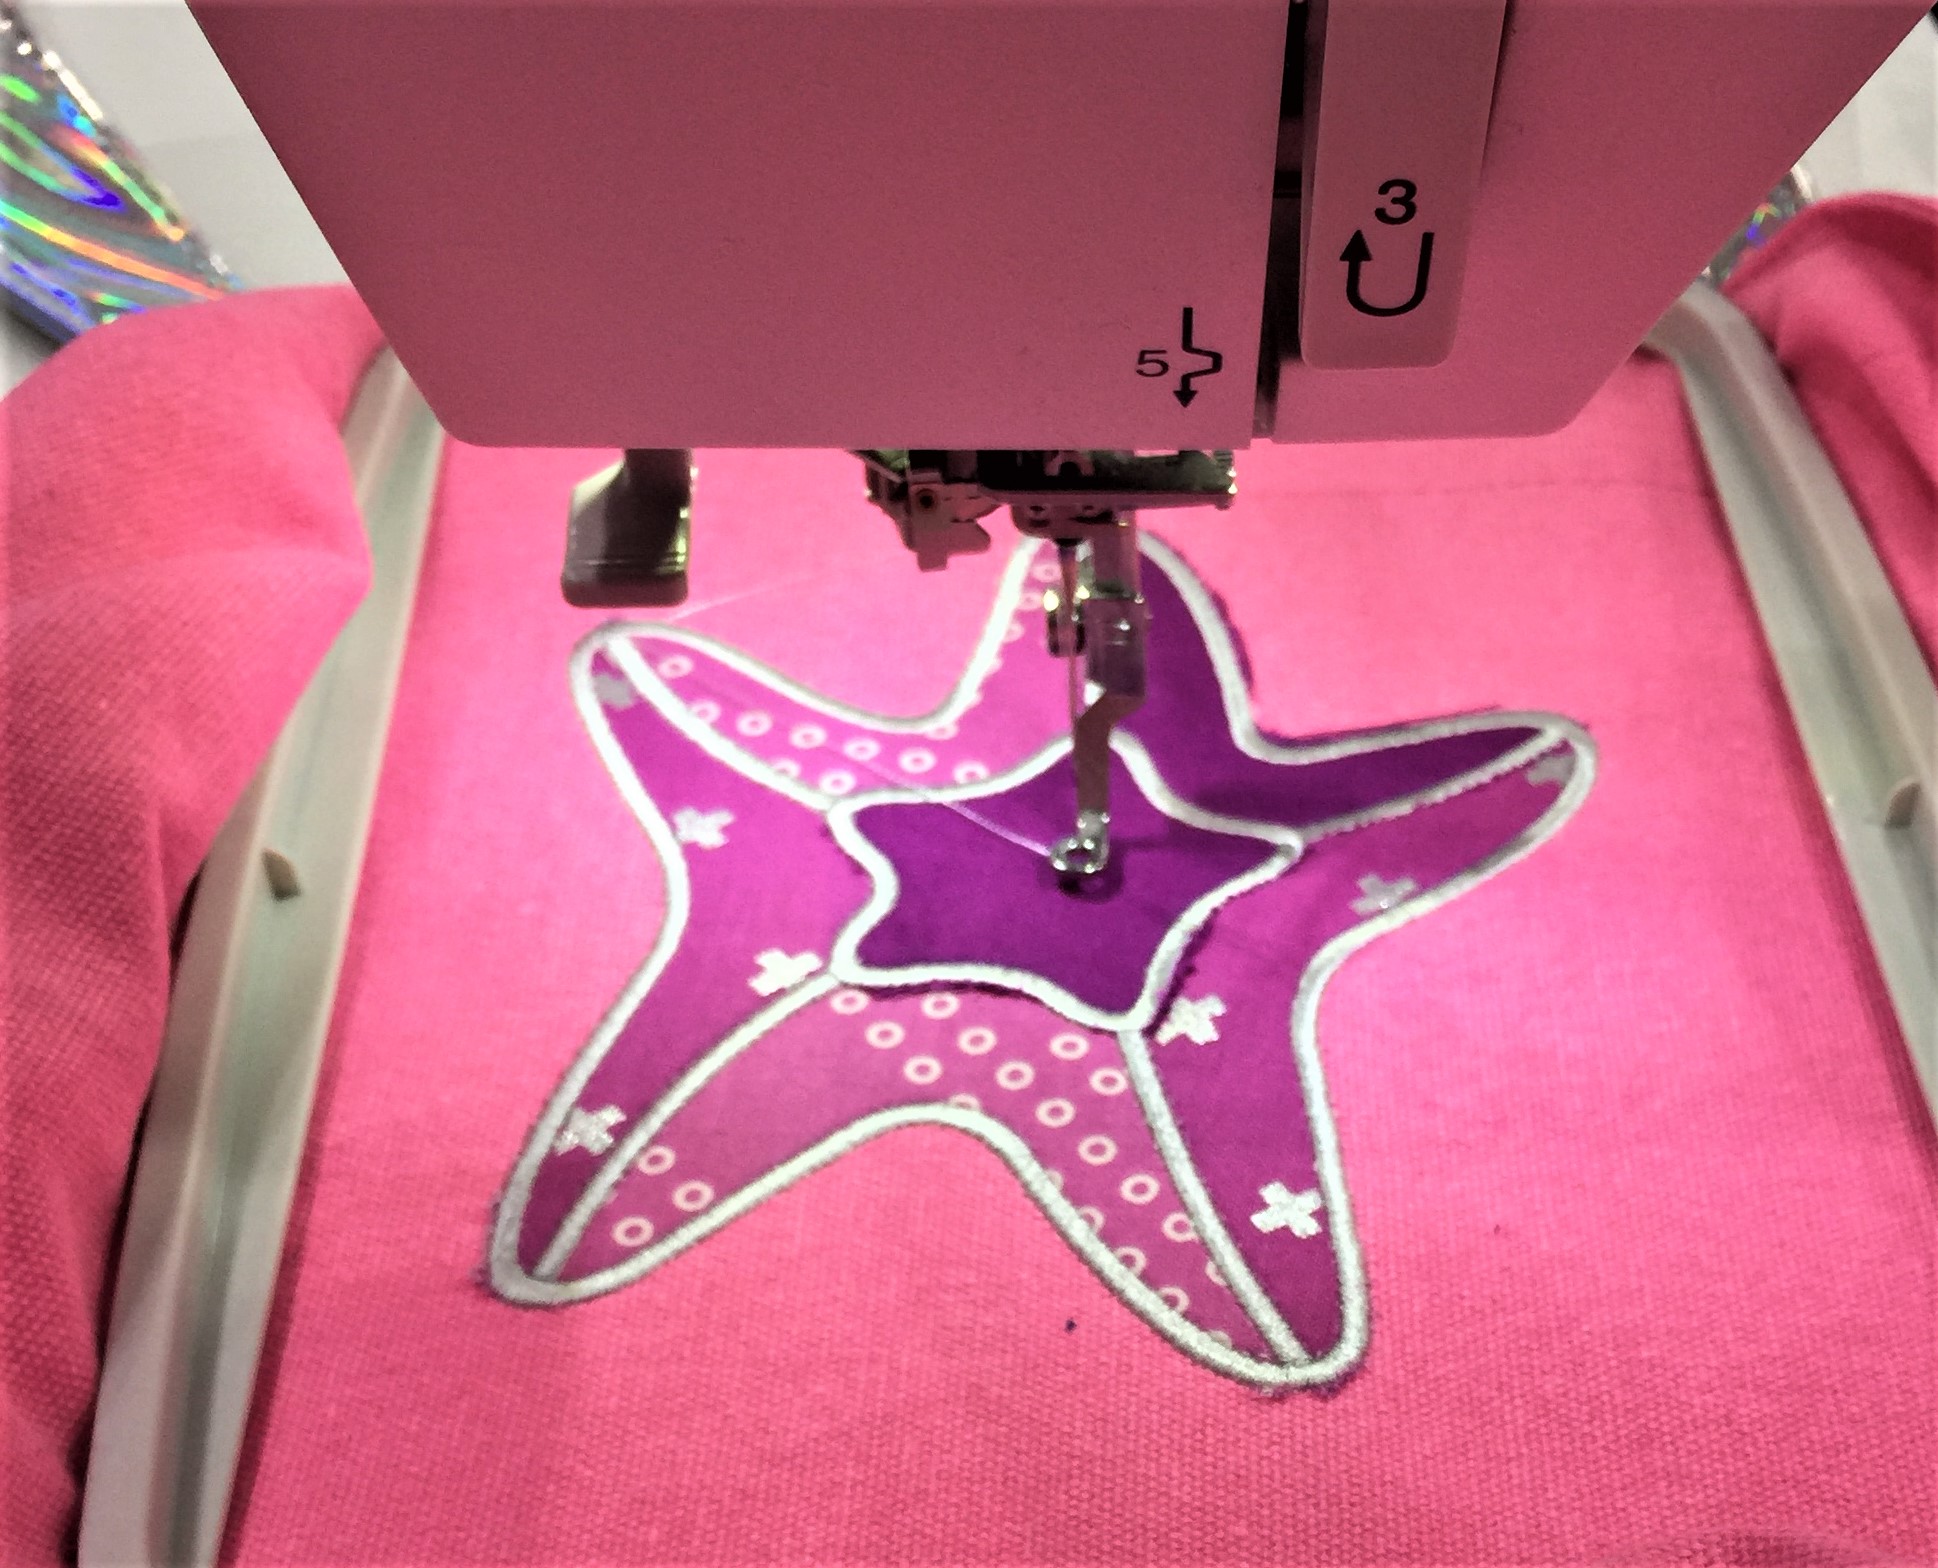
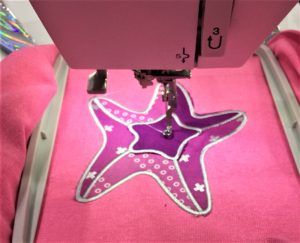
Are you looking for some cute and quick Summer sewing projects? Then you’ve got to hop over to the 2018 Summer Sewing Camp with Janome! The first three weeks of projects are already available, and there’s even a cut file for a camp t-shirt. It’s all the fun and creativity of summer camp without the hefty price tag, so you really can’t go wrong :). Every Monday, through July 30, a new sewing project will be released that can be finished in a couple of hours with minimal supplies. You have to check out the DIY Starfish Tote tutorial!
My contribution was Week 3– A DIY starfish tote bag with the option to use an embroidery design (if you have an embroidery machine) and an option to applique the star with a regular sewing machine. If you want a really quick finish, you can purchase a ready-made tote bag or follow my simple instructions to make your own!
Embroidered/Appliqued Starfish
I used an embroidery/applique design from the Janome Embroidery website and it was so quick and easy to do, I was literally done in 30 minutes with the applique! I hope you enjoy this quick and easy FREE tutorial–you can download it from the Janome site linked above, or you can download the DIY Starfish Totehere as well 🙂
This is a great project to do with your kids to combat boredom and then load the bag up with some beach towels, sunscreen, and snacks and head over to your local watering hole. Or if you really want to score some points, gather up some of your kids’ friends and really create the camp feeling! If you participate in any of the projects, be sure to share what you make with the #janomecamp18 to be entered in the giveaway drawing that will end on August 13, 2018. They’re giving away a sewing machine AND some other awesome sewing related items, so you’ll definitely want to get in on this!
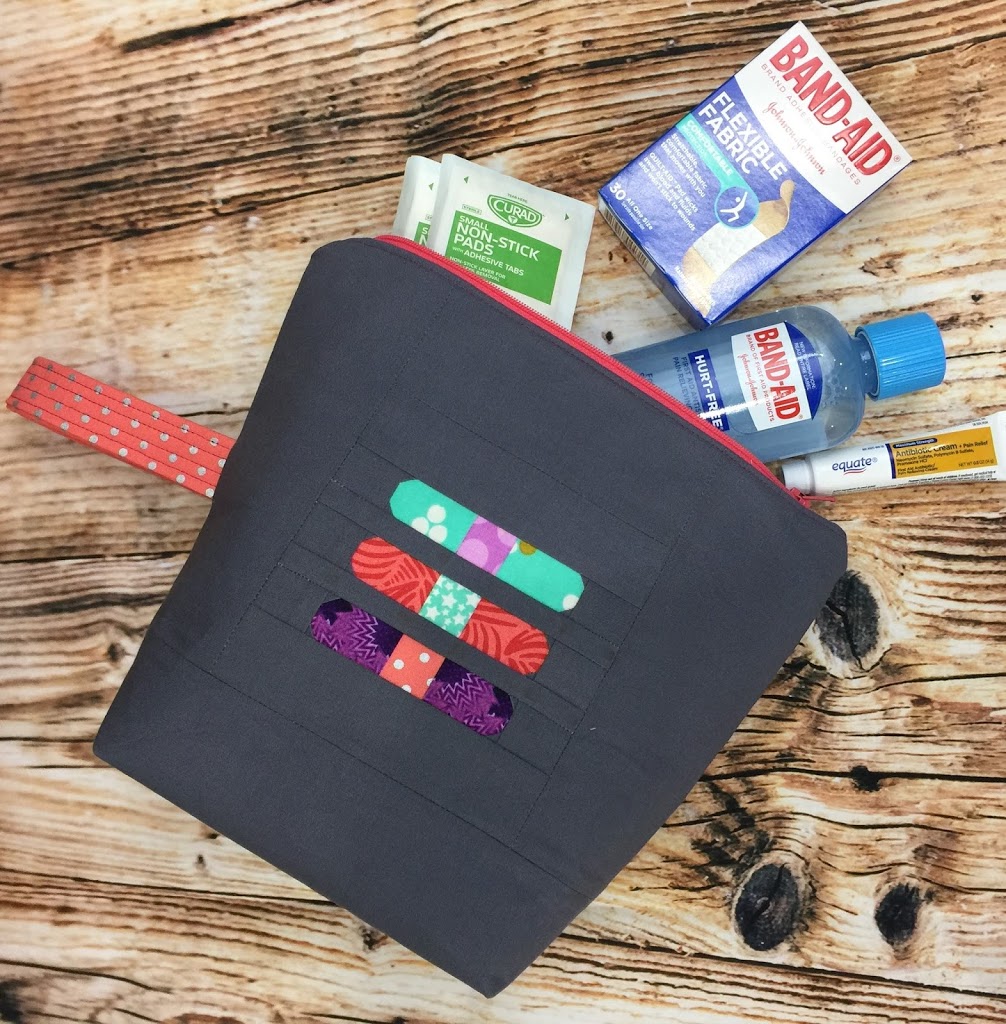
Now that summer is here, many people are planning day outings or vacations with the kiddos. It’s a good idea to have a first aid kit with you in case something happens, and I know I haven’t even kept one in my car (I’m learning, though!). So this pattern has a free zipper pouch tutorial and a free foundation paper piecing tutorial in it. Two for the price of one! But not really, because they’re both free 😉 Head over to the AQS Blog and get your free tutorial HERE!
finished foundation block
If you don’t feel like messing around with the band aid block and the paper piecing, you can totally skip that part and just cut two slid pieces of fabric for the front and back. But those little band aids are so cute!
I filled my little kit up with band aids, some antiseptic spray and wipes, bandage tape, gauze, and antibiotic ointment. You can personalize yours however you’d like and maybe sew up an extra one for a friend (or for dad’s car). The little band aids are a great way to use up small scraps of fabric. I know I have a hard time throwing any fabric away, so I’ll keep this block pattern close at hand for teacher gifts or whatever! Happy sewing until next time!
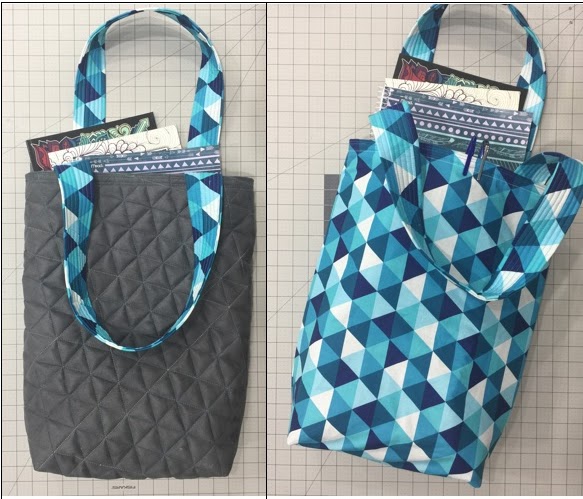
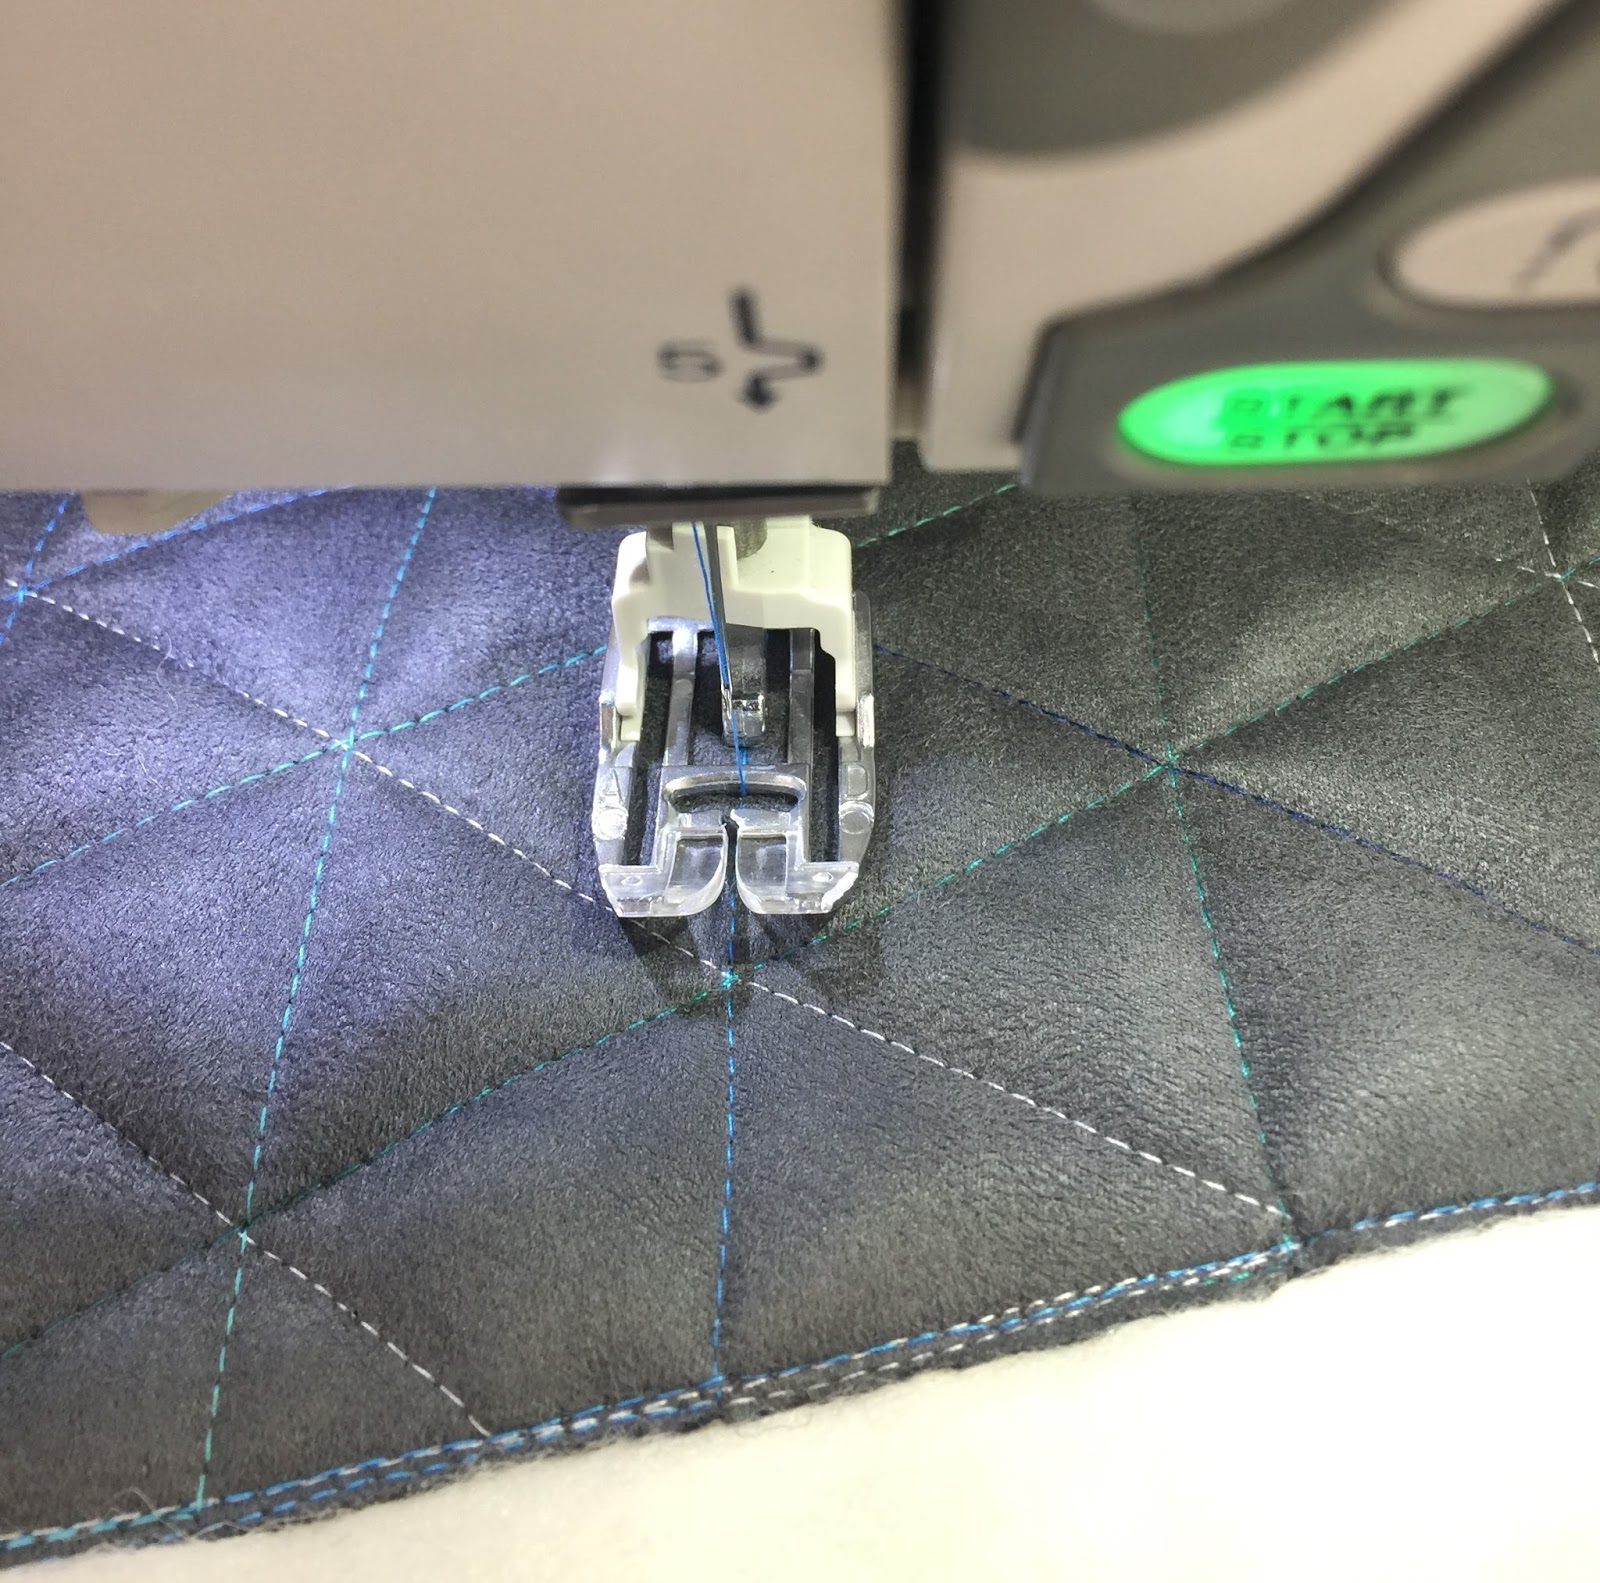
Happy, happy 4th of July! I hope you’re able to enjoy the holiday with your loved ones and make some great memories. Today, I’m excited to share a free tutorial that I created with the Janome Horizon Memory Craft 9400 for an awesome project bag. I’m always scouring the house for bags to load up with notebooks, sketch pads, folders, or whatever I’m currently working on to squeeze in a few extra minutes of work on the go, and this bag has a little extra depth to really protect all those items. It’s also reversible, so you can make one side to go with the fall season and the other a little brighter to work with spring and summer!
Reversible Notebook Bag
Plus…we’ll take a look at quilting on a thicker fabric than your usual quilting cotton. I do a lot of quilting and embroidery on leather and faux leather fabrics, and there is a lot of hesitation when it comes to that from some. When I started sewing, I didn’t take a bunch of classes…rather, I just dove in and experimented to find what worked for me. I didn’t have anyone there to tell me I shouldn’t try something, or that it wouldn’t work, so I think that was a huge benefit. For this tutorial, break out that walking foot (or your free motion foot) and try your hand at some geometric quilting.
Janome Dual Feed Foot quilting geometric lines on faux leather
If you haven’t tried quilting on leather or faux leather before, I’d recommend getting a few scraps of some cheap faux leather–my local Joann’s has lots of remnants on clearance that I grab whenever I can–and do some quick samples. I usually do my best work on “trash” fabric when there’s no pressure to mess up expensive fabrics. I’ll make sure my pieces are big enough to make a little cosmetic bag or something with later on, because 9 times out of 10, I end up wishing I could save my sample! This really is a quick sew–and you can easily alter the bag measurements to make the bag any size you like, upgrade it to add some pockets on the interior and exterior, or whatever your needs are. Check out the full tutorial on the American Quilter’s Society Blog and have fun with it! Go and conquer your fears of quilting on some different fabrics, and happy sewing!