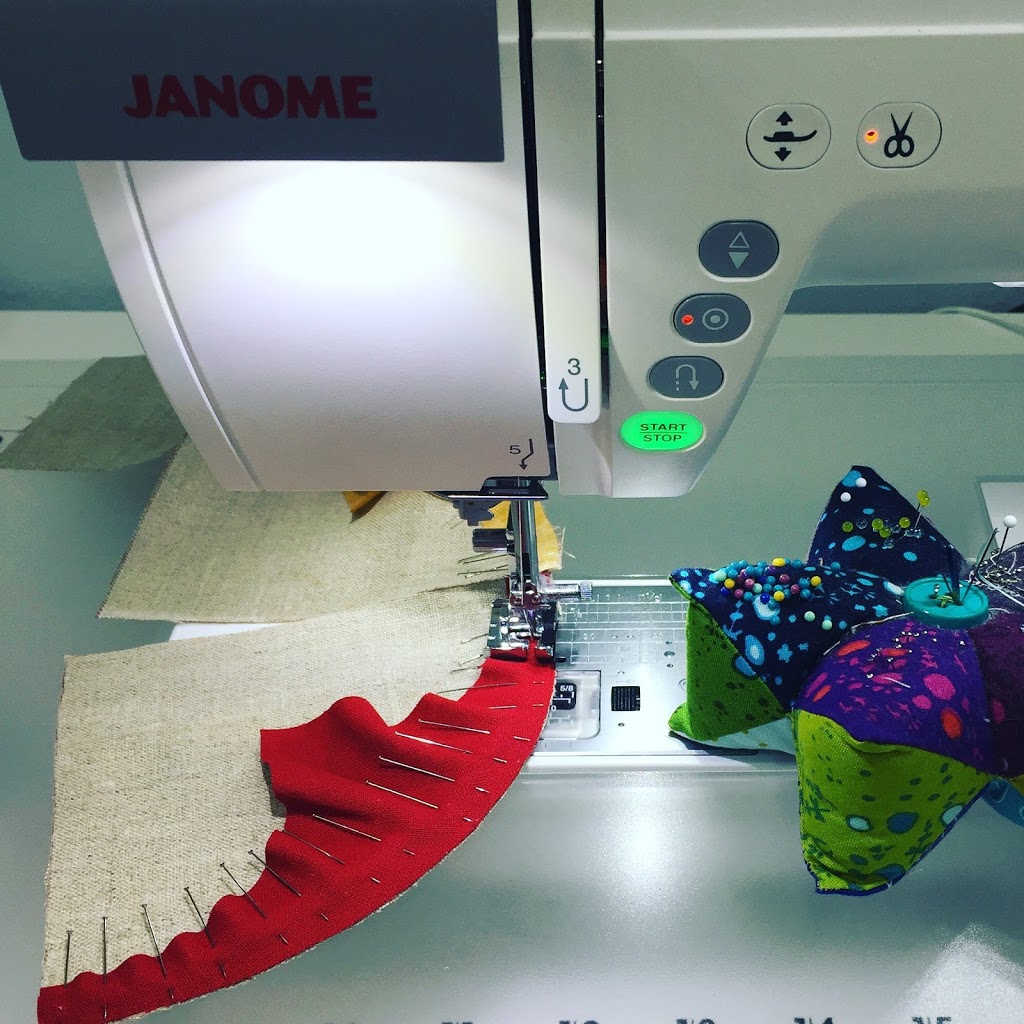
Are you tired of your throw pillows and need a quick way to freshen up your home dec? Grab a few sewing supplies, a pillow form, and some fabric and you’ll be on your way to piecing and quilting up this simple pillow cover in no time at all! I made my pillow on the Janome MC9400, but it can easily be adapted to work with any sewing machine and it’s helpful if you’ve got a walking foot (or some sort of dual feed device), but not a deal breaker! This tutorial consists of piecing some flying geese units and doing a little straight line quilting to add a modern punch to your home dec. Check out the supply list below, then click on the PDF instructions “All is Bright” below for the complete project.
Supplies
Janome HMC9400QCP (or other sewing machine)
Janome supplies (or other sewing machine supplies): Dual feed foot holder, Dual Feed Foot AD, 1/4″ Foot, Standard Foot A, Purple Tip Needle, Empty Bobbin, Pre-wound Bobbin
1 FQ bright green floral fabric (fabric A) sub cut into:
(4) 2-3/8″ square
(1) 3-1/2″ square
1 FQ true red floral fabric (fabric B) sub cut into:
(4) 2-3/8″ square
(1) 3-1/2″ square
1 FQ bright green and true red mix fabric (fabric C) sub cut into:
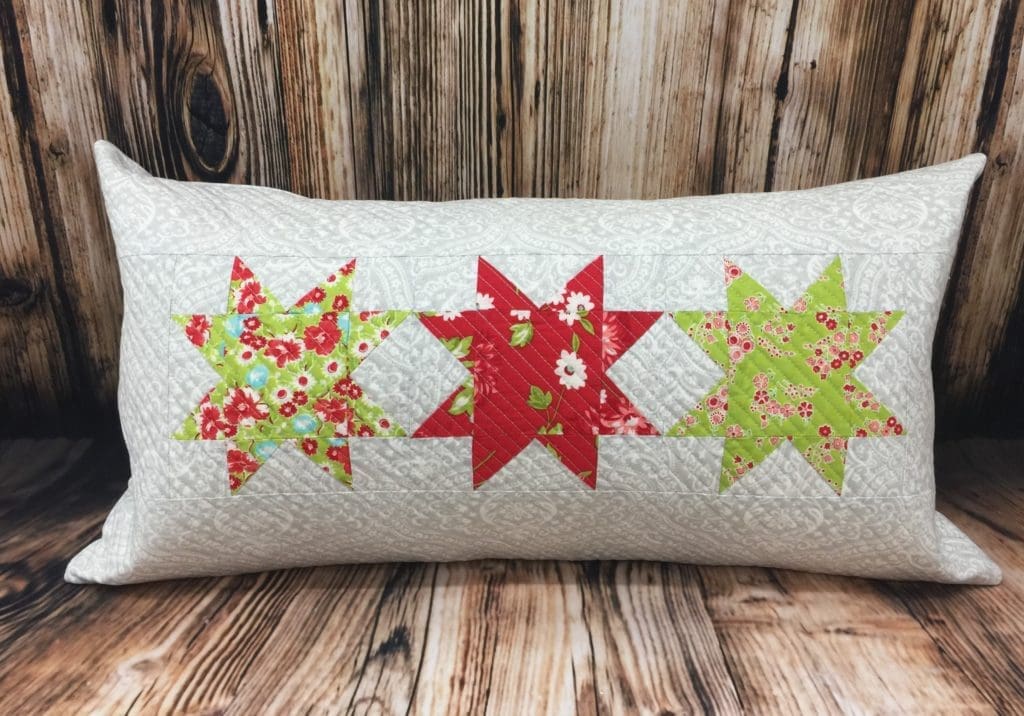
Are you looking for a way to brighten up your patio with some fun home dec pillows? Make your own DIY outdoor pillow with this quick and easy tutorial to create a super cute oilcloth pillow with pom pom trim, and give your deck a cheery look! I used my Janome Horizon Memory Craft 9400QCP and the Janome Ultra Glide Needle Plate and Ultra Glide Foot to stitch up this oilcloth pillow. Start sewing with some new fabrics and try out a new foot attachment that will take your sewing projects to the next level. The Ultra Glide Needle Plate and Ultra Glide Foot set is perfect for working with fabrics that might not smoothly feed under the standard foot A, such as oilcloth and laminated cotton. Also, check out my previous post on TOP TIPS FOR SEWING WITH OILCLOTH. This is a great tutorial for beginners, and will take approximately 4 hours from start to finish. The finished pillow size is 12″ x 18″.
Supplies: Sewing machine, Janome Ultra-Glide foot and Ultra Glide Needle Plate (Teflon foot for all other sewing machine brands), Zipper foot (Foot E for Janome), Needle, Pre-wound bobbin.
1 yard Aqua Rose gall oilcloth (Fabric A) sub cut into:
(2) 6-3/4″ x 19″ (zippered back of pillow)
(1) 13″ x 19″ (front of pillow)
3 yds. Jumbo Pom Pom Trim/ball fringe
40 wt. Black sewing thread (or white for less contrast)
20″ zipper
12″ x 18″ Weather proof pillow form/Outdoor pillow form
Marking pen
Rotary cutter/ruler/mat
Binding clips
Scissors
Figures 1-4
Prepare the back of the pillow and install the zipper
Take the two 6-3/4″ x 19″ pieces of Fabric A and measure and mark the center of one 19″ edge. Take the 20″ zipper and measure and mark the center on both edges of the zipper tape (see figure 1).
Tip: Use binding clips instead of pins when working with oilcloth. The fabric does not heal when holes are made in the oilcloth. Any holes made in the oilcloth will be permanent. Also, use a slightly longer stitch length to minimize the amount of puncture holes made in the fabric when sewing. Typically, adjusting the stitch length from the standard 2.4 to 3.0 is a good adjustment. The raw edges of oilcloth don’t fray, so there isn’t a need to finish raw edges as there would be with a regular woven fabric.
Place one of the 6-3/4″ x 19″ pieces of fabric A RSU and align the zipper tape with the 19″ raw edge, matching the marked centers of the zipper and the pillow back. The zipper and the fabric should be RST (see figure 2). Use binding clips to secure the zipper in place.
Remove the standard needle plate from the MC9400 and install the Ultra Glide Needle Plate. Using this needle plate with the Ultra Glide Foot will keep the oilcloth gliding smoothly under the presser foot. Select a zipper sewing stitch to move the needle position to the left. Lengthen the stitch length to 3.0. Attach zipper foot E to the presser foot and sew the zipper to the fabric A with a 1/4″ seam allowance (see figure 3). Finger press the seam allowance of the zipper away from the zipper teeth, under the oilcloth. Fold the remaining edge of the zipper over (see figure 4).
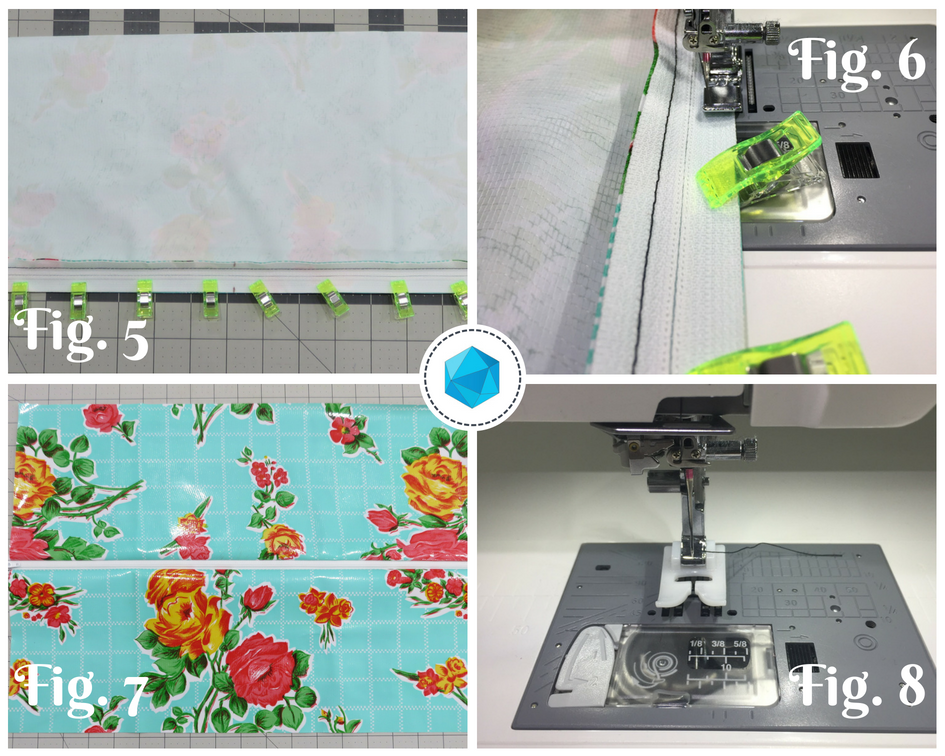
Place the remaining 6-3/4″ x 19″ piece of fabric A RSU. Take the remaining side of the zipper tape and match the marks on the zipper tape edge and the pillow back edge, with the zipper right side down. Line up the raw edges and clip in place with binding clips (see figure 5). Sew the zipper in place with a 1/4″ seam allowance (see figure 6).
Once again, finger press the zipper tape seam allowance away from the zipper teeth so it is under the oilcloth pieces (see figure 7).
Remove the zipper foot E from the presser foot and attach the Janome Ultra Glide Foot to the presser foot (see figure 8).
Figures 5-8
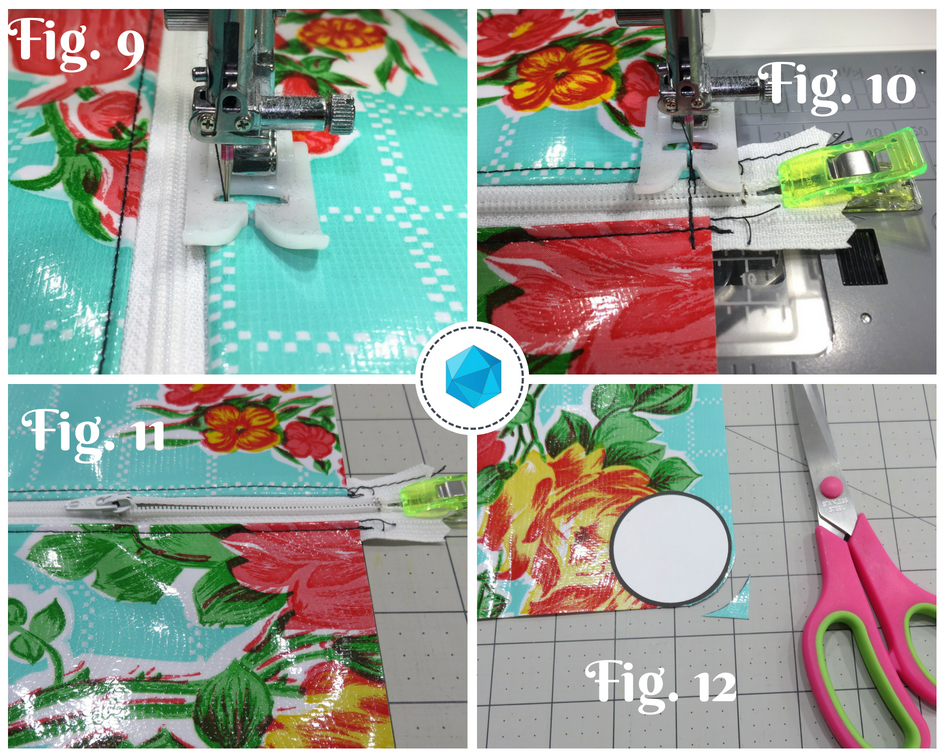
Topstitch 1/8″ away from the folded edge of the oilcloth (see figure 9).
Select stitch #1 from the utility menu. Move the zipper head towards the middle of the zipper tape (see figure 11). Use a binding clip to keep the ends of the zipper together. Sew a few stitches and then backstitch to connect the zipper ends, about 1/8″ away from the edge of the oilcloth fabric (see figure 10). This will act as a zipper stop until the front and back of the pillow are sewn together. Keep the zipper unzipped at least half way.
Round the corners and baste the pom pom trim
Take the circle template that you printed and cut out, and place it with the edges touching the corner edges of the pillow. Trace around the curved edge of the circle with a marking pen.
Cut the edge to round the corner (see figure 12).
Figures 9-12
Repeat steps 8 and 9 with the remaining corners of the back of the pillow and the four corners of the front of the pillow.
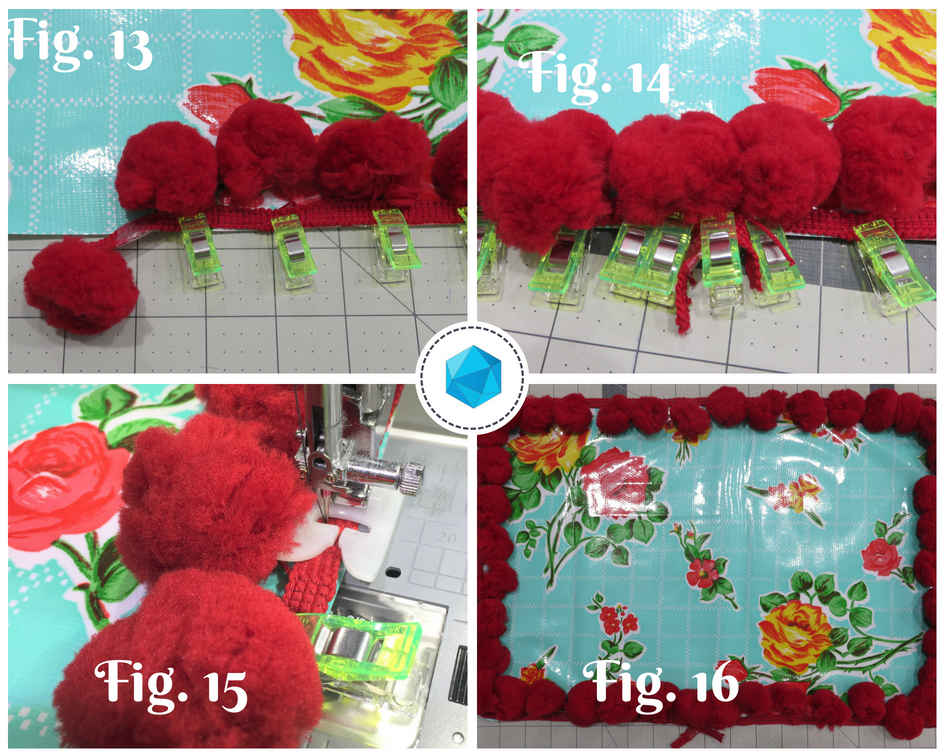
Set aside the zippered back of the pillow. Take the 13″ x 19″ piece for the pillow front and the jumbo pom pom trim. Place the pillow front RSU. Starting in the middle of one of the 19″ edges of the pillow front, align the edge of the trim with the edge of the oilcloth. Trail the end of the trim off the edge of the pillow by 2-3 inches figure (see figure 13). The pom poms should be pointing inward towards the center of the pillow front.
Align the edge of the trim and the edge of the pillow front all the way around the perimeter of the pillow. When you reach the point you started the trim at, overlap the trim and trail the end off by 2-3 inches, as you did to start (see figure 14). If the jumbo poms overlap, carefully trim one or two away to decrease the bulk. Use binding clips to clip the trim in place.
Move the needle position to the left. Lengthen the stitch length to 5.0 for a basting stitch. Baste the trim in place with a 1/8″-1/4″ seam allowance (see figure 15).
Sew the pillow together and finish
Place the basted pillow front RSU (see figure 16).
Figures 13-16
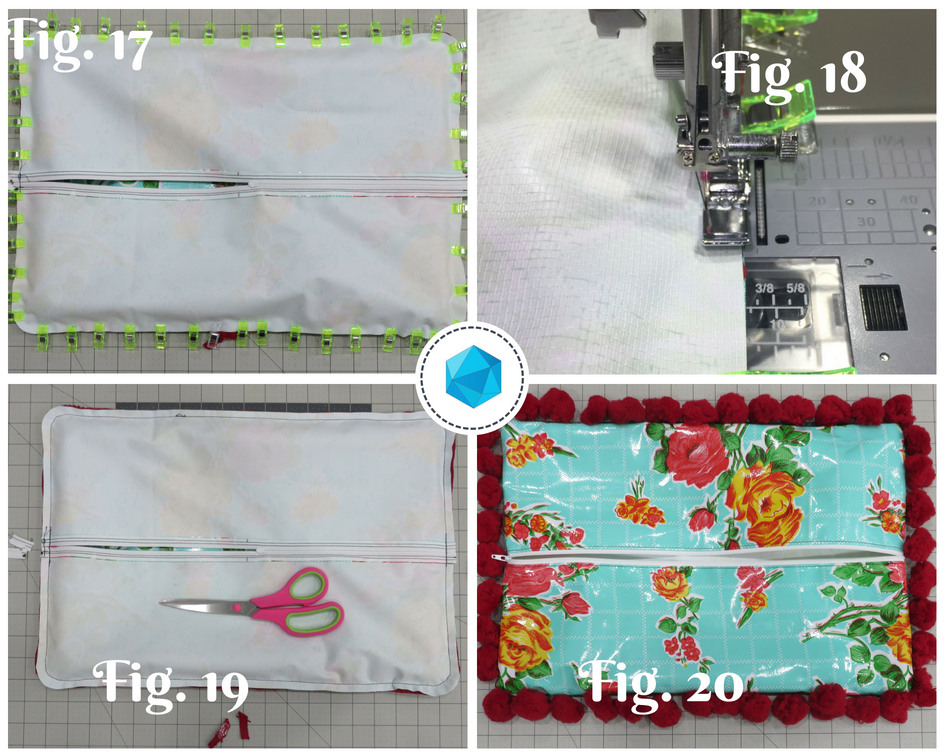
Place the zippered back of the pillow right side down on top of the pillow front (see figure 17). Line up all the edges and make sure the pom poms are all facing in towards the center of the pillow. Double check to be sure the zipper is unzipped at least half way. Use binding clips to secure all the edges together.
Remove the Ultra Glide Foot and attach the zipper foot E to the presser foot. Keep the needle position moved to the left, as if you were sewing a zipper. Sew around the perimeter of the pillow using a 1/4″ seam allowance (see figure 18). Double check that none of the pom poms are getting caught in the seam allowance while you are sewing.
Use a pair of scissors to trim away the excess ends of the zipper so the ends are flush with the pillow edges (see figure 19).
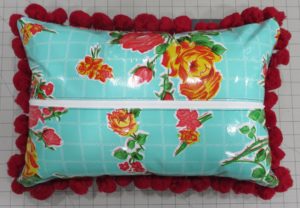
Turn the pillow right side out and carefully push out all the curved edges (see figure 20).
Figures 17-20
Tip: Oilcloth has little to no stretch, unlike cotton fabrics you might be used to working with. A zipper closure helps to keep seams sewn together versus using an envelope closure. Be careful to not stretch the fabric when inserting the pillow form. For a fully weather-resistant pillow, you can opt to sew this pillow without the ball fringe trim.
Insert the 12″ x 18″ pillow form and use to liven up your patio!
Finished Pillow!
Now get out there and party with your new DIY outdoor pillow 😉
Are you looking for some cute and quick Summer sewing projects? Then you’ve got to hop over to the 2018 Summer Sewing Camp with Janome! The first three weeks of projects are already available, and there’s even a cut file for a camp t-shirt. It’s all the fun and creativity of summer camp without the hefty price tag, so you really can’t go wrong :). Every Monday, through July 30, a new sewing project will be released that can be finished in a couple of hours with minimal supplies. You have to check out the DIY Starfish Tote tutorial!
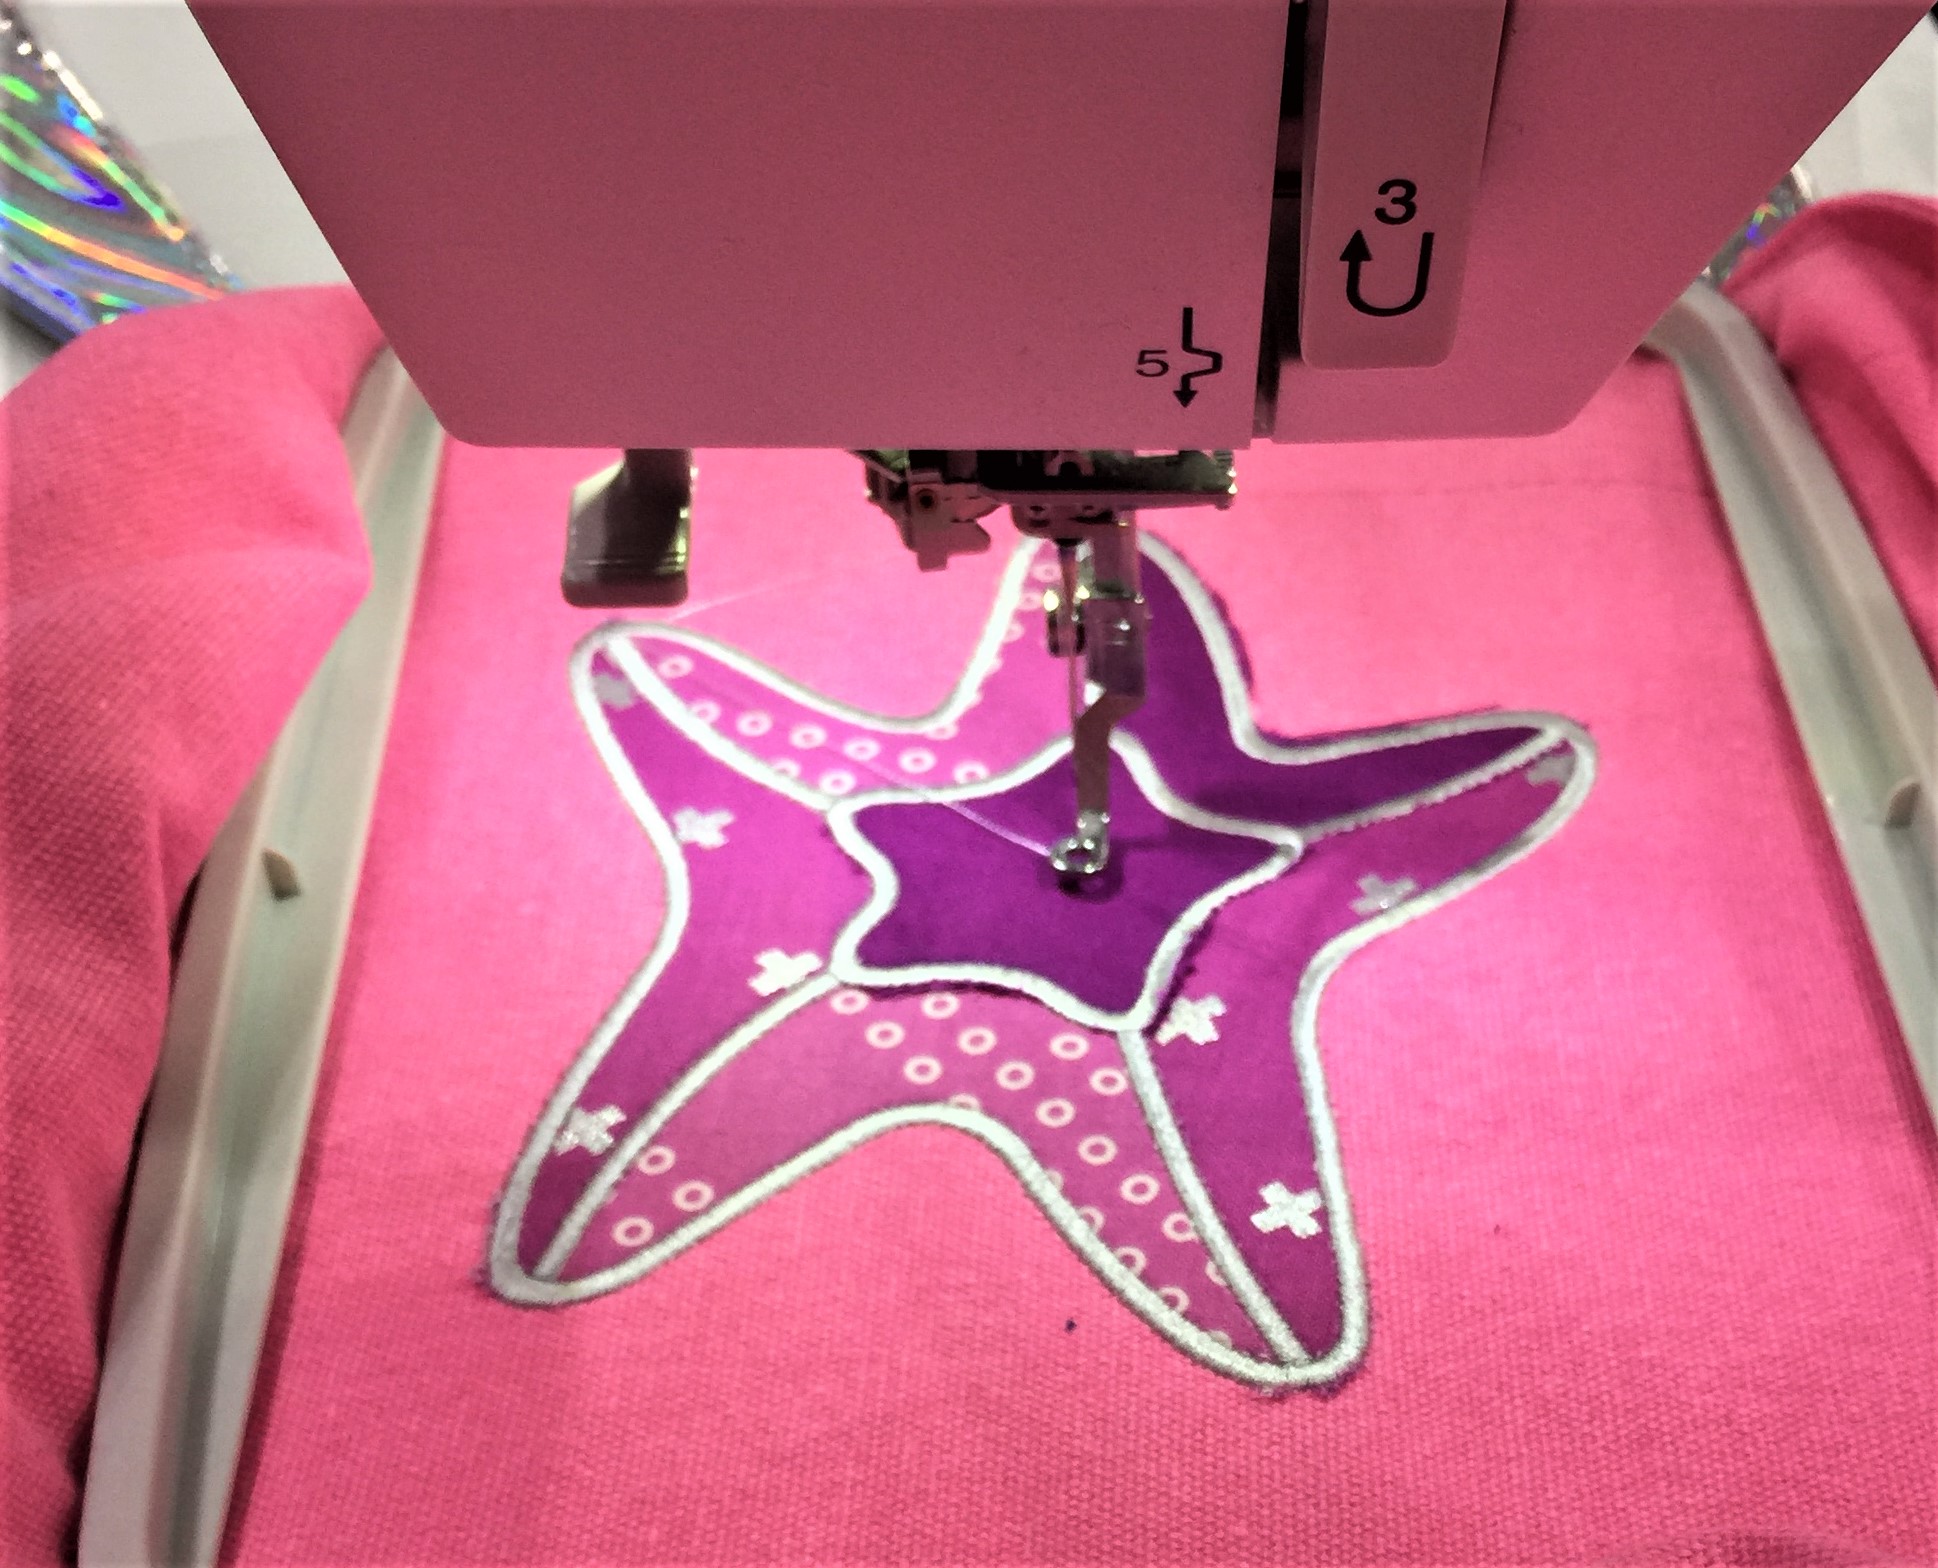
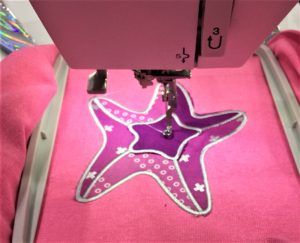
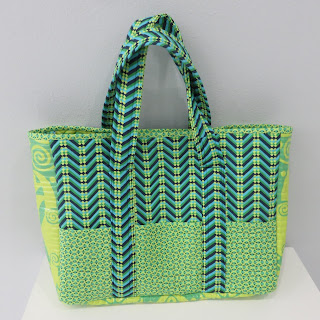
My contribution was Week 3– A DIY starfish tote bag with the option to use an embroidery design (if you have an embroidery machine) and an option to applique the star with a regular sewing machine. If you want a really quick finish, you can purchase a ready-made tote bag or follow my simple instructions to make your own!
Embroidered/Appliqued Starfish
I used an embroidery/applique design from the Janome Embroidery website and it was so quick and easy to do, I was literally done in 30 minutes with the applique! I hope you enjoy this quick and easy FREE tutorial–you can download it from the Janome site linked above, or you can download the DIY Starfish Totehere as well 🙂
This is a great project to do with your kids to combat boredom and then load the bag up with some beach towels, sunscreen, and snacks and head over to your local watering hole. Or if you really want to score some points, gather up some of your kids’ friends and really create the camp feeling! If you participate in any of the projects, be sure to share what you make with the #janomecamp18 to be entered in the giveaway drawing that will end on August 13, 2018. They’re giving away a sewing machine AND some other awesome sewing related items, so you’ll definitely want to get in on this!
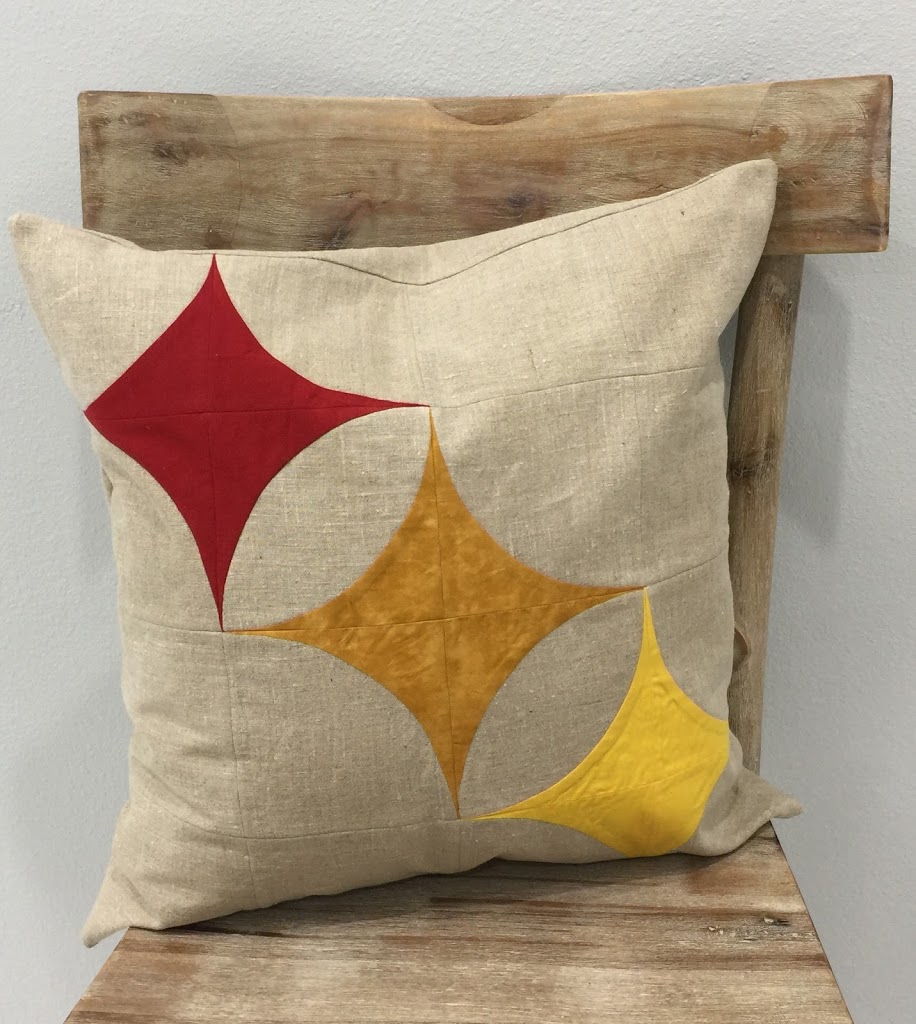
A few weeks ago around Mother’s Day, I was contemplating what handmade gifts would be truly appreciated by mom. As a new mom, I was excited to celebrate my first mother’s day, but didn’t really care about getting any gift (I honestly wanted some house chores done as a gift, and maybe some honey-do’s!), so I was thinking about gifts with meaning. I was seeing lots of advertisements on social media for jewelry and diamonds and just lots of STUFF. I’m not much of a jewelry person, but the diamonds got me thinking about birthstones and some of the jewelry I had seen a few years ago. I remembered one of my friends receiving a ring that had her kids’ birthstones set in it, and how much she loved it. How could you translate that representation into a quilt? And how many people have time to whip up a “quick” quilt, by the time they are pondering mother’s day gifts?
I thought a decorative pillow for the couch or bed might be more practical and manageable on a short time frame. So I teamed up with Janome to create a generational pillow that would be a great design for using the birthstone jewelry idea and making something for the home. You can view the free tutorial on the Janome Projects Website
I used the Janome Horizon Memory Craft 9400QCP to sew this project, and sewing the curves was a breeze. I’m completely spoiled by this machine and will be hard pressed to sew on anything else ever again. It even has an additional light that you can pull out for a better lit area when sewing. It’s extremely helpful, especially if you are sewing dark fabrics and using dark thread. Another favorite perk from this machine is that when you stop sewing, the needle remains in the down position. Which is absolute heaven when you are sewing anything tricky that you don’t want to shift too much when the presser foot is lifted.
In the free tutorial, there are three options for the pattern–you can select birthstone colors for 3, 4, or 5 people (or even more-but you’ll have to do the math for that on you own 😉
If you have a couple of people with the same birthstone, you can use different tones of that stone for a little variety. Some months even have multiple birthstones (or so I was told in my reading up on different months…), so you could go that route as well. Happy sewing, and see you next time!
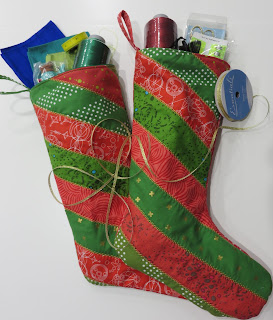
It’s time for another free tutorial! I got to team up with Janome again to bring you an awesome Christmas stocking tutorial 🙂 Be sure to check it out on the Janome website !
These stockings are super easy to whip up! All you have to do is sew some strips of fabric together (jelly roll strips would be perfect!), then use the template to cut the stockings out. You can add some decorative stitching to the seams where the fabric is joined for a little extra oompf! Start and finish in an afternoon and make some awesome new stockings for the family 🙂 Merry Christmas!
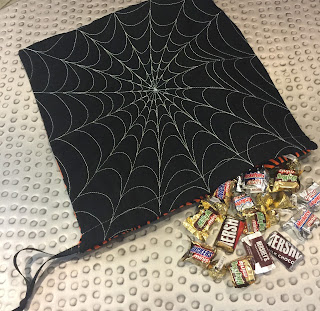
If you’d like to make the perfect project for your special little trick-or-treater, I teamed up with Janome to bring you the perfect tutorial for a reusable treat bag! Visit Janome’s website for the full tutorial and a quick and easy sew!
This is a great project with a little pop of color on the reverse side of the drawstring bag–you can use a contrasting fabric to really make it pop (or even glow in the dark fabric!)
And learn to quilt some really fun spiderwebs! Enjoy!
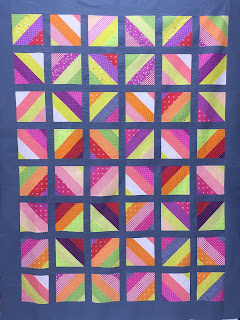
If you’ve been looking for a way to use up those super cute jelly rolls you’ve acquired…I have a great jelly roll tutorial for you! It’s free, and you can find it at the American Quilter’s Society Blog, sponsored by Janome.
Free Jelly Roll Quilt tutorial by Joanna Marsh
I whipped up this quick tutorial using L’s Modern Basics (in the warm colors) Sushi Roll. I absolutely love this fabric collection and plan on making one of these in the cool colorway too!
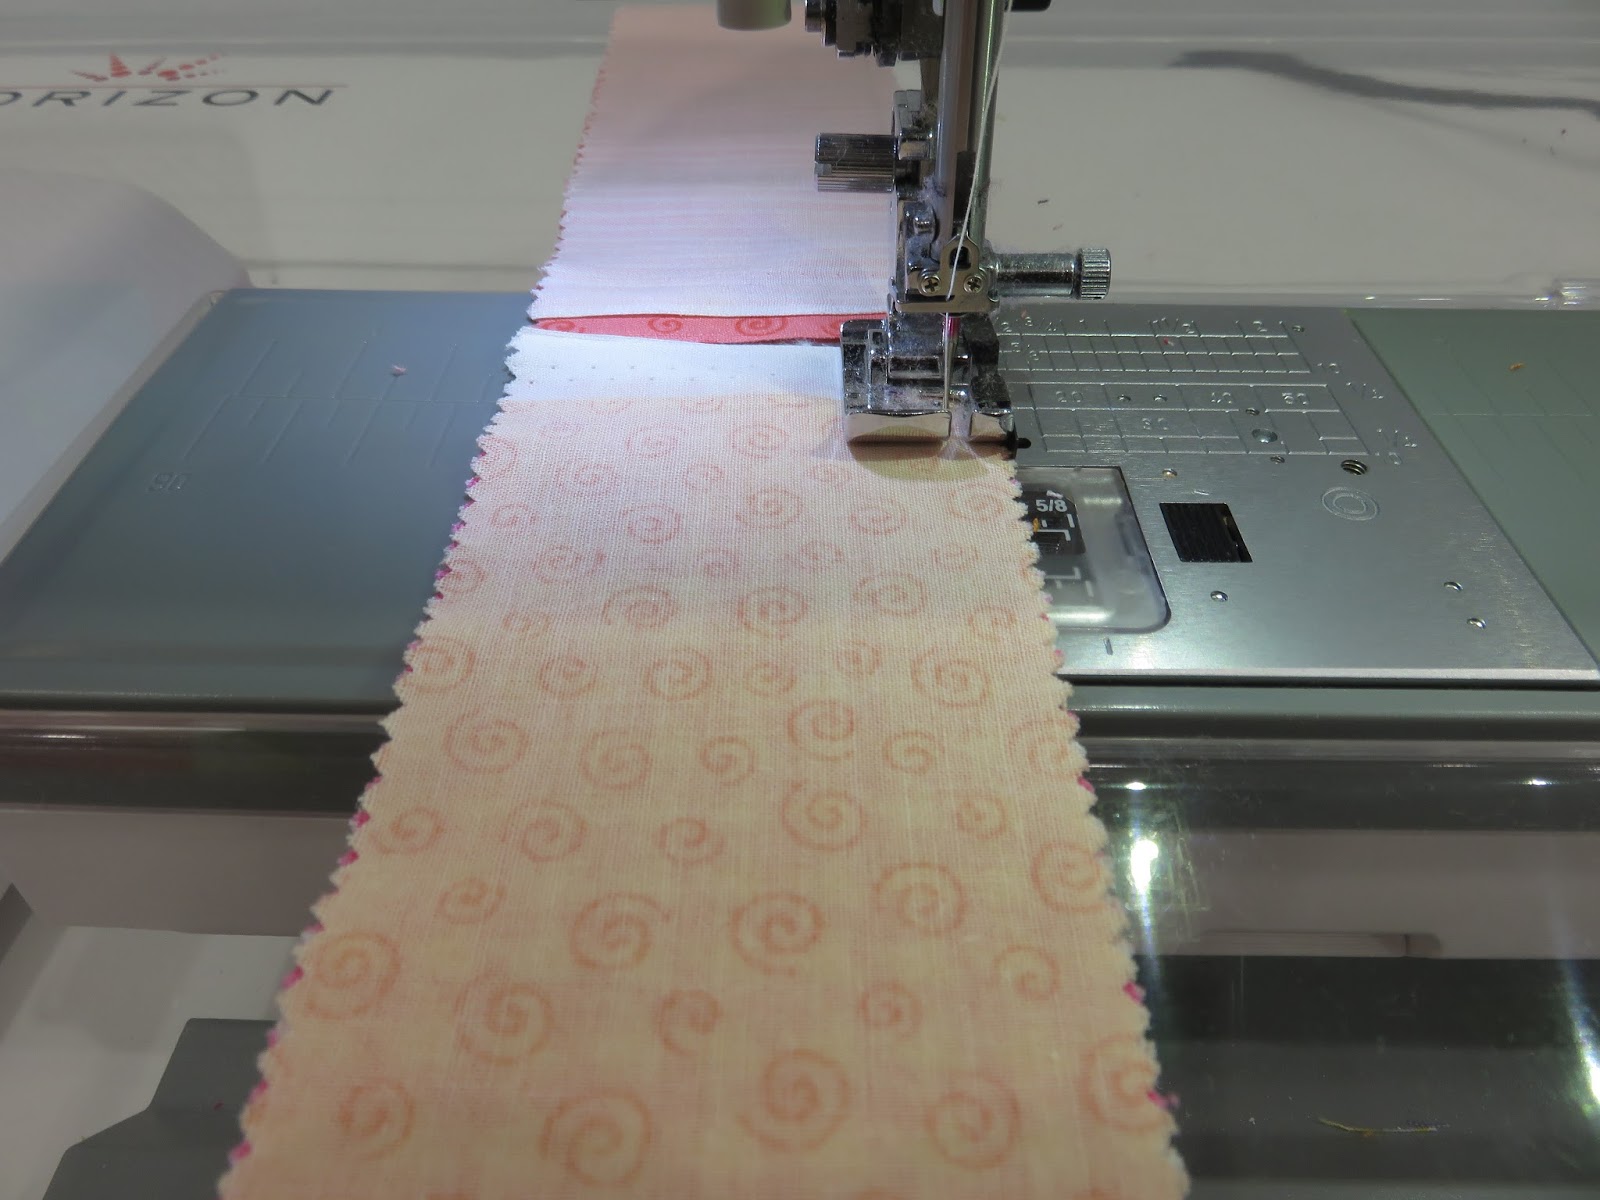
Easy piecing with Janome’s 1/4″ piecing foot
If your quarter inch seams aren’t perfect, you can take your piecing skills to the next level with a 1/4″ piecing foot that will give you perfect seams every time. This foot is everything when it comes to piecing!!!
Up close and personal of the quilting
And then finish your top off with some fun free motion quilting! Have fun with this free tutorial, and use up that fabric you’ve been hoarding for so long 🙂
Everyone loves that time of year when it’s hotter than blue blazes outside, right? That means summer is in full swing, and another favorite is right around the corner…THE FIRST DAY OF SCHOOL!!! Parents everywhere countdown the days to this landmark date like children do Christmas, and breathe a sigh of relief to have a bit of a break and shoo the kiddos out the door to start their education once again.
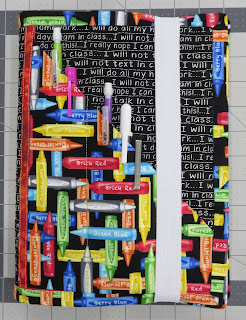
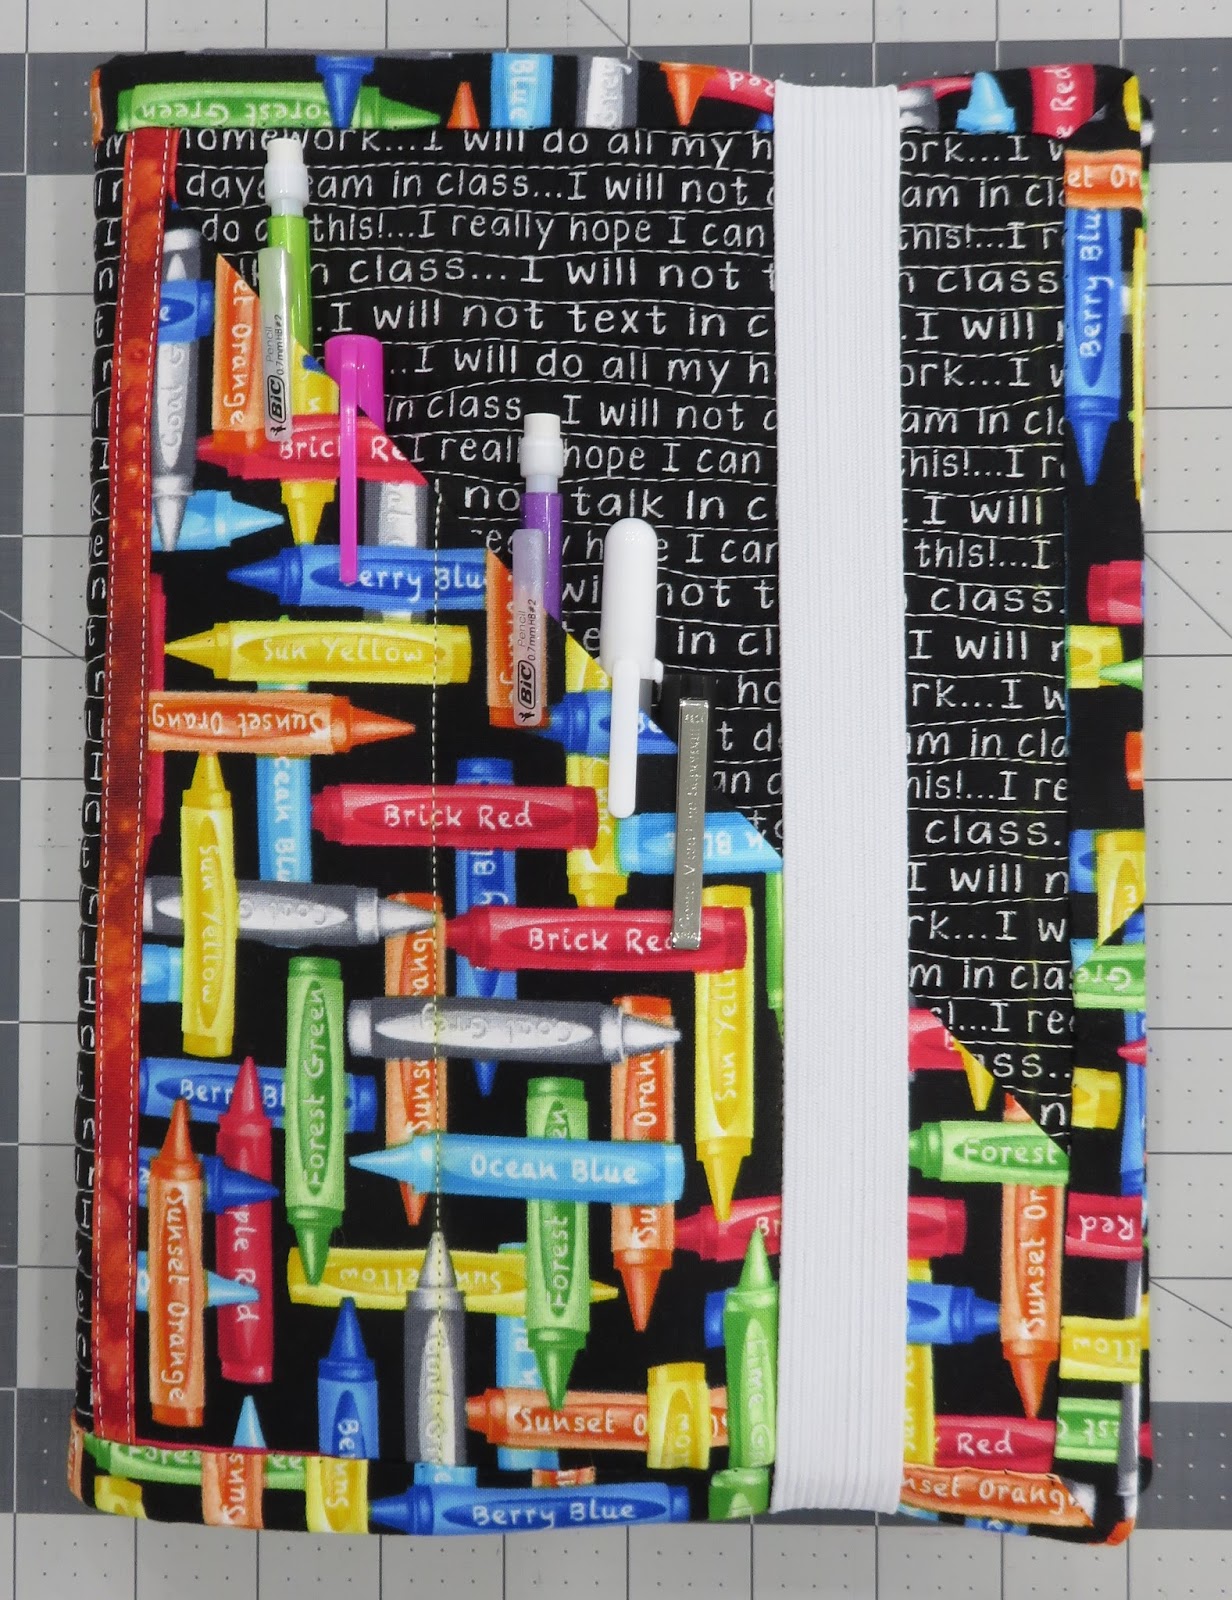
Many moms or dads may want to treat their kiddos to some personalized back to school handmade goodies, and I’m here to help with that!
Make some great customizable notebook (or day planner) covers by simply taking a few measurements of the kids’ existing school supplies. My quick and easy step-by-step tutorial will help you create some great covers that will prolong the life of those school supplies and make the kids feel extra special on their first day back. The tutorial can be found HERE so head over and check it out!
If you’re planning a trip to the pool, river, beach this summer, you’ve got to whip up this painless pool tote lined with laminated cotton. Throw your wet towels in and you don’t have to worry about them getting water spots on the car seats or even forgetting about them in the car (hey…don’t judge…we’ve all done it!)
Water resistant pool tote
The only thing extra you might want to pick up, as far as sewing machine accessories, is a teflon foot. Teflon feet are absolutely amazing when it comes to sewing any sort of “sticky” fabric. So if you run your hand over it with pressure, and it doesn’t smoothly run across the fabric, a teflon foot will easily sew it! Some great examples are glitter vinyl, regular vinyl, oilcloth, and laminated cotton. Any fabrics that look like they have a sheen or platic-y finish. Personally, I love to sew with weird fabrics, so I’ve had a teflon foot for a while now. But if you don’t stray from the beaten path very often, now is the time to stray!!! You will love the teflon foot, and have so many more interesting sewing options.
Teflon foot for Janome
So let’s get down to the nitty gritty–This pattern was written for Janome exclusively for the Quilt views blog. So you can grab the FREE PATTERN HERE
Hop to it and get sewing! Make something cool this summer 🙂
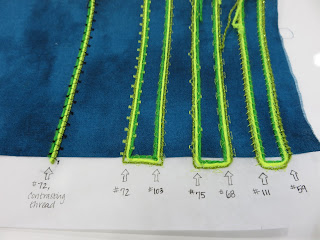
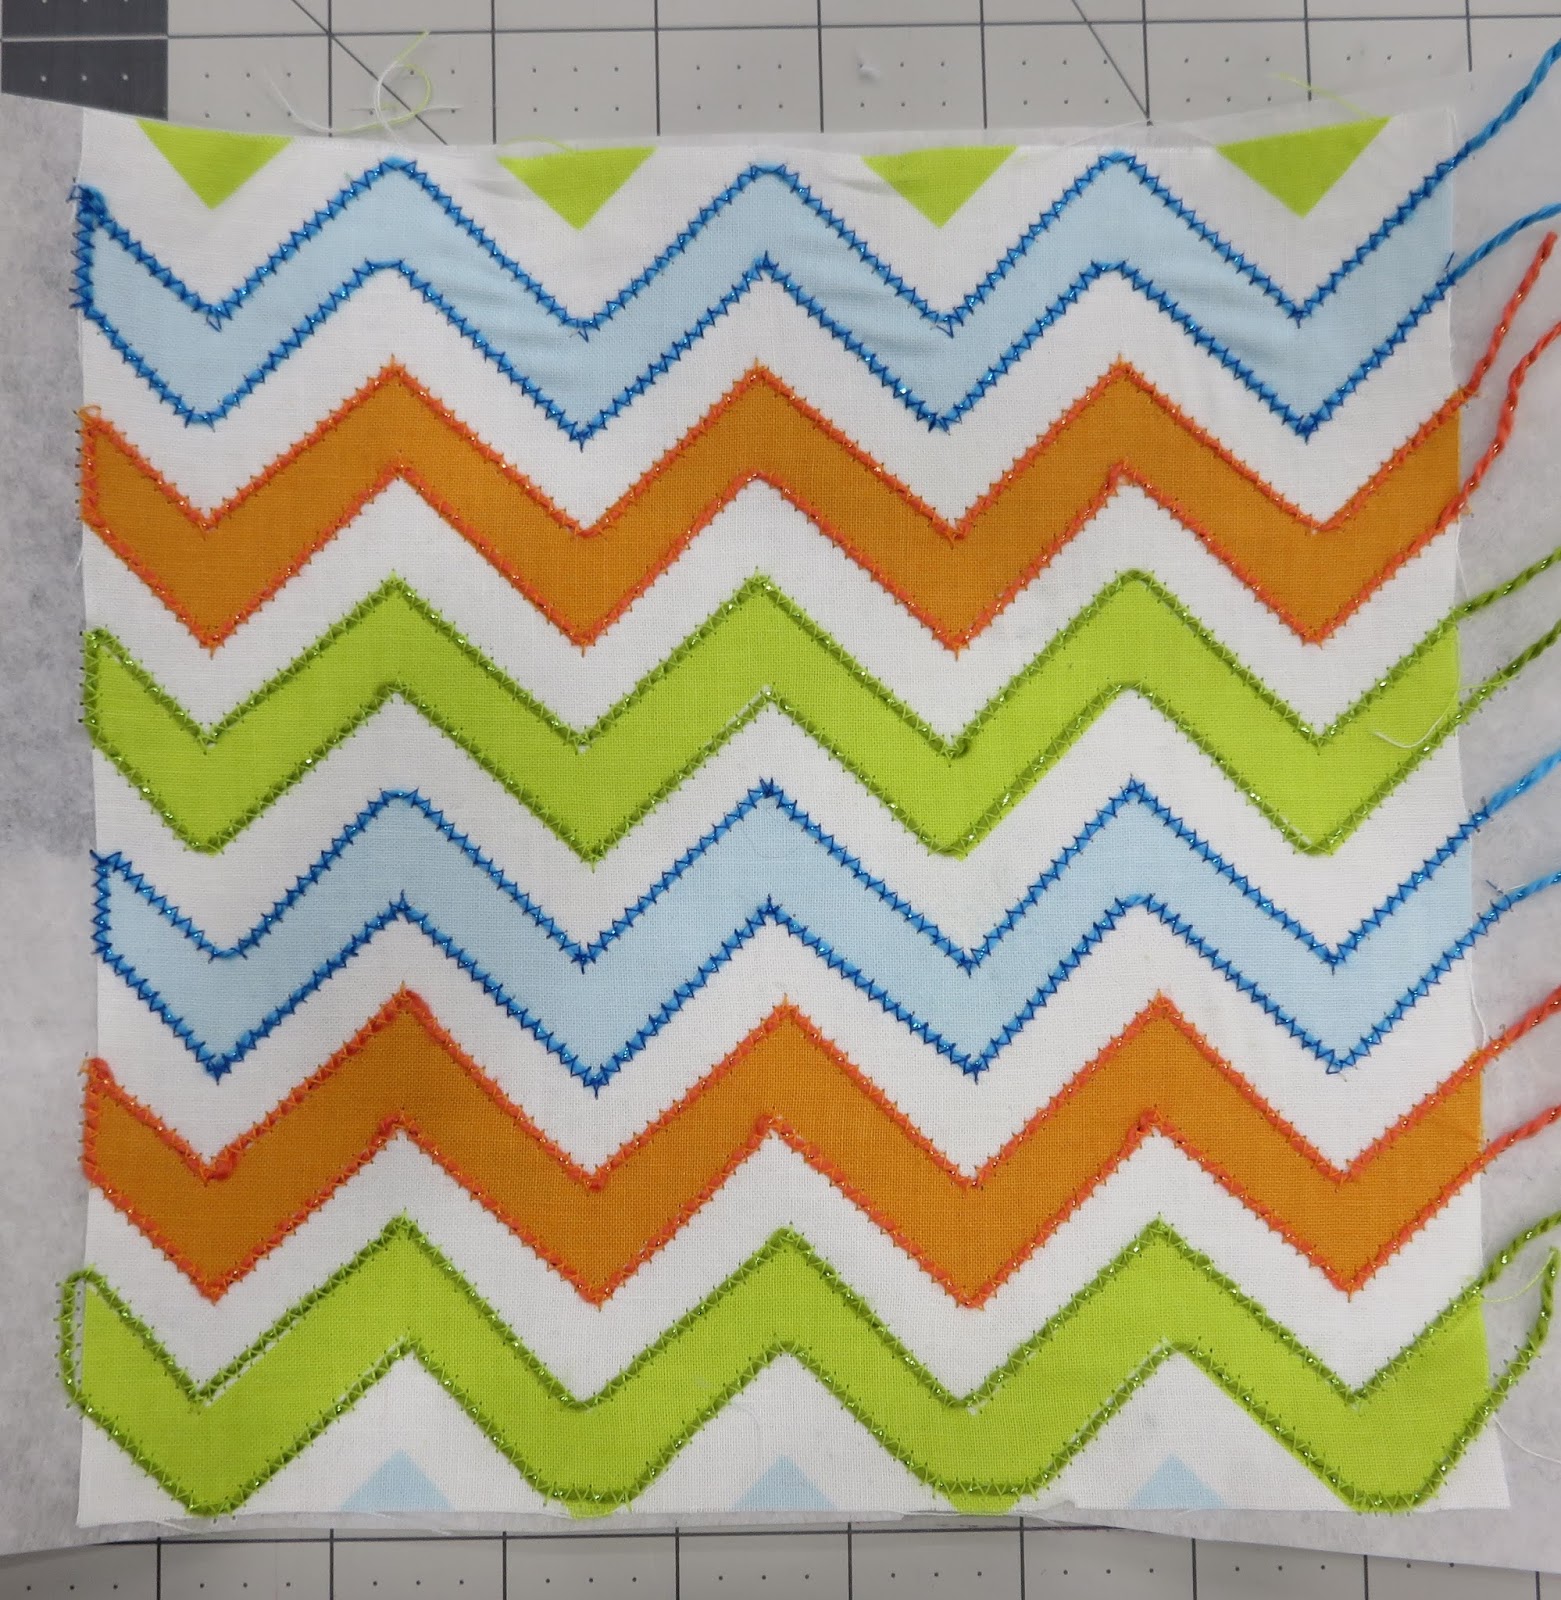
I had absolutely no idea what couching was when I first heard of it. I saw a demonstration of couching on a longarm quilting machine, and then very quickly wrote it off (since I didn’t have a longarm at the time), thinking I would never have the means or opportunity to try couching. You can use couching to emphasize a print on fabric, outline applique, doodle with it, and you can even quilt with it.
Couching can add a little flair to regular fabric
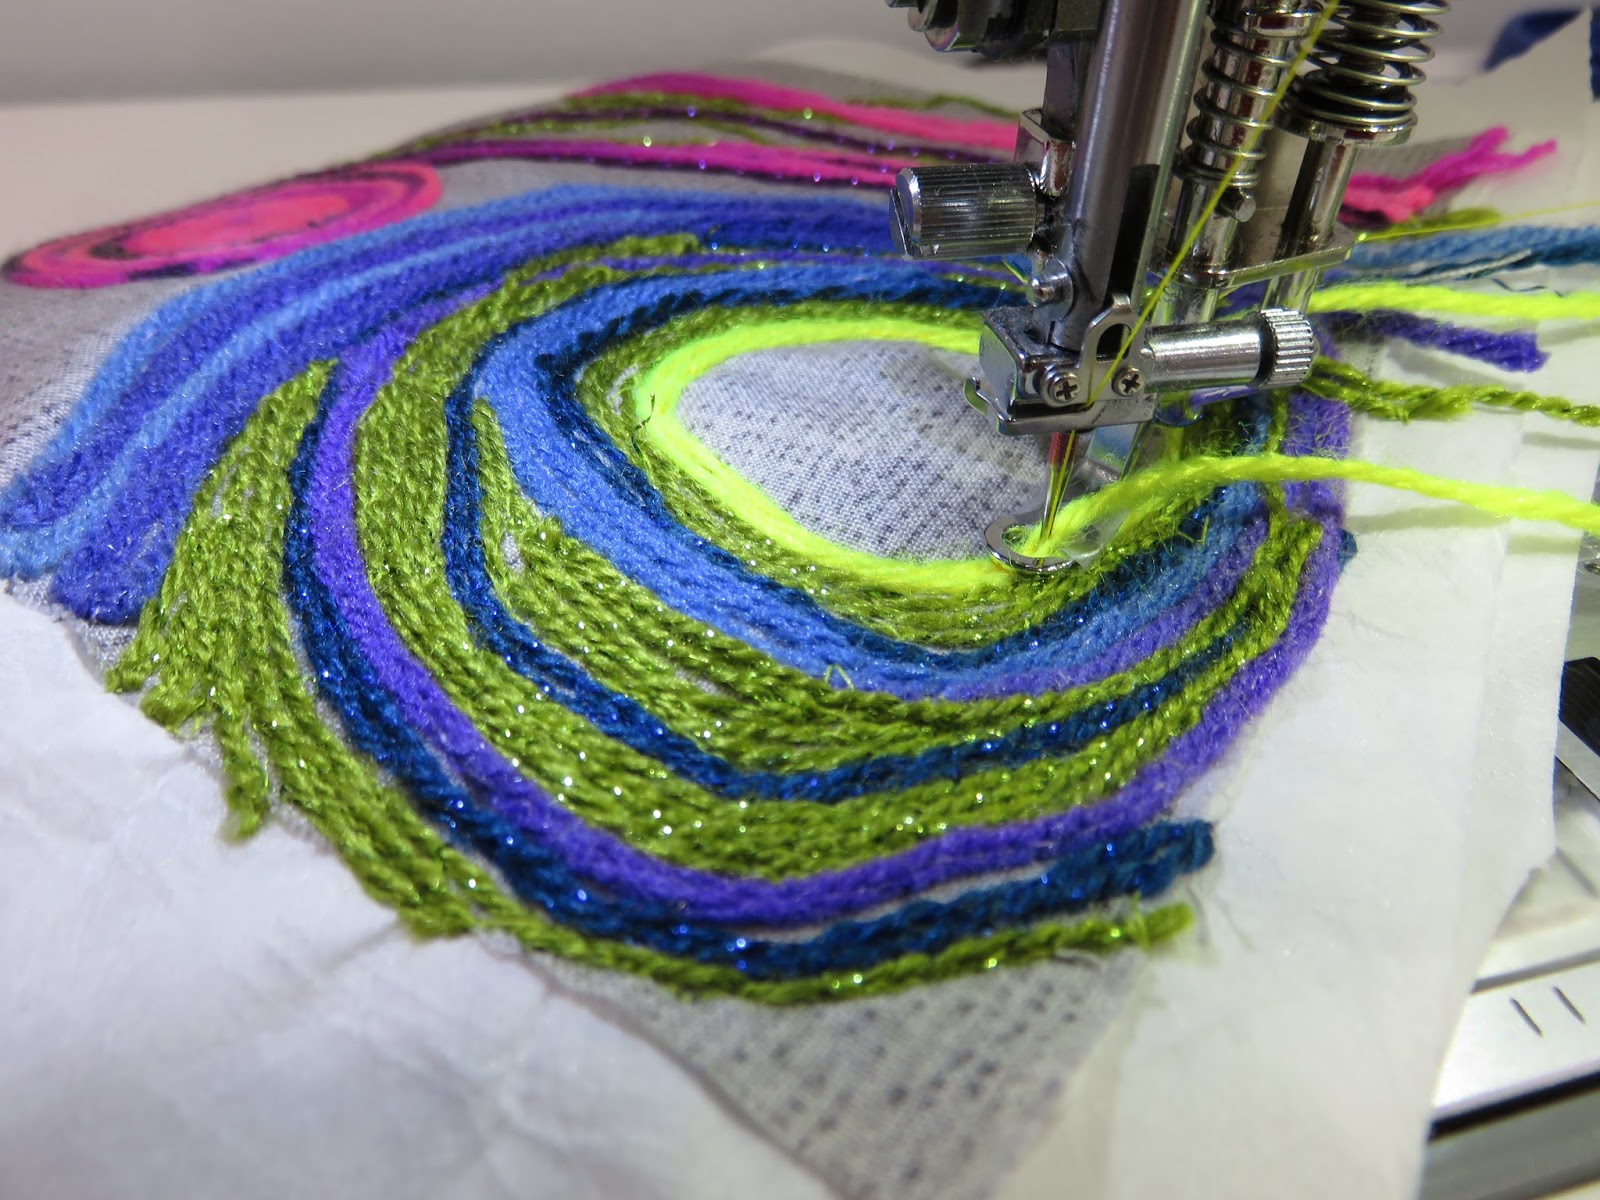
Well, there are some ways that you can couch without buying a super expensive longarm quilting machine, and then also buying a super expensive couching attachment for said longarm. You can actually couch by hand–but it takes a while. And you can certainly try couching by using a domestic sewing machine. You don’t even have to buy a special foot for it if you don’t want to. As long as you have a free motion quilting foot that has some sort of round part that the needle goes through, you’re good! I will say, that if the hole for the free motion foot is really big, you can easily modify it yourself by taking a small piece of scotch tape and covering a portion of the hole (not a portion the needle will travel through). The smaller the hole on the free motion (or couching) foot, the easier it will be for the yarn to travel where you want it to go.
Make an art piece using couching techniques if that floats your boat!
I wrote a super easy to follow couching tutorial for Janome’s website that can be accessed HERE So click it and check out how easy couching is! There are seriously so many things you can do with couching to spice up existing projects.