Posted on

Quilty friends are the best


I may not have come right out and said this yet, but as I type this, I am 37 weeks pregnant with our first child.  I’m kind of a private person when it comes to this kind of stuff and social media, so there haven’t been any baby bump pictures or ultrasound photographs or “facebook official” posts.   

However…I have to talk about my “tribe”.  The group of people I didn’t even know I needed until I found them.  I also have my church family to lean on and love (thank God for that!), but there is something to be said for your sewing friends that other groups don’t relate to.  

I’m a member of the San Antonio Modern Quilt Guild, and have been for a little over 2 years.  From the first meeting I attended, I looked around the room, and I could feel something different about the group.  It was mostly (I think ALL, then) women.  They were talking about things they made with their own hands, and they were supporting and encouraging each other.  There was laughter and gossip and friendship.  And they were all very different in their own way.  

Sewing can be a very isolating hobby if you don’t have a tribe.  And I didn’t know what I was missing out on until I went to that first meeting.  I immediately joined and can’t believe the friendships I’ve made in that short period of time.  There has been laughter, tears, good times, and bad.  And sometimes there wasn’t any sewing going on during this.  My point here is that sewing/quilting friends are the BEST.  They get it.  You can be talking about your dog dying one minute and the new quilting technique the next, and they don’t bat an eye.  

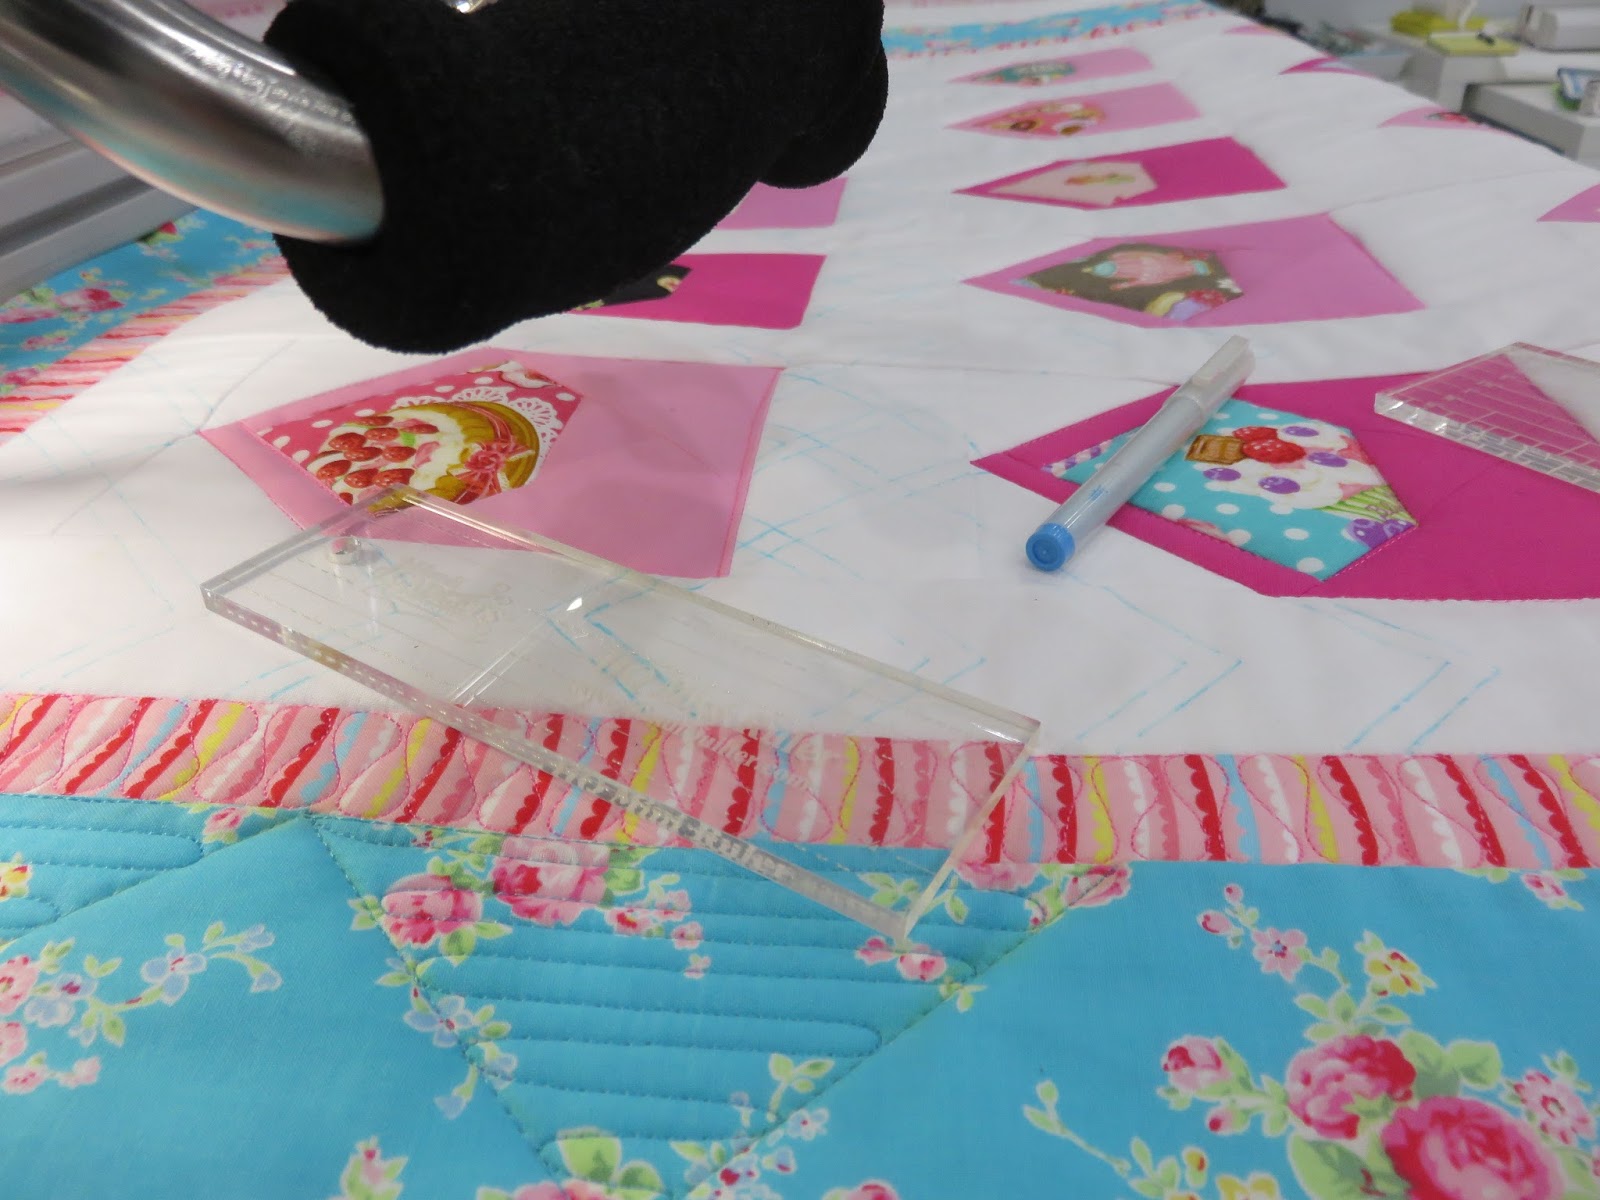
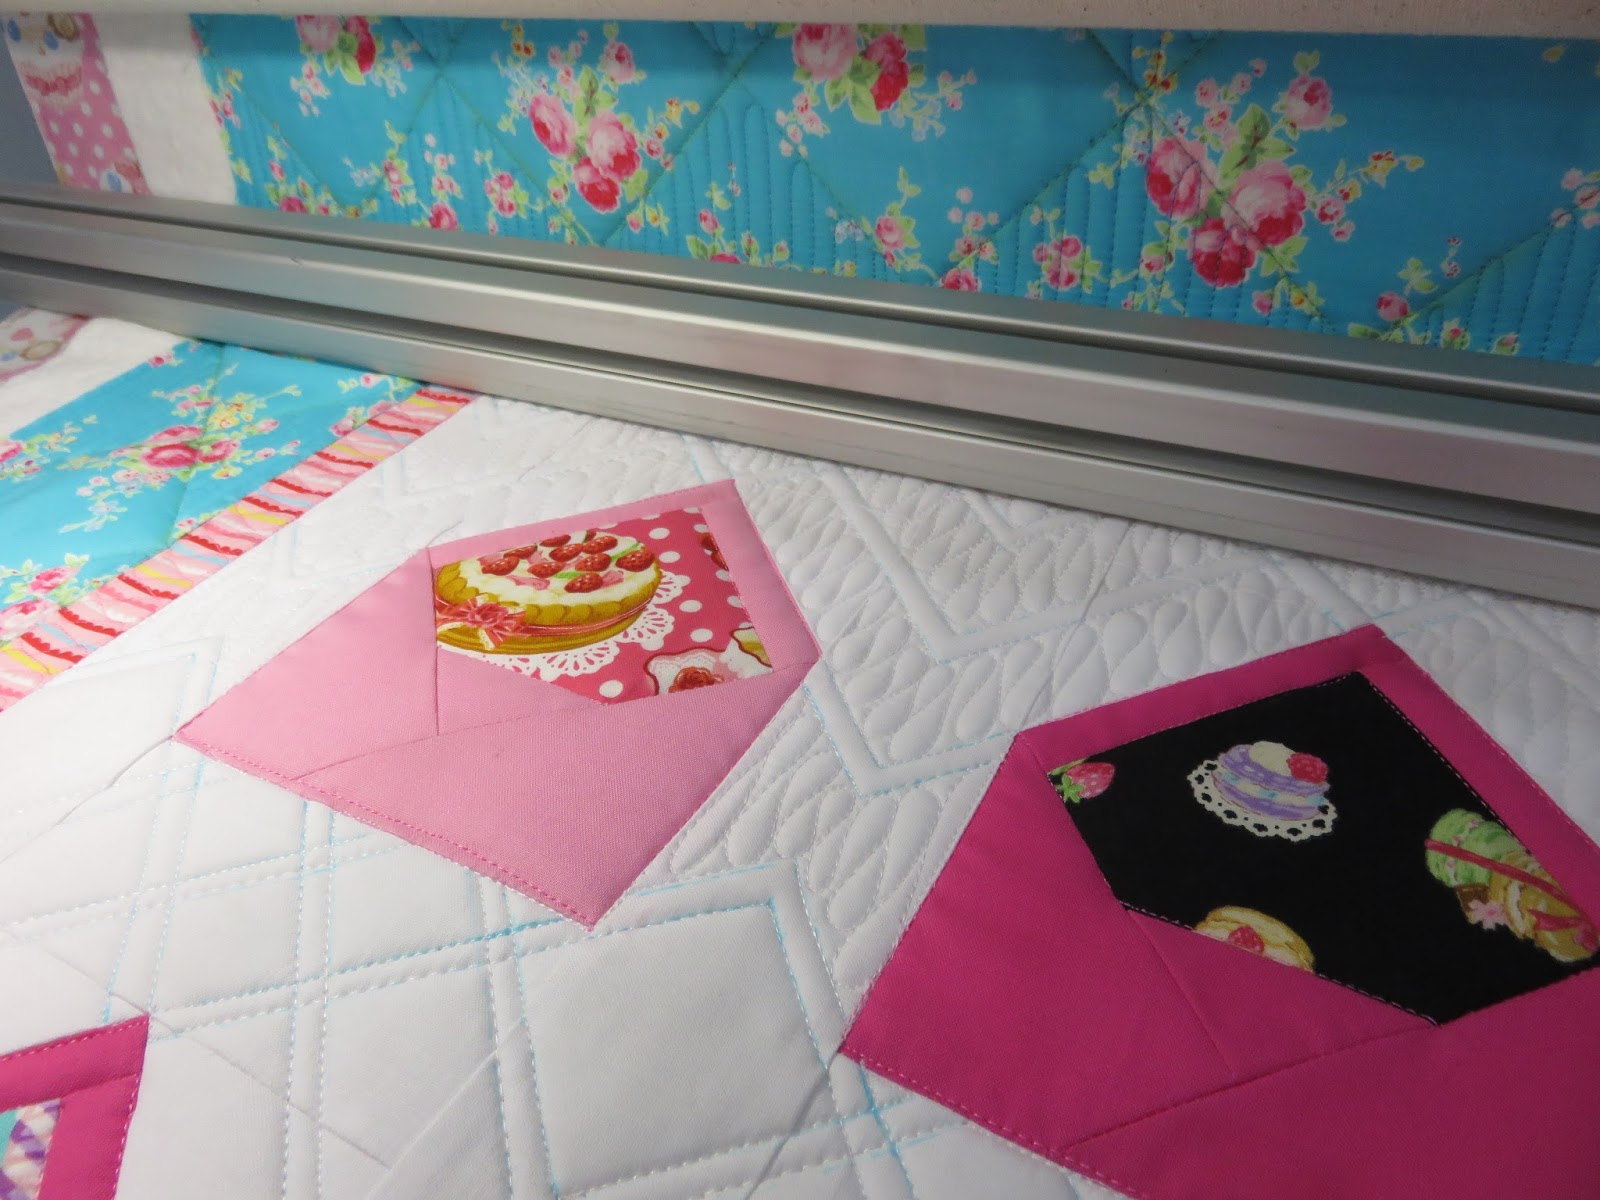
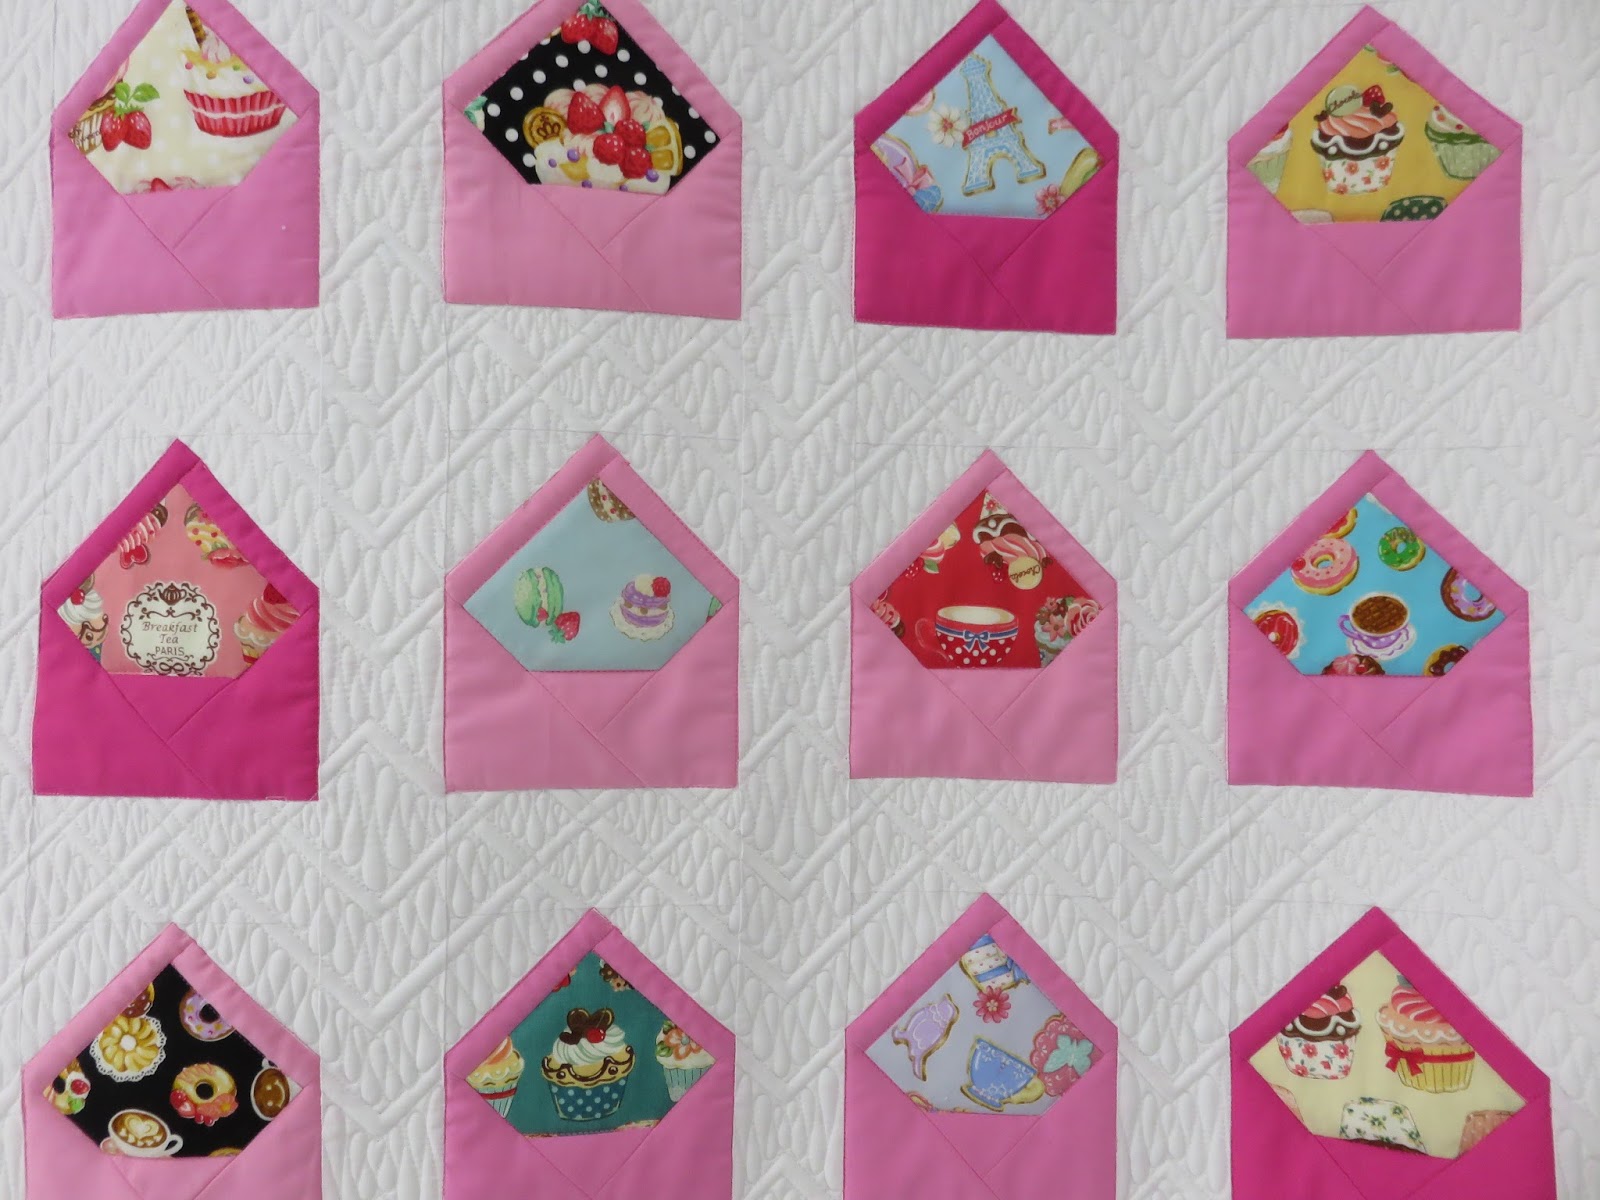
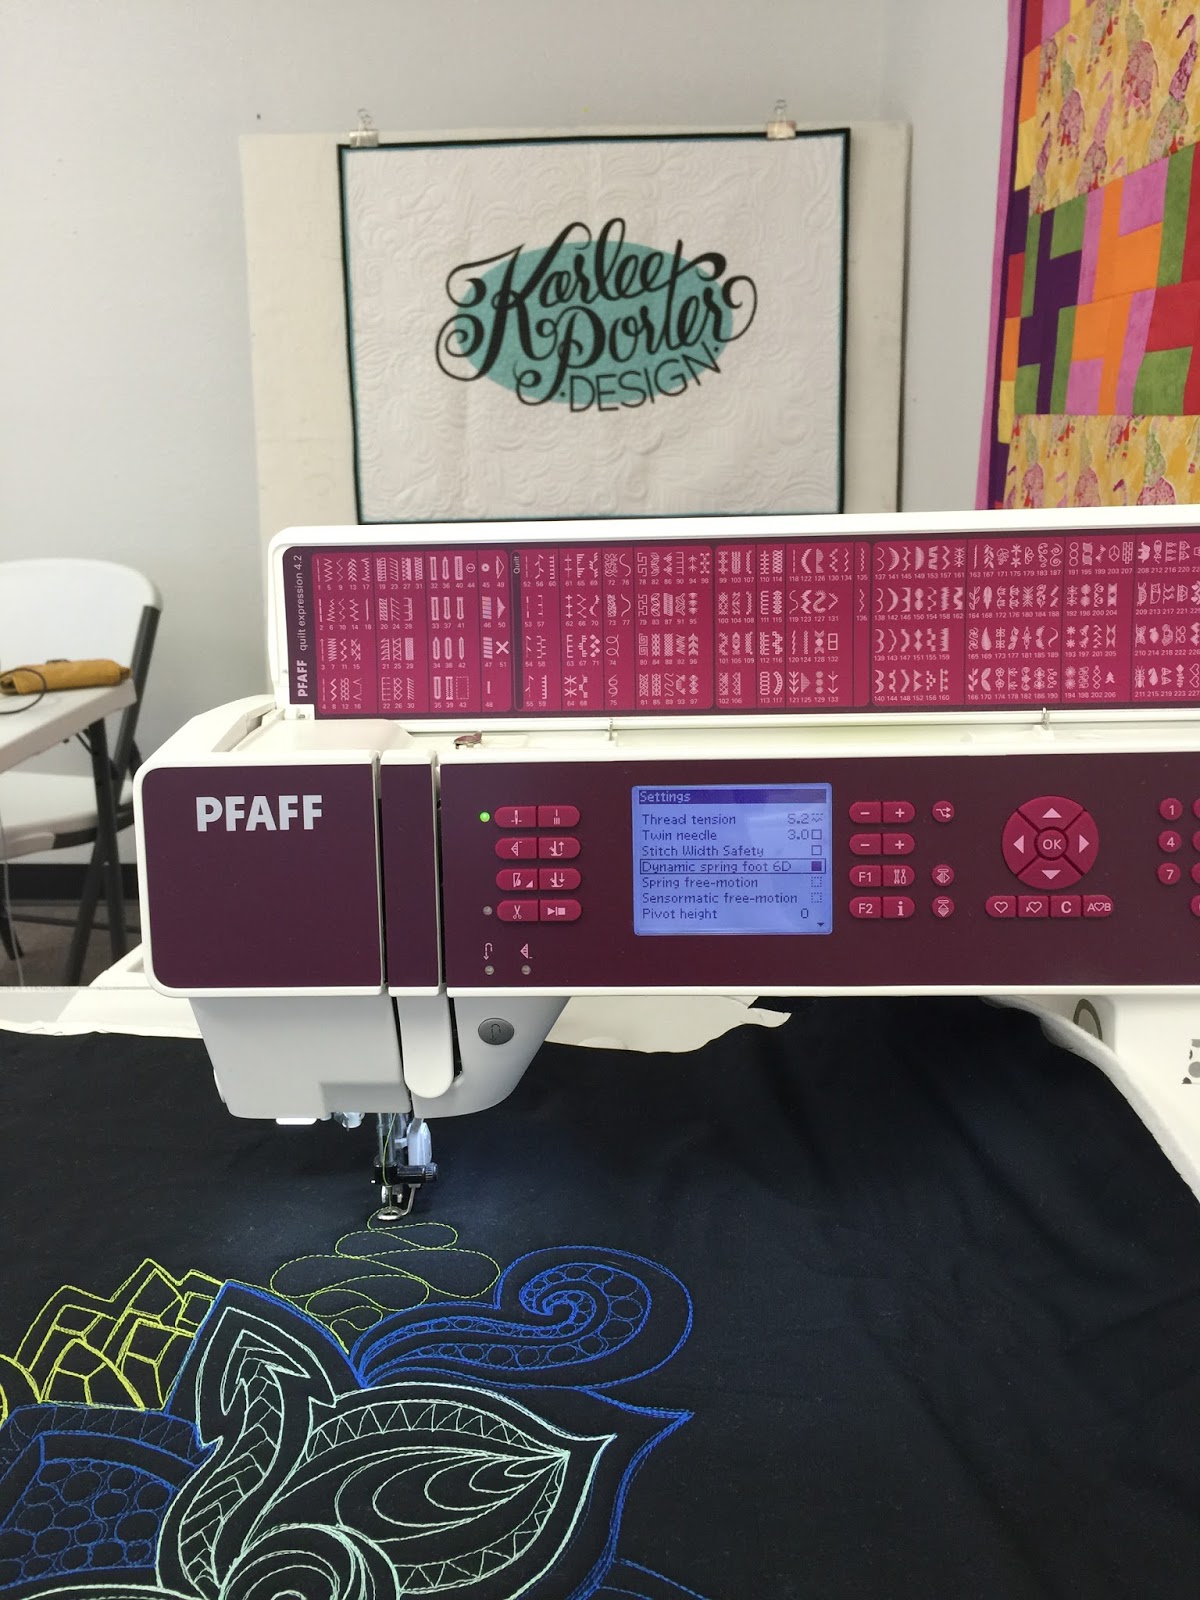
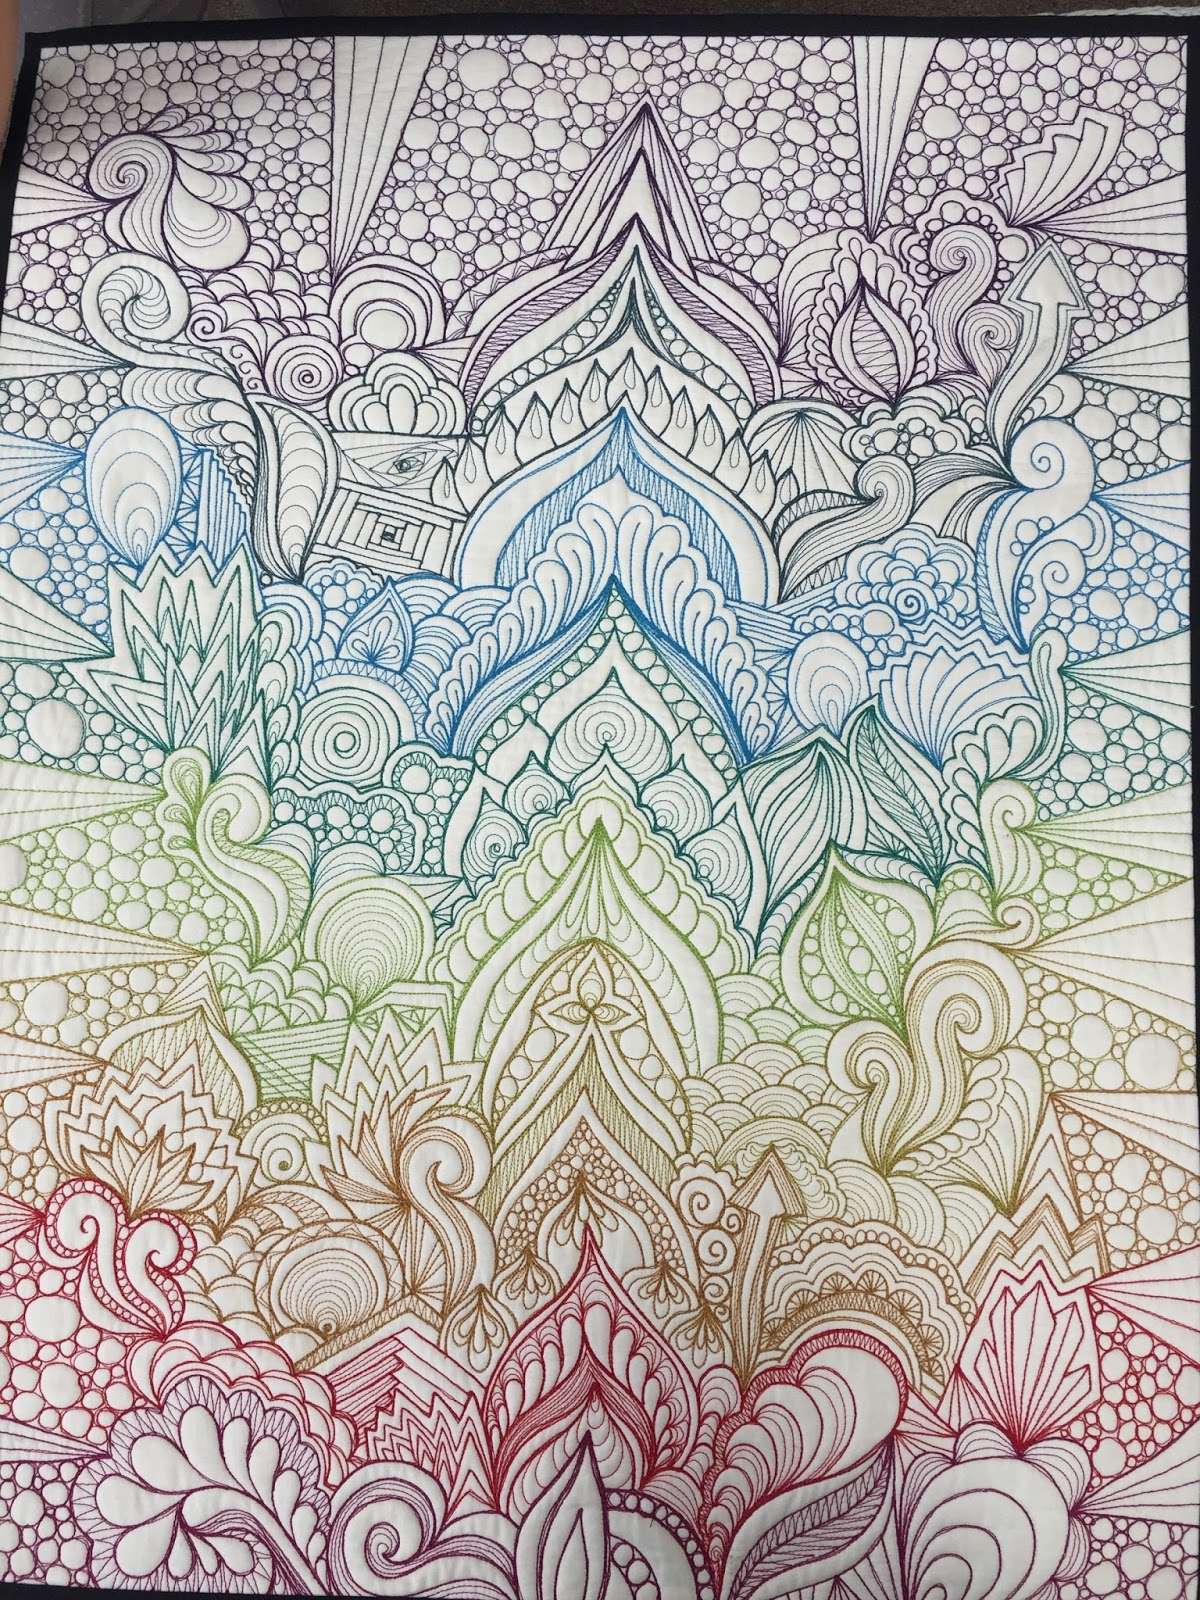
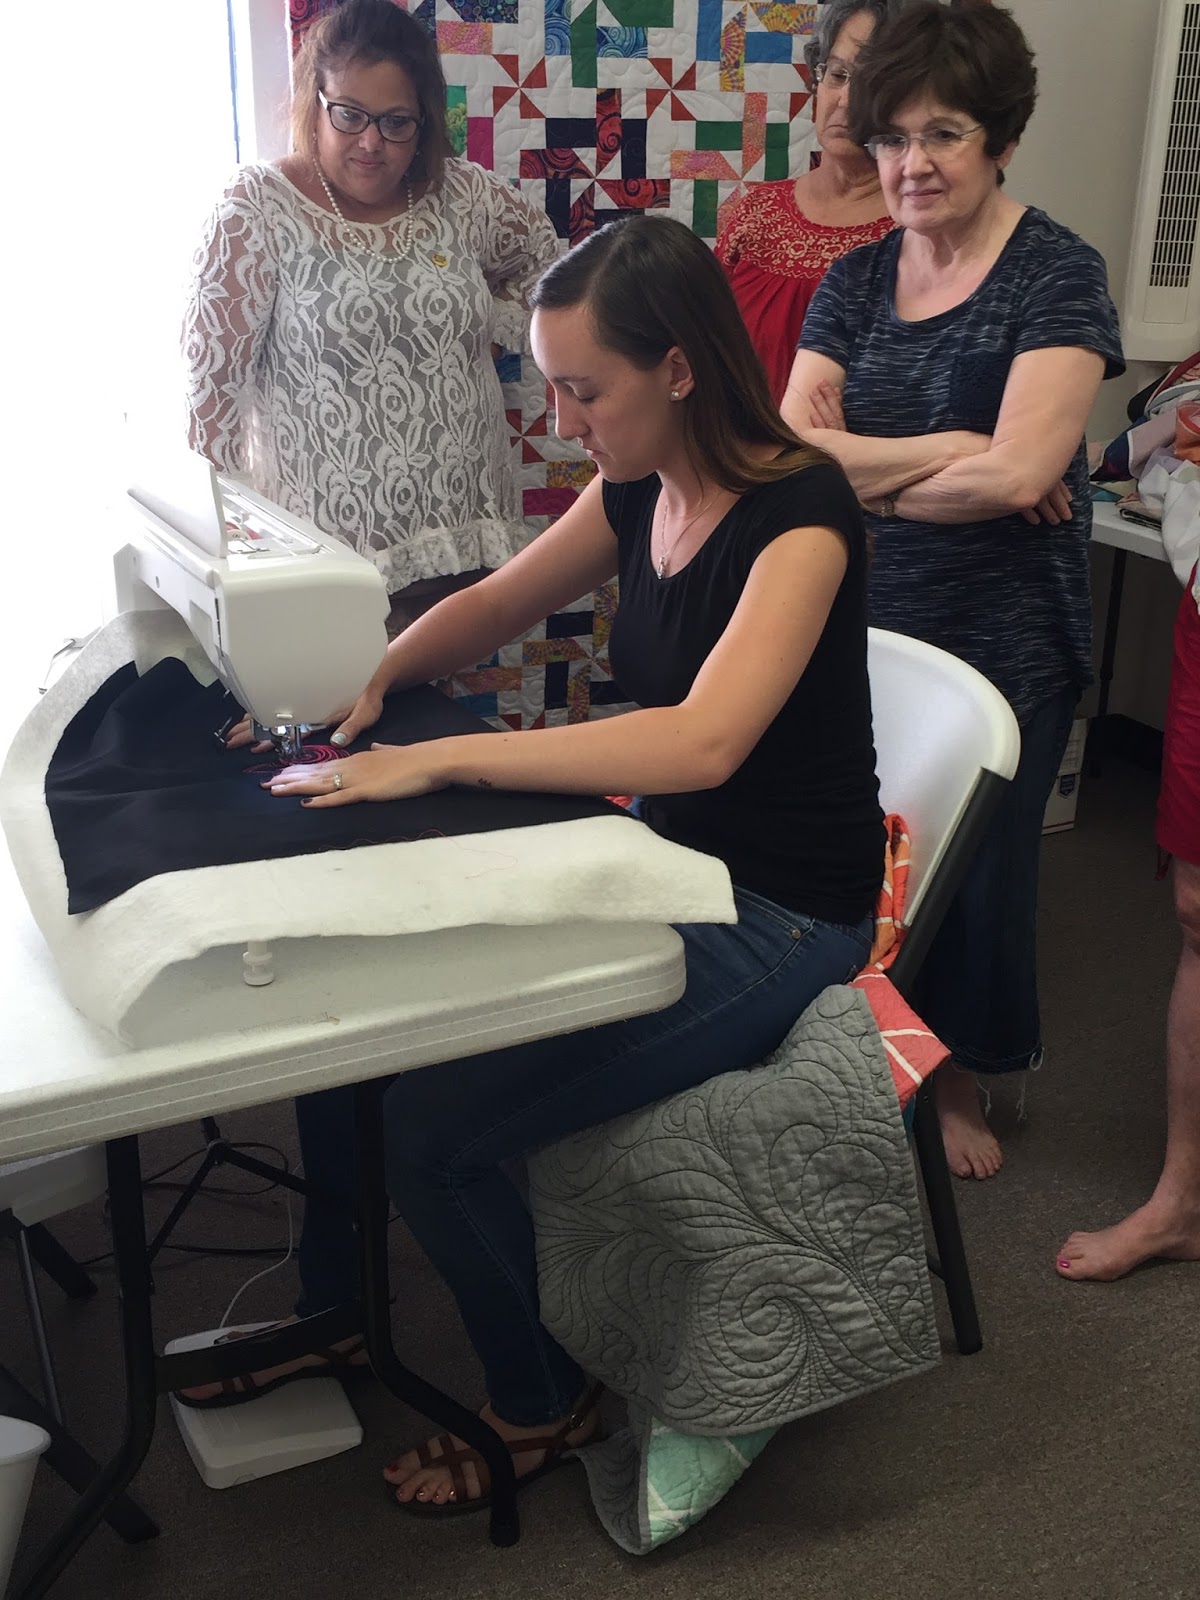
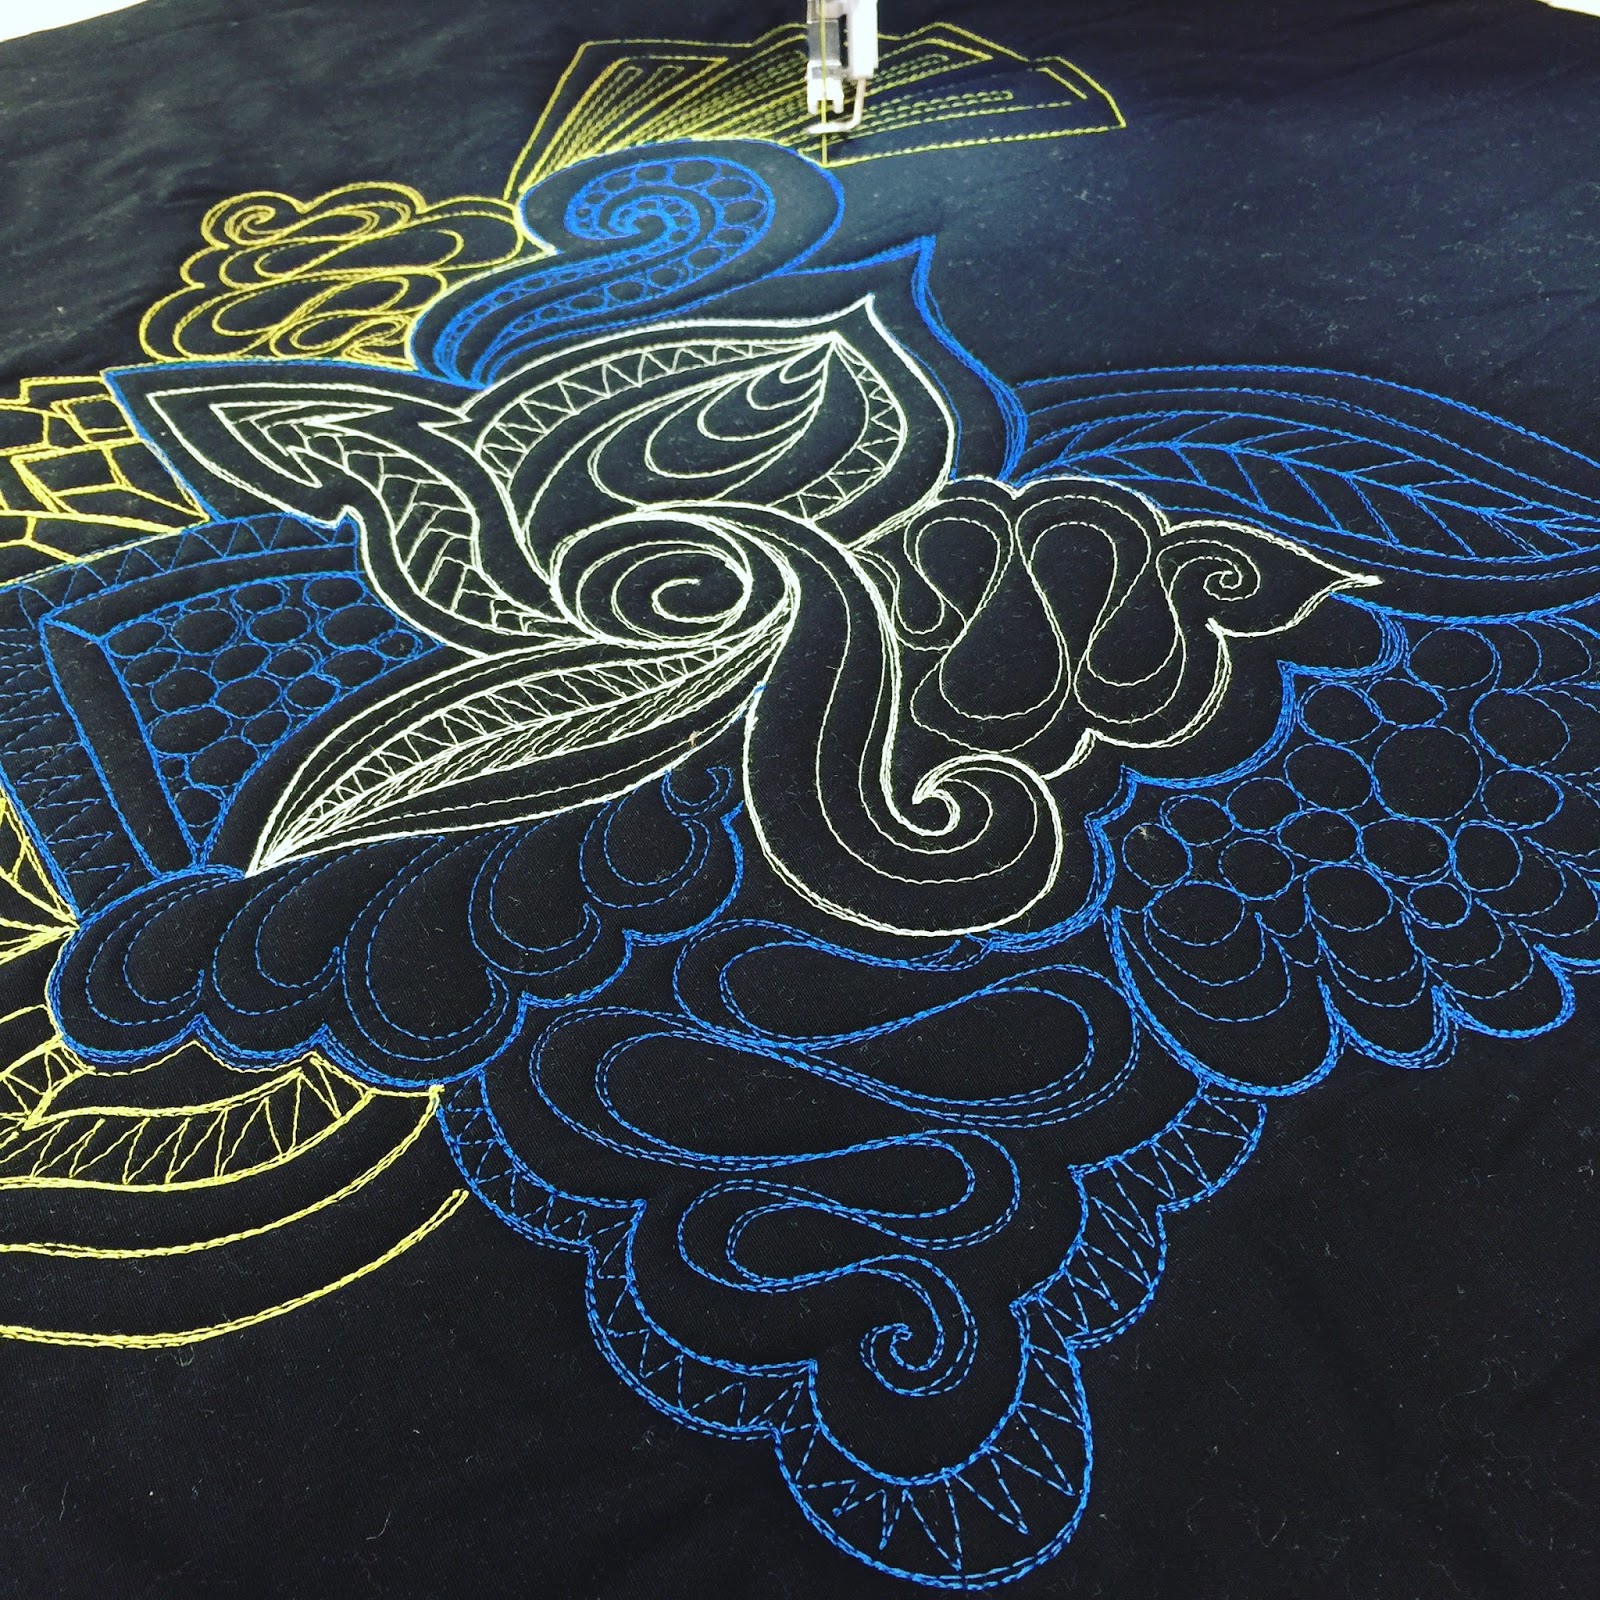
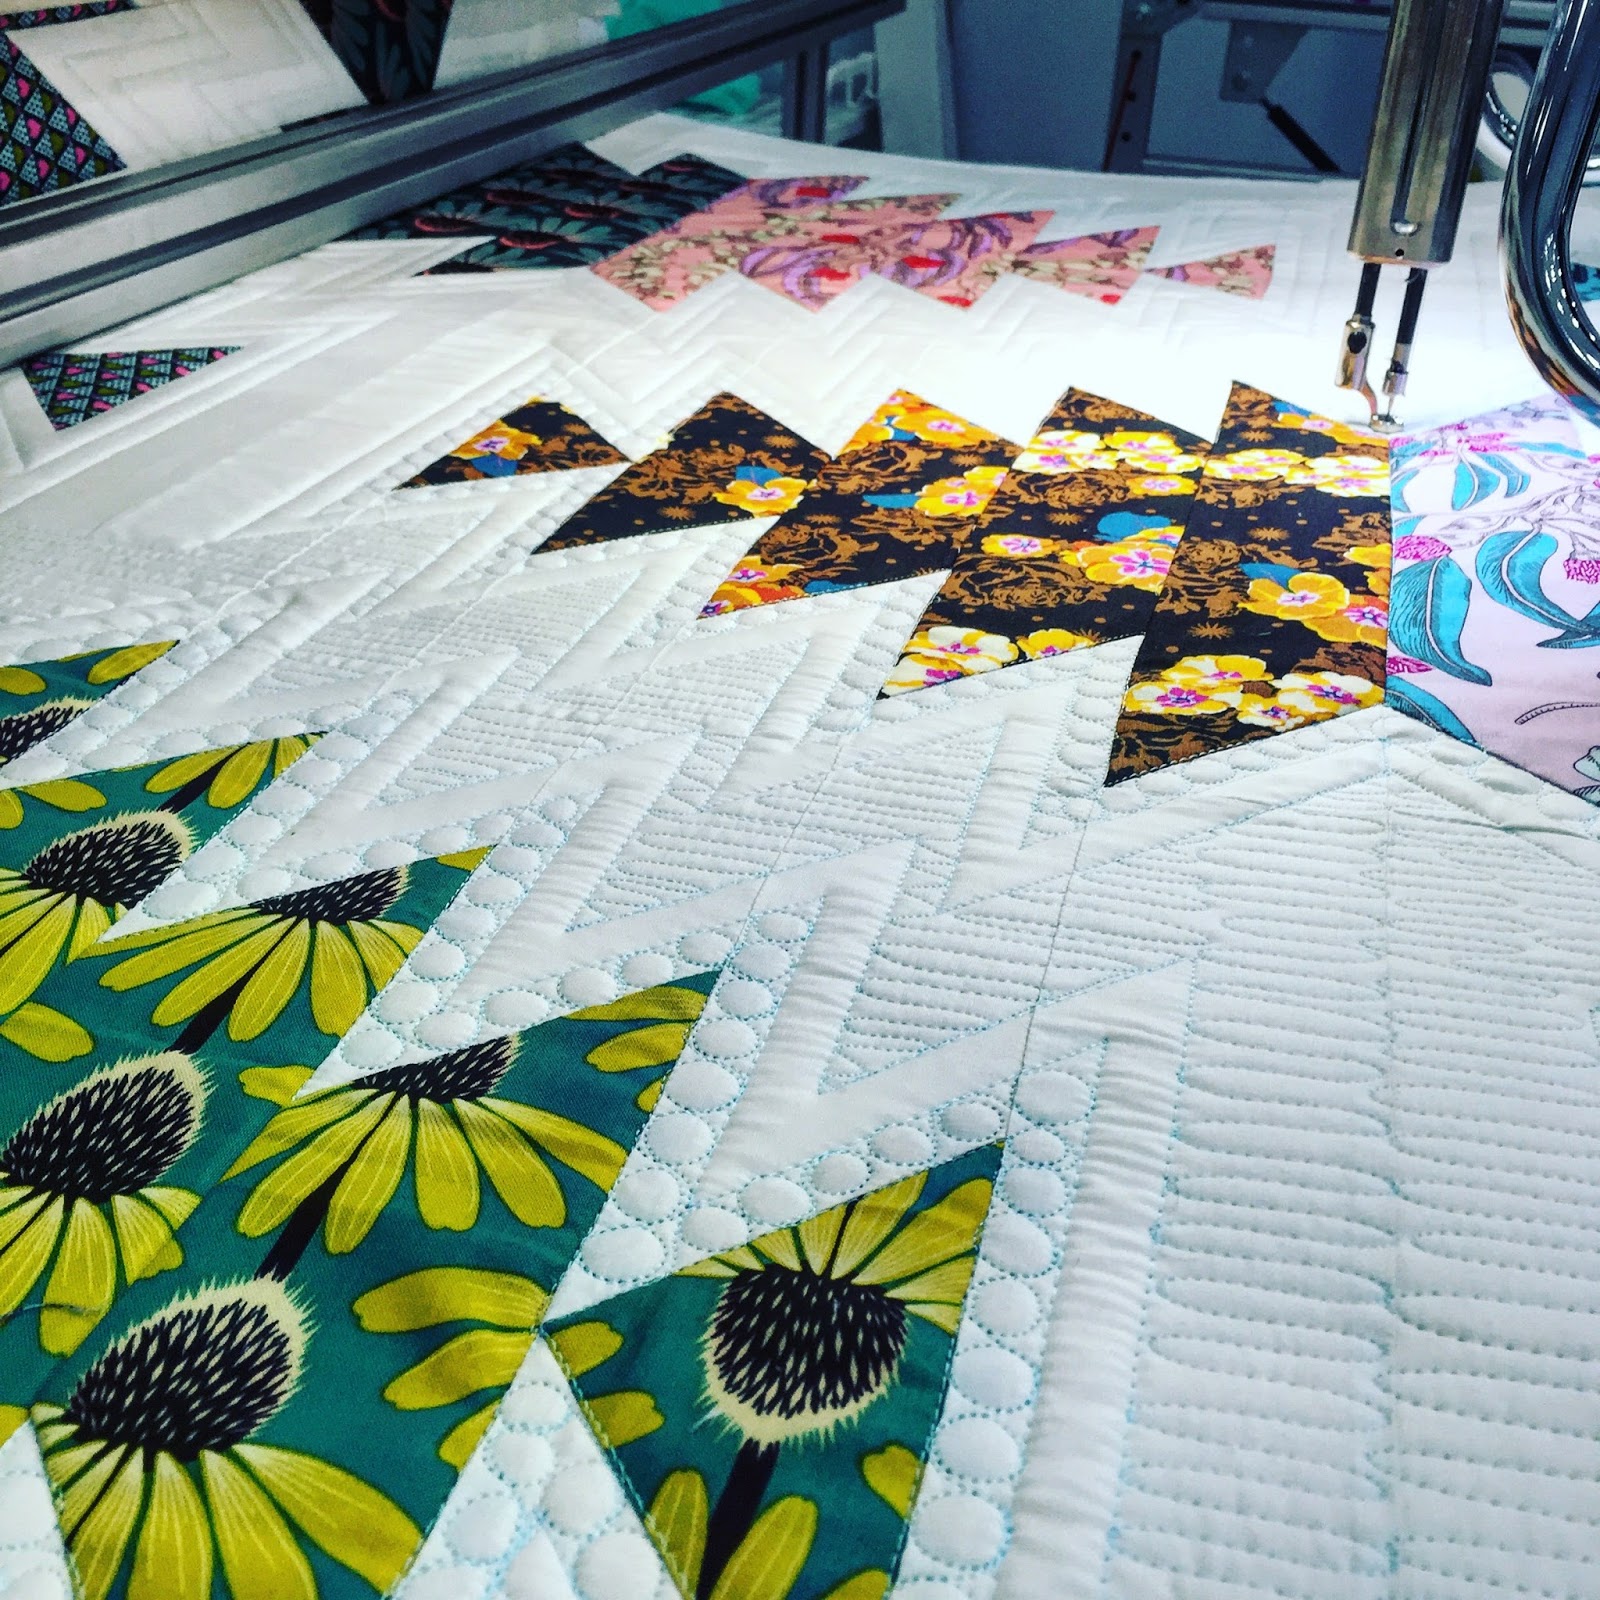
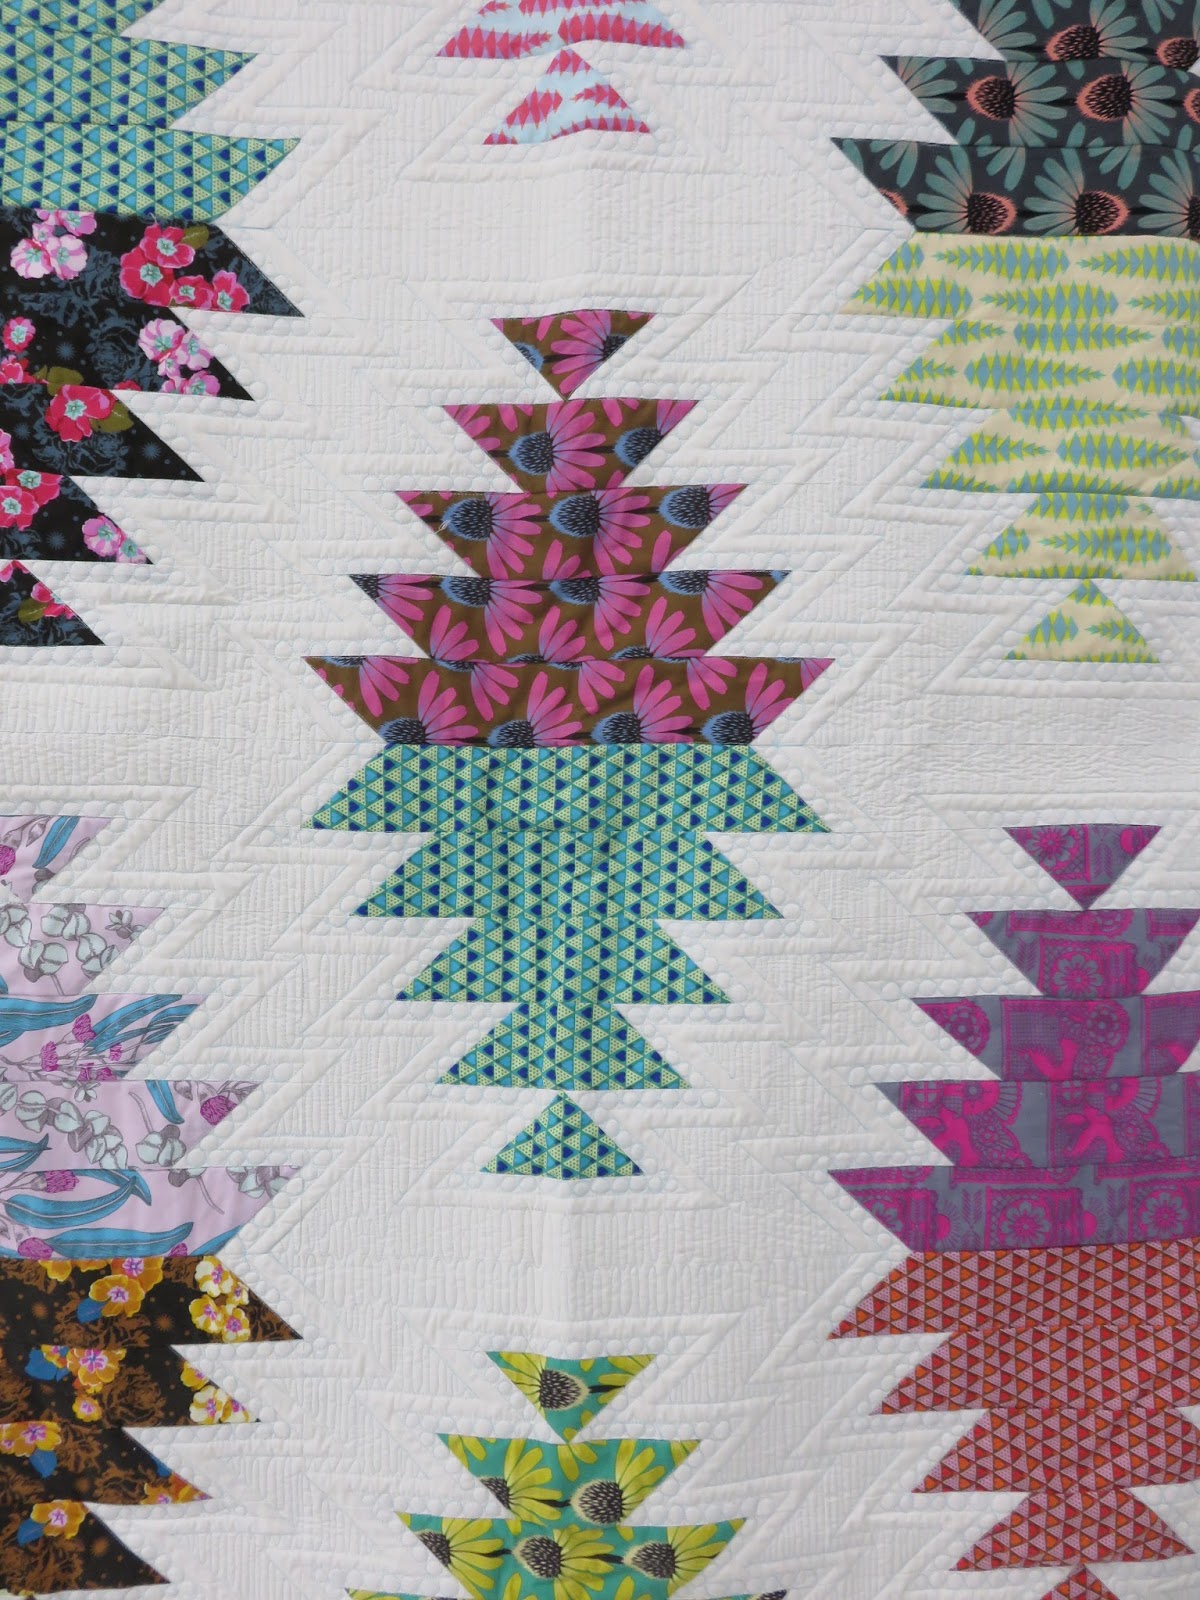
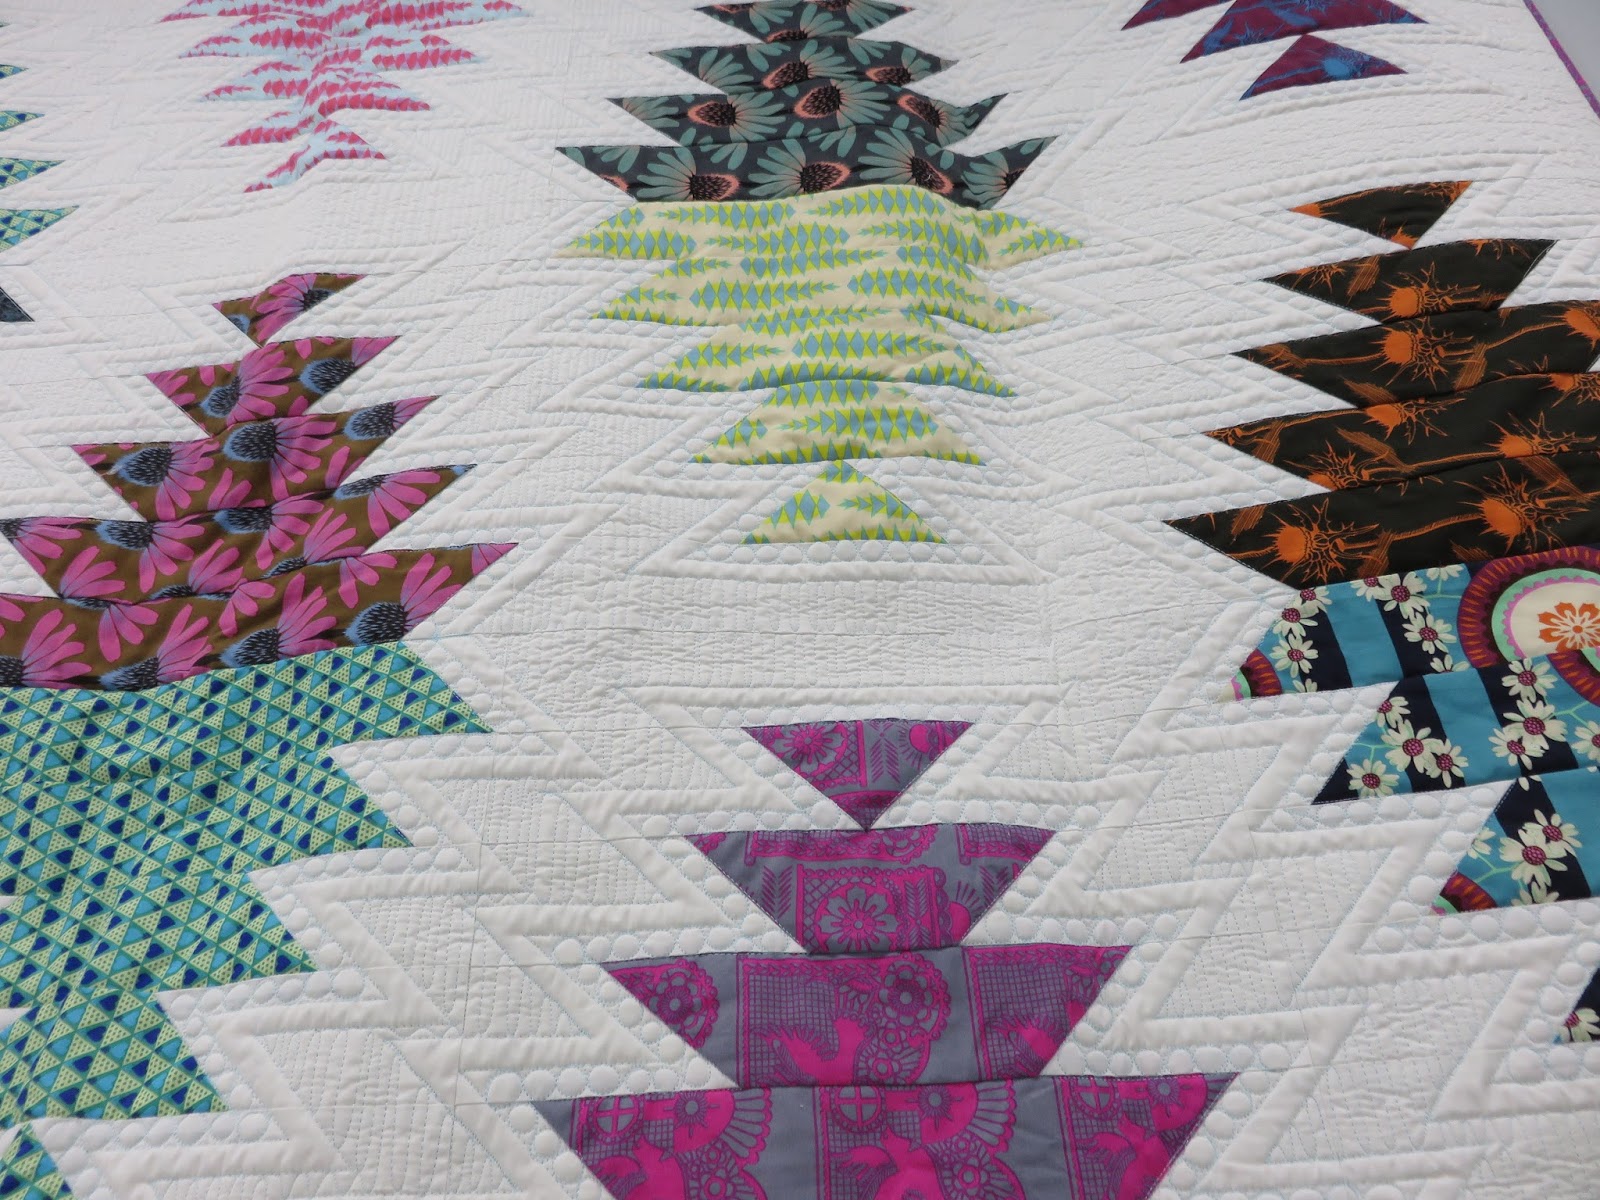
I feel like I got a little derailed there, so let me get back to my point.  Our MQG has a tradition that someone will head up making a baby quilt for expecting moms in the guild.  So several of the people in the guild got together and put this amazing quilt together.  I love everything about it, and it couldn’t be more perfect.  They had even finished piecing it back in August.  Which is the month our guild had booked Karlee Porter to come do a graffiti quilting workshop for us.  Somewhere in all of this, they were discussing the baby quilt in front of Karlee and discussing who would quilt it.  (I have to say here that Karlee is hands down the most authentic Sewlebrity I’ve even met.  She is real and such a great person to be around.  And AMAZINGLY talented.)

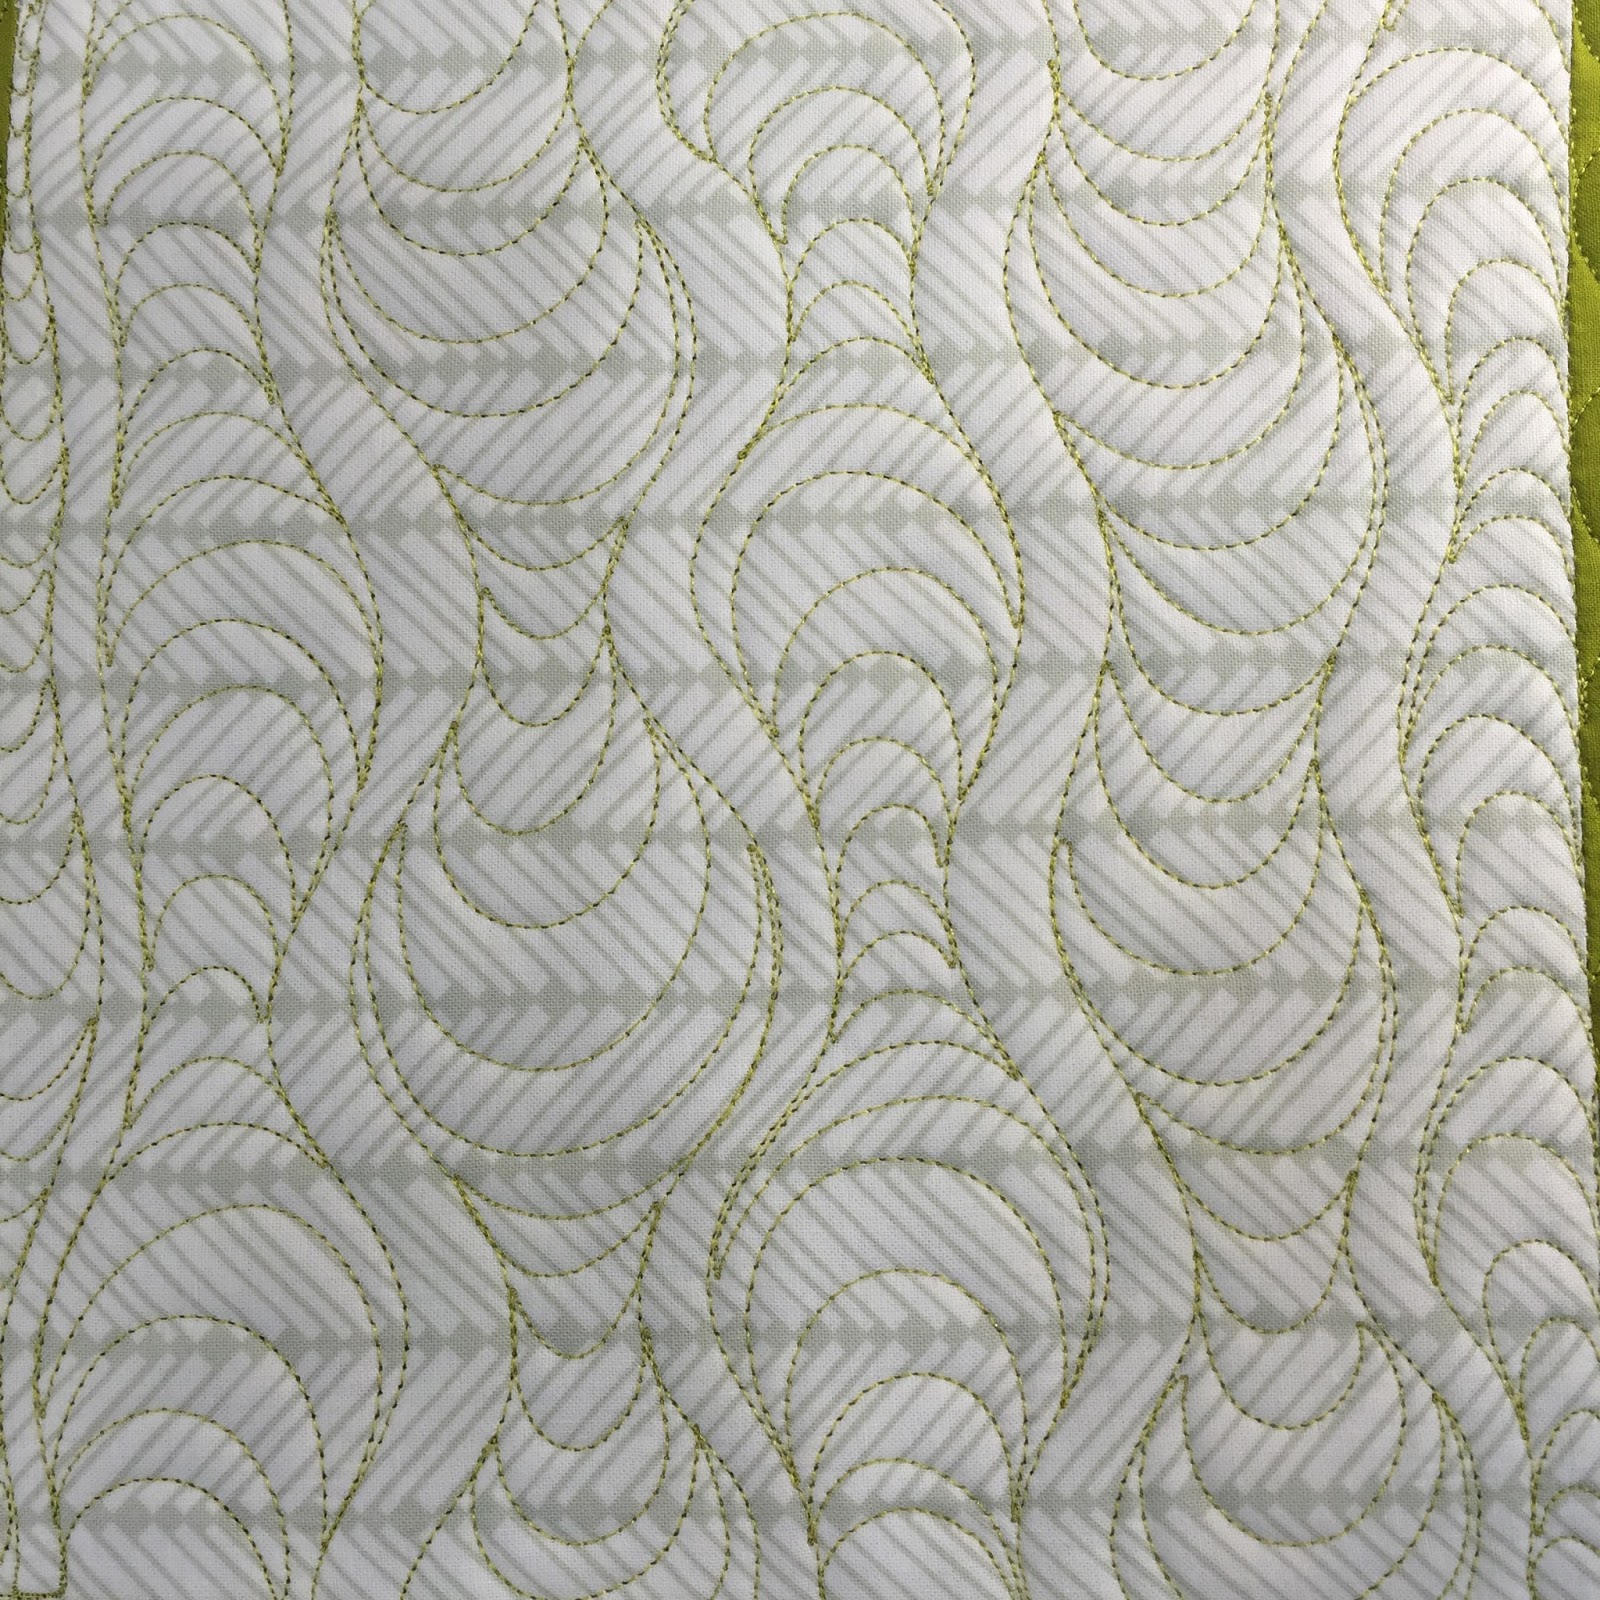
And Karlee volunteered to take it home and quilt it.  NUTS.  Not only did she take it home and quilt it, she couched my baby’s name in the center of the quilt with metallic yarn.  This post is more for me than anyone else.  I want to always remember how special I felt when i received this.  Emily presented it to me at our October guild meeting, and I had no idea that it was finished.  I wasn’t expecting it, and lately, I have been nothing but a bucket of raw emotions.  So they told me how they put it together, the amazingly special people that planned it, gave fabric for it, gave their time for it, and arranged for Karlee to help as well.  And I lost my shit.   (Pardon the french.  I don’t cuss on the blog, but there it is.)  I cried so hard that I nearly couldn’t recover to do the rest of the meeting (I’m currently interim President).  Ugly tears were seen by all, and I didn’t even care.  Because this group is my tribe.  And wouldn’t you know, I’m crying again while I’m typing this.  Seriously, I can’t wait for these pregnancy hormones to be gone!  

Anyway. I’m totally overwhelmed at the thought of being a new mom and have no clue what to do once Gemma gets here, but I know that she will be SO loved.  And already is if this group is any indication.  

Posted on

Is more sometimes less?


Let’s talk a little bit about quilt designs.  Of the quilting variety.  Not the piecing variety.  How many of us struggle with keeping our quilting plans fresh and unique?  If you’re anything like me, you might be constantly on Instagram or Pinterest searching through “free motion quilting” posts or “custom quilting” or “longarm quilting”, or any other search request you can think of.  And while I don’t ever want to copy someone else’s work, I’m always trying to find my own voice through things I like in other quilters’ work.  
I’m often blown away by tedious, tiny, overthought, quilted to death quilts.  I know I don’t charge nearly enough to compensate me for my time if I were to quilt every quilt that way.  To be honest, I wouldn’t even be able to pay the electric bill!  Don’t get me wrong, this is not a post to get on my soap box about charging what you’re worth.  I just want to discuss simplicity in quilt design.  I chose one of the quilts I quilted this year, that honestly, isn’t a show quilt–it isn’t a mind blowing quilt design, but it is thoughtful enough to look good (in my opinion).  
Isn’t the purpose of a good quilter to make the designer/piecer’s work shine?  To make the block or the quilt look it’s absolute best? 

I chose two motifs do be used on this quilt.  One was a continuous loop that was stitched throughout the green pieces on the quilt to give uniformity to the design.

The other motif was simple double wavy lines with curved lines connecting them on the larger pieced blocks.  While these two designs won’t be winning any ribbons at quilting shows, I’m sure, it does enough to simply enhance the quilt without drawing so much attention to the quilting that you can’t even see the actual quilt or blocks anymore.  I know this is nothing special, but I just want to point out that not every quilt has to be QTD.  (Quilted to death)

I recently saw a quilt on Instagram from a quilter I follow on a log cabin quilt.  The quilter is extremely talented and really takes quilting to a new level.  The log cabin quilt was QTD.  Quilted. To. Death.  It looks good.  But the actual quilt is lost in the quilting.  What purpose does this serve?  I almost feel like it is just to inflate the ego of the quilter, and maybe the piecer requested this…but I wouldn’t think so.  Shouldn’t the piecing and quilting work together to make the quilt balanced overall?  I would really like to post a picture of what I’m talking about, but I don’t want to demean anyone’s work.

Also, keep in mind that I’ve only been sewing and quilting since about 2011.  So really, in the grand scheme of things, what do I know? 🙂  Just something to chew on and think about when it comes to quilt design…does more sometimes equal less?

Posted on

Spooky Spiderweb Trick Or Treat bag tutorial


If you’d like to make the perfect project for your special little trick-or-treater, I teamed up with Janome to bring you the perfect tutorial for a reusable treat bag!  Visit Janome’s website for the full tutorial and a quick and easy sew!  

 This is a great project with a little pop of color on the reverse side of the drawstring bag–you can use a contrasting fabric to really make it pop (or even glow in the dark fabric!)


And learn to quilt some really fun spiderwebs!  Enjoy!

Posted on

Lemon Slice Picnic Blanket


This may seem a little redundant, seeing as how I already participated in Erin’s blog hop for SewHome, BUT I had to talk about the really unique Picnic Blanket (Quilt) that I also had the opportunity to work on for the book.

SewHome by Erin Schlosser, photo by C&T Publishing

I can’t stop thinking about how unique and practical the projects are in Erin Schlosser’s new book.  For real, y’all.  I’ve bought fabric and supplies to make my top 6 favorite projects in the book (who knows when I’ll have time to do it!!!).

Lemon Slice Picnic Blanket, photo by C&T Publishing

So, this is the Lemon Slice Picnic Blanket, and it is too cool for school!  The ingenious part is that the backing is with laminated cotton–so you don’t have to worry about getting grass stains on the back of it.  Erin asked me to quilt this for the book, and it was so much fun to do.  I just had to share this and, if I’m being honest, don’t be surprised if there are more posts from Erin’s book in the future.

Posted on 2 Comments

Quilting a “Letters from home” quilt


A couple of months ago, I had the awesome opportunity to quilt one of my customer’s “Letters from Home” quilt (pattern by Heather Givens/Crimson Tate).  Now, I have to preface this post by saying that I’m barely wetting my toes in the waters of custom quilting.  But I am super-duper proud of the quilting on this quilt.  I’m going to take you through the process.

I like Glide’s thread for a little pop of sheen on a quilt.  Plus, it quilts like a DREAM.  I selected a few different thread colors for the quilting on this quilt.  Mainly, I changed thread colors to help them blend with the fabrics they were quilting on for a more subtle pop.  I used Quilter’s Dream batting for this quilt, as I do with most of my client quilts.

Glide Threads selected

 Some people might have you believe that once the quilt was loaded and the threads picked out that the quilting just magically happened with a wave of their wand.  Here’s my dirty little secret:  This quilt sat on my frame for a week.  An entire WEEK.  I had sketched out at least a dozen ideas for quilting, and each morning I would go out to my studio, ready to attack.  But then I would end up standing there, staring at the quilt top.  I changed my mind so many times, and then decided on the most difficult (or most time consuming) design I had drawn up.

Beginning to mark and quilt the borders

So I broke out my water soluble marking pen and trusty ruler and started marking some guidelines for the quilting.  I did some straight line quilting on the borders after marking them, and then marked the rest of the quilt as I went.  Each pass on the longarm took me about an hour to mark with the ruler and pen.

More markings, filled in with some quilting
The thing about the design being quilted, is that it isn’t complicated.  It’s just a bunch of straight lines and loops, but the way they are put together really leaves you with a huge impact.  
I have a black light on my longarm and seriously think it is SO cool.  This shows the texture a little better.

I really wanted to focus on the texture on this quilt, and so I chose to stitch in the ditch around the envelopes and the focal fabrics so they would pop out more.  My client selected Japanese import fabrics from Bunny Designs (out of Austin, TX), with a backing out of an adorable cupcake pattern (see the first photo in the post).  The attention to detail and her impeccable piecing made this quilt one of my all time favorites to quilt.  The quilt pattern by Crimson Tate is SO cute, and an ingenious way to showcase focal fabrics.

So, aside from me just talking about how much I loved this quilt, my other point is that sometimes it isn’t second nature to just come up with quilting designs out of thin air.  And it’s okay if the quilt has to sit on your frame for a week while you change your mind a hundred times about the quilting design (as long as your client has allowed you to do so!).  And while it is my favorite thing ever for a client to say–I want custom quilting, and the design is up to you–it can also be the most challenging (and rewarding) part of my job.  I think this is a great way to grow your skill set and think about how many different ways there are to quilt a quilt.  (Quilt construction and fabric selection by Debra Barnes)

Posted on

Free Jelly Roll Quilt Tutorial!


 If you’ve been looking for a way to use up those super cute jelly rolls you’ve acquired…I have a great jelly roll tutorial for you!  It’s free, and you can find it at the American Quilter’s Society Blog, sponsored by Janome.  

Free Jelly Roll Quilt tutorial by Joanna Marsh

I whipped up this quick tutorial using L’s Modern Basics (in the warm colors) Sushi Roll.  I absolutely love this fabric collection and plan on making one of these in the cool colorway too!  

Easy piecing with Janome’s 1/4″ piecing foot

If your quarter inch seams aren’t perfect, you can take your piecing skills to the next level with a 1/4″ piecing foot that will give you perfect seams every time.  This foot is everything when it comes to piecing!!!

Up close and personal of the quilting

And then finish your top off with some fun free motion quilting!  Have fun with this free tutorial, and use up that fabric you’ve been hoarding for so long 🙂  

Posted on 28 Comments

Sew Home Blog Hop! It’s a Twist table runner


Welcome to the next stop on the SewHome blog hop!  I am super excited to be included in this blog hop and can’t wait to share one of my favorite projects from this awesome book with you.  There’s also a giveaway (open internationally) hosted by each blog hop participant!!!  Instructions on how to enter are at the end of the post 🙂

SewHome by Erin Schlosser (photo by C&T Publishing)

Be sure to follow the other participants as they showcase some seriously amazing projects from Erin’s new book!


Wednesday, September 21 – Sew 4 Home & Jen Carlton Bailly
Monday, September 26 – Windham Fabrics & Rebecca at Bryan House Quilts
Wednesday, September 28 – Dear Stella Fabrics & Mandy at Mandalei Quilts
Thursday, September 29 – Erin at Schlosser Designs


Let me start by saying I had the awesome opportunity to quilt another project for SewHome, and so found out about this amazing book a few months before its release.  Erin is so talented and has thought of literally every project you could ever want to sew up to make a house your home.  

I am not as blessed as others when it comes to the interior decorating gene, so this book is a God send.  Erin even thought to include some design basics and clearly explains everything that needs to be considered prior to starting any project.  She has tons of suggestions on how to keep your projects cohesive, even discussing color and fabric selection.  I had the opportunity to preview this awesome book before it was printed, and had to purchase it myself to keep a hard copy on hand.  

It’s a Twist Table Runner (photo by C&T Publishing)

I chose to make the “It’s a Twist Table Runner” since my kitchen decor is a little blah…and I had never seen a design this unique before.  With summer fading and fall quickly approaching, I opted for a warm ombre color scheme to do my “twists” in, and chose the new Essex linen in yarn dyed metallic by Robert Kaufman so I could keep this beauty on the table from September through December.  

Warm ombre color scheme with Essex metallic linen

I had so much fun picking out my fabrics, and couldn’t wait to try the new Essex yard dyed metallic to keep the design warm and fall-feeling.  This project is so fun, and great for adapting to use up your scrap pile!  

You can see the tiny metallic detail in this close up of the sewn together table runner

Erin’s instructions are clear and concise, and I was able to finish this adorable project in under 3 hours.  The twisting technique is really simple to follow and gives such a great look when finished.  I’m excited to try this technique in other sewing projects, too!  

My finished table runner


I also loved that the table runner didn’t have batting in it and wasn’t quilted.  It seems like most table runner projects these days are of the quilted variety, and the “It’s a Twist Table Runner” has ample interfacing to give it a luxurious feel and weight.  It also made it a quick and fun sew.  

I was thrilled to participate in this, and can’t wait to make more projects from SewHome.  Thanks Erin for a delightful read!!!

To enter the giveaway for your free copy of Erin’s book SewHome, answer the following question by September 30, 2016 either in a comment here (on my blog), or a comment on my instagram post about this project:  What home decor item have you been dying to sew for your home?   Giveaway entries will close at midnight, central standard time 9/30/2016 and winner will be selected randomly.  If winner is domestic (US), they will receive a hard copy of SewHome, if international, the winner will receive the e-book version.  Winner will be contacted by me for shipping information.  

Posted on

I left my REAL job to quilt! My two cents…


Up until this past June, I was a full time teacher for 9 years (or all of my professional career, post college).  I’m not going to give you an earful about my experiences, but I will tell you that I taught agriculture science and was the FFA sponsor.  Also, not going into the details of that…I could talk for hours about what that job entails.  But I’m not going to.  

I am going to say that I think teachers are not supported in what they do (by lots of people).  I’m not going to be specific, but I will say that it only took 9 short years for me to become burned out.  In a job that I originally thought I would never tire of.  I loved my kids.  I loved them so much that I called them MY kids.  Years after they graduate, I still have many contact me around the holidays, when they are home from the military or just texting me to say hi (When you’re an FFA sponsor-all the kids have your phone number in case of emergencies with their livestock projects).  I’ve cried over sadness my kids have suffered, prayed for them, been happy with their successes, and some of them have impacted my life in ways that I can’t begin to describe.  I think there truly is no other profession where you become so invested in the lives of other people’s children that you are emotionally torn to shreds over decisions to move, accept another job, or leave the classroom entirely.  (With FFA, you keep the same kids all 4 years of high school.)

That being said, I also think there are few careers where a person (in this pay grade) is criticized so much.  And called/texted at all hours of the day, night, and in between.  The expectation is that you are 100% devoted to that job 100% of the time.  Or that’s how I felt, at least.    

I made the decision to leave teaching (for now, at least) because I was truly unhappy.  I stuck it out for roughly 2.5 years of being unhappy.  I know that being happy isn’t everything, but I think your job shouldn’t make a miserable, bitter person out of you.  The only times I felt happy was when I was with family or when I was sewing.  I’m not going to talk about the MANY factors of what made me unhappy, but there was a limitless supply.  I did still love the kids, and that was one of the few reasons I stayed.  This post was originally going to be about what I do now-the custom sewing for others, longarm quilting, creating, making, etc. but I feel like that almost cheapens the decision I made to leave the classroom.  When I’m alone in my sewing room with the machines humming around me, or the music turned up as loud as it will go, my mind will frequently travel to the kids I spent so much time with.  I wonder about the choices they are making on a daily basis, if I even made any difference being with them in the classroom, and I hope for them and their futures.  I think about all the hardships those kids endured through high school, losing loved ones, being mistreated by parents, and all the other hard things kids go through.    

I don’t really know where I was going with this, just felt the need to get this off my chest.  And most days when I’m walking the short 20 yard walk to my sewing room to go to work, I have a smile on my face.  I’m not a miserable person to come home to anymore.  I’m able to spend quality time with my family.  I know that for now, I’ve made the right decision.  Just my two cents.  

Posted on

Graffiti Quilting workshop with Karlee Porter


This picture!!!  I had the awesome opportunity to take a 2 day workshop from THE Karlee Porter.  The workshop was in Castroville at the Quilt Shop, and I swear, it was one of the best classes I’ve ever taken.  Most of the time, when I take a workshop and the person putting it on says there will be about half a day of lecture, then we get to play… I’m usually a little dismayed.  But Karlee had an awesome program that I left with PAGES of notes and drawings for inspiration.  And it wasn’t like I was just writing stuff down to busy my hands.  I’ve referred to those notes and drawings at least a dozen times in the short weeks since I took that class.  

Karlee was so gracious in letting us ask unlimited questions, take pictures of all the samples she had, and she even did a trunk show at our SAMQG guild meeting.  This is one of her masterpieces–I  believe it’s called “Russian Mosque”, that literally takes your breath away.  

The principles Karlee taught can be applied to a domestic machine, sit down quilter, or longarm.  Since I started out quilting my quilts on a domestic, I liked that.  However, since I’ve been doing most of my quilting on a longarm in the last year, it took a minute for my brain to catch up that my hands were moving the fabric and not the machine 🙂

After Karlee taught us her important principles of successful graffiti quilting, she turned us loose and we were able to apply those principles to some small class samples.  This was the sample that I worked on, and although I’m not nuts about the thread colors I selected, I did like the high visibility of it.  

And of course, I had to include a picture of me and Karlee!  Not sure what I’m doing with my hand…is that a hook?  Anyway, I was seriously beyond excited that I had the opportunity to hear Karlee in Texas–and can’t wait to keep working on my graffiti quilting skills.  

Posted on

Anna Maria Horner Quilt and thinking about quilting design


Ahhhhh!  I’m dying a little bit over those Anna Maria Horner Pretty Potent prints.  This is a fabric line that I adore, but never ended up making anything myself with.  So it was a special treat to get to quilt this and ooh and ahhhh over the fabrics and quilt design.  

When I first looked at this quilt, I was literally stumped at what to quilt it with.  I knew it was going to be custom quilted, but couldn’t figure out what to do with all the negative space.  I loaded it on the frame and it sat for a week.  I sketched out ideas in my sketchbook and didn’t really have any great luck with inspiration.  Finally I decided on a simple outlined design with some ruler work, embellished with pebbles and other straight lines to fill in the gaps.  

This picture has a filter on it to try to high light the thread more.  It was quilted with Glide Cloud, so it doesn’t necessarily blend like white thread would have, but it doesn’t starkly stand out from the background, either.  If I could change anything about the quilting, I would go back and double batt the quilt or use a loftier batting.  


You can see here a little better that each print fabric was outlined twice with a small ruler.  Then pebbles were added, along with some straight lines for filler to add more texture.  

I really enjoyed the process this quilt took me through, and I hope to continue to better develop my quilting design.  Usually, I can load a quilt on the frame and I have at least 2 fairly decent ideas by the next day.  This quilt really gave me a run for my money, but all in all, I’m pretty satisfied with the results.    I really love the way a quilt looks finished when ruler work and free motion quilting are combined in the same top.  Sometimes the simplest design can work and really make the fabrics and quilt pop, and other times, it takes some work and elbow grease to figure out the best fillers and accents.