Posted on

Chevron Table Runner free tutorial with foundation paper piecing

So St. Patrick’s Day is right around the corner–let’s face it–everything is right around the corner!  I feel like I blink and the week is over ;)–anyway, you probably need some greenery in the kitchen to avoid getting pinched, right?  Well, you’re in luck (like what I did there??), because I’ve teamed up with Janome to bring you a super simple tutorial for a table runner.  If St. Patty’s Day isn’t your thing, you can easily swap out the colors for something more suiting and make it your own.  

So pictured below are a few great supplies to have on hand for foundation paper piecing.  I absolutely love my add-a-quarter ruler.  It has a little lip that you butt up against the edge of your fabric for easy trimming.  I’m also a big fan of Cristy Fincher’s glue basting tips that you can get HERE.  They screw onto the top of a regular bottle of Elmer’s school glue and are fantastic for distributing just the right amount of glue to the fabric.  And some 8.5″ x 11″ newsprint paper–you can use standard printing paper if you don’t have this on hand and don’t want to make a special trip for it.  The newsprint tears away a little easier than the heavier weight printer paper, so that’s why I prefer it.  And a glue stick!  The rest of the supplies are pretty standard sewing supplies.  

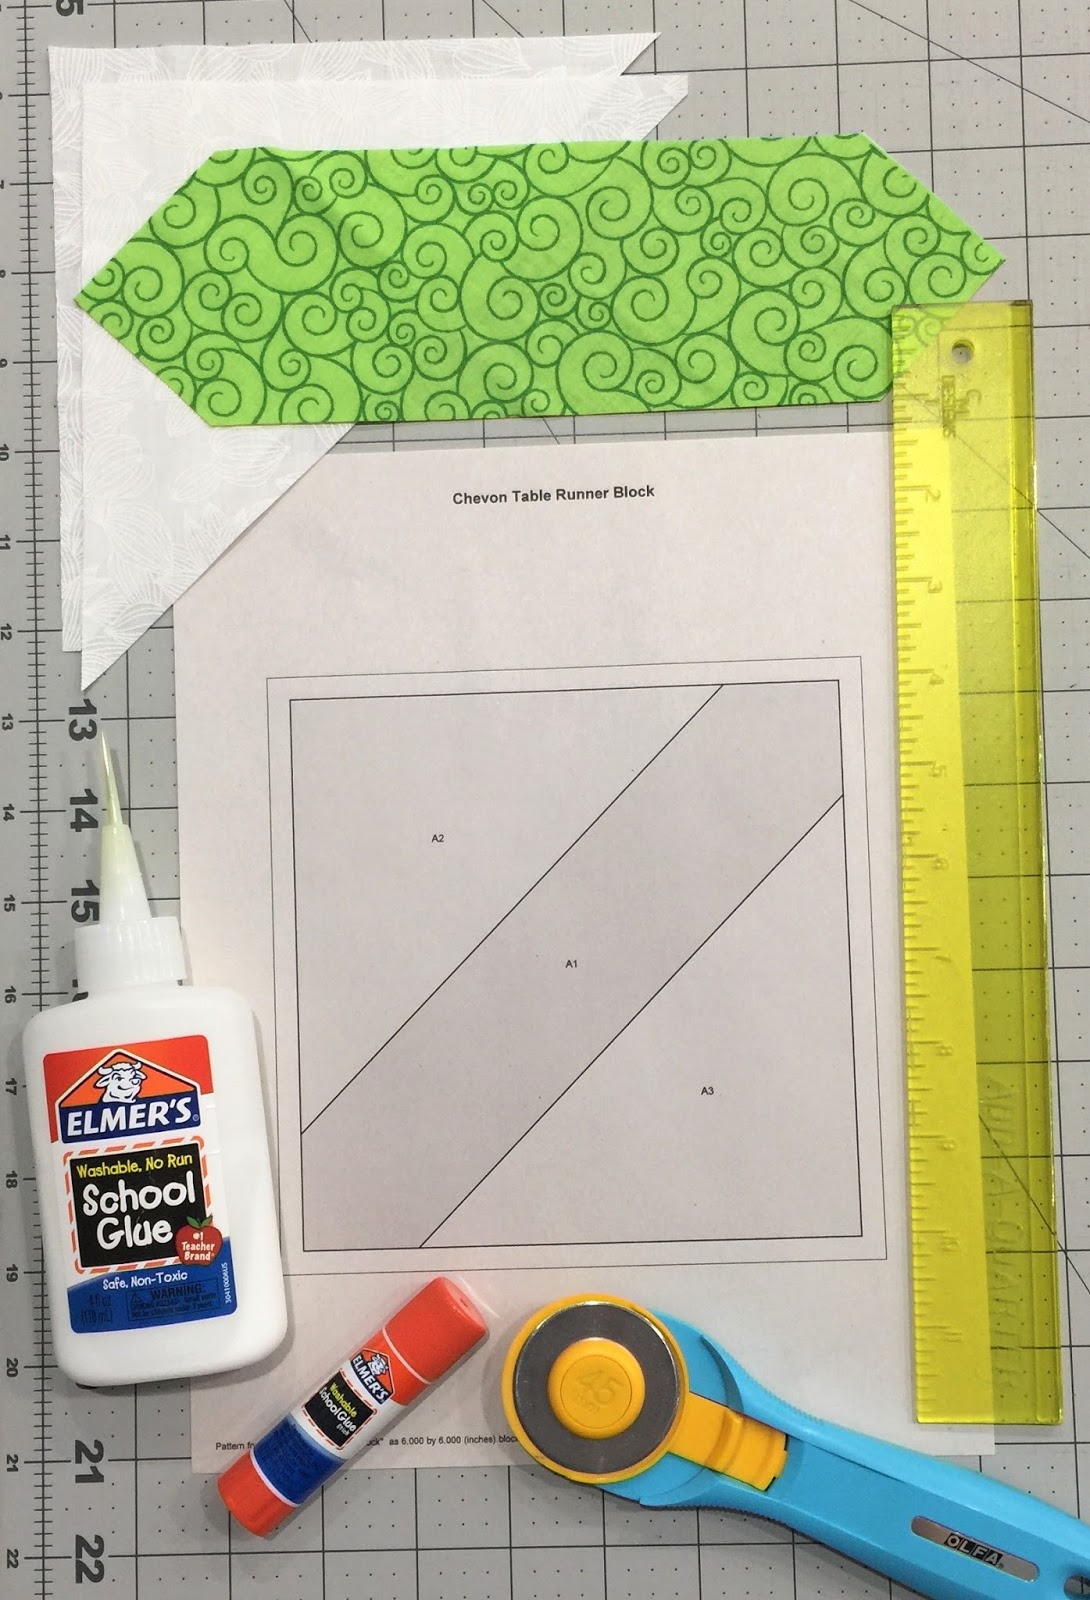
Foundation Paper Piecing Supplies

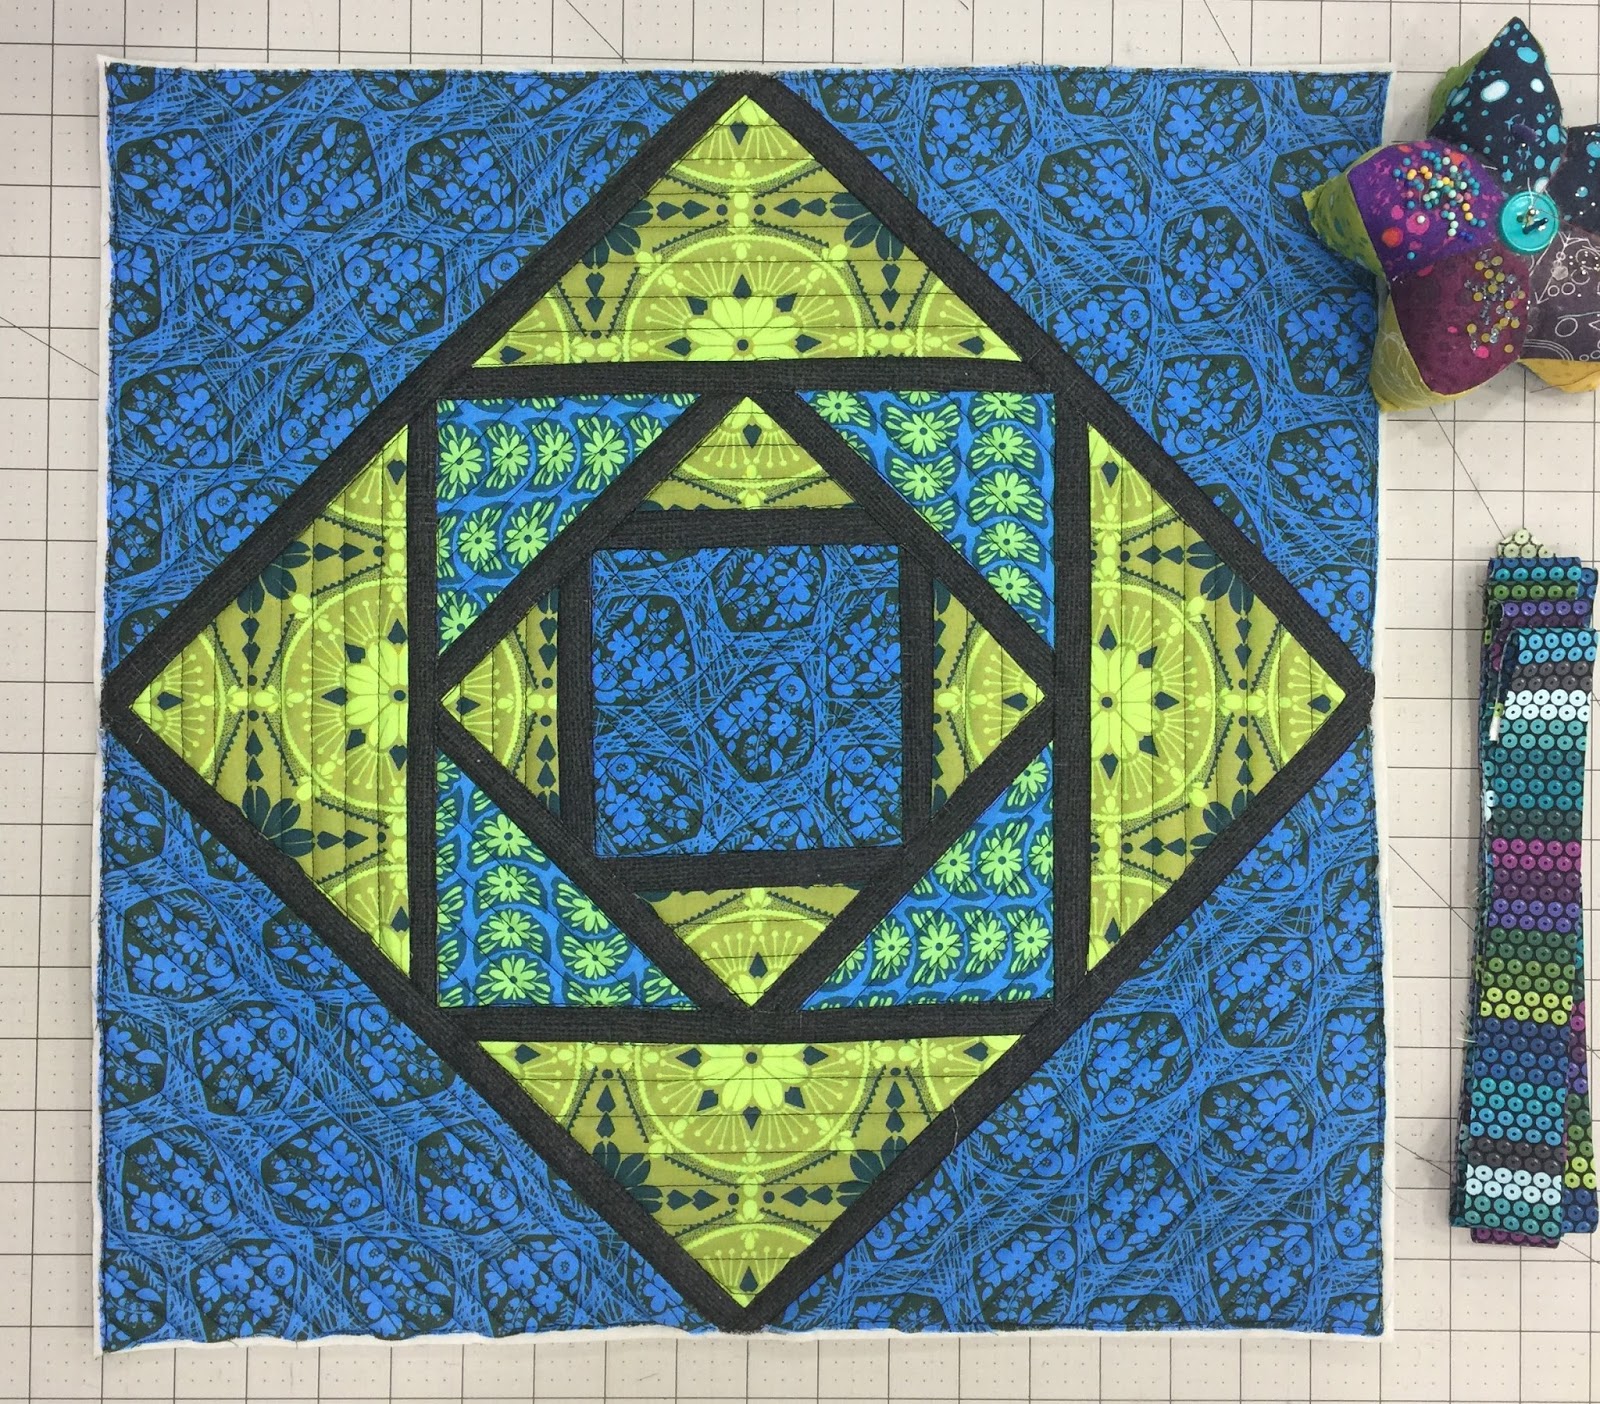
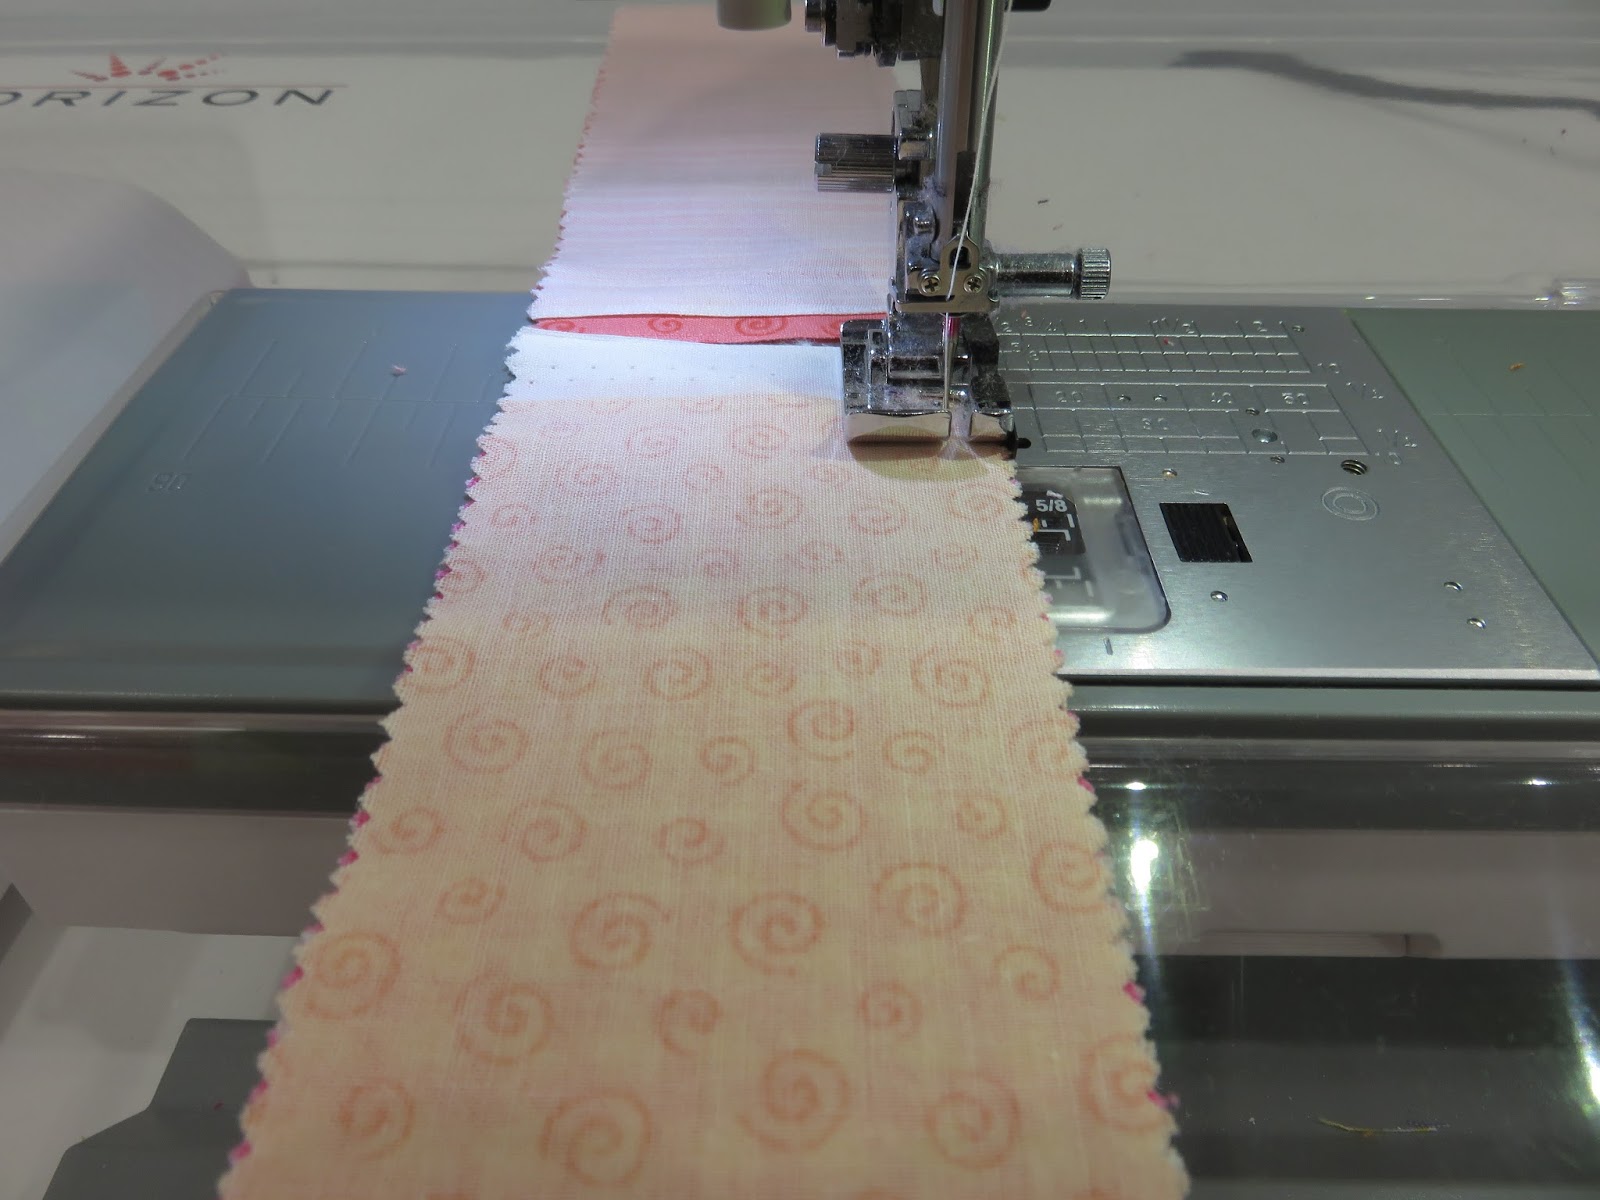
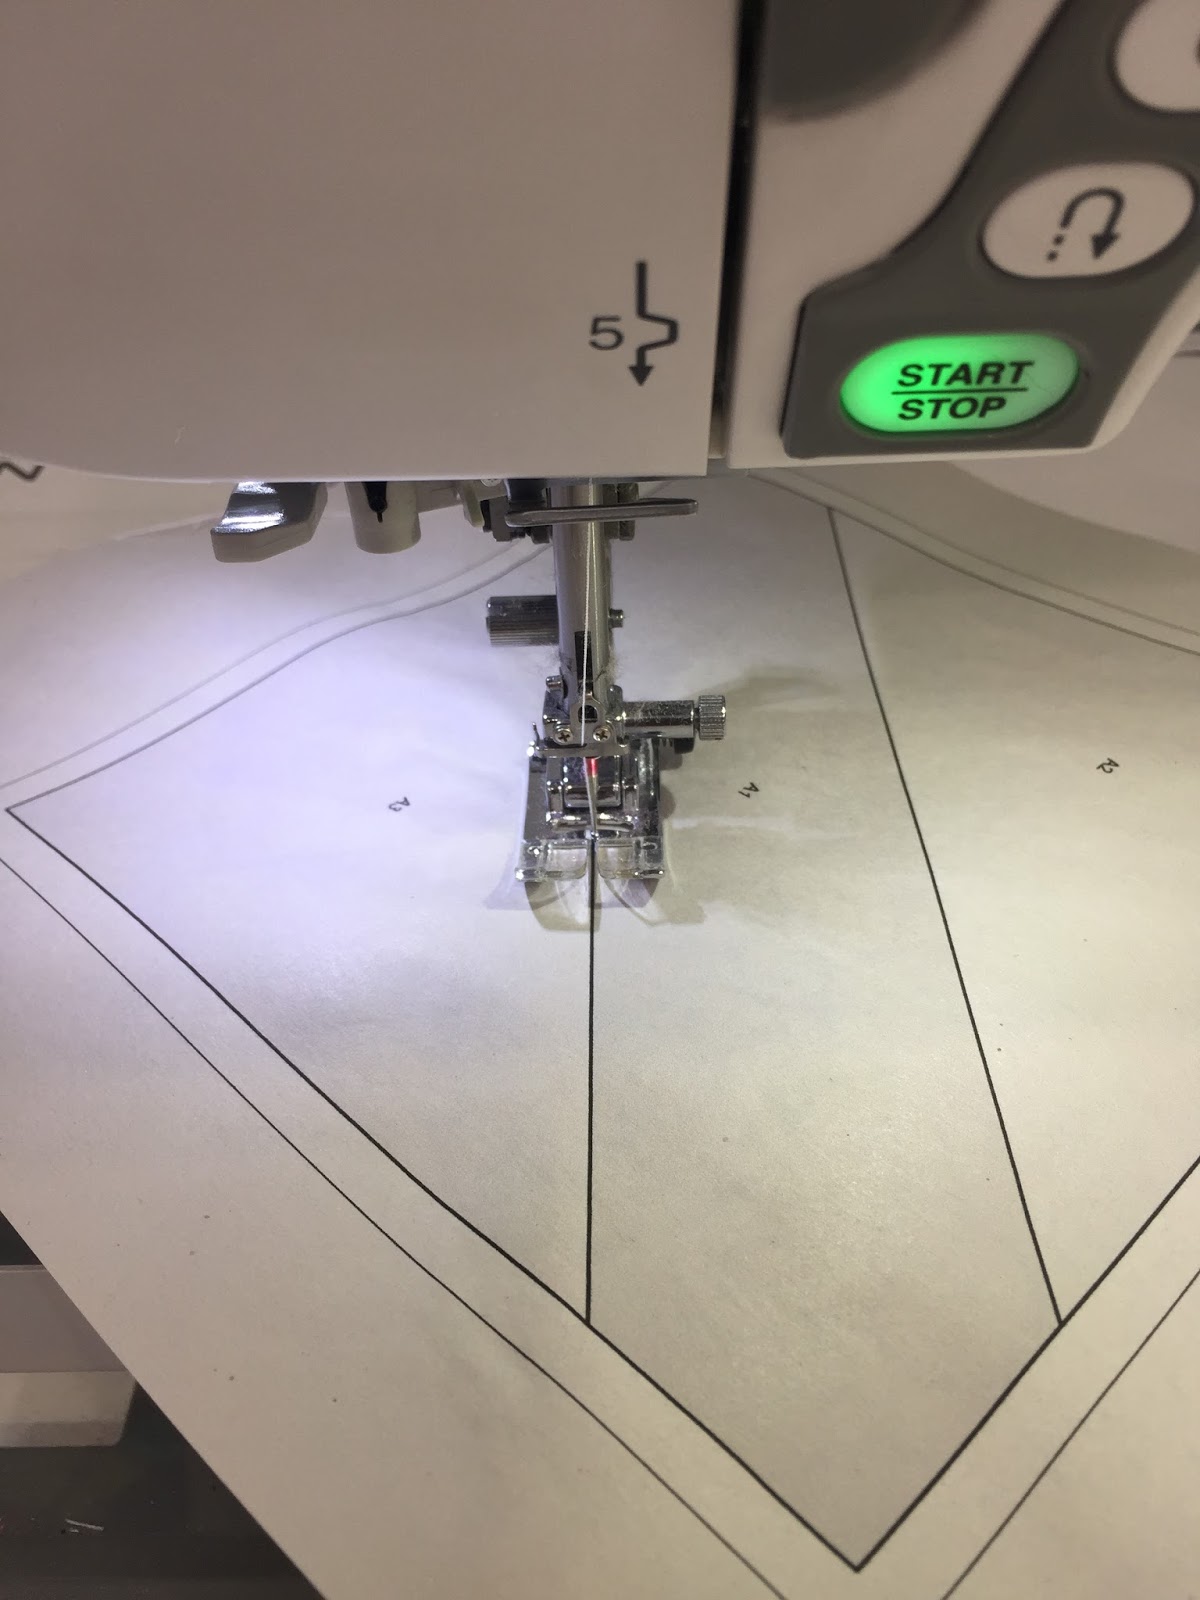
When you foundation paper piece, you sew on the printed side of the paper.  The fabric is secured by using a little glue from the glue stick to adhere it to the opposite side, and the elmer’s glue to add another piece of fabric.  Be sure you shorten your stitch length–a good rule of thumb is to shorten your stitch length to 1.5 or smaller.  This perforates the paper enough to easily tear away later.  If you don’t shorten the stitch length, you could play tug of war trying to tear the paper away once your blocks are complete!


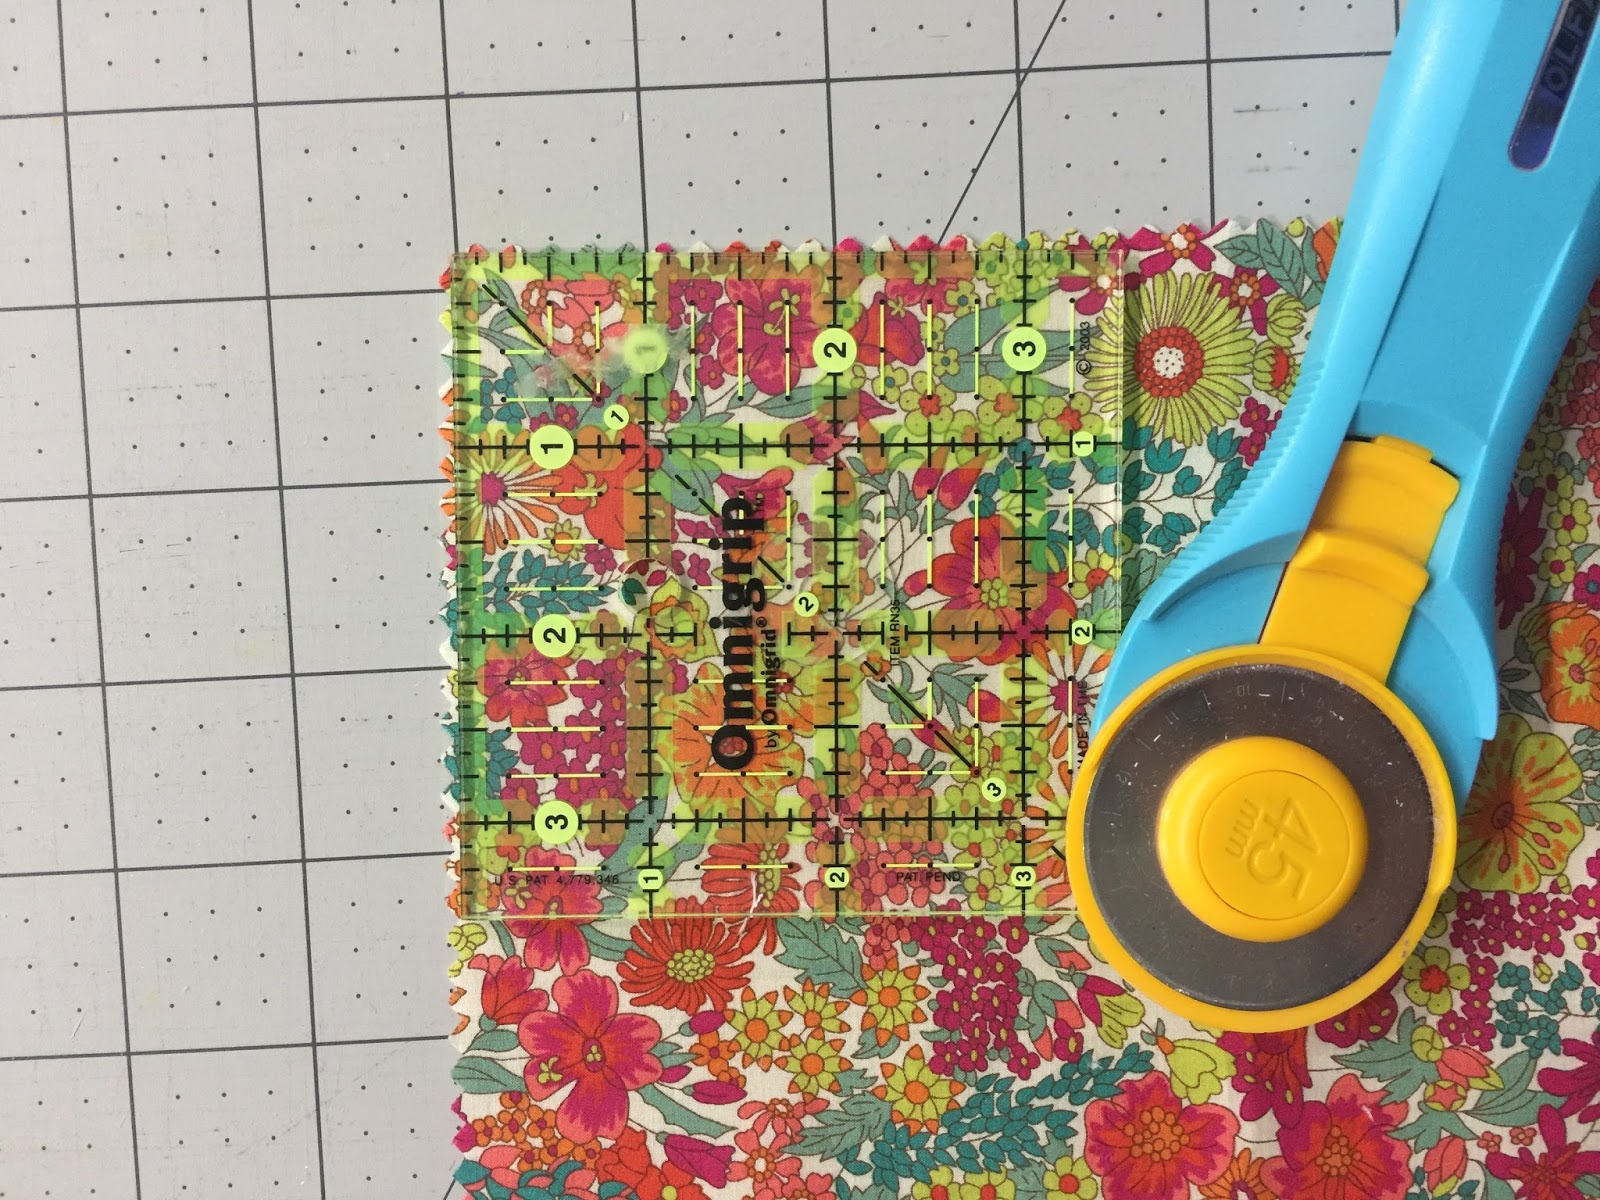
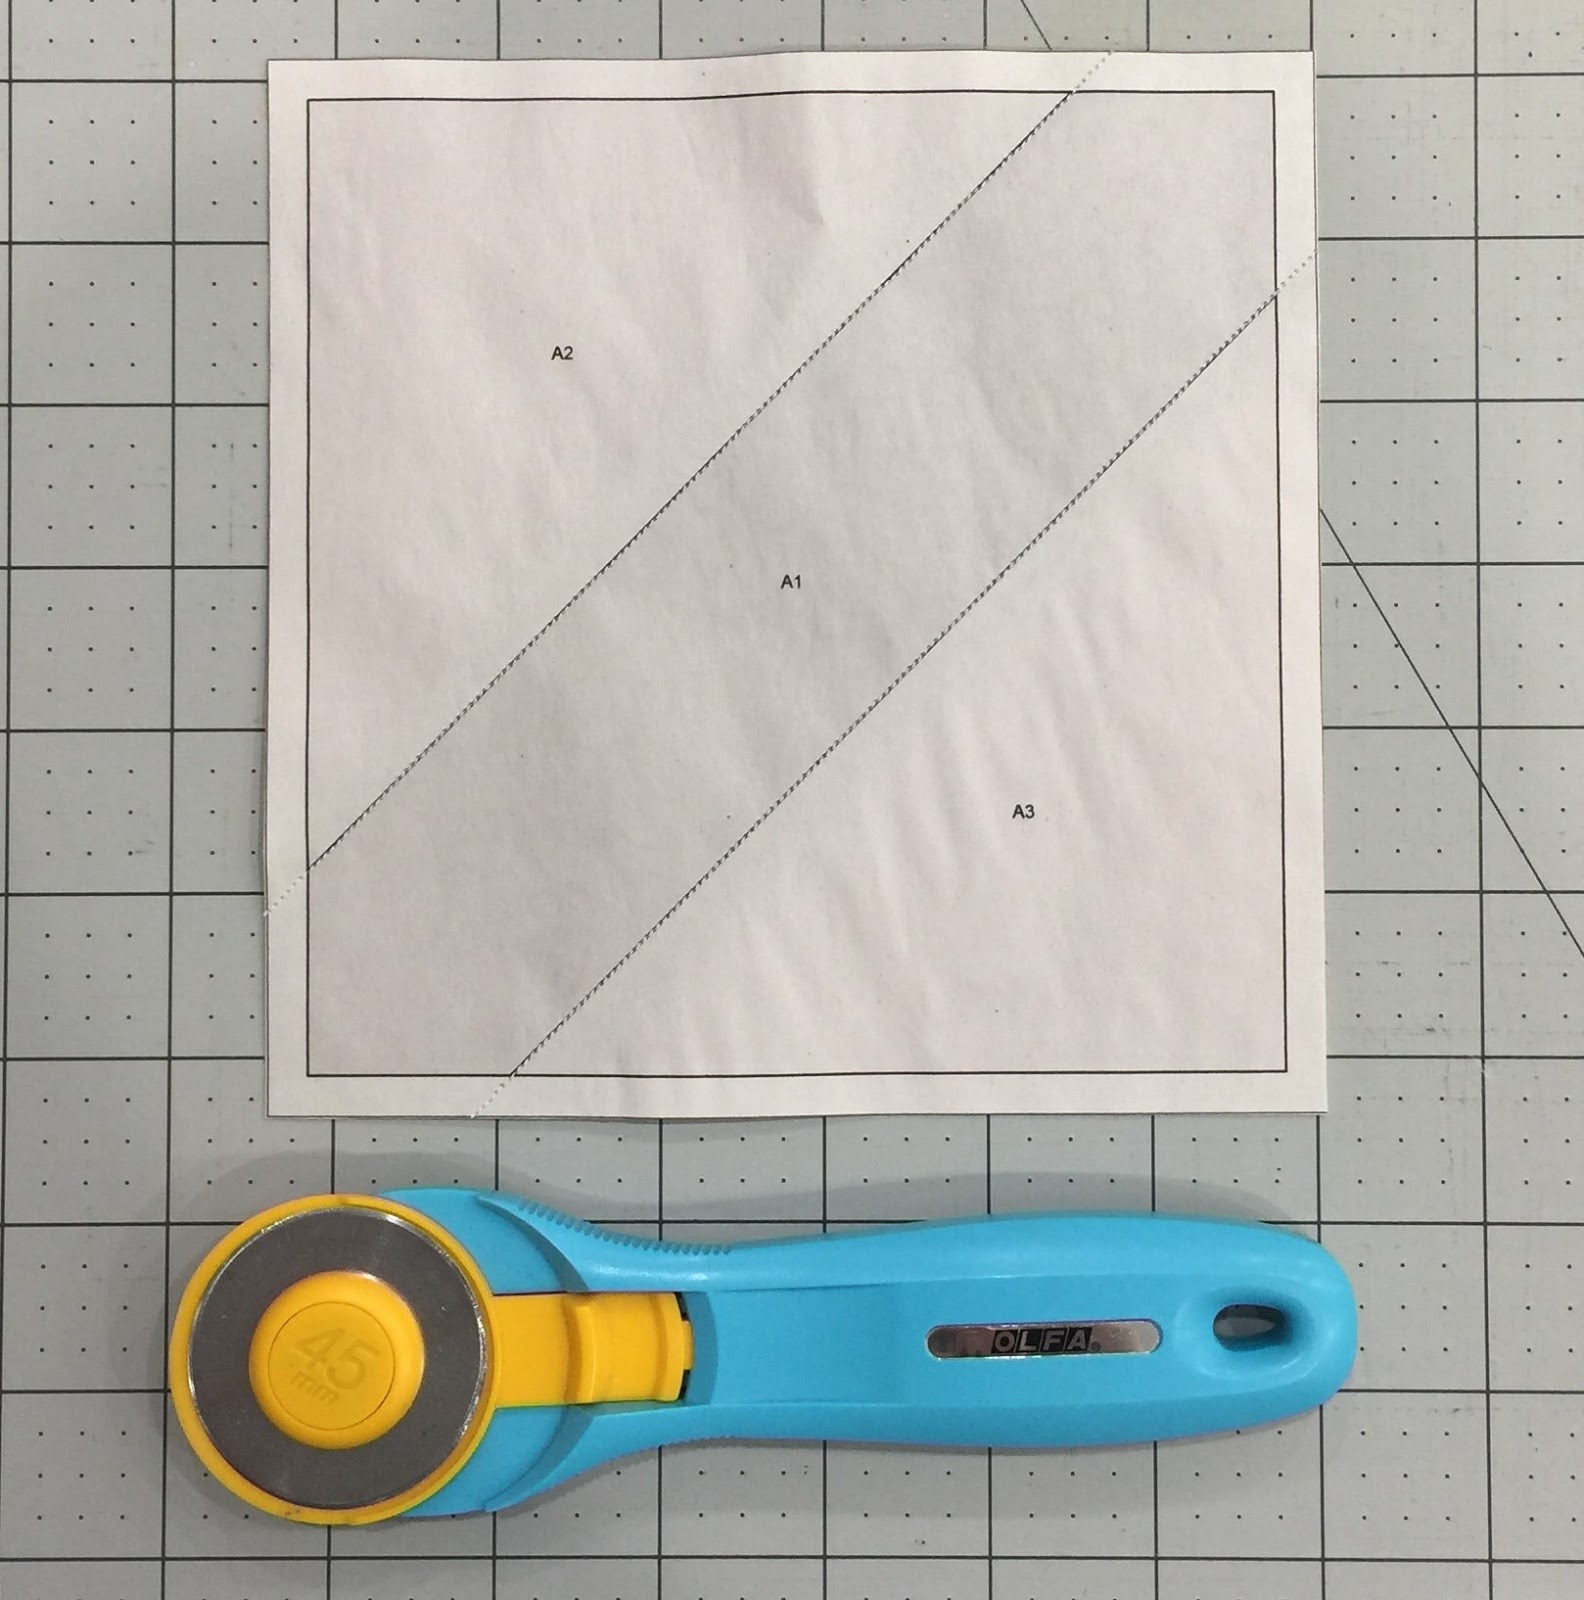
Use a ruler to trim away the excess fabric and paper (you may want to use a rotary cutter that you designate for paper use for this), making sure you leave the 1/4″ seam allowance in tact!


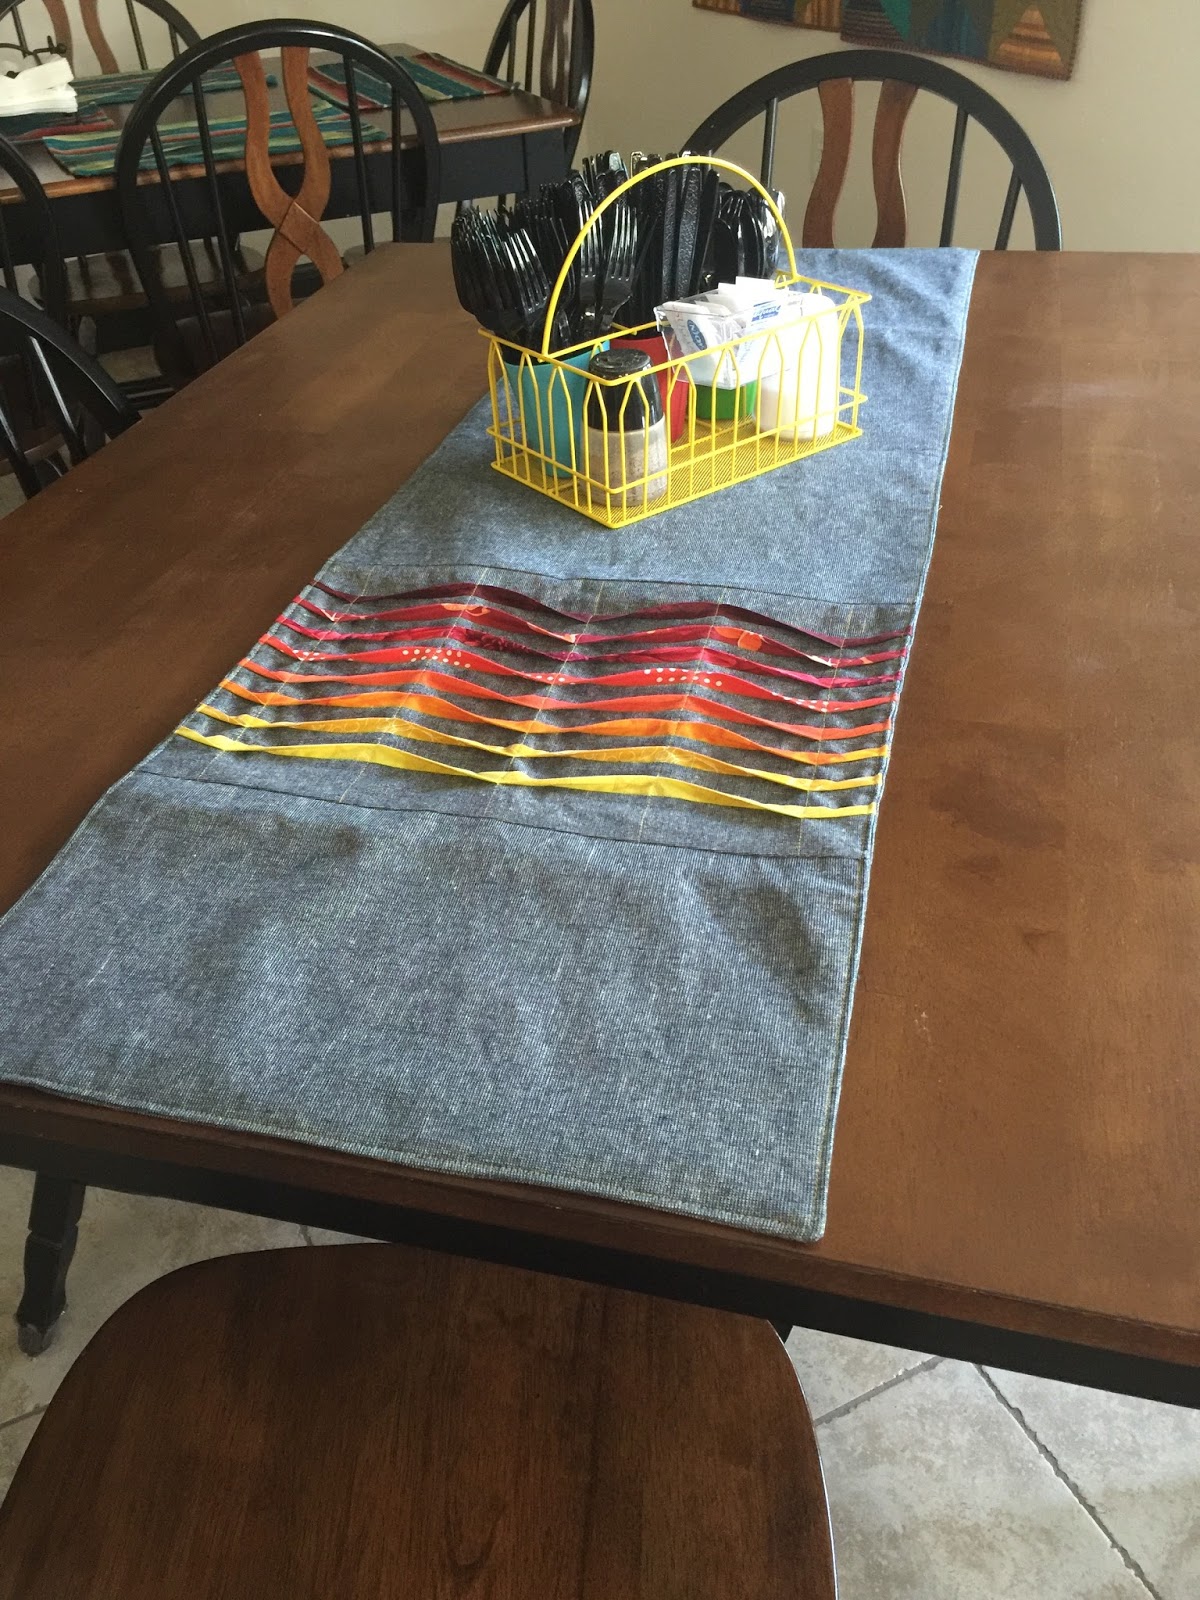
Visit the Janome Website for the full instructions on how to finish this sweet project!


Enjoy the rest of your week!  I know I will–as I type this, my husband has taken our 3 month old for a walk so I can have a little break 🙂  I love her to pieces, but my lanta–sometimes it’s nice to have a minute for yourself!  Happy sewing!

Posted on

Quilted Oven Mitt Tutorial (Free project)

Yikes!!  So I’m a little late on sharing this, but it will be here for future reference 😉


Do you love a fun (and quick) project for Valentine’s sewing?  Check out this sweet tutorial I teamed up with Janome to create HERE .  

This is a great project to incorporate some low volumes with a great print that you’ve been saving (I used Liberty of London), but you might now have a lot of! 


The oven mitt tutorial can also be customized–you can leave out the reverse applique option for a simpler finish and enjoy your new oven mitt quicker.

Happy belated Valentine’s Day!

Posted on

Valentine’s Day Oven Mitt Tutorial

Are you looking for a great project to showcase that one print that you may not have much of? 


Check out the tutorial that I teamed up with Janome to bring you by clicking HERE!  I know that I just love Liberty of London prints, but gosh…they’re pretty proud of them, am I right?  It’s not often I spend $40+ per yard on fabric…but I will admit to purchasing a couple of “swatches” from fabric.com for a few bucks a piece.  I could almost never bring myself to sew with them, especially considering each piece that I had was less than a fat eighth…hello…!  Not many patterns allow for this!  


So I whipped up this cute oven mitt tutorial and thought that Liberty fabric I had been hoarding for so long would be perfect for the little reverse applique window!  


It’s a great project for showcasing your favorite prints, and also for using up scraps of low volume fabrics (or any scraps, really!)

Have the happiest of Valentine’s Days and take this project into the kitchen to bake up some yummy sweets for the one you love 🙂

Posted on

Mock Stained Glass Mini Quilt Tutorial

Happy New Year!  Well, this post is a day late and a dollar short, but it’s here 🙂
I usually post on Tuesdays, but this one got away from me!  

Sometimes winter blues can get you down (although here, in Texas, it was nearly 80 degrees yesterday and looked WAY more like spring than winter!) and it helps to have some fun and easy projects to get you through the weather.  I hope you’ll take a look at the free tutorial I teamed up with Janome to create.  It’s listed on the APQS blog and is a great free pattern for a mini quilt–or– if you prefer not to quilt it, hang it in a window that gets lots of light for a stained glass effect.  Either way, it’s a great way to add another technique to your arsenal of skills.  


Find the free tut HERE

Have a great week!

Posted on

Free Christmas Stocking tutorial

It’s time for another free tutorial!  I got to team up with Janome again to bring you an awesome Christmas stocking tutorial 🙂

Be sure to check it out on the Janome website !

These stockings are super easy to whip up!  All you have to do is sew some strips of fabric together (jelly roll strips would be perfect!), then use the template to cut the stockings out.  You can add some decorative stitching to the seams where the fabric is joined for a little extra oompf!  Start and finish in an afternoon and make some awesome new stockings for the family 🙂  Merry Christmas!


Posted on

Hot Pad Hostess Gift! Sewing for a hostess…

So I got to team up with Janome to offer a free tutorial for a quick and cute hostess gift!  If you aren’t the main cook in charge of Thanksgiving, but a guest at someone else’s table–you don’t want to show up empty handed!  Whip up one of these cute hot pads with a little recipe card and a cooking utensil and you’ll be sure to be invited back!  Get the free pattern at the AQS Blog !  And also–Happy Thanksgiving!!!

Posted on

Spooky Spiderweb Trick Or Treat bag tutorial

If you’d like to make the perfect project for your special little trick-or-treater, I teamed up with Janome to bring you the perfect tutorial for a reusable treat bag!  Visit Janome’s website for the full tutorial and a quick and easy sew!  

 This is a great project with a little pop of color on the reverse side of the drawstring bag–you can use a contrasting fabric to really make it pop (or even glow in the dark fabric!)


And learn to quilt some really fun spiderwebs!  Enjoy!

Posted on

Free Jelly Roll Quilt Tutorial!

 If you’ve been looking for a way to use up those super cute jelly rolls you’ve acquired…I have a great jelly roll tutorial for you!  It’s free, and you can find it at the American Quilter’s Society Blog, sponsored by Janome.  

Free Jelly Roll Quilt tutorial by Joanna Marsh

I whipped up this quick tutorial using L’s Modern Basics (in the warm colors) Sushi Roll.  I absolutely love this fabric collection and plan on making one of these in the cool colorway too!  

Easy piecing with Janome’s 1/4″ piecing foot

If your quarter inch seams aren’t perfect, you can take your piecing skills to the next level with a 1/4″ piecing foot that will give you perfect seams every time.  This foot is everything when it comes to piecing!!!

Up close and personal of the quilting

And then finish your top off with some fun free motion quilting!  Have fun with this free tutorial, and use up that fabric you’ve been hoarding for so long 🙂  

Posted on 28 Comments

Sew Home Blog Hop! It’s a Twist table runner

Welcome to the next stop on the SewHome blog hop!  I am super excited to be included in this blog hop and can’t wait to share one of my favorite projects from this awesome book with you.  There’s also a giveaway (open internationally) hosted by each blog hop participant!!!  Instructions on how to enter are at the end of the post 🙂

SewHome by Erin Schlosser (photo by C&T Publishing)

Be sure to follow the other participants as they showcase some seriously amazing projects from Erin’s new book!


Wednesday, September 21 – Sew 4 Home & Jen Carlton Bailly
Monday, September 26 – Windham Fabrics & Rebecca at Bryan House Quilts
Wednesday, September 28 – Dear Stella Fabrics & Mandy at Mandalei Quilts
Thursday, September 29 – Erin at Schlosser Designs


Let me start by saying I had the awesome opportunity to quilt another project for SewHome, and so found out about this amazing book a few months before its release.  Erin is so talented and has thought of literally every project you could ever want to sew up to make a house your home.  

I am not as blessed as others when it comes to the interior decorating gene, so this book is a God send.  Erin even thought to include some design basics and clearly explains everything that needs to be considered prior to starting any project.  She has tons of suggestions on how to keep your projects cohesive, even discussing color and fabric selection.  I had the opportunity to preview this awesome book before it was printed, and had to purchase it myself to keep a hard copy on hand.  

It’s a Twist Table Runner (photo by C&T Publishing)

I chose to make the “It’s a Twist Table Runner” since my kitchen decor is a little blah…and I had never seen a design this unique before.  With summer fading and fall quickly approaching, I opted for a warm ombre color scheme to do my “twists” in, and chose the new Essex linen in yarn dyed metallic by Robert Kaufman so I could keep this beauty on the table from September through December.  

Warm ombre color scheme with Essex metallic linen

I had so much fun picking out my fabrics, and couldn’t wait to try the new Essex yard dyed metallic to keep the design warm and fall-feeling.  This project is so fun, and great for adapting to use up your scrap pile!  

You can see the tiny metallic detail in this close up of the sewn together table runner

Erin’s instructions are clear and concise, and I was able to finish this adorable project in under 3 hours.  The twisting technique is really simple to follow and gives such a great look when finished.  I’m excited to try this technique in other sewing projects, too!  

My finished table runner


I also loved that the table runner didn’t have batting in it and wasn’t quilted.  It seems like most table runner projects these days are of the quilted variety, and the “It’s a Twist Table Runner” has ample interfacing to give it a luxurious feel and weight.  It also made it a quick and fun sew.  

I was thrilled to participate in this, and can’t wait to make more projects from SewHome.  Thanks Erin for a delightful read!!!

To enter the giveaway for your free copy of Erin’s book SewHome, answer the following question by September 30, 2016 either in a comment here (on my blog), or a comment on my instagram post about this project:  What home decor item have you been dying to sew for your home?   Giveaway entries will close at midnight, central standard time 9/30/2016 and winner will be selected randomly.  If winner is domestic (US), they will receive a hard copy of SewHome, if international, the winner will receive the e-book version.  Winner will be contacted by me for shipping information.  

Posted on

Back to school tutorial: Notebook / Planner cover

Everyone loves that time of year when it’s hotter than blue blazes outside, right?  That means summer is in full swing, and another favorite is right around the corner…THE FIRST DAY OF SCHOOL!!!  Parents everywhere countdown the days to this landmark date like children do Christmas, and breathe a sigh of relief to have a bit of a break and shoo the kiddos out the door to start their education once again.

Many moms or dads may want to treat their kiddos to some personalized back to school handmade goodies, and I’m here to help with that!  

 Make some great customizable notebook (or day planner) covers by simply taking a few measurements of the kids’ existing school supplies.  My quick and easy step-by-step tutorial will help you create some great covers that will prolong the life of those school supplies and make the kids feel extra special on their first day back.  The tutorial can be found HERE so head over and check it out!