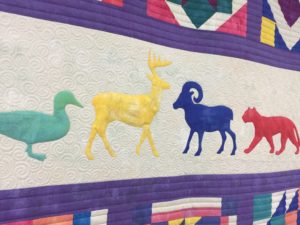
I just love some good free motion quilting! Last month, I quilted some amazing client quilts. One quilt was a BOM from a local quilt shop – Sew Special in San Antonio, TX, and another was pieced by Kasandra Lee from the SAMQG. The first quilt I mentioned was a quilt pieced by Katelen Postert that started as a traditional BOM using Moda’s Grunge line. Katelen added her own special touch and added some amazing animal appliques to really make this quilt special. Katelen is so talented, and that mini-parade of wildlife strolling down the center of the quilt is just perfection!
Katelen’s Quilt
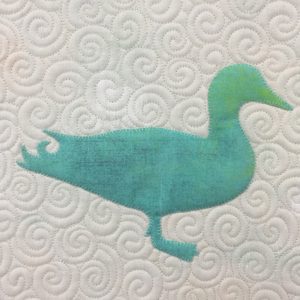
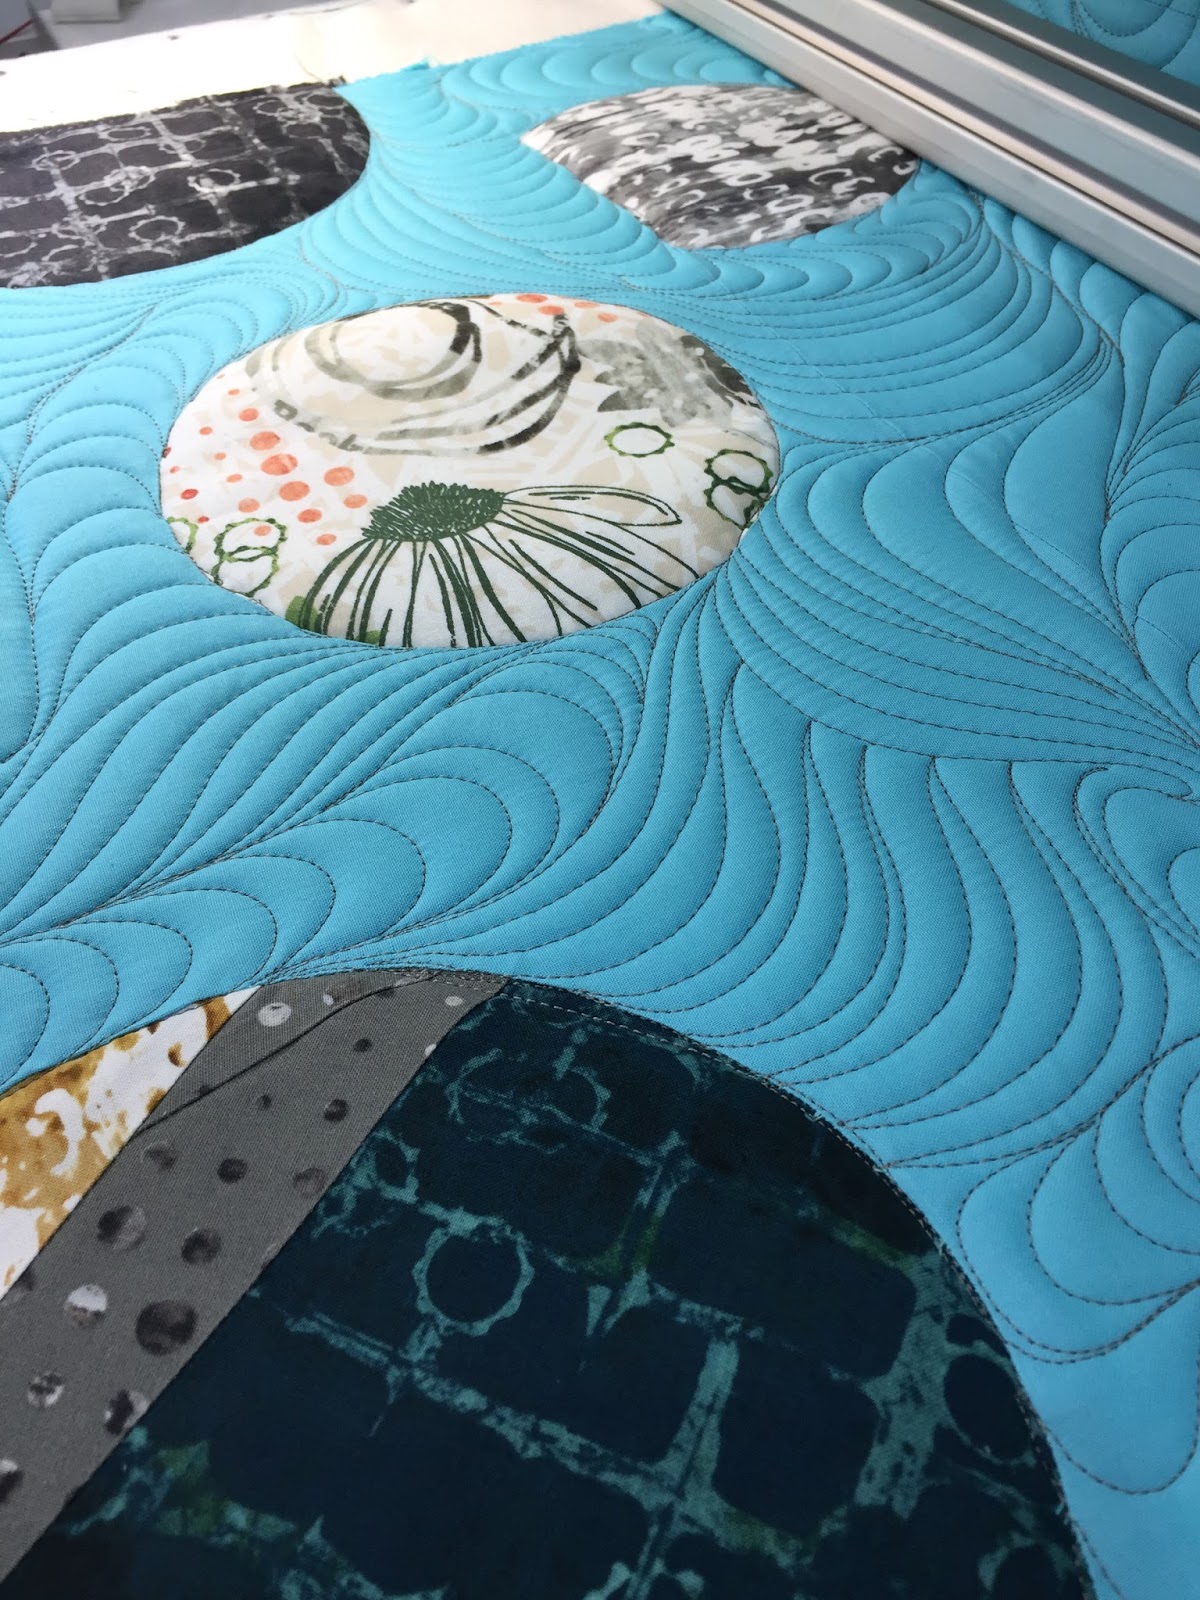
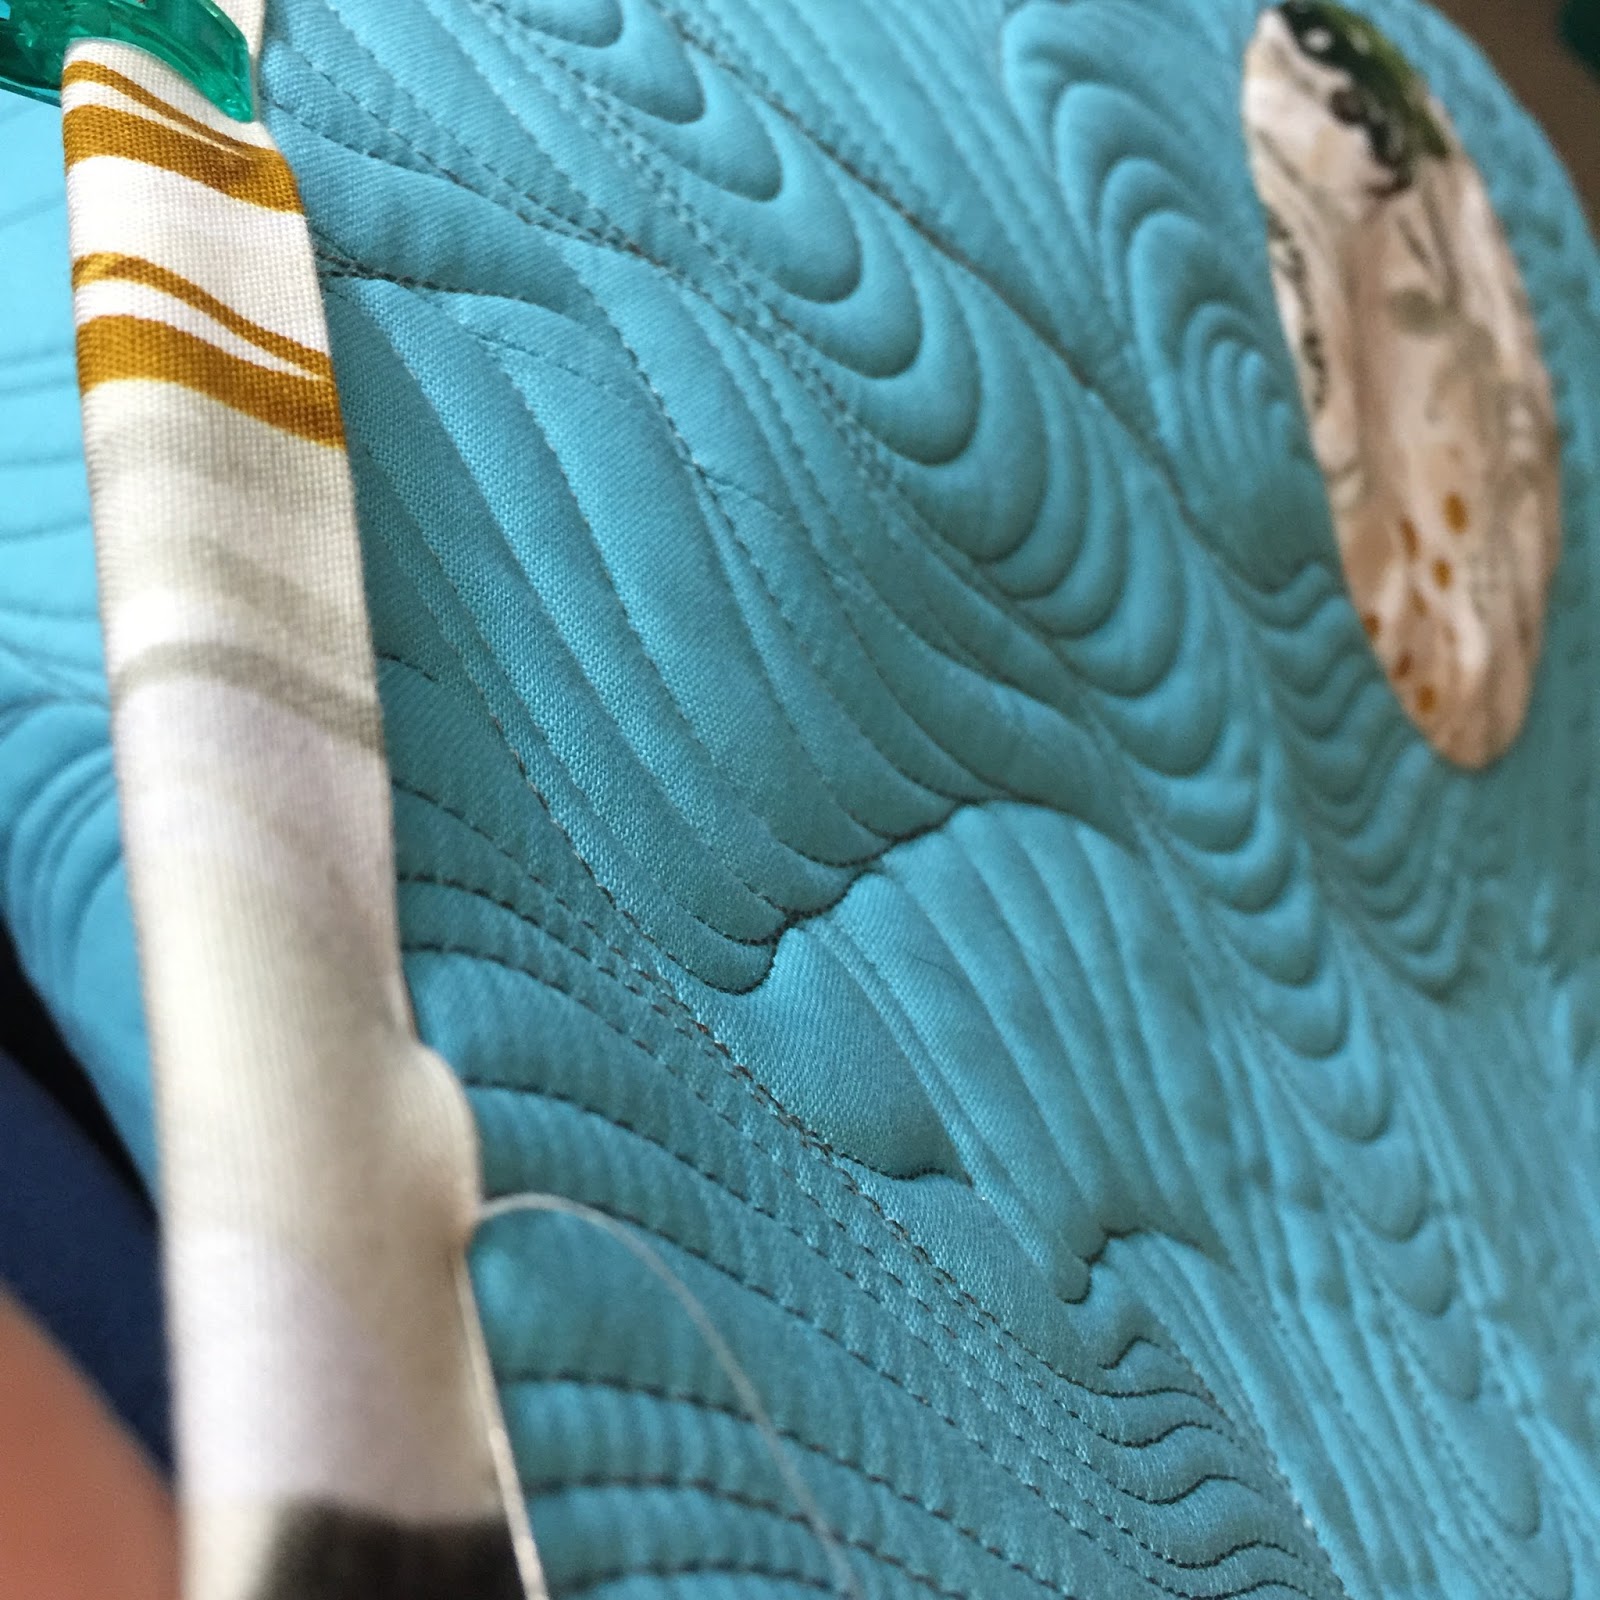
When I met with Katelen for her quilting consultation, we decided on some clean straight line quilting (not too dense), and outline the appliques with some stitch in the ditch and surround them with medium-sized swirls. I used Glide thread in a 50 wt. light teal color that matched the duck (along with a lighter cream color for the swirls), and used a single layer of Quilter’s Dream Wool batting.
Duck AppliqueLongarm View
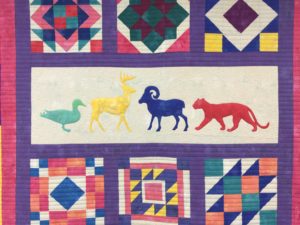
I was so in love with Katelen’s color choices and her addition of the applique was such an awesome touch. Here’s a portion of the finished quilt with the applique. Bravo Katelen!!!
Katelen’s quilt
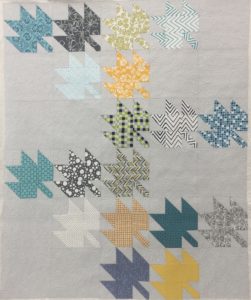
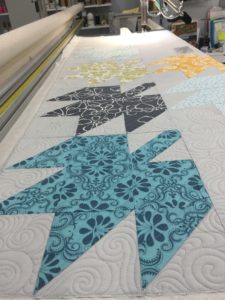
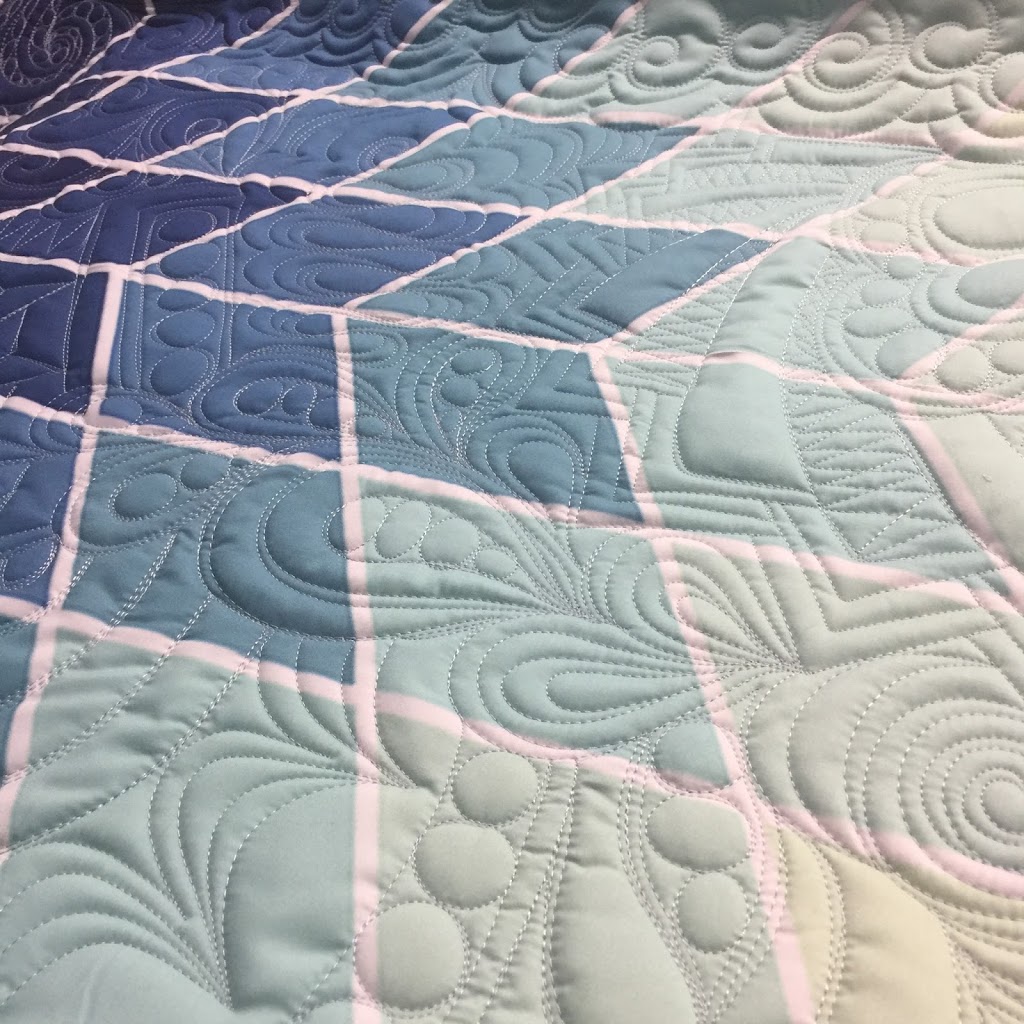
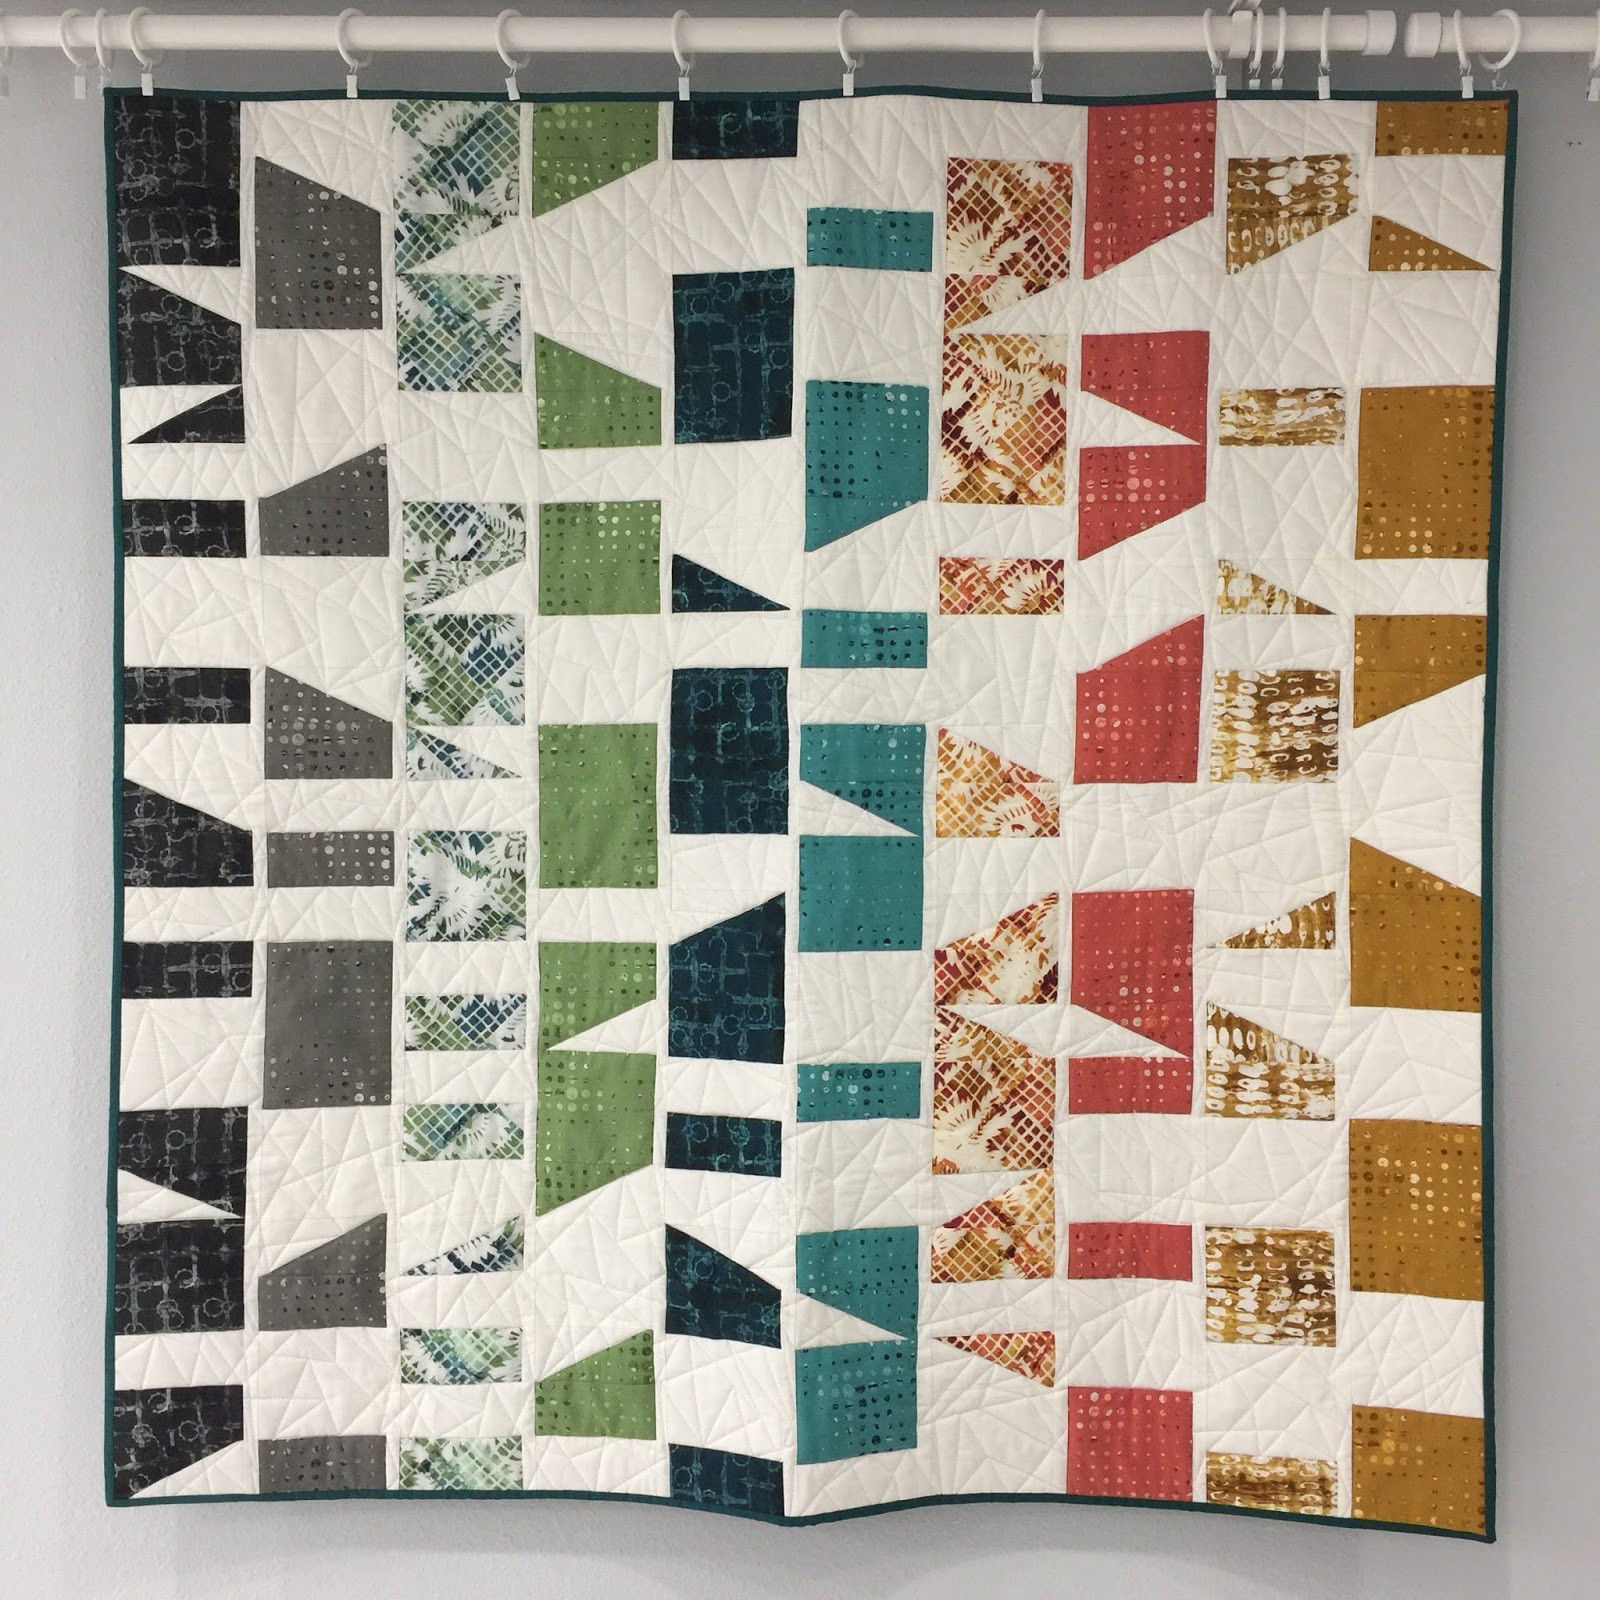
Kasandra’s quilt was just as exciting for me to quilt. She did a great modern maple quilt with lots of negative space in a cool color palette.
Kasandra’s Quilt
I did some diagonal straight line quilting within the maple leaves to follow the lines of the piecing, and then added some free flowing swirls to the background. The batting used was Quilter’s Dream Orient for a functional, soft, and drapey quilt that will be useful in a hot climate.
Longarm View
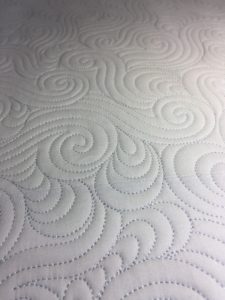
And these are the free-flowing swirls I did in the negative space. This is truly one of my favorite fills to do, and so relaxing to get lost in!
Swirls!
I’m so happy I can share these quilts made by some very talented women. I love mixing a little free motion quilting with ruler work and I think it makes the quilt really stand out without being overly done. Hope you’re getting to do some lovely sewing this week!
Who wants a free Ice Cream, You Scream Quilt Pattern? Well today is your lucky day!!!
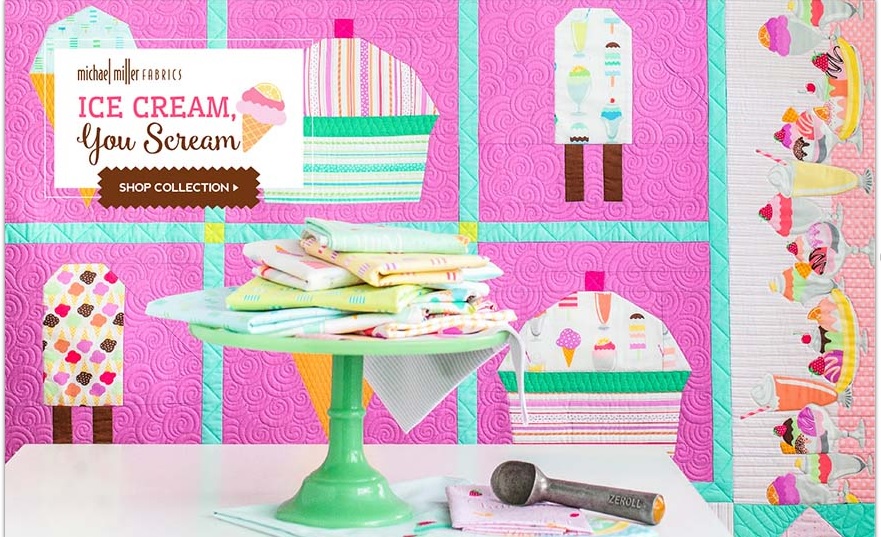
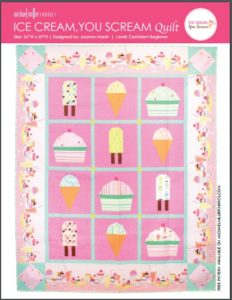
You have to check out this adorable fabric line Michael Miller Fabrics just released. The line is called Ice Cream, You Scream and the colors are everything! Also, there’s this border print that is just dying to be put in a quilt (or made into a little girl’s skirt!!), and nearly makes me swoon! I got a chance to get my hands on this fabric to design a quilt for the release, and I’m not gonna lie…I spent a few hours just playing with the fabric and coordinating Cotton Couture. It features sweet ice cream cones, sundaes, and the best stripes. It reminded me of the 4th of July and ice cream socials and everything pure in the world. The best part is, Michael Miller Fabrics is offering this pattern as a freebie–you can get your own PDF pattern download from their website.
Ice Cream, You Scream Quilt – Picture from Michael Miller Fabrics website
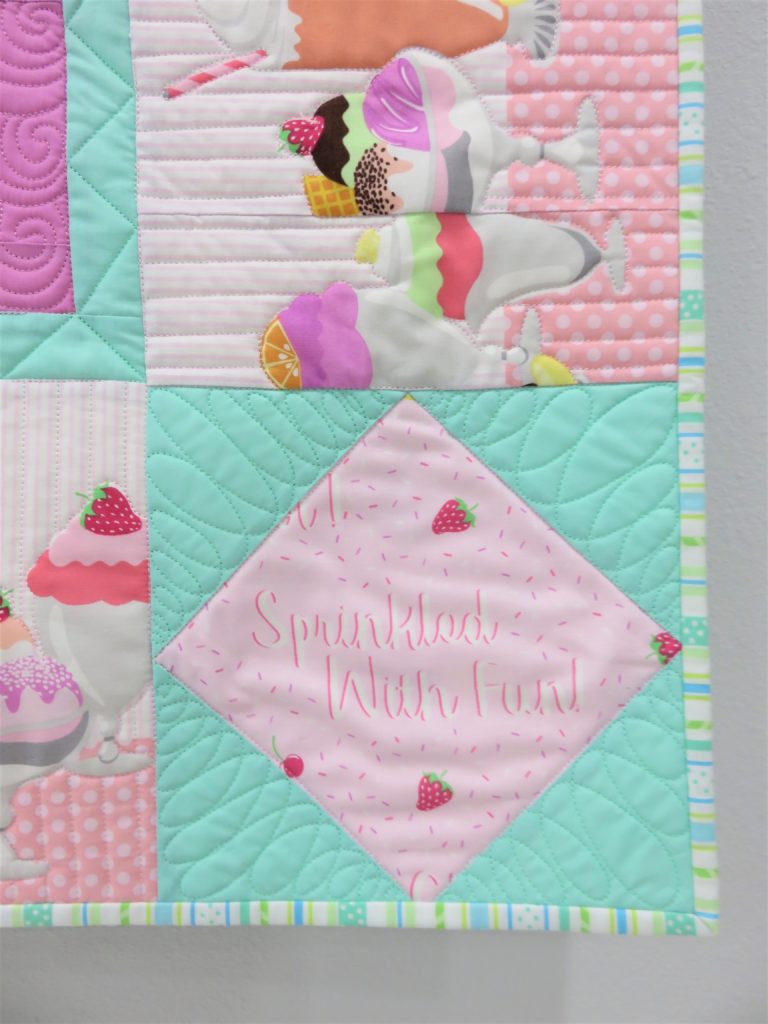
The pattern is for “confident beginners”, which just means you need a general knowledge of foundation paper piecing and fussy cutting. I fussy cut the border pieces so the ice cream sundaes were centered along the center of the borders, and the cornerstones in the border were fussy cut to showcase the cute little ice cream phrases on the fabric.
I had a blast designing and piecing the quilt. I had even more fun quilting it! I used Glide thread (from Hab+Dash) and Quilter’s Dream batting in the quilt. I used a few different colors of thread and matched them to the different fabrics. Most of the quilting was handguided free motion quilting, with the assistance of straight rulers for the grids.
Ice Cream Cone QuiltingCornerstone block quilting
I’d love to see what you do with the pattern–the foundation paper piecing blocks are pretty quick to sew up. Just remember to shorten your stitch length (I like to use 1.5) so the paper is perforated enough to tear away easily and print your paper piecing templates at 100%. Then add your sashing and borders and voila! Don’t forget to grab your free copy, and check out the pattern (pictured below). Happy sewing!!!
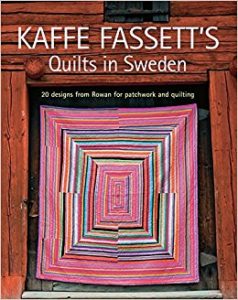
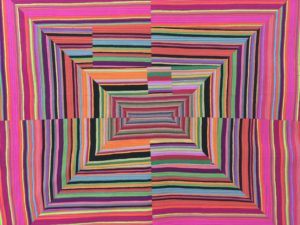
Man, oh man! I had the honor of quilting this awesome Kaffe Fassett quilt by Leslie Tucker Jenison. Leslie pieced her quilt based on Kaffe Fassett’s quilt pattern from the book Quilts in Sweden (pictured below-photo from amazon.com), using his fabric. Leslie also pieced the backing using some awesome linen and polka dots.
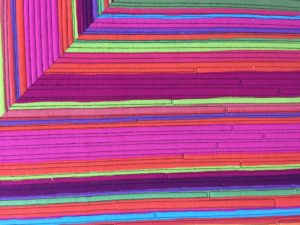
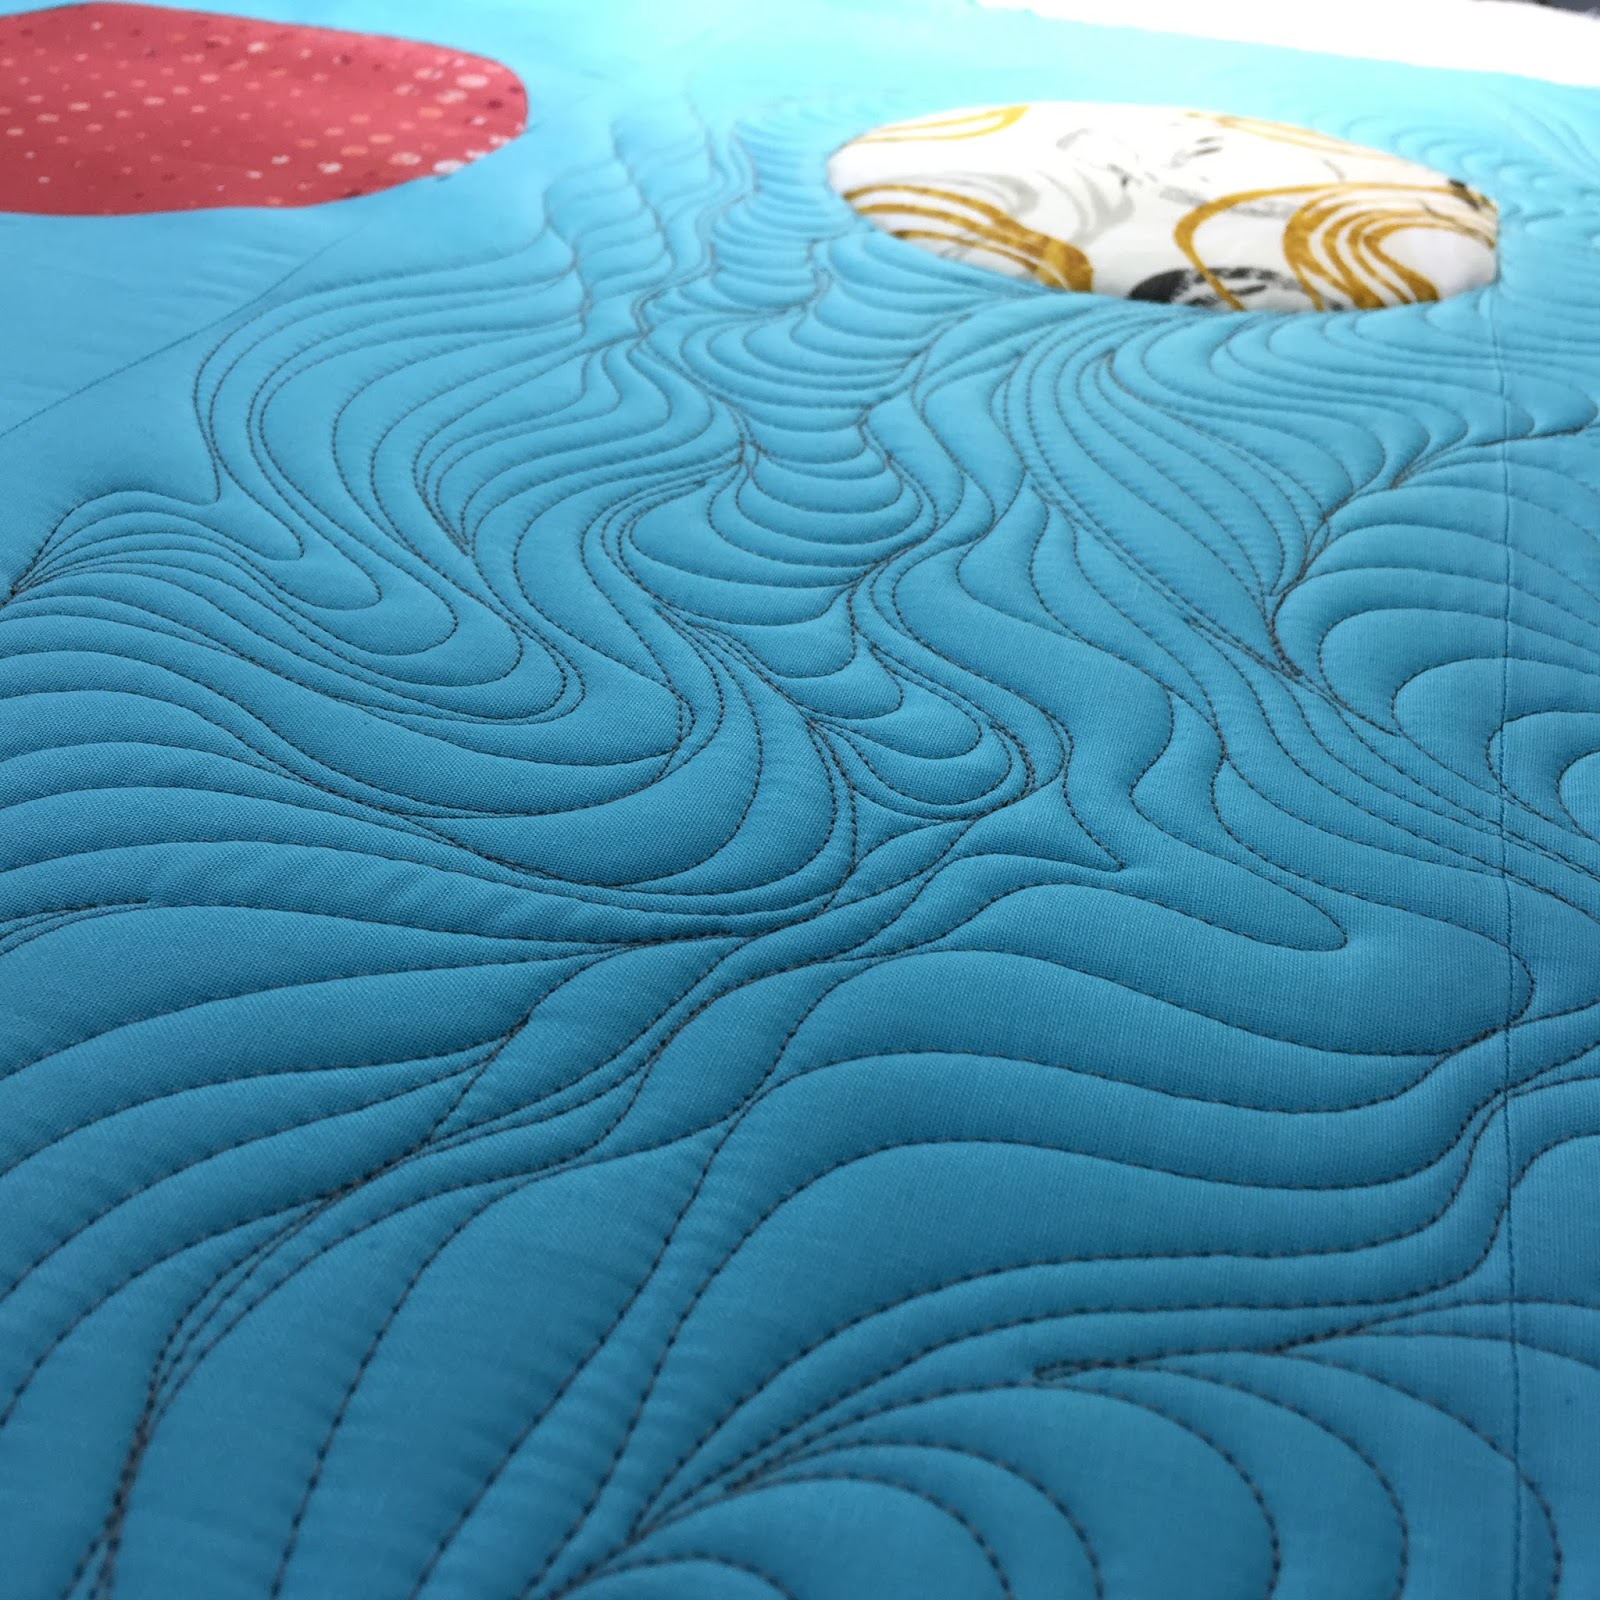
Leslie had requested some straight line quilting to follow the lines of the fabric pattern–I loved that idea. Quilting a quilt like this using a concentric design can be a challenge on the longarm, and you sometimes end up advancing and rolling back the quilt on the frame back and forth, back and forth, back and forth, (did I say back and forth already?) etc. To avoid doing that ONE MILLION times, I connected some of the lines, and I really liked the outcome of the quilting look.
Quilting close up
The lines of this fabric are so amazingly deceptive and provide the illusion that this was painstakingly pieced. I love the wonky look of the finished quilt and really found the design brilliant! I have been wanting to do a stripe study (kind of like how some people do color or quilt block studies) for so long, and this made me move that up my priority list. Someday soon I’ll start that project.
The thread used was Magnifico in black and batting was Quilter’s Dream Orient with Quilter’s Dream Wool layered beneath the quilt top. This was quilted usingelectric channel locks on my Innova longarm (hand guided), and those electric channel locks make all the difference. I recently upgraded and had those installed from the basic manual channel locks that come on the machine.
The difference is this:
Manual channel locks:
walk to the back of the machine and engage the channel lock
quilt a straight line
stop the machine
walk to the back of the machine and disengage the channel lock
walk to the front of the machine and move to new point
repeat 1-5 over and again
Electric channel locks:
Push remote button from front of machine to engage channel lock
Quilt a straight line
stop the machine
push remote button from front of machine to disengage channel lock
move needle to new point
repeat 1-5 as needed (and your legs are breathing a huge sigh of relief from all that walking you just saved yourself)
I digress. Here’s some more amazing eye candy from Leslie’s quilt.
Leslie’s Kaffe QuiltAngled close up
If you’re interested in purchasing the book, you can check it out here on Amazon.
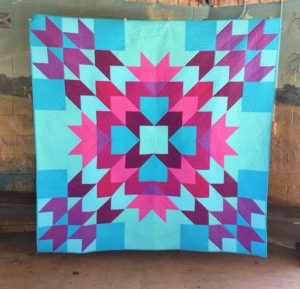
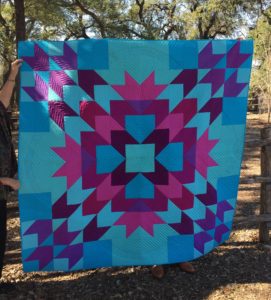
Hi! I’m Joanna Marsh from Kustom Kwilts. I live in the Texas Hill Country with my husband and baby girl. I have been so captivated by all of the #whatshadeareyou projects and the RJR Cotton Supreme Solids, and I’m so excited to share mine with you on the RJR blog today–The Dreamer’s Star Quilt! You can check out my instagram @kustomkwilts to see what I’m up to. I’m so excited to be featured on the RJR blog today with their amazing cotton supreme solids! Check out the What Shade Are You? posts for some amazing inspiration here.
Dreamer’s Star Quilt in RJR Cotton Supreme Solids
A little background on what brought me to quilting: In my previous career, I was a high school agriculture science teacher. My principal’s secretary was a quilter, and I mentioned to her that I was interested in starting to sew. I remember her telling me the secret to quilting was a consistent quarter inch seam allowance–and that as long as I remembered that, I’d be okay! I found a beginner’s quilting book in my teacher mailbox one morning with a sweet note of encouragement from Donna Jo (principal’s secretary), and that was how my sewing journey began. Both of my grandmothers were amazing seamstresses, but I had never learned to sew from them. One thing I’ve learned about the sewing community is that it’s full of people who want to share their love of the craft with others, and I love being part of such a giving community!
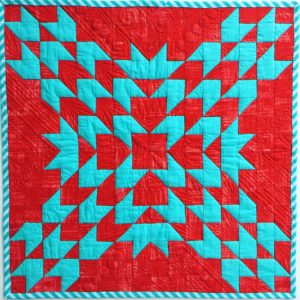
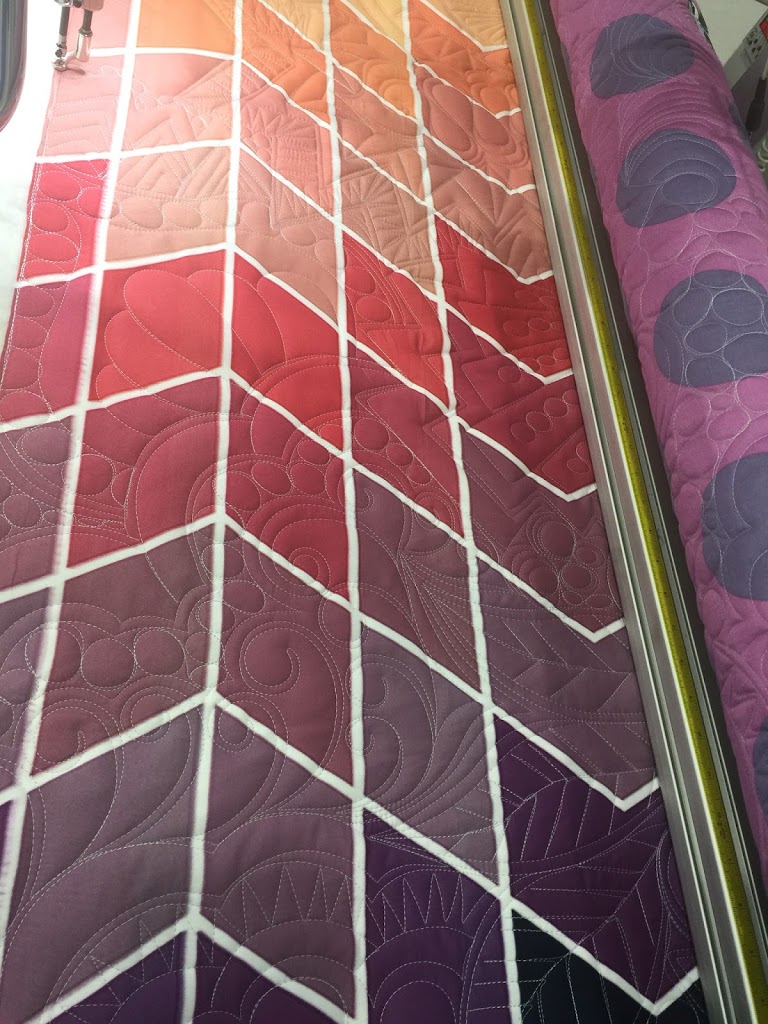
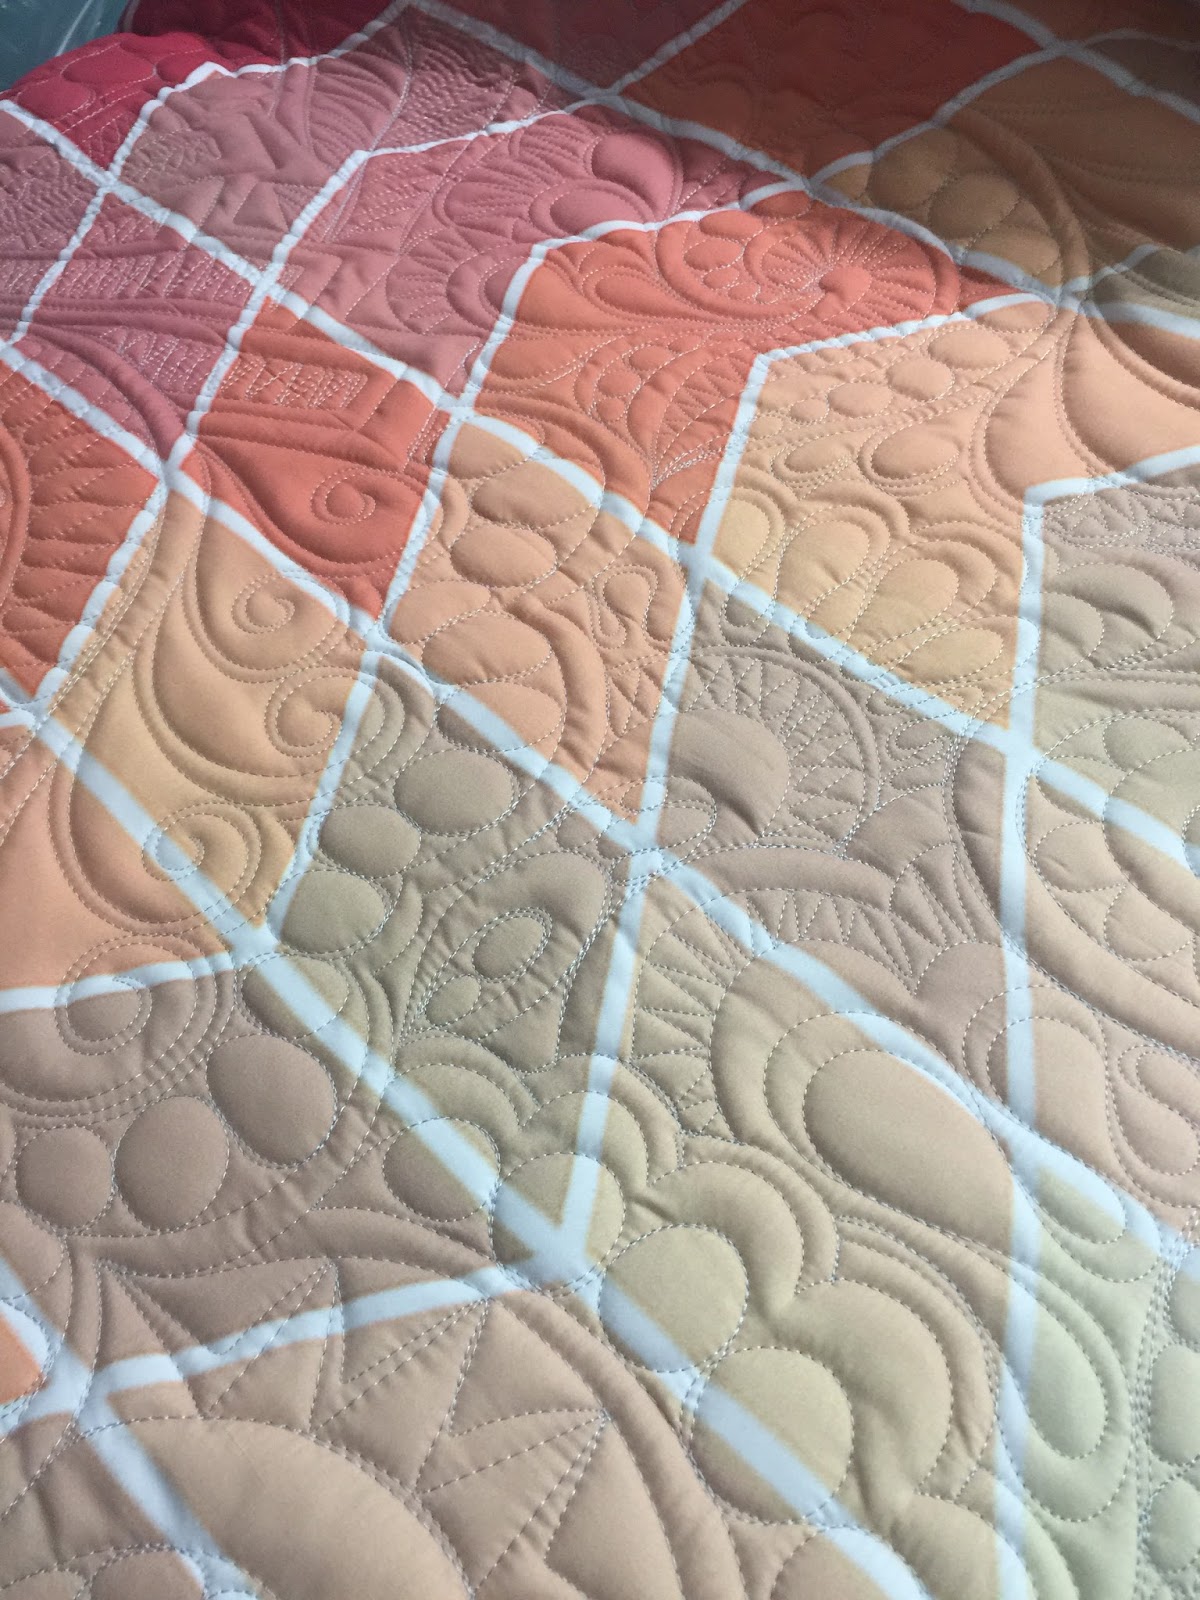
In 2016, I left my teaching job and committed to sewing and quilting full time. At my 9-5 job (really more like 5-9), I would find myself thinking about sewing in spare moments. The Dreamer’s Star Quilt is a quilt I drew while dreaming of doing the thing I love as a career, and I knew I wanted to use my favorite pattern for the What shade are you project. The design reminds me of the toy kaleidoscopes that produce different images just by turning the end, and how the images can be so bold and impactful. I love quilts that have a large central design and aren’t necessarily block based. I also remembered that when I started quilting, I struggled with selecting lots of fabrics to coordinate within a quilt, and I wanted a design that would look great with a two-color scheme, but could also make a big impact with lots of colors. This is the original quilt that I used Michael Miller’s painter’s canvas with.
Dreamer’s Star Mini Quilt
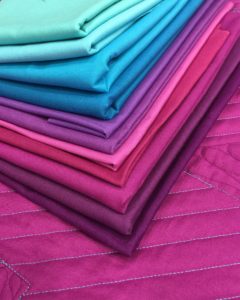
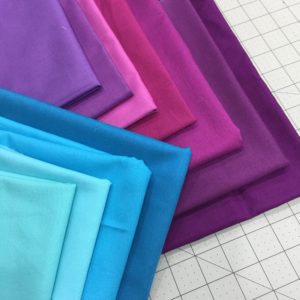
I knew that the Dreamer’s Star Quilt would just glow with RJR Cotton Supreme Solids, and wanted to use colors that would reflect the gorgeous sunsets that we sometimes see out in the Texas Hill Country.
RJR Cotton Supreme Solids
There are so many amazing colors to choose from and I went with 11 of my absolute favorites:
292-Turks and Caicos
279-Purple Haze
274-Riviera
317-Jacaranda
391-Robin’s Egg
328-Bora Bora
422-Plum
371-Melody
333-Bougainvillea
287-Raging Ruby
378-Lilac Festival.
Look at those yummy colors!
While I was browsing through the color card, I couldn’t help but chuckle to myself about the clever names of the colors. Some of my color selections might tell you that I’m ready to take a vacation 😉
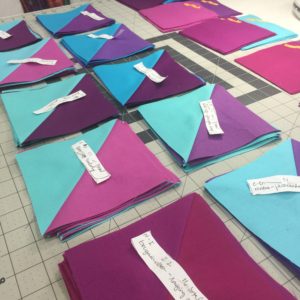
Piecing the quilt together was a breeze with lots of simple half-square triangles and chain piecing.
I love these color combos!
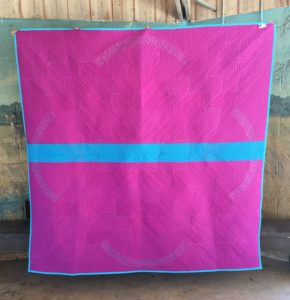
I love to use several shades of similar colors to create a little depth and dimensions to a quilt. For the backing I used Bougainvillea with a strip of Bora Bora down the middle, and Turks and Caicos for the binding. I loved seeing all the colors melt together, but still be distinctly different, just as in a sunset.
Bougainvillea with a strip of Bora Bora really make the quilt back glow.
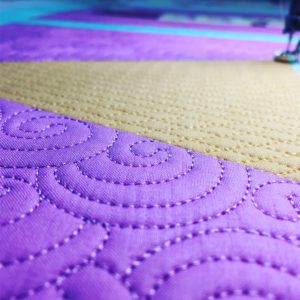
Once the top was completed, I loaded it on my longarm and quilted some simple straight lines with rulers and added some free motion accents in coordinating Glide threads.
Quilting the quilt
I love using Quilter’s Dream Wool to keep the quilt lightweight–remember, I live in Texas–but still let the quilting pop. I had a lot of fun getting some pictures at the Cibolo Wilderness Trail in Boerne, Texas. It was an absolutely gorgeous day and my husband and mom were my professional quilt holders.
Check out other versions of the Dreamer’s Star on Instagram with #dreamersstarquilt and you can pick up your copy of the pattern here. The pattern comes with three different size options, and the color combinations you could choose are limitless! I had so much fun making this quilt and drooling over the Cotton Supreme Solids. Thanks for joining me in this quilting adventure, and a huge thank you to RJR for allowing me to participate and for the inspiration they bring with the #whatshadeareyou blog hop!
photo provided by Love Patchwork and Quilting fabric for quilt provided by Robert Kaufman Fabrics
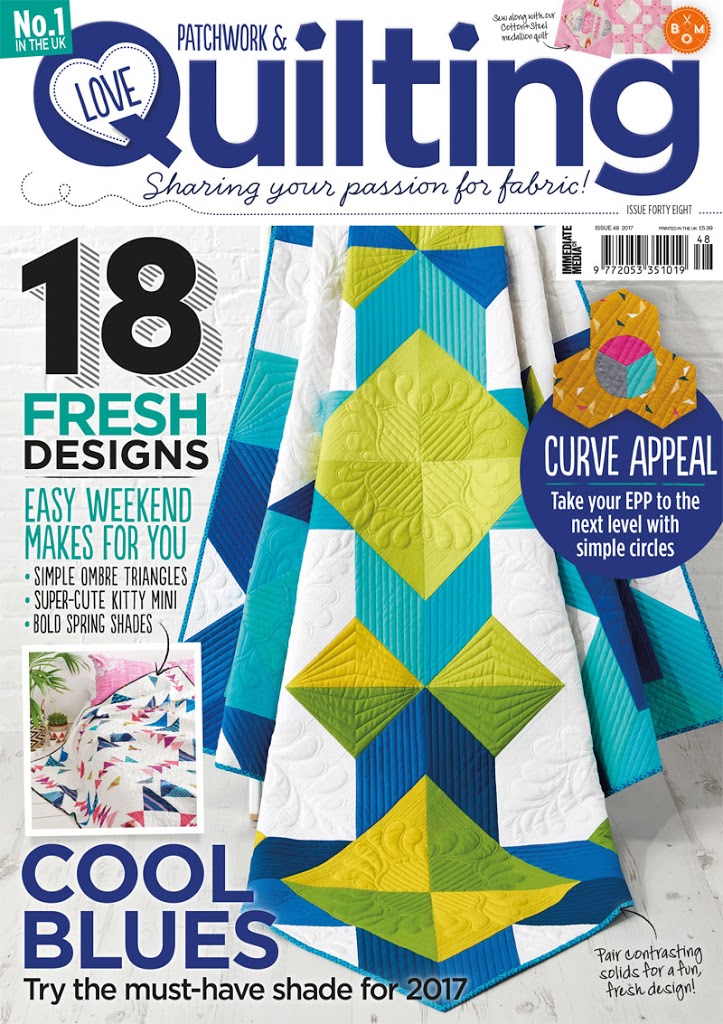
Have any of you ever made a goal so outrageous that you don’t ever really even consider it to be a possibility? You might still work towards that goal, but the hopes that it will come to fruition aren’t there. That’s exactly how I feel about this post. I always looked at the quilts and projects in this magazine and was blown away by the talent and variety. I’m BEYOND excited (so excited I’m yelling in all caps!) to say that this quilt I submitted to Love Patchwork and Quilting Magazine made the cover! When I started sewing a few years ago, I joined the San Antonio Modern Quilt Guild, and someone mentioned that LP& Q was the only magazine they bought. So I jumped on that train. I had never heard of it, because I was very new to quilting, let alone sewing. I was tired of the traditional color palettes that are represented in other quilting magazines. It was definitely love at first sight, and I subscribed to it immediately. (And ask for it for Christmas every year!)
photo provided by Love Patchwork and Quilting fabric for quilt provided by Robert Kaufman Fabrics
I’m super excited about the photography of this quilt! I’ve never had a quilt professionally “shot” before, so it is thrilling to see the results (and know that I have a lot to learn when it comes to my own quilt photography 😉
This quilt is something I worked really hard on, and for a long time. I am so thankful to the amazing people at Robert Kaufman Fabrics for providing the Kona Cotton Solids that were used to make the cover quilt, and for the opportunity from LP&Q to share my quilt!
I did some custom quilting and a little bit of ruler work on the longarm to finish off the quilt. I hope you’ll check out the quilt in issue 48 of Love Patchwork and Quilting! Thanks for letting me share my happy news with you 🙂
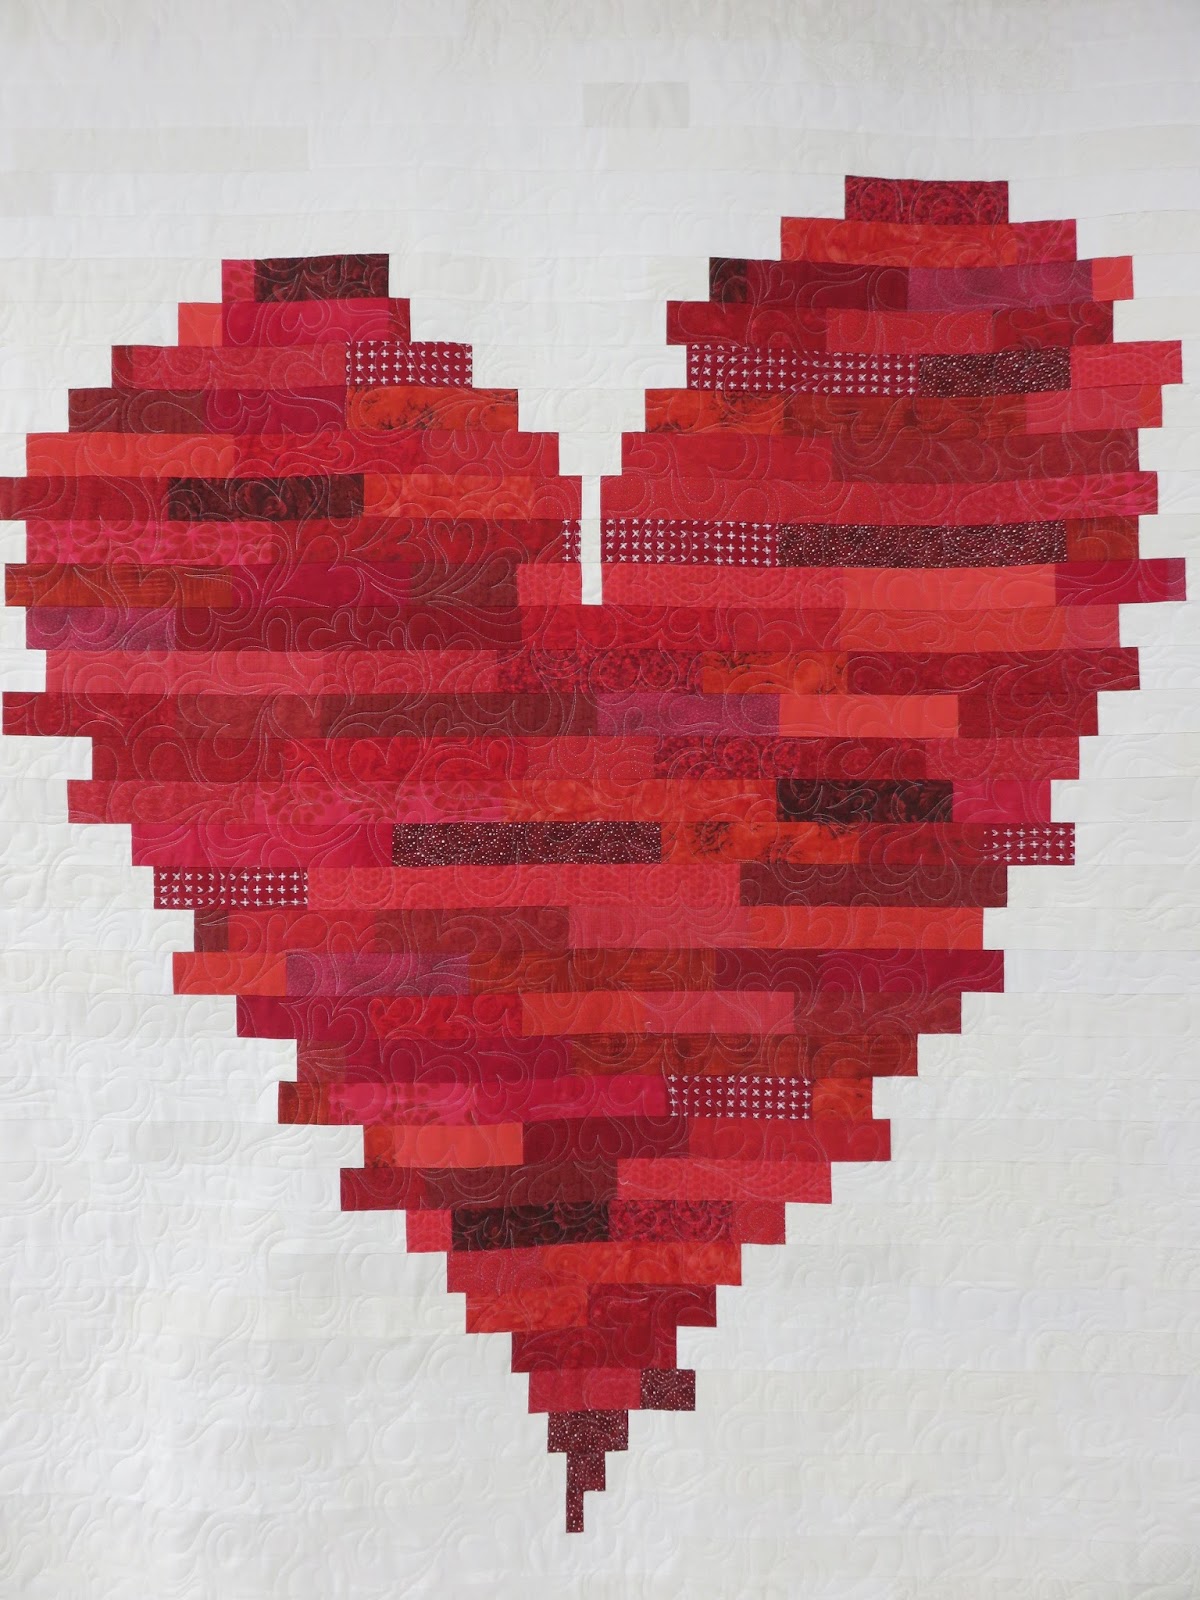
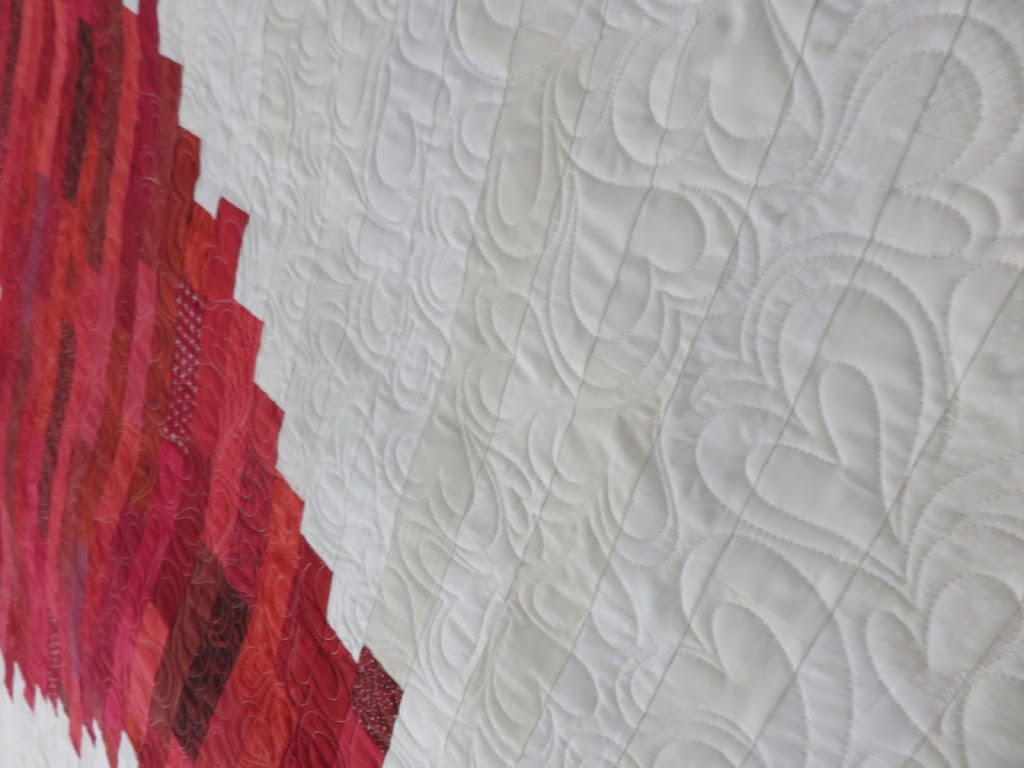
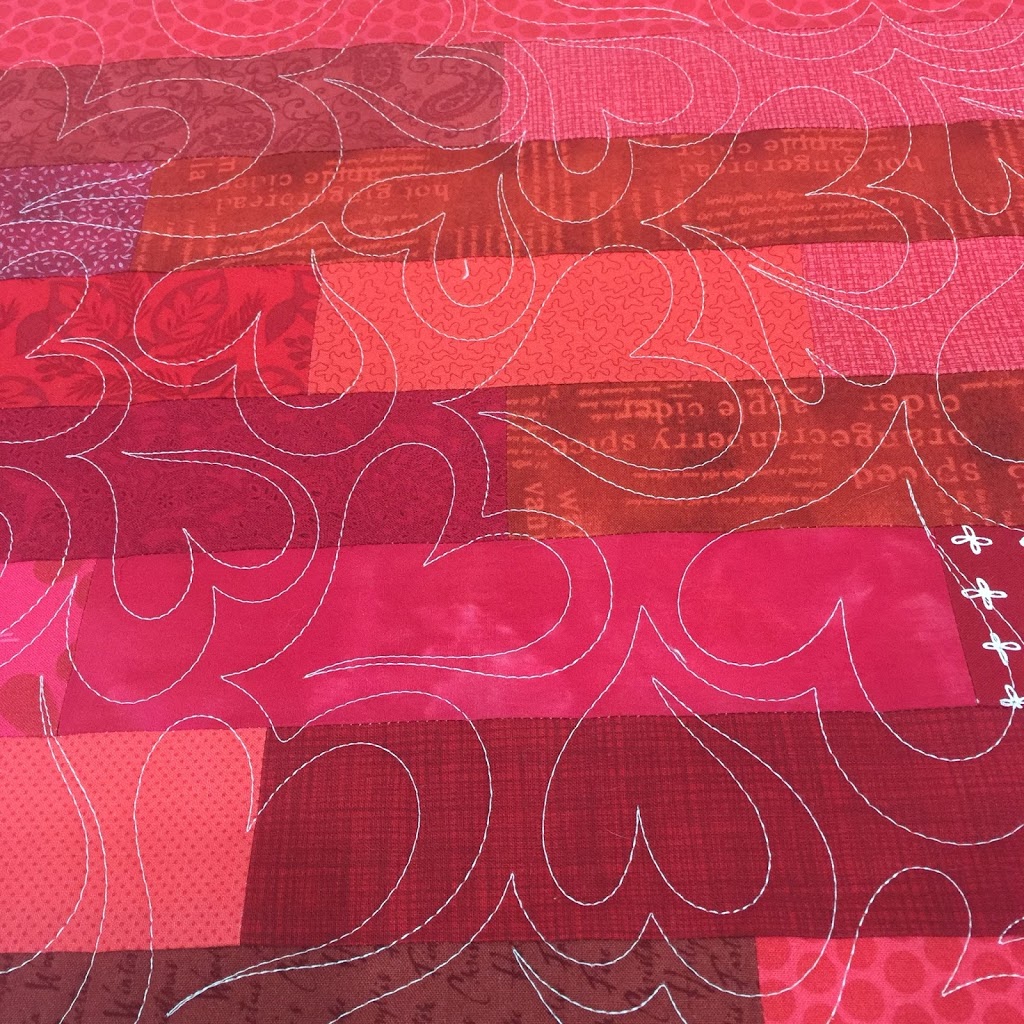
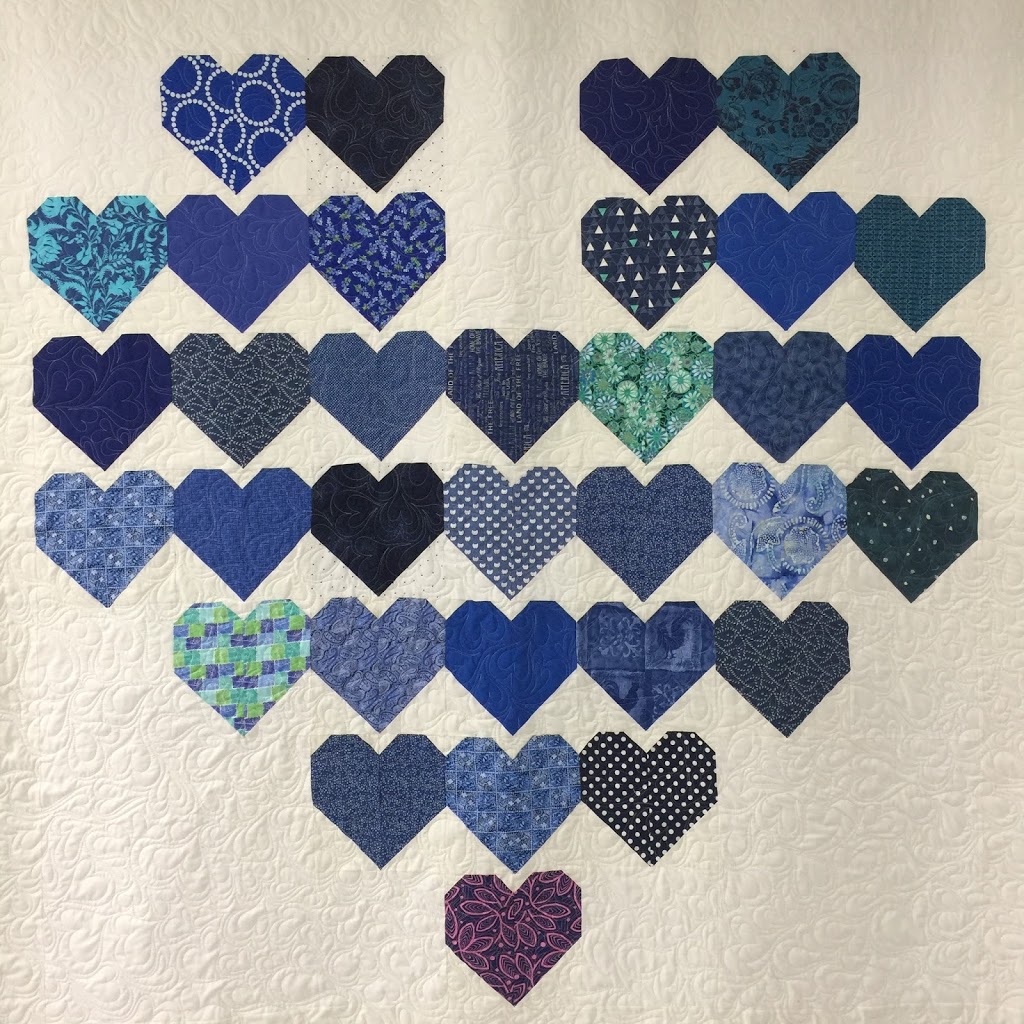
I recently had the privilege of quilting this gorgeous quilt for one of my clients. The piecing is just gorgeous and the quilt was donated to a charity event/fundraiser. I quilted the quilt with free motion hearts all over the top.
Quilt Pieced by Debra B.
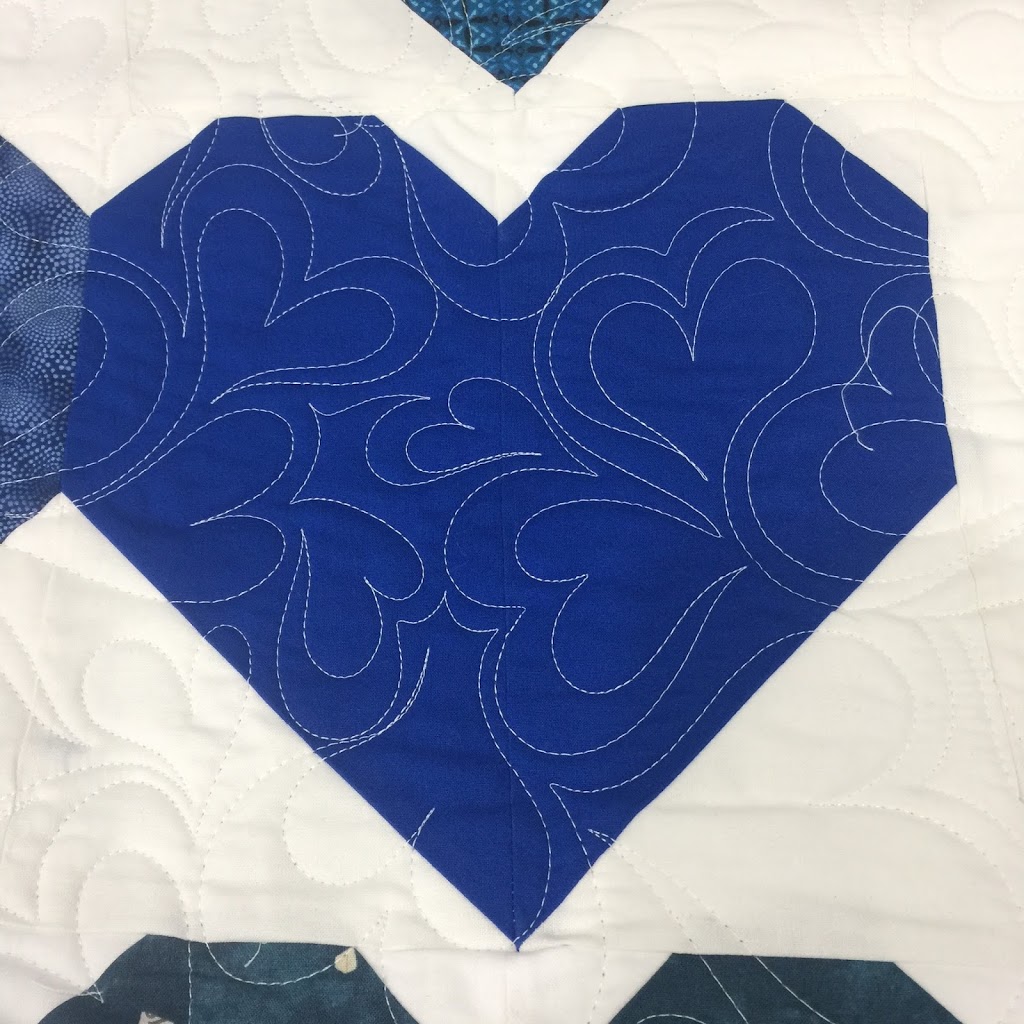
This was such a joy to quilt–check out the close up of the free motion hearts 🙂
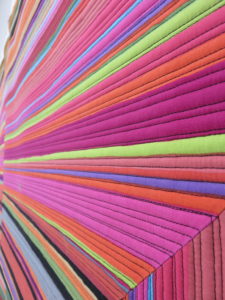
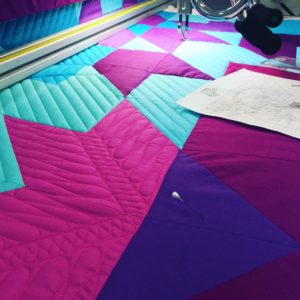
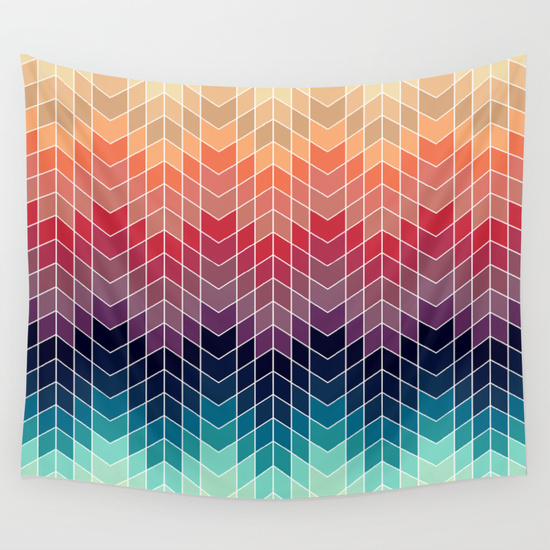
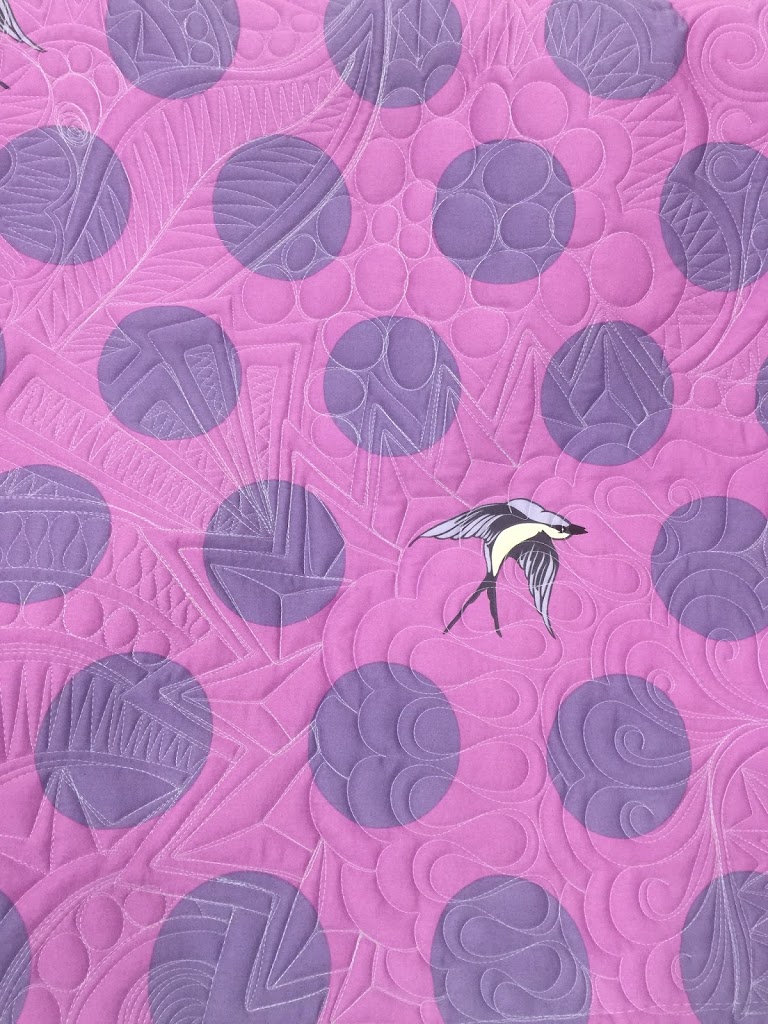
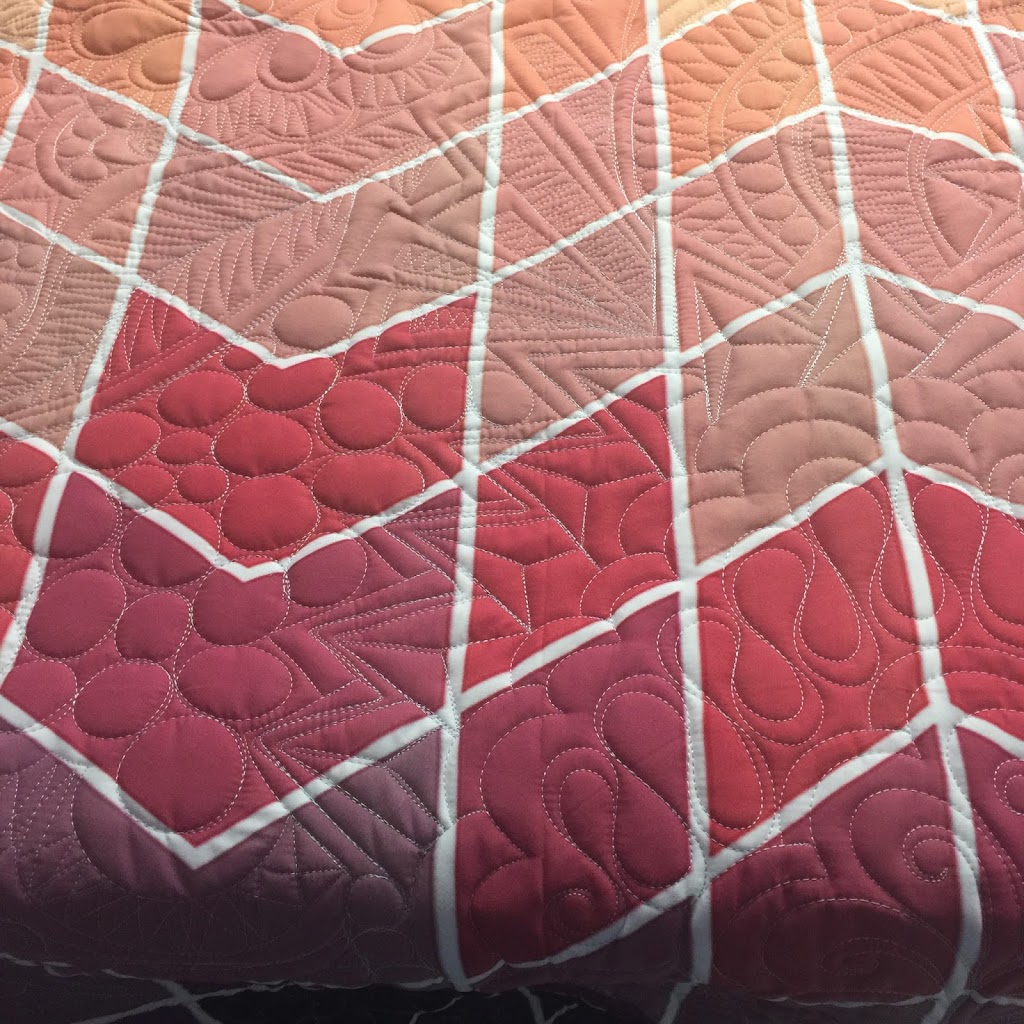
I know I already posted about attending the Karlee Porter workshop that SAMQG hosted a few months ago–but I really need to post about this as well! Karlee has some really awesome panels that she designed, and if you haven’t felt them in person, they are buttery soft. This one is called “Explosion” (picture is from Karlee Porter’s website), and if you want one, click HERE to order your own! And FYI, this one is ginormous!
“Explosion” printed tapestry designed by Karlee Porter (picture from Karlee’s website)
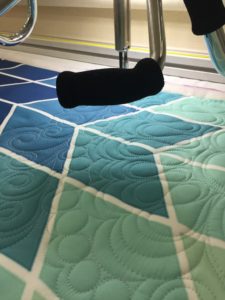
I love sewing and piecing and constructing quilt tops as much as the next person, but seriously…it is so awesome to load a quilt top and not worry about the hours, days, weeks it took to piece it. Especially when you get to skip that part entirely. There’s nothing better that just mindlessly losing yourself in a quilt while quilting. This is my ultimate stress reliever.
The back of the quilt (Tula Pink wide back)
I haven’t hung this one yet, as I haven’t bound the edges, but I will update this blog post once it’s finally finished.
So on my birthday this year, only five days after bringing our little girl home from the hospital from being born, I have the tv turned on to some inconsequential show to help me forget how tired I am. A news story comes on about a police officer in San Antonio being shot and killed while writing someone a ticket. It is really disturbing that we keep having incidents like this happen, and even more so when you just had your first child. It’s so discouraging thinking that this will be the world she grows up in–where good people who lay their life on the line on a daily basis are killed without rhyme or reason.
The front
I am happy though, that I am part of a guild that has such a heart for charity and outreach. I won’t name the individual who organized everything and made this happen, but I am so glad she did. This is one of the quilts that was put together by members of the San Antonio Modern Quilt guild for the officer’s surviving family members. I really felt priveleged to have a hand in this (even if all I did was the quilting–check out the appliqued back!). I hope that the family is brought some small measure of comfort, or even feels a little appreciation for what their family member worked for. And hopefully the good that people do will overpower the wicked people in this world.
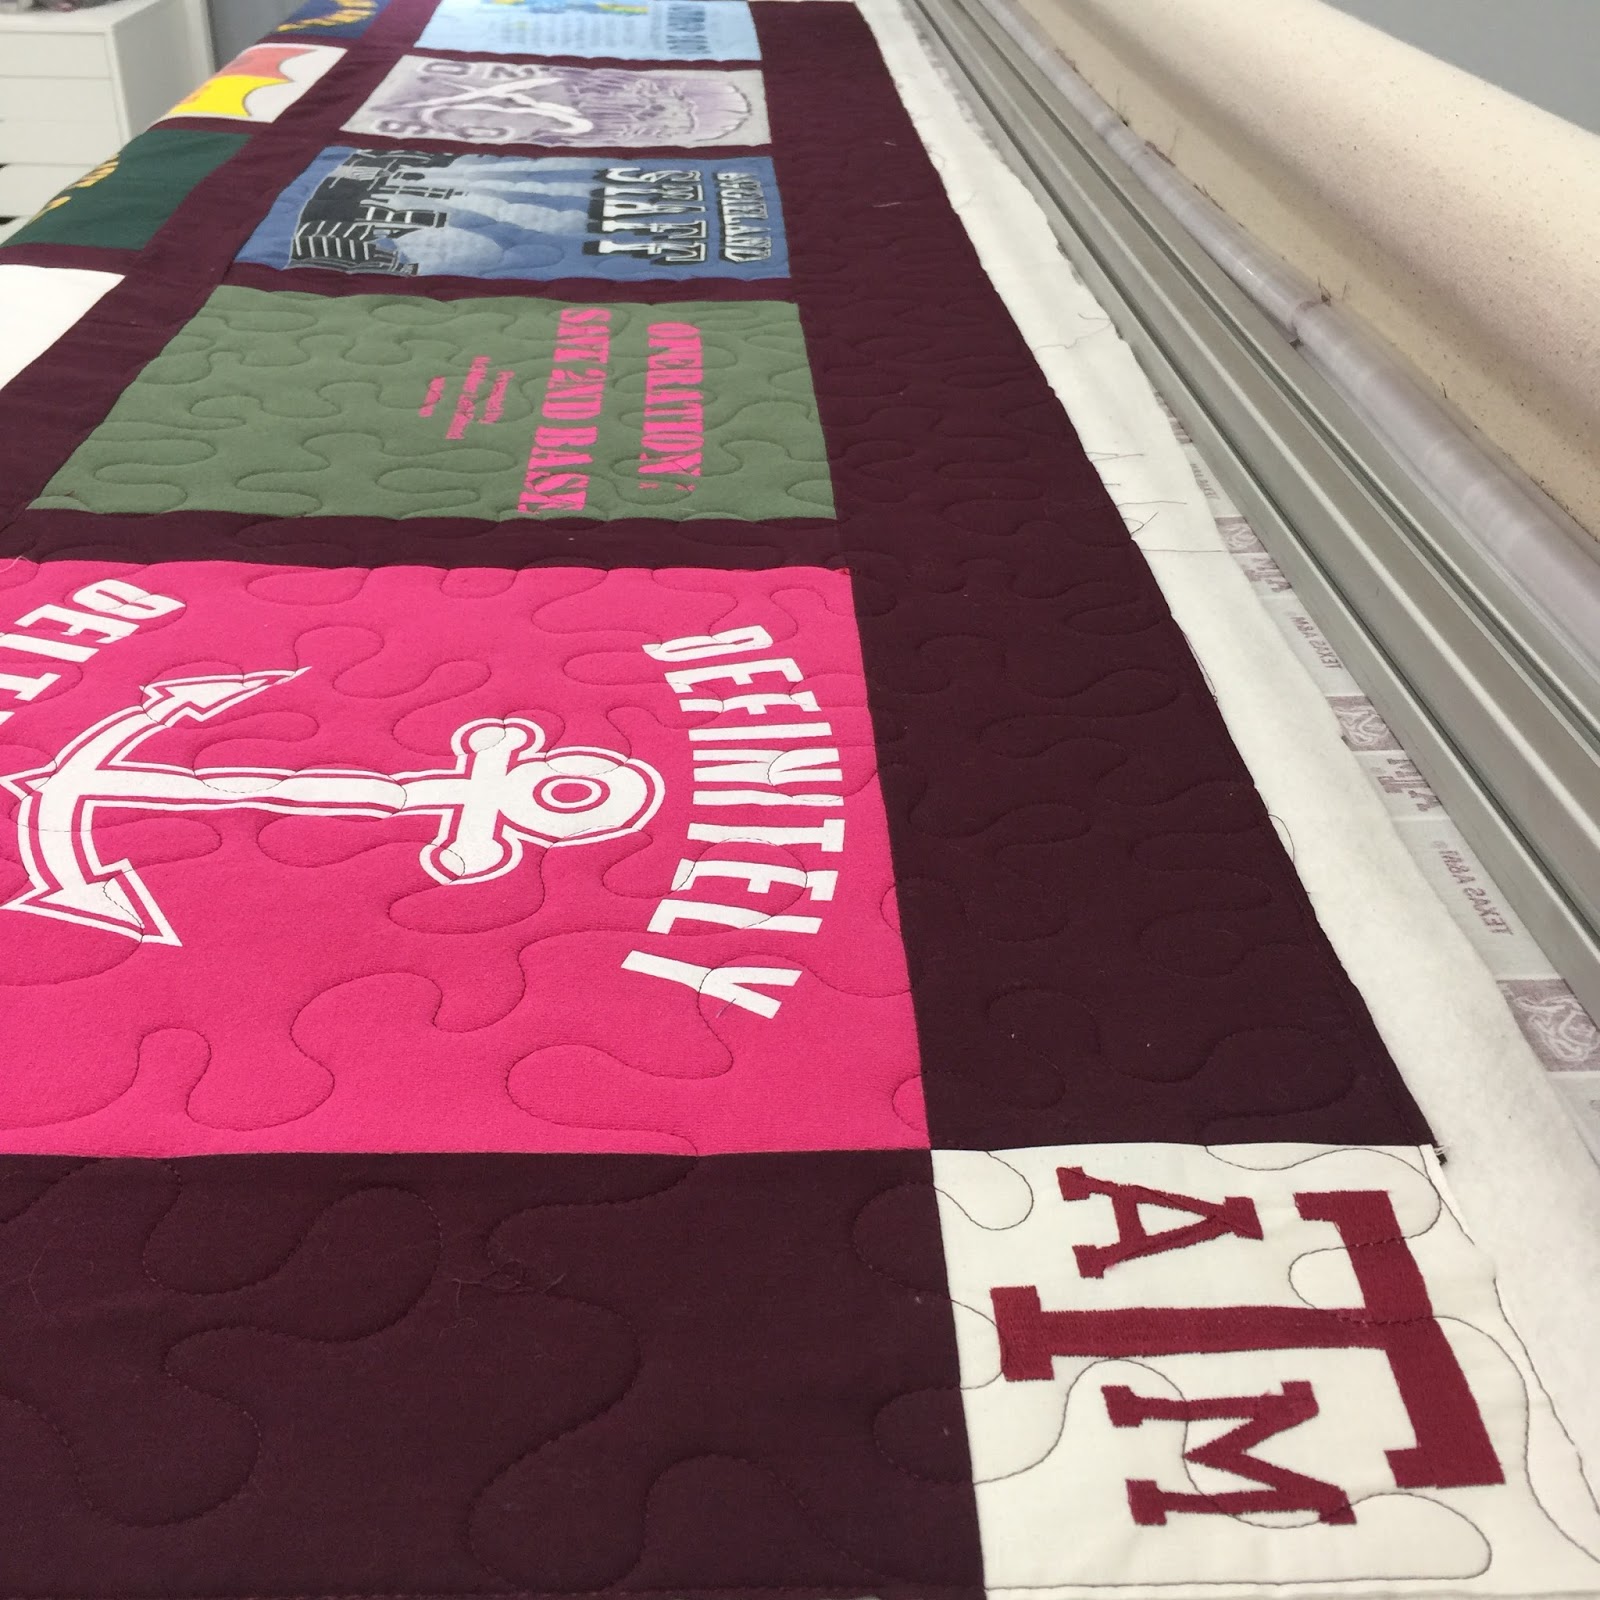
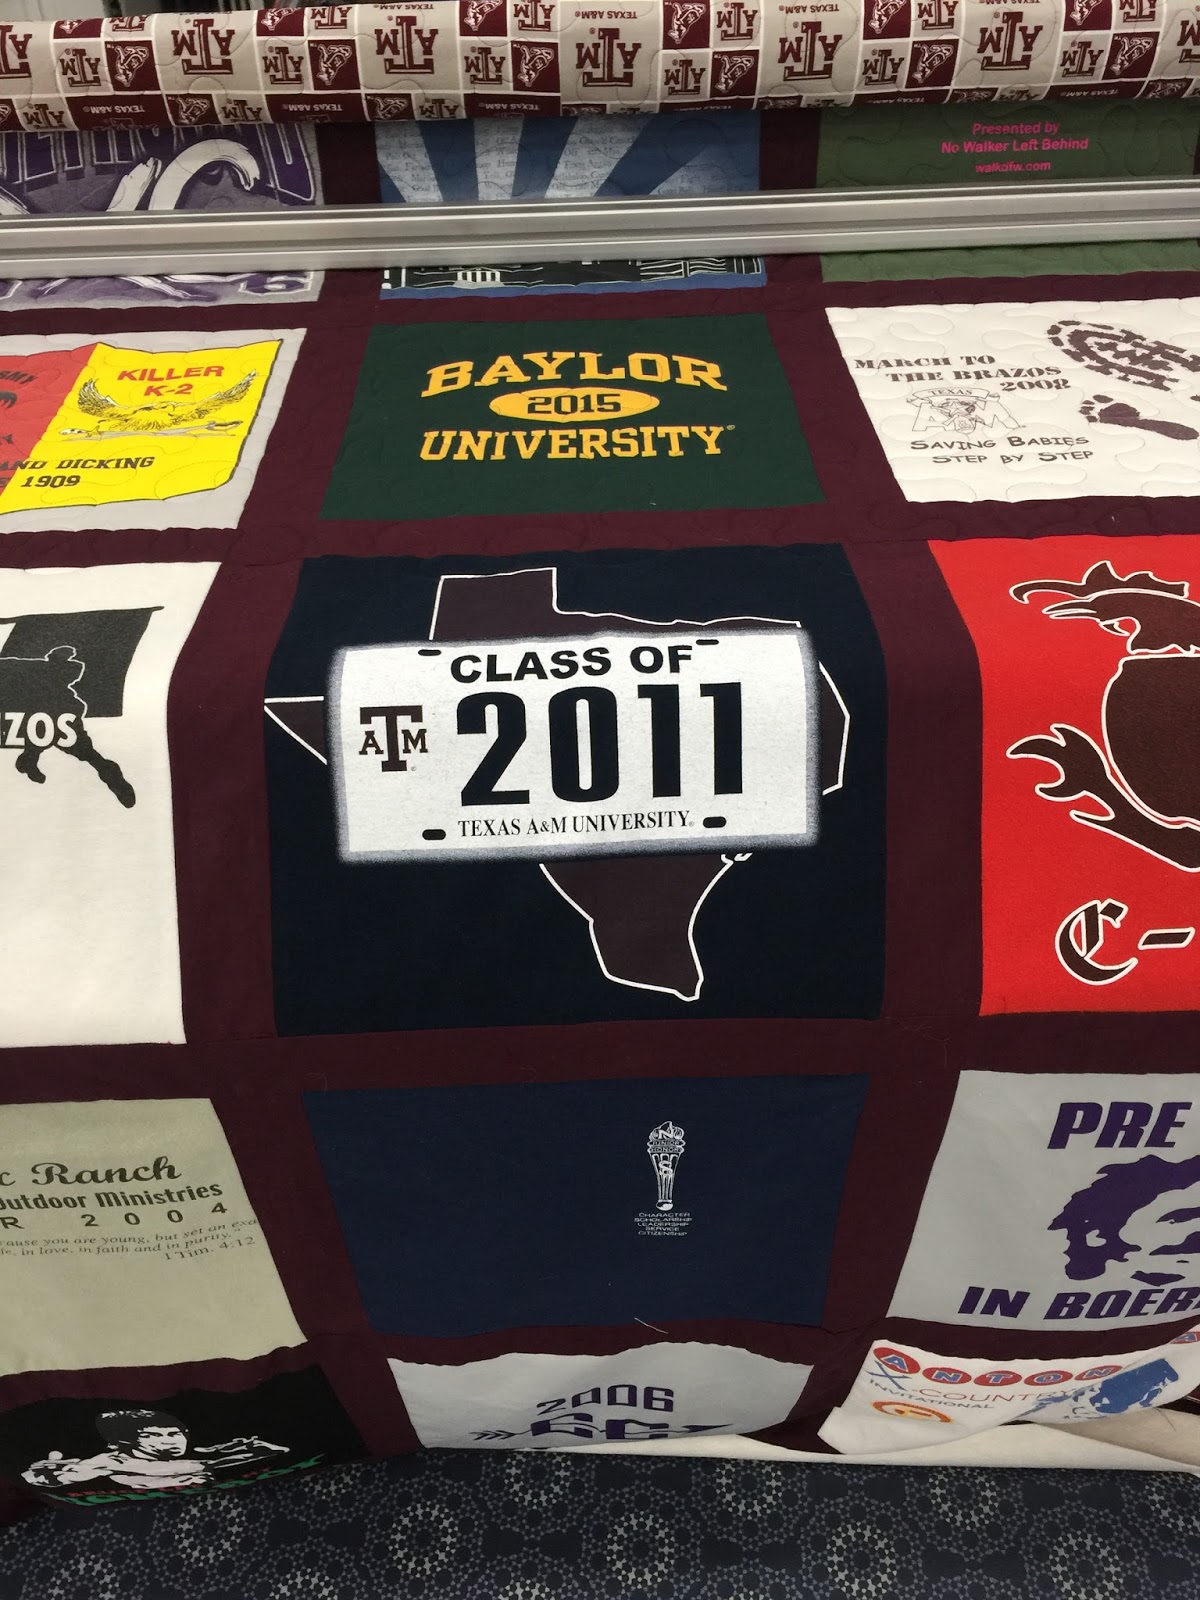
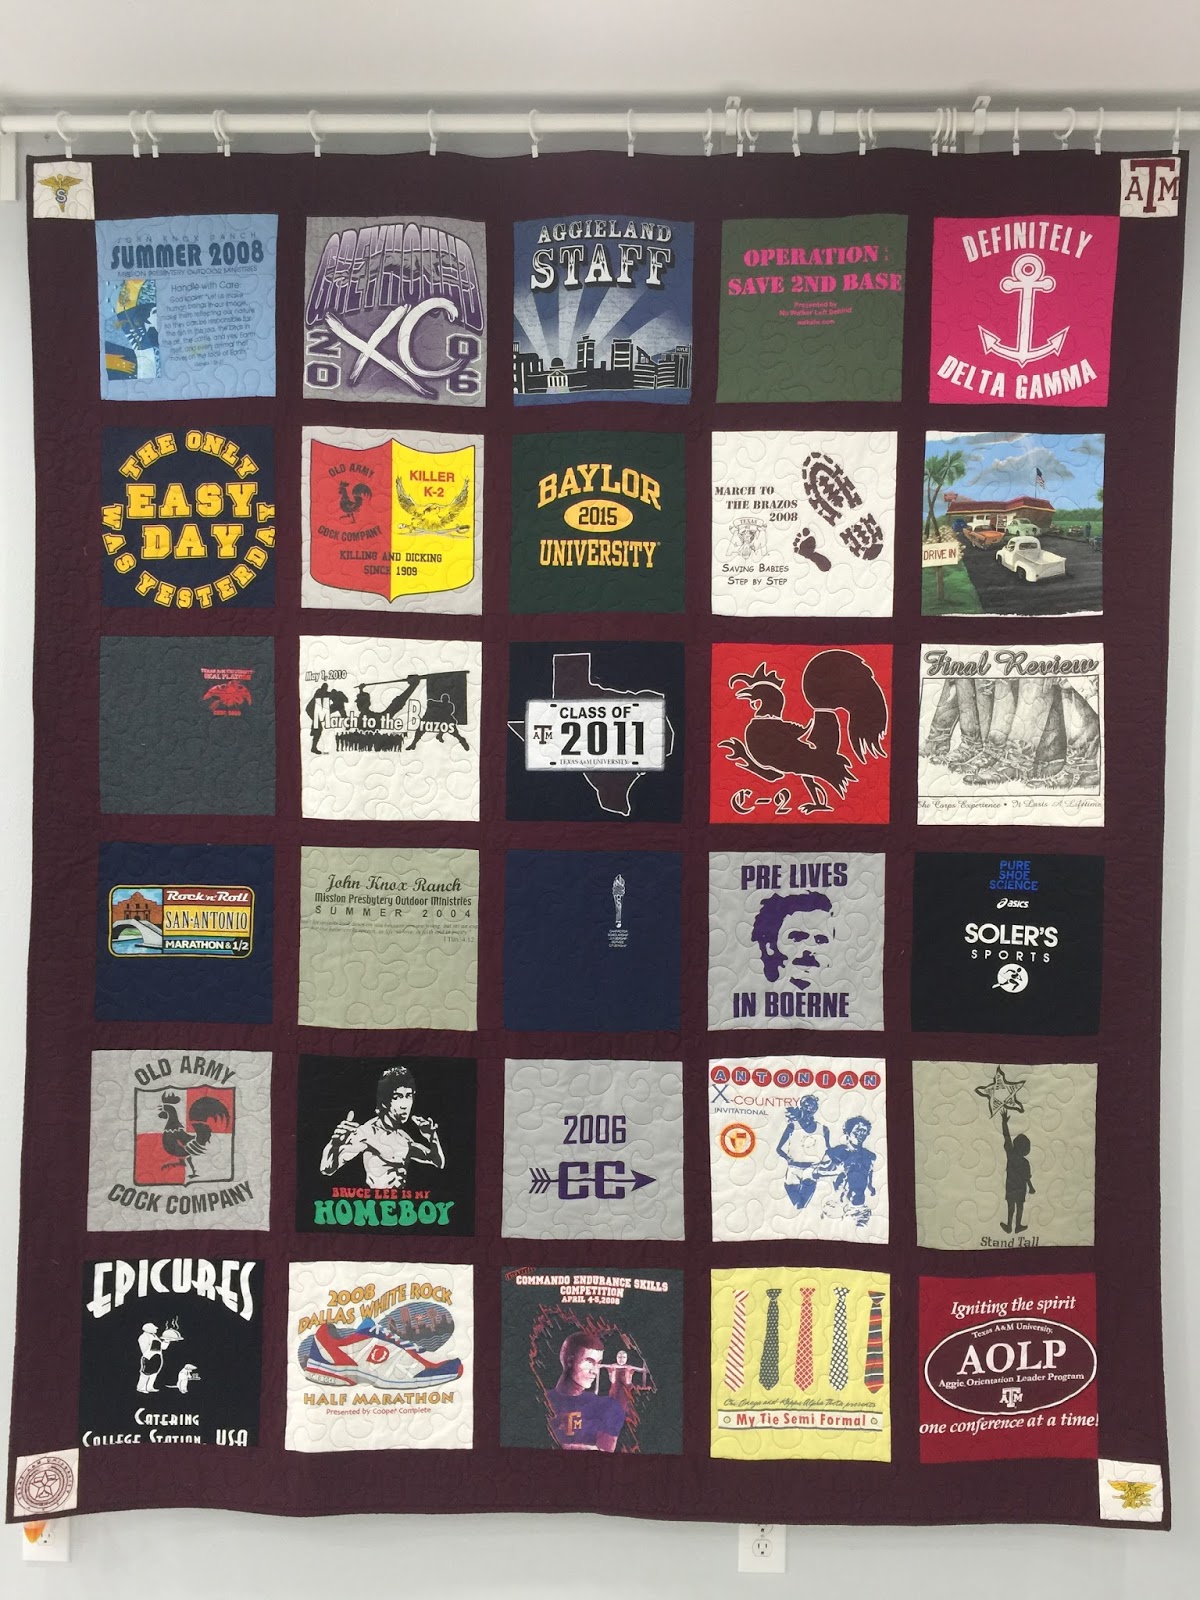
I know that t-shirt quilts aren’t considered to be the most glamorous form of creating in the quilt world, but they have always held a special place in my heart. The first quilt I ever made was a t-shirt quilt. And I definitely won’t post pictures of that quilt here (I had no idea what a 1/4″ seam allowance was or that knit fabric stretched when you sewed it…), I still have the quilt and use it often. Honestly, you could more appropriately call it a blanket. But I digress…
I want to talk about this fabulous t-shirt quilt I was asked to finish for a customer. Her son attended the same high school that I went to, ran cross country and track (as I did), and attended the same University! This person was 5 or 6 years behind me in all these things…nevertheless, making this quilt was almost like making it for myself. His mother even embroidered symbols from the university to put as cornerstones on the border of the quilt. It turned out really cool!
I love seeing t-shirts being re-purposed, and it is really cool to see how many were saved and the duration they were saved for!
Here is the finished quilt–It was so much fun getting to work on this and think about my college days (and I seriously can’t believe that was 10 years ago!!!)
So I guess this is part 2 of my Quilt Market preparations posts…The quilting edition!
I had the opportunity to quilt a couple of quilts for my friend Leslie’s quilt market booth. I’m going to be brief here…
The first one was an awesome quilt designed by Liberty Worth. It’s pretty modern and gave me tons of inspiration with the quilting. Below are pictures:
Putting the binding on…
Quilt designed by Liberty Worth with Urban Artifacts by Leslie Tucker Jenison
Quilt designed by Liberty Worth with Urban Artifacts fabrics by Leslie Tucker Jenison
The next quilt was designed by Allison Chambers of the San Antonio Modern Quilt Guild and was inspired by mid-century modern style. I love this quilt! I was aiming to keep the quilting modern but understated and used a blending thread instead of a highly contrasting one. I did some geometric ruler work with stitch in the ditch on this one.
Quilt designed by Allison Chambers using Urban Artifacts Fabric by Leslie Tucker Jenison
Quilt designed by Allison Chambers using Urban Artifacts Fabric by Leslie Tucker Jenison
I got to quilt 2 other amazing quilts that were designed by Leslie, but those are patterns that are not yet released, so no pictures of those yet! I am so blown away by the talent and creativity. I really wish I could have attended Quilt Market this year, but like I said…life happens. There’s always next year!