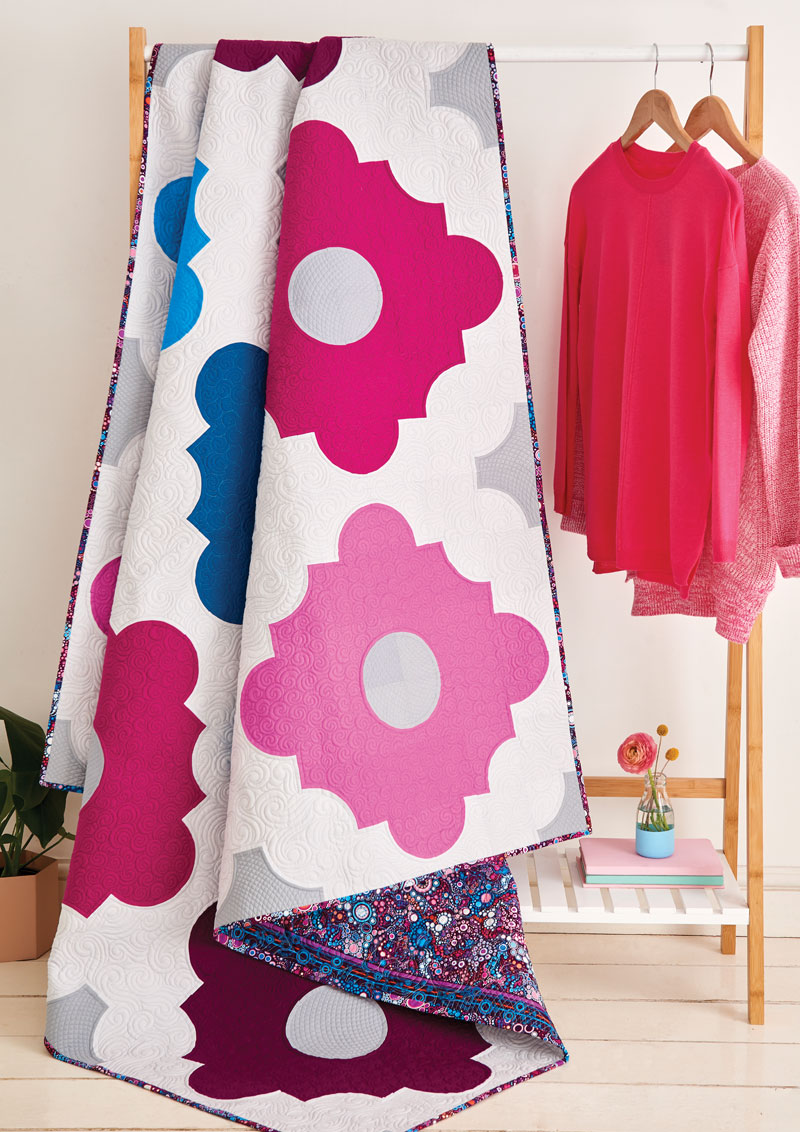
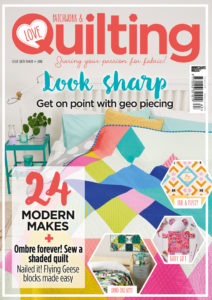
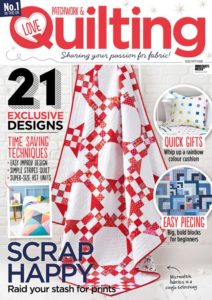
Do you have a favorite crafting or quilting magazine? There are so many great magazines filled with exciting new patterns, and I have quite a few favorites of my own! I’m so excited to finally be able to share with you the Moroccan Tiles Quilt in Love Patchwork and Quilting Issue 63.
LPQ Issue 63 Cover Photo Provided by LP&Q
Issue 63 isn’t yet available in the US, but it is on shelves in the UK now. I’m anxiously awaiting my copy in the mail any day now!
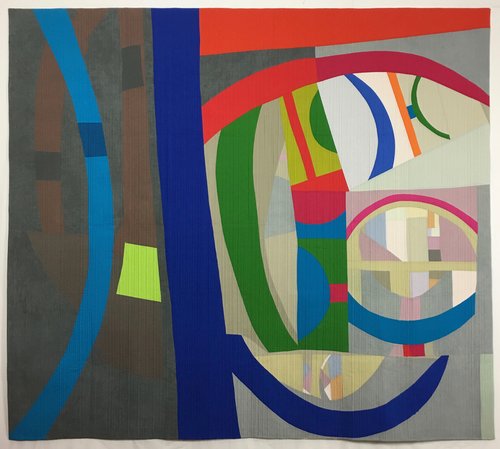
I designed the Moroccan Tiles quilt because I have a secret love of traditional quilt blocks–specifically the different variations that can be made from drunkard’s path blocks.
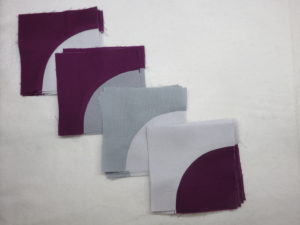
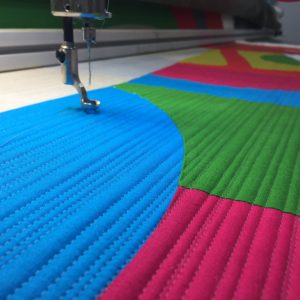
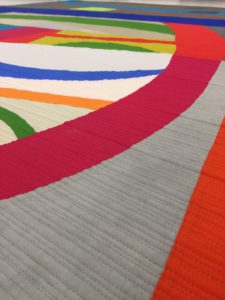
Sewing curves
I used to be scared stiff of sewing curves, but there really is nothing to it once you practice a little bit. The shapes I created by rotating and flipping the drunkard’s path blocks reminded me of gorgeous tile work and design shapes.
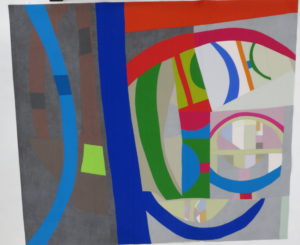
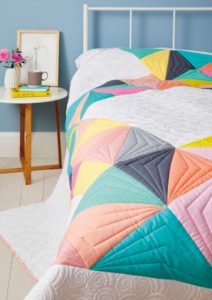
I chose a gem toned palette from some of my favorite Robert Kaufman Kona Cotton Solids and rather than using the standard go-to white background fabric, I love to use Kona Silver! I like to think it makes the background such a shocking contrast, and gives it a softer glow so the other colors can shine on their own.
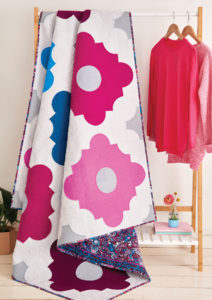
LPQ Issue 63 Moroccan Tiles Quilt Photo provided by LP&Q
For the backing, I was dying to use Robert Kaufman’s Effervescent fabric. It is a beautiful fabric that looks like it has little champagne bubbles overflowing on the entire surface. The color way I chose coordinated exactly with the colors of Kona Cotton I had selected, so it was definitely a match made in heaven!
I hope you’ll grab your very own issue of the magazine and check out all of the awesome projects and all of the great contributors, and maybe try something a little new this week that involves sewing some curves? You might fall head over heels for them, just like I did–so you won’t know if you don’t try! Happy sewing!
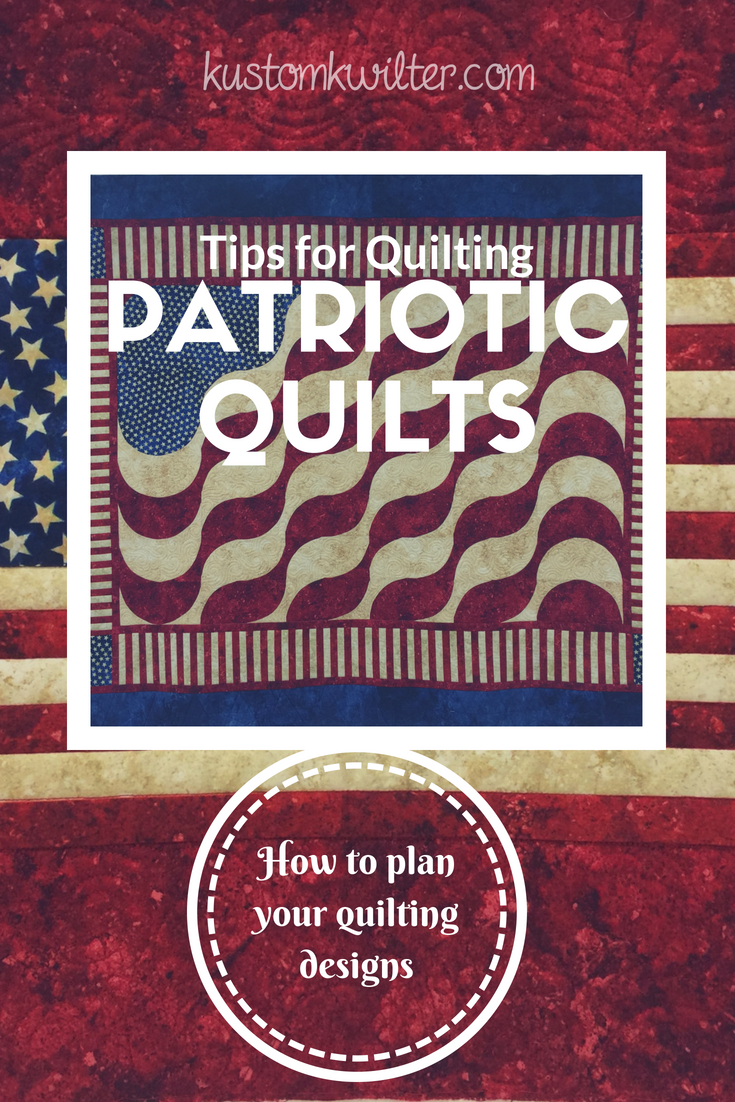
Happy 4th of July! I hope you’re getting to enjoy family and friends and all the great festivities that the 4th brings! In my neck of the woods, it’s hotter than Hades and we haven’t had a decent rain shower since March, so we may not be enjoying tons of fireworks this evening…we’re definitely praying for the little rain shower than is a minor possibility tonight. Now lets talk quilting tips and how to tackle planning your quilting design!
I recently got to quilt an American Wave Quilt (pattern by Lisa Moore of Quilts with a Twist) for my mother-in-law and thought it would be a good opportunity to share some of my quilting tips for adding texture and movement to your quilt tops and planning your overall quilting design. Even though I love bright colors and modern-traditional quilt designs, I have a great appreciation for traditional colors and patriotic quilts. Some of the first quilts I made when I was learning to sew were with traditional, warm colors and American designs. I’m using this quilt to talk about the 8 things I usually think about before I start quilting, but these tips can be applied to any quilt top.
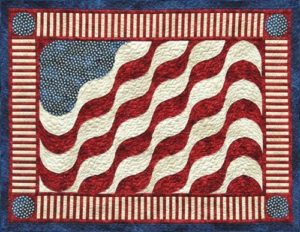
My MIL didn’t follow the pattern exactly as shown below, but this is the original pattern, by Lisa Moore, pictured below. If you’re interested in purchasing the pattern, you can grab a PDF copy at Quilts with a Twist (this is not an affiliate link, I’m just crediting the original designer in case you want to purchase the pattern).
American Wave Quilt Pattern by Lisa Moore – Photo from Quilts with a Twist Pattern Page
Here are my top quilting tips for devising your quilting plan:
Consider the quilting as a design element of your quilt.
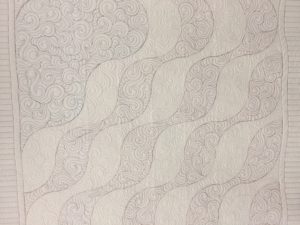
When you get a quilt top completed that has so much work put into it–much as this one does–it’s important to consider the quilting as another design element and not an afterthought. In my opinion, a basic meander or other edge to edge can take away from the overall impact of the quilt.Since our goal was to enhance the movement already present in the piecing, we decided to stitch in the ditch, quilt swirly waves, add some stars to go with the theme, and quilt piano keys on the striped fabric border.
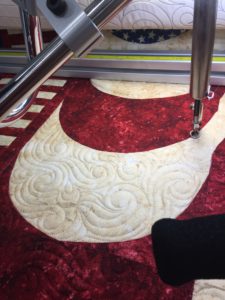
SID and swirly waves
Examine the layout of the quilt and follow the lines in the quilt to enhance the design.This quilt design already shows lots of movement in the piecing. I opted to stitch in the ditch on the waves and within the different fabric colors, I quilted swirly waves. Another great quilting motif would have been to echo the wavy lines within the quilt to complement the already wavy lines.The red and white striped fabric wasn’t exactly stitched in the ditch (SID), since it was one piece of fabric and not pieced stripes, but I followed the lines of the colors and did a faux SID to make it appear that it was pieced.
Consider thread color.
I used three different thread colors on this quilt–red, cream, and blue. I matched the thread colors to the fabrics I was quilting and changed them often. This isn’t always necessary, but it’s important to consider before you stick with just one thread color for the entirety of the quilt. If you want the quilting to really pop, then using just one of those colors–like cream would be a great idea. The cream will blend into the cream colored fabrics, but contrast highly against the darker values of the red and blue.
Blending thread
Ask yourself — Do I want my quilting to blend or POP? If your goal is great subtle quilting, then select your thread colors to blend or melt into the fabric. If your goal is high contrast quilting that will POP against your fabric, select thread colors that contrast with the fabric.
Also, if you’re a beginning quilter, matching your thread colors to your fabric colors will help conceal any minor mistakes you might make. This is a great confidence building technique to get you started on your quilting journey!
What color is your backing?
Some people prefer the quilting to blend into the backing, but in this case, the red and blue threads really pop on the cream colored muslin that was used for the backing. It’s a good idea to think about your backing and what the quilting will look like on the back prior to starting quilting.
Backing
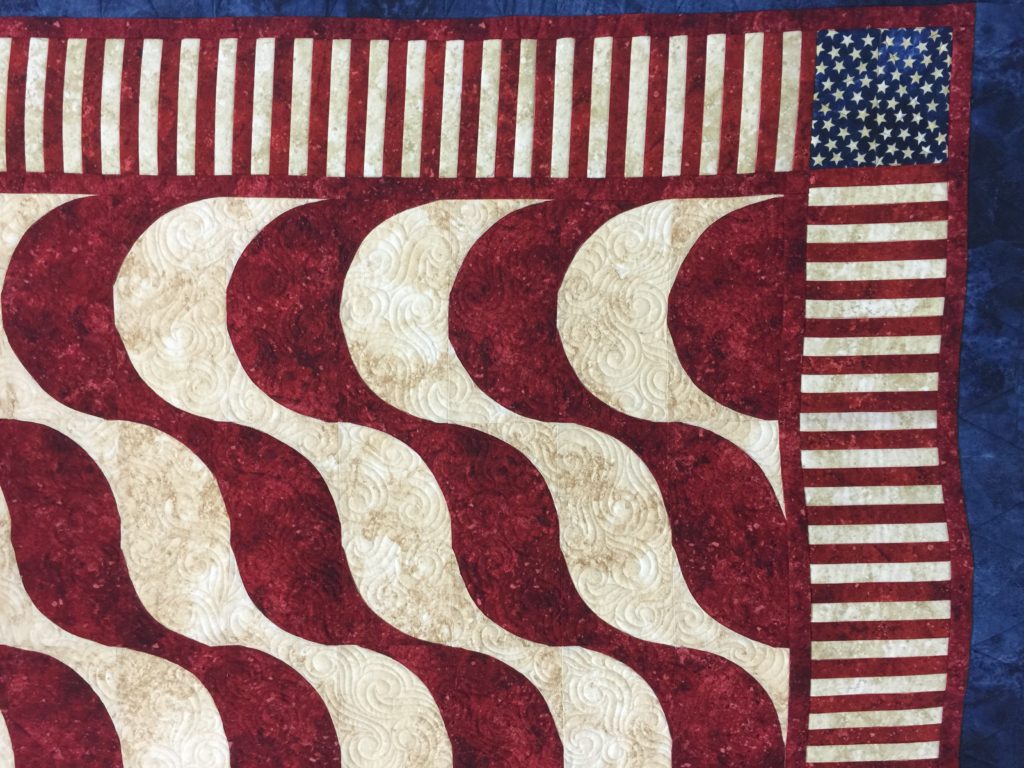
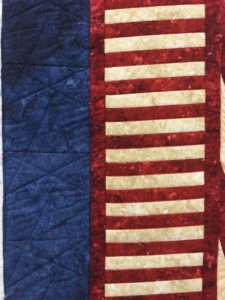
Look at your borders (if there are borders).
So there were two “borders” on this quilt top. The outer border was a dark navy blue, and the inner border was the red and white striped fabric. I quilted stars that connected to each other in navy blue thread on the outer border and the faux SID on the striped fabric. It’s a little difficult to see because of the thread matching, but it’s there :). Select quilting motifs that will complement your border designs.
Border designs
Think about the theme of the quilt.
In this case, the theme is pretty straightforward. It’s obviously a patriotic themed quilt, so think about designs that go with that theme. Stars, stripes, waves, etc. would all be good choices to go with this quilt top. maybe you have a quilt top that has cats on it, and the cats are made from triangles–you could quilt triangle motifs in the borders, or a ball of yarn, or little mice. Stars probably wouldn’t be a good choice to go with a cat quilt, so you’d want to pick something in theme with the quilt top.
Evaluate the purpose of the quilt.
This will help you decide the density of quilting that is appropriate and what type of batting you may want to use. If it’s a quilt that’s going to be a wall hanging, you’d probably want to use a stiffer batting, or maybe double batt with a puffy top like wool. If the quilt is intended to be used often, you might select a poly-cotton blend or 100% cotton-something that would stand up to being washed and laundered frequently.The batting you select might also dictate how far apart the quilting can be. If you buy packaged batting, it will usually tell you how far apart the quilting lines can be (example-up to 8″ apart). Keep in mind the denser the quilting, the stiffer it will feel. A looser quilted quilt will be softer and drape better than a heavily quilted one.
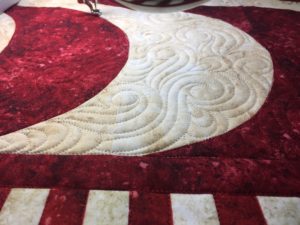
Stitch in the ditch might be a lot of work, but the payoff is worth it.
I’m a big fan of SID. I haven’t ever quilted a quilt with stitch in the ditch and regretted it, but there have been instances where I didn’t do it and wished I had. It gives the overall quilt a more finished look (in my opinion), and a very polished look.
SID detail
The overall idea is to think of your quilting plan and how it will affect the overall impact of your finished quilt. These 8 tips are small things you can consider that will really impact your finished quilt. I hope these tips are helpful in planning your next quilting project! Have a safe and happy 4th, and happy quilting 🙂
Today is the release day for the Wonky Logs Quilt Pattern, and I can’t wait to share it with you!
I don’t know about you, but when I started sewing a few years ago, I had absolutely zero intention of ever making clothing. The thought of doing so actually made me break out into a cold sweat. (I promise I’m getting to the quilt–hang in there for just a hot minute!) I can still remember sitting on my mom and dad’s bed, worrying over a dress pattern that my mom desperately wanted to make for me. We (I say we, but I was mostly there for moral support 😉 had managed to cut the pattern pieces out of the flimsy tissue paper, and pinned it to the fabric that was destined to be the dress. I honestly can’t recall what happened after that, but I don’t think were able to finish it. I remember the feeling of frustration and not understanding the horribly written pattern that was intended for beginners. It was even more frustrating because my Mamaw was an excellent seamstress, and my mom didn’t inherit those skills, or really want to. Her calling is gardening and home making, and she does it all perfectly. My point in telling you this story is that it left me with a bad taste in my mouth for sewing. I didn’t attempt any kind of sewing related feat, with the exception of cross stitch, for the next 20 years.
Some angled straight line quilting on my Wonky Logs Quilt
Fast forward 20 years, and I’ve gotten the basic knowledge down of quilting. I joined a modern quilt guild and went on a retreat where many of the members were making their first (or second or third) garments. I decided they could have it and waited another couple of years before finally sewing my very first School House Tunic by Sew Liberated. It wasn’t pretty, but I wore it with so much pride, you’d have thought it was Chanel (the pattern is great–it wasn’t pretty because my fabric choices were A-W-F-U-L). That feeling of accomplishment and pride–isn’t that what we all get when we complete a new challenging project? I want to encourage you to broaden your horizons and challenge yourself to take on the sewing tasks you think you’re not good enough for. That’s how I felt with garments. And now I am obsessed with sewing my own clothing and clothing for my daughter and husband. I’d like to help you get there.
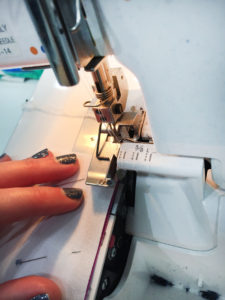
Okay, that was a long intro, but I needed to tell you WHY I wrote the Wonky Logs Quilt pattern. It’s fat quarter friendly! It’s a quilt pattern you can put together with your serger.
Bust out your serger!
WHAT??? Yup. (Don’t run away just yet–you can piece it with your sewing machine too) If you don’t have a serger, no worries. You can still use the pattern with a traditional sewing machine and a 1/4″ seam allowance just like normal. If you DO have a serger, and it’s sitting in the corner of your closet with old raincoats and Halloween decorations, then it’s time to pull that puppy out and dust it off. Give it a little cleaning, find the manual and give it some oil, if necessary. Think of this quilt pattern as your gateway pattern to garments. You can still have fun picking out your fabrics and making a really gorgeous quilt, but you can do it while getting to know your serger a little better. Starting to work with “wovens” with your serger will take a lot of the intimidation out of it because your fabrics won’t be stretchy like knits are. I’ll be posting more on some fun garment construction and sharing some tips with you along the way, but for now–grab your copy of the Wonky Logs quilt pattern and gather your fabric and have fun!!!
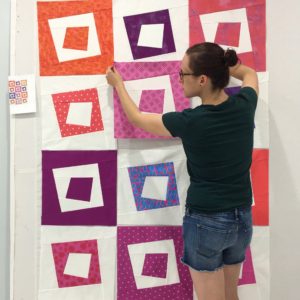
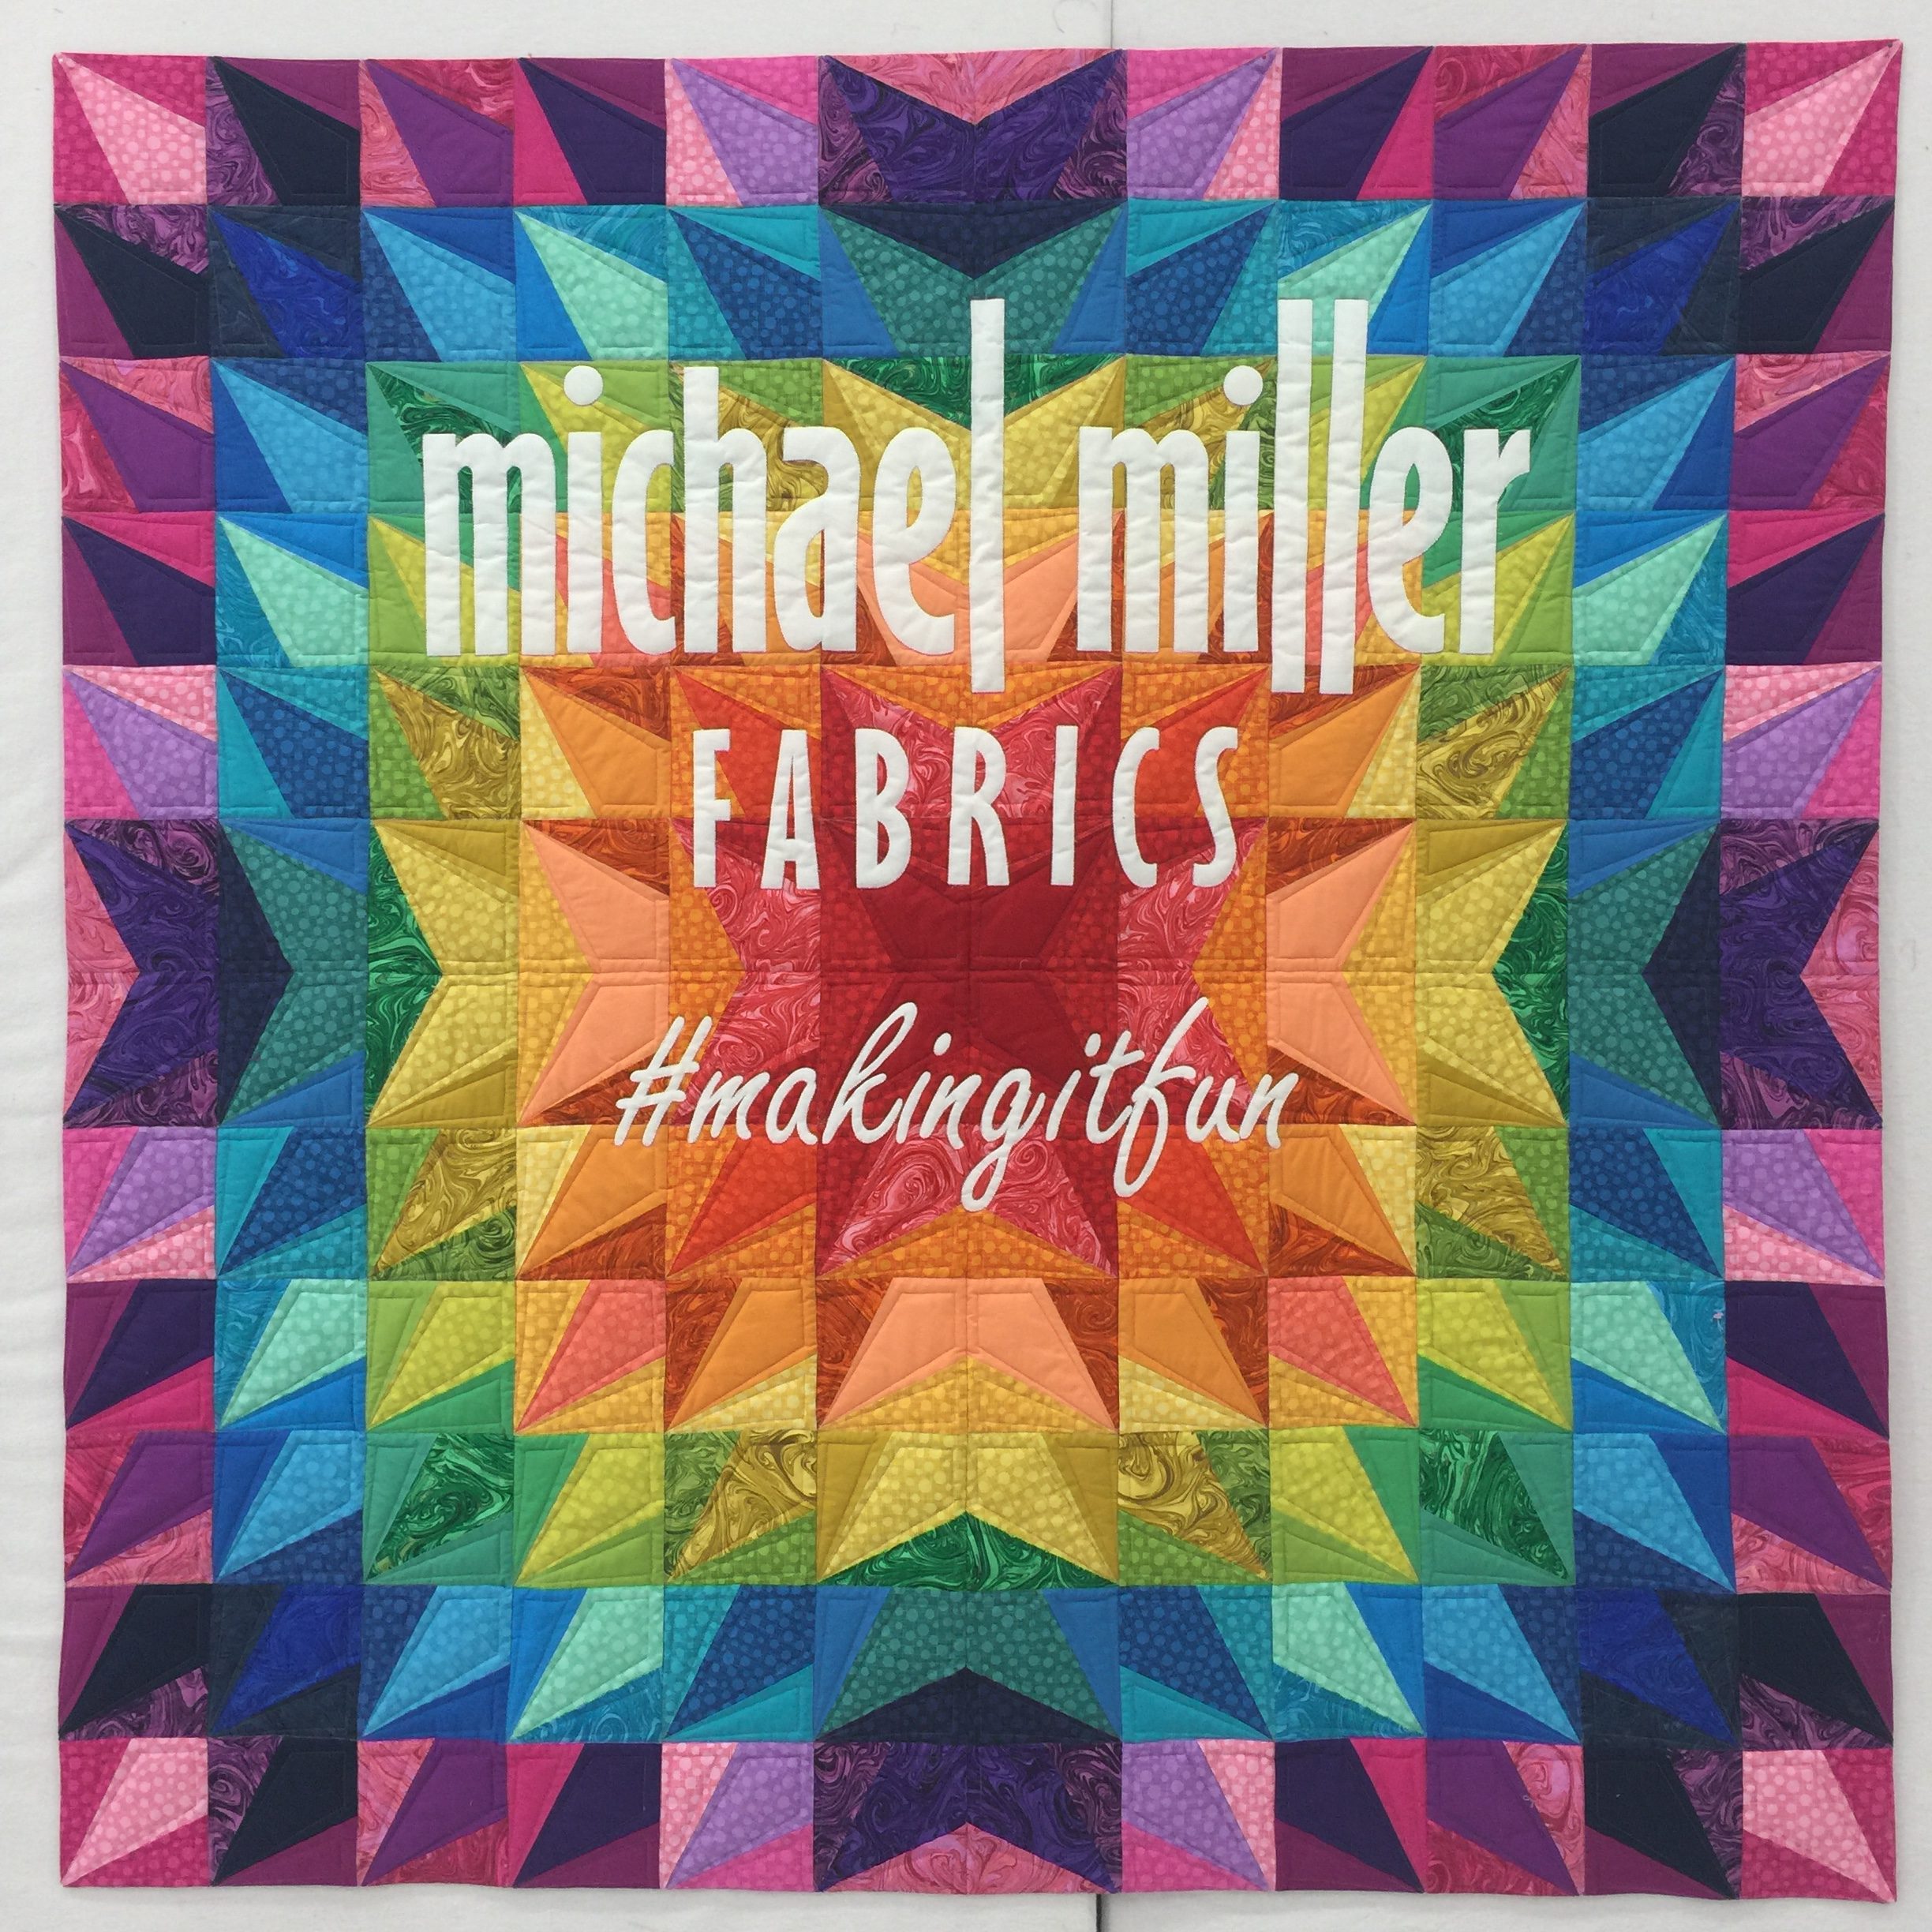
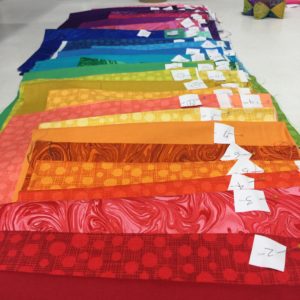
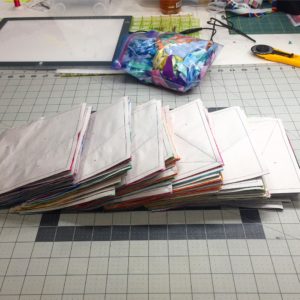
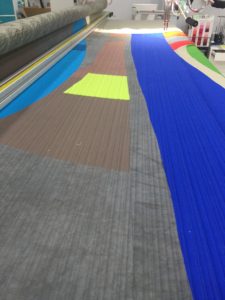
Guys!!! I’m so excited to finally be able to share my project for the Michael Miller Spring Quilt Market booth. They sent me fat quarters of their new has dot blenders and their marbled fabrics, along with some coordinating Cotton Couture solids and told me to make something fun and rainbow-y! Is that a dream assignment, or what?? I narrowed it down to 48 unique fabrics that I wanted to use in the quilt, and lined them up:
Holy cow!!! 48 different fabrics!
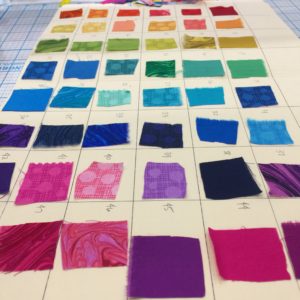
I numbered them and then numbered the design I had mocked up in EQ8, but it was starting to get a little crazy. I ended up having to make a smaller swatch card because some of the fabrics were so similar in color and shade that I was starting to go cross-eyed flipping through that stack.
Swatch Card
I very rarely make swatch cards, but I found it to be very necessary with this quilt. I designed a foundation paper piecing block in EQ8 and then rotated it slightly to complete the design. The piecing went really quickly and I just needed to double check that I had the correct fabric for each block before I started sewing. I’ll admit, there was a good amount of seam ripping to be had with this one!
Foundation Paper Pieced Blocks stacked and ready to go!
I used my new Daylight Company light box to help with the foundation paper piecing, and I really love how thin and lightweight the unit is. I had a very bulky, cumbersome light box in the past and recently upgraded to this one. It’s been such a nice treat to have one that doesn’t take up all of my cutting mat. I also used Adobe Illustrator to help design the applique text in the right size and fonts, then tiled the pages to make a huge pattern. I hand cut each letter and symbol out, then used the paper as a template to trace onto the white fabric for the applique. I used Misty Fuse on the backside of the white Cotton Couture and then cut out each letter. It was pretty time and labor intensive, but I love how it turned out.
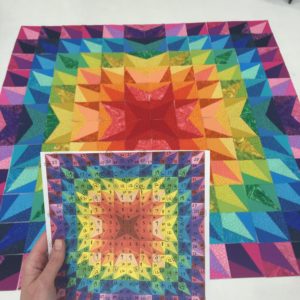
My EQ layout compared to the quilt top, prior to adding applique
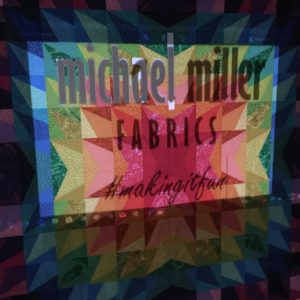
I did come up with a slight problem in getting the applique on straight, centered, and spaced equally. Usually, I would just use a big window and tape the quilt in place or trace where the letters needed to be, but I decided to buy a cheap portable projector and project the original applique design onto the quilt while it hung, and then I positioned the letters in place with a small amount of glue from an Elmer’s glue stick. Once they were in position, I lightly fused them into place and then took the quilt top to my Janome MC9400 to complete the applique blanket stitching around each individual letter (that took about a day and a half!).
Using the portable projector to project my applique design onto the quilt
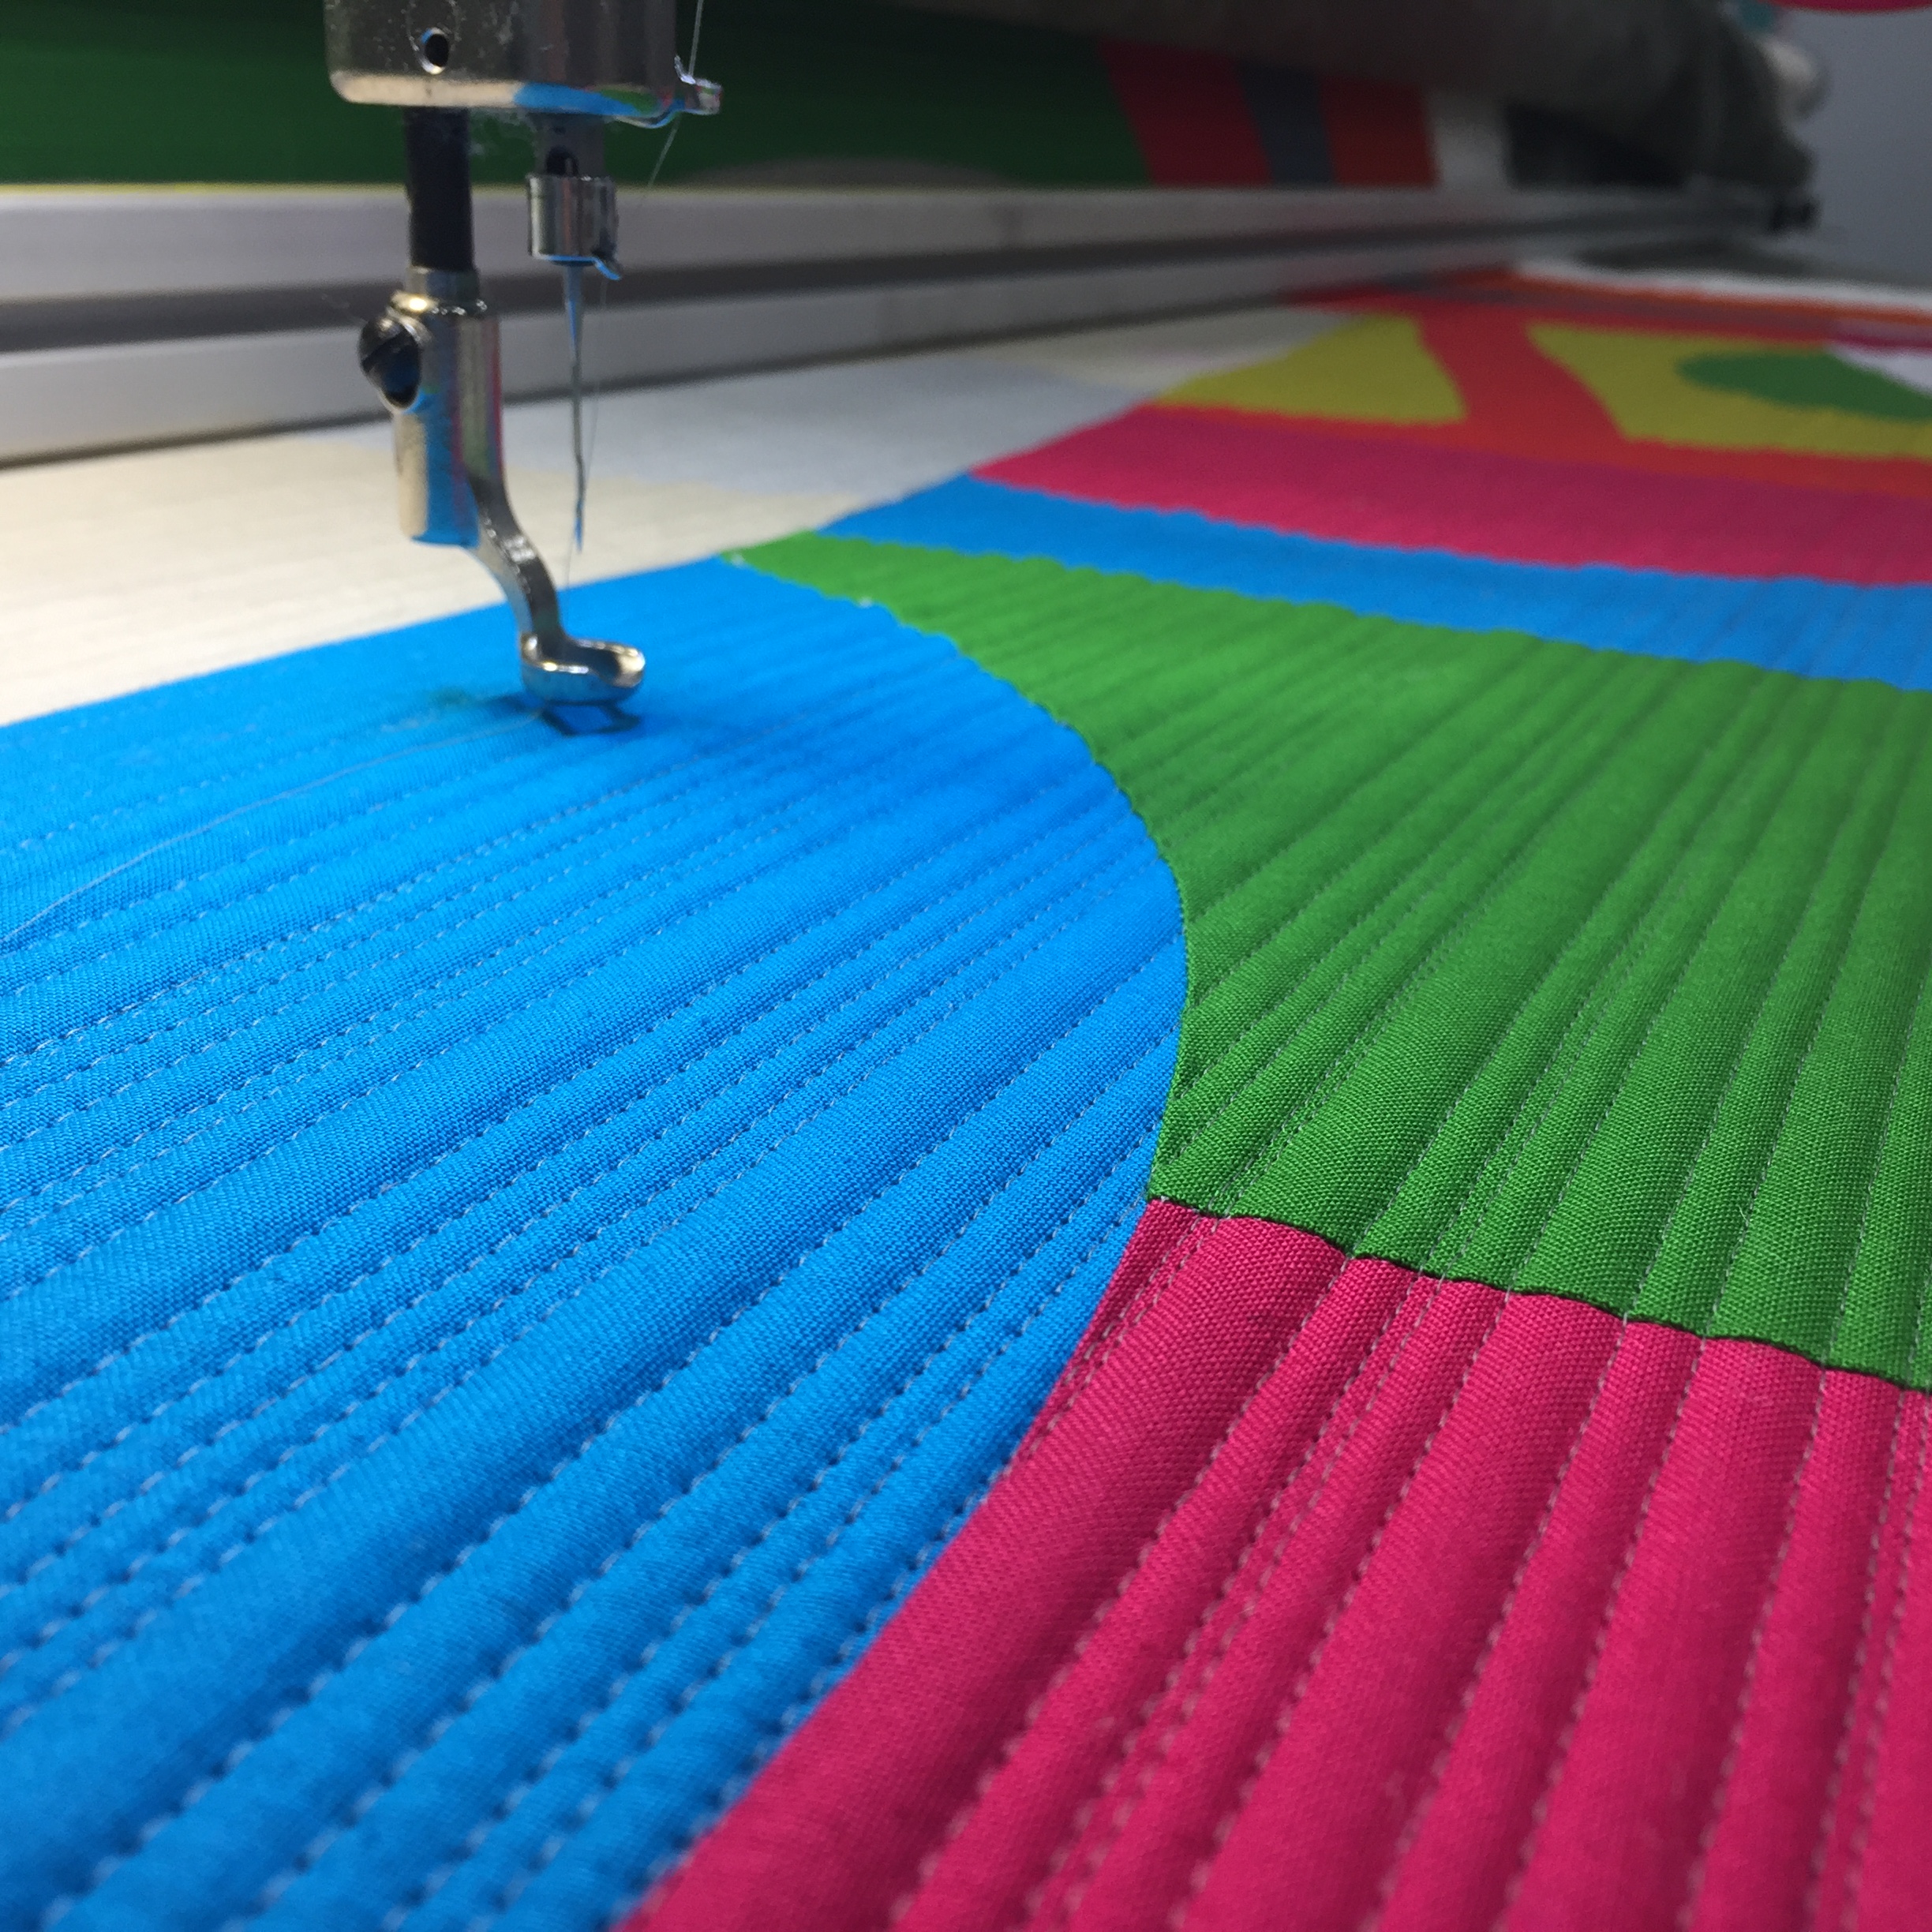
Once I finished the applique, it was time to throw it on the longarm for quilting. I chose just a single layer of Quilter’s Dream Wool to maximize the quilting texture and also keep it fairly lightweight. Then I quilted some straight diagonal lines with rulers to finish it off. I opted to not bind the quilt traditionally, but I faced it to not take away from the overall punch of the quilt, and keep the focus on the applique. I really loved making this quilt and loved the new fabrics being released by Michael Miller Fabrics for Spring Quilt Market 2018. I can’t wait to get my hands on more of that fabric!
Well, months have passed since QuiltCon happened in California, and I’m just now getting around to writing a blog post about it. I wasn’t able to attend, but several of the quilts I quilted did! There’s a reason I didn’t write this post in a timely manner. I have this thing where I think that quilting someone else’s quilt doesn’t necessarily give me the right to share the quilting. I guess I don’t want people to think I’m trying to take credit for someone else’s work. I also don’t really know or understand the rules about when someone’s quilt wins something that I’ve quilted…does that mean I also share that victory? I’m sharing this one because I am super excited about how the quilting turned out, and it won a Judge’s Choice Award at QuiltCon. There are so many amazing quilts and creators in the winner’s circle, so be sure you check them all out here! A huge congratulations to Leslie and all the other amazing artists who were recognized for their work.
Nests and Vessels by Leslie Tucker Jenison, Quilted by Joanna Marsh (photo from the QuiltCon Website)
Leslie Tucker Jenison created and constructed this quilt titled “Nests and Vessels”, and it was awarded a Judge’s Choice Award by Beverly Fine. Leslie has studied with Nancy Crow and her style is truly unique and inspiring. L is a contemporary quilt artist and designer for RJR fabrics. Leslie’s use of color and shape never cease to amaze me, and I consider myself quite lucky that I get to quilt for her. Leslie had several quilts that were juried into the show, and they were all equally inspiring and thought provoking.
I’ll share a few progress pictures from the quilting. Leslie requested some straight line quilting on this one, and I varied the proximity of the lines to be distanced 1/16″ apart to 1/4″ apart. This picture probably demonstrates that the best:
Quilting spacing
And here are a few more:
Nests and VesselsLadder viewlongarm view
This quilt was quilted with MicroQuilter thread by Superior Threads and the batting was Quilter’s Dream Orient and Quilter’s Dream Wool. I really love the subtle finish the Microquilter thread gives a project. You can definitely see the quilting, but it doesn’t overpower the project and leaves more of a hint of design rather than barging into a room and demanding attention.
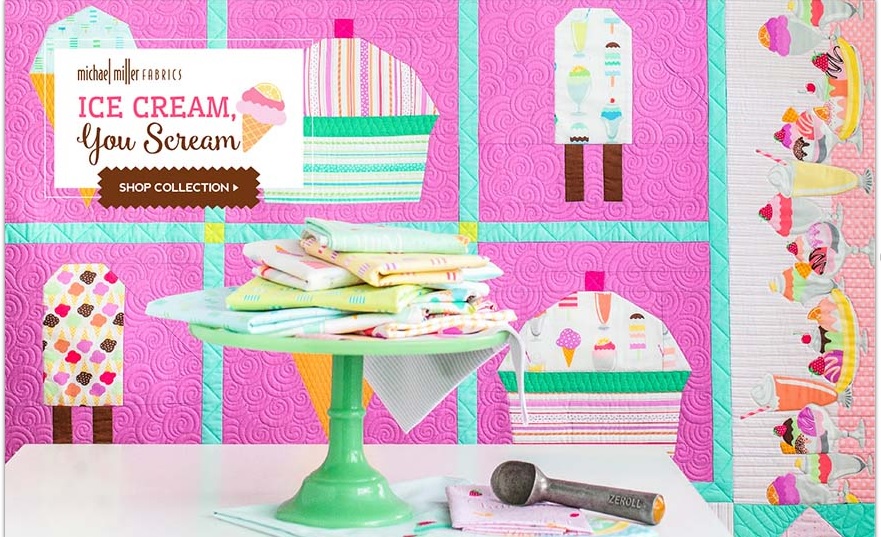
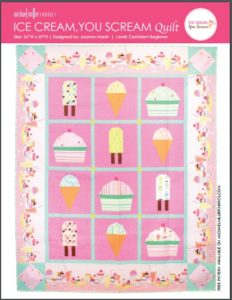
Who wants a free Ice Cream, You Scream Quilt Pattern? Well today is your lucky day!!!
You have to check out this adorable fabric line Michael Miller Fabrics just released. The line is called Ice Cream, You Scream and the colors are everything! Also, there’s this border print that is just dying to be put in a quilt (or made into a little girl’s skirt!!), and nearly makes me swoon! I got a chance to get my hands on this fabric to design a quilt for the release, and I’m not gonna lie…I spent a few hours just playing with the fabric and coordinating Cotton Couture. It features sweet ice cream cones, sundaes, and the best stripes. It reminded me of the 4th of July and ice cream socials and everything pure in the world. The best part is, Michael Miller Fabrics is offering this pattern as a freebie–you can get your own PDF pattern download from their website.
Ice Cream, You Scream Quilt – Picture from Michael Miller Fabrics website
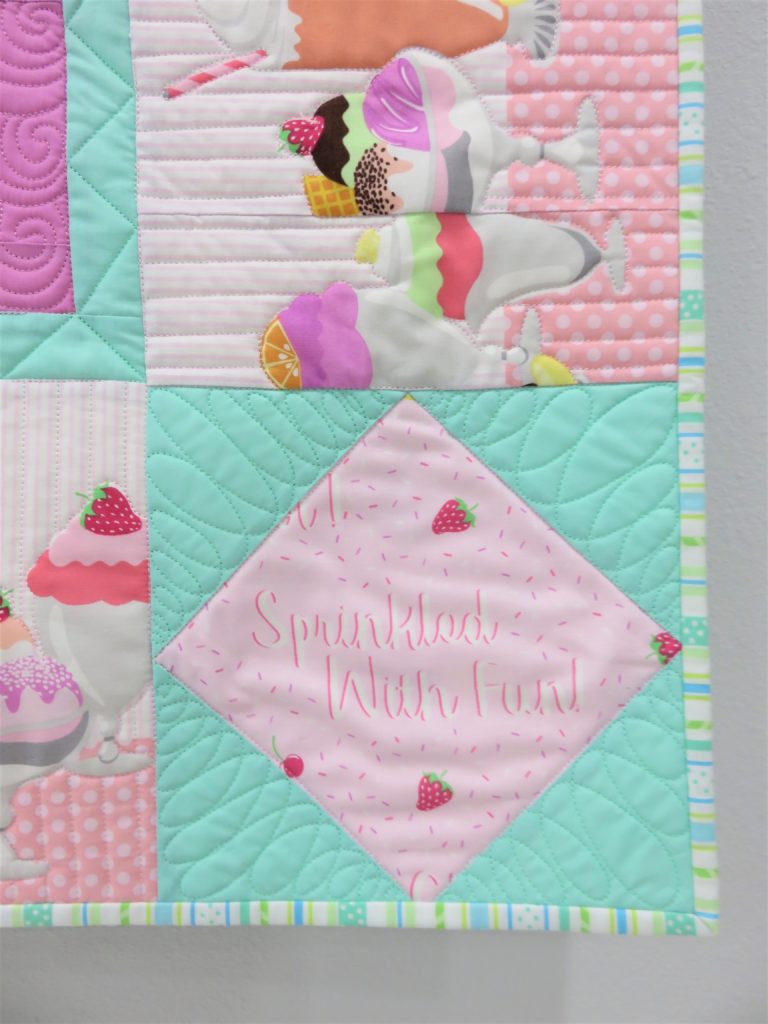
The pattern is for “confident beginners”, which just means you need a general knowledge of foundation paper piecing and fussy cutting. I fussy cut the border pieces so the ice cream sundaes were centered along the center of the borders, and the cornerstones in the border were fussy cut to showcase the cute little ice cream phrases on the fabric.
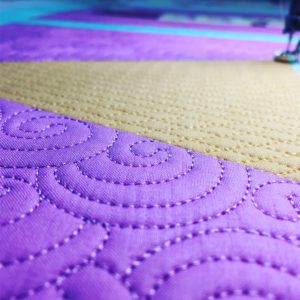
I had a blast designing and piecing the quilt. I had even more fun quilting it! I used Glide thread (from Hab+Dash) and Quilter’s Dream batting in the quilt. I used a few different colors of thread and matched them to the different fabrics. Most of the quilting was handguided free motion quilting, with the assistance of straight rulers for the grids.
Ice Cream Cone QuiltingCornerstone block quilting
I’d love to see what you do with the pattern–the foundation paper piecing blocks are pretty quick to sew up. Just remember to shorten your stitch length (I like to use 1.5) so the paper is perforated enough to tear away easily and print your paper piecing templates at 100%. Then add your sashing and borders and voila! Don’t forget to grab your free copy, and check out the pattern (pictured below). Happy sewing!!!
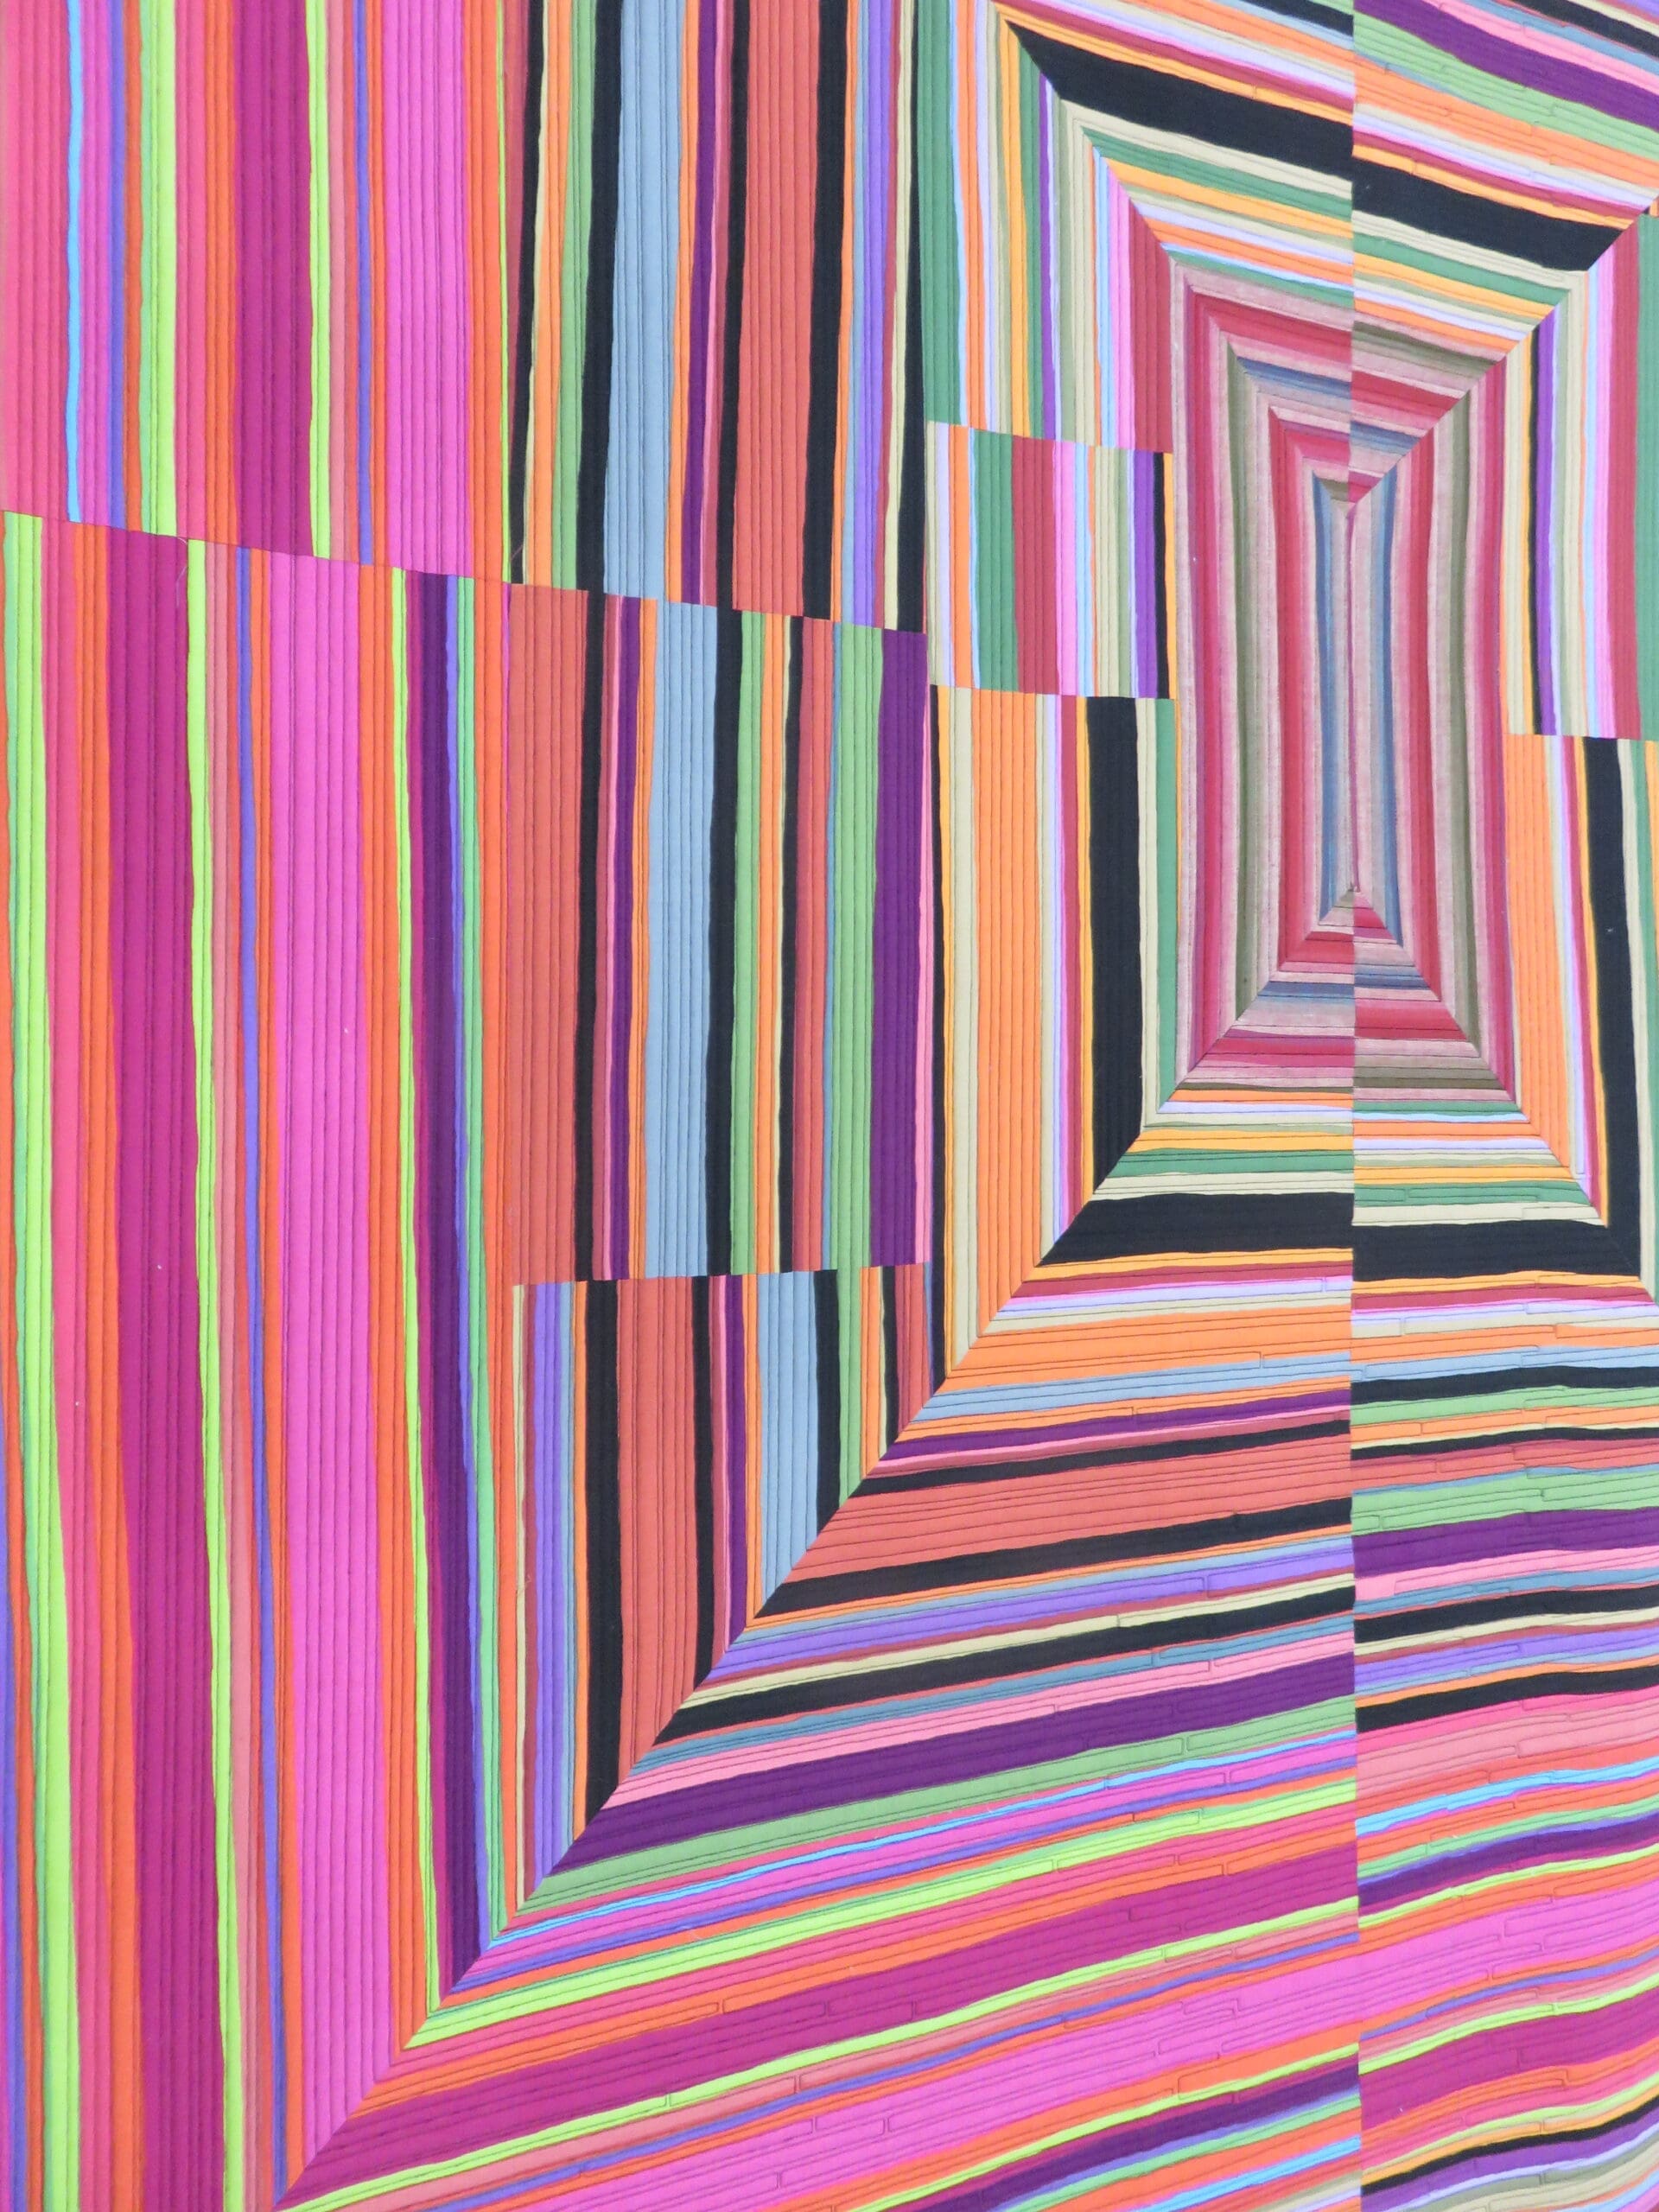
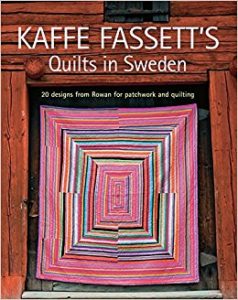
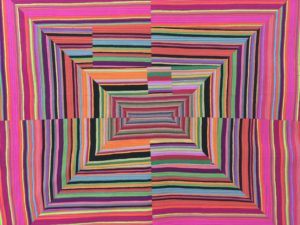
Man, oh man! I had the honor of quilting this awesome Kaffe Fassett quilt by Leslie Tucker Jenison. Leslie pieced her quilt based on Kaffe Fassett’s quilt pattern from the book Quilts in Sweden (pictured below-photo from amazon.com), using his fabric. Leslie also pieced the backing using some awesome linen and polka dots.
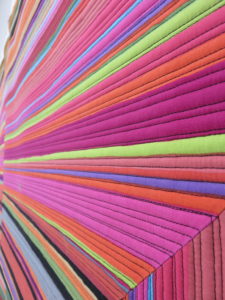
Leslie had requested some straight line quilting to follow the lines of the fabric pattern–I loved that idea. Quilting a quilt like this using a concentric design can be a challenge on the longarm, and you sometimes end up advancing and rolling back the quilt on the frame back and forth, back and forth, back and forth, (did I say back and forth already?) etc. To avoid doing that ONE MILLION times, I connected some of the lines, and I really liked the outcome of the quilting look.
Quilting close up
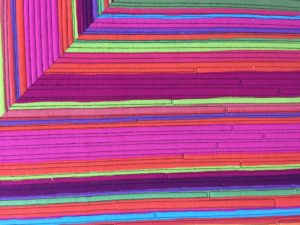
The lines of this fabric are so amazingly deceptive and provide the illusion that this was painstakingly pieced. I love the wonky look of the finished quilt and really found the design brilliant! I have been wanting to do a stripe study (kind of like how some people do color or quilt block studies) for so long, and this made me move that up my priority list. Someday soon I’ll start that project.
The thread used was Magnifico in black and batting was Quilter’s Dream Orient with Quilter’s Dream Wool layered beneath the quilt top. This was quilted usingelectric channel locks on my Innova longarm (hand guided), and those electric channel locks make all the difference. I recently upgraded and had those installed from the basic manual channel locks that come on the machine.
The difference is this:
Manual channel locks:
walk to the back of the machine and engage the channel lock
quilt a straight line
stop the machine
walk to the back of the machine and disengage the channel lock
walk to the front of the machine and move to new point
repeat 1-5 over and again
Electric channel locks:
Push remote button from front of machine to engage channel lock
Quilt a straight line
stop the machine
push remote button from front of machine to disengage channel lock
move needle to new point
repeat 1-5 as needed (and your legs are breathing a huge sigh of relief from all that walking you just saved yourself)
I digress. Here’s some more amazing eye candy from Leslie’s quilt.
Leslie’s Kaffe QuiltAngled close up
If you’re interested in purchasing the book, you can check it out here on Amazon.
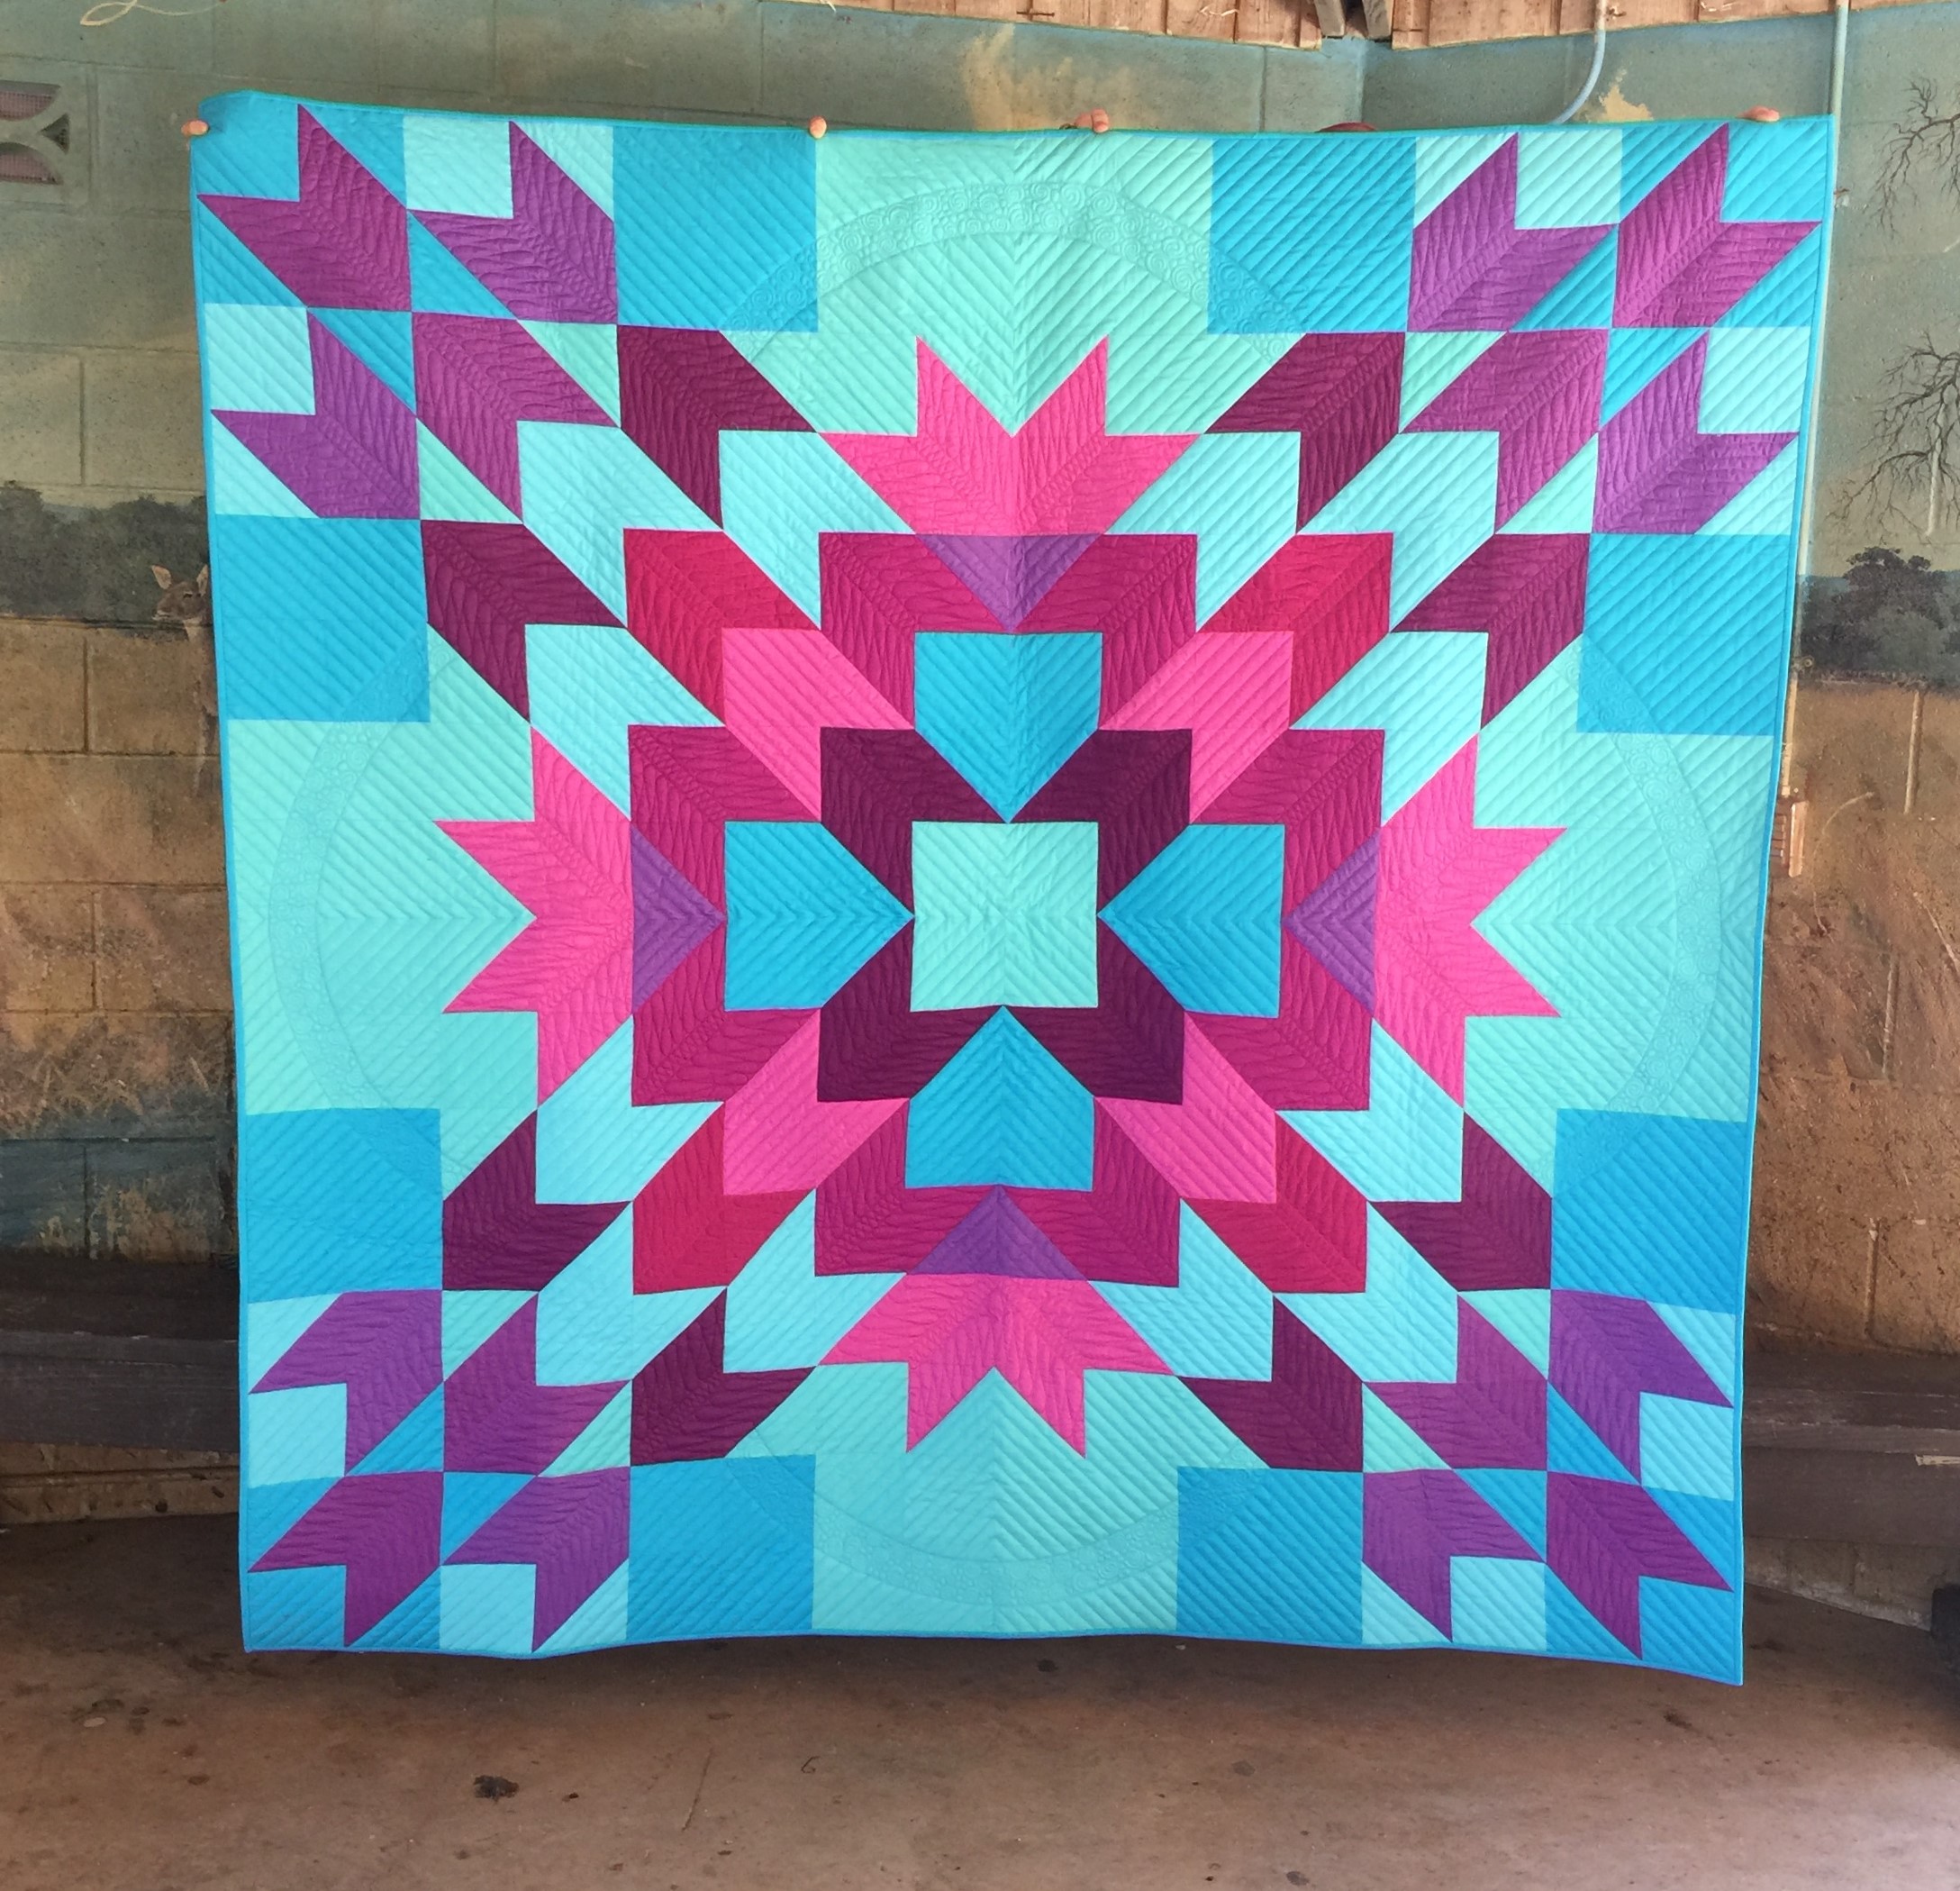
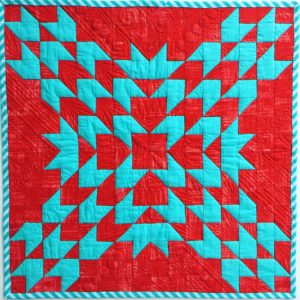
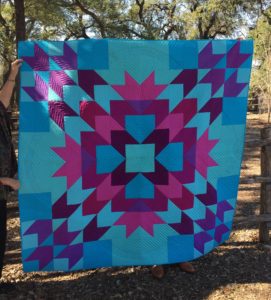
Hi! I’m Joanna Marsh from Kustom Kwilts. I live in the Texas Hill Country with my husband and baby girl. I have been so captivated by all of the #whatshadeareyou projects and the RJR Cotton Supreme Solids, and I’m so excited to share mine with you on the RJR blog today–The Dreamer’s Star Quilt! You can check out my instagram @kustomkwilts to see what I’m up to. I’m so excited to be featured on the RJR blog today with their amazing cotton supreme solids! Check out the What Shade Are You? posts for some amazing inspiration here.
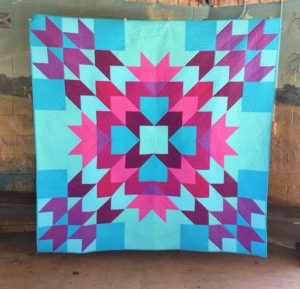
Dreamer’s Star Quilt in RJR Cotton Supreme Solids
A little background on what brought me to quilting: In my previous career, I was a high school agriculture science teacher. My principal’s secretary was a quilter, and I mentioned to her that I was interested in starting to sew. I remember her telling me the secret to quilting was a consistent quarter inch seam allowance–and that as long as I remembered that, I’d be okay! I found a beginner’s quilting book in my teacher mailbox one morning with a sweet note of encouragement from Donna Jo (principal’s secretary), and that was how my sewing journey began. Both of my grandmothers were amazing seamstresses, but I had never learned to sew from them. One thing I’ve learned about the sewing community is that it’s full of people who want to share their love of the craft with others, and I love being part of such a giving community!
In 2016, I left my teaching job and committed to sewing and quilting full time. At my 9-5 job (really more like 5-9), I would find myself thinking about sewing in spare moments. The Dreamer’s Star Quilt is a quilt I drew while dreaming of doing the thing I love as a career, and I knew I wanted to use my favorite pattern for the What shade are you project. The design reminds me of the toy kaleidoscopes that produce different images just by turning the end, and how the images can be so bold and impactful. I love quilts that have a large central design and aren’t necessarily block based. I also remembered that when I started quilting, I struggled with selecting lots of fabrics to coordinate within a quilt, and I wanted a design that would look great with a two-color scheme, but could also make a big impact with lots of colors. This is the original quilt that I used Michael Miller’s painter’s canvas with.
Dreamer’s Star Mini Quilt
I knew that the Dreamer’s Star Quilt would just glow with RJR Cotton Supreme Solids, and wanted to use colors that would reflect the gorgeous sunsets that we sometimes see out in the Texas Hill Country.
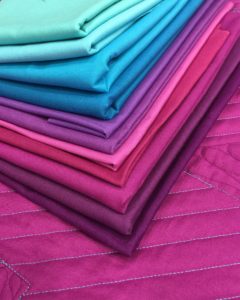
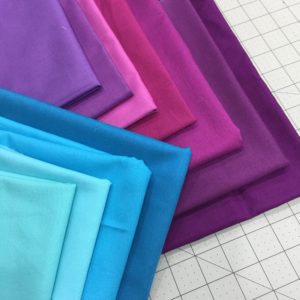
RJR Cotton Supreme Solids
There are so many amazing colors to choose from and I went with 11 of my absolute favorites:
292-Turks and Caicos
279-Purple Haze
274-Riviera
317-Jacaranda
391-Robin’s Egg
328-Bora Bora
422-Plum
371-Melody
333-Bougainvillea
287-Raging Ruby
378-Lilac Festival.
Look at those yummy colors!
While I was browsing through the color card, I couldn’t help but chuckle to myself about the clever names of the colors. Some of my color selections might tell you that I’m ready to take a vacation 😉
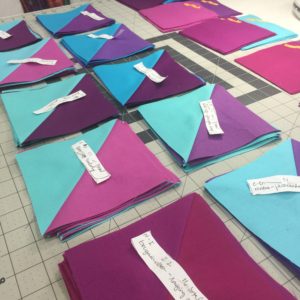
Piecing the quilt together was a breeze with lots of simple half-square triangles and chain piecing.
I love these color combos!
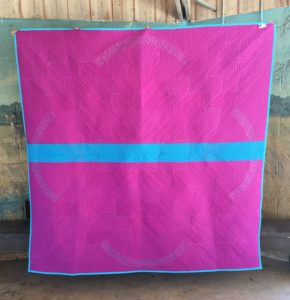
I love to use several shades of similar colors to create a little depth and dimensions to a quilt. For the backing I used Bougainvillea with a strip of Bora Bora down the middle, and Turks and Caicos for the binding. I loved seeing all the colors melt together, but still be distinctly different, just as in a sunset.
Bougainvillea with a strip of Bora Bora really make the quilt back glow.
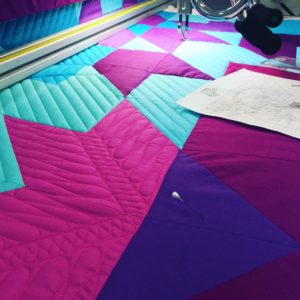
Once the top was completed, I loaded it on my longarm and quilted some simple straight lines with rulers and added some free motion accents in coordinating Glide threads.
Quilting the quilt
I love using Quilter’s Dream Wool to keep the quilt lightweight–remember, I live in Texas–but still let the quilting pop. I had a lot of fun getting some pictures at the Cibolo Wilderness Trail in Boerne, Texas. It was an absolutely gorgeous day and my husband and mom were my professional quilt holders.
Check out other versions of the Dreamer’s Star on Instagram with #dreamersstarquilt and you can pick up your copy of the pattern here. The pattern comes with three different size options, and the color combinations you could choose are limitless! I had so much fun making this quilt and drooling over the Cotton Supreme Solids. Thanks for joining me in this quilting adventure, and a huge thank you to RJR for allowing me to participate and for the inspiration they bring with the #whatshadeareyou blog hop!
Who doesn’t love a little churn dash quilt? I know I can’t seem to get enough of the traditional block that basically represents butter being churned! Have you peeked in issue 54 to check it out? I’ll tell you a little bit about the design…
Photo provided by Love Patchwork and Quilting
I’m so excited to share my most recent quilt with you from the Love Patchwork and Quilting Issue 54. I’m inspired by bright, saturated colors–and that’s typically the palette I use. But for this quilt, I opt for a more subtle palette. The cheery sherbet colors and hints of greys that are sure to make you swoon! This quilt- “Sorbet Shades” in the mag, is inspired by one of my favorite traditional quilt blocks–the churn dash. This block is so rich in history and I love that it can be interpreted in a modern way. I have a great appreciation for the traditional quilt blocks and the colors they typically have. I also love seeing them updated in a more modern way.
One of the first quilts I made when I was learning to sew was a traditional churn dash quilt. My mother and I gave this special quilt to my grandmother prior to her passing. The churn dash block represents so much more to me than just a traditional quilting block. The simplicity of the block lends itself to being altered in construction in so many ways. The possibilities for this block are limitless! I quilted this quilt with swirls on the white background and simple straight lines on the colored blocks.
Photo provided by Love Patchwork and Quilting
For this project, I use some delightful Kona Cotton Solids and create a coordinating pillow to go with the quilt. The colors in these projects really make me want some ice cream and macaroons–or really any other cute little pastel dessert! I hope you’ll checkout the issue (digital issues are available here). Don’t be afraid to try your hand at breaking out of the traditional box to create a modern spin on traditional. (photos above provided by Love Patchwork and Quilting).