Posted on 2 Comments

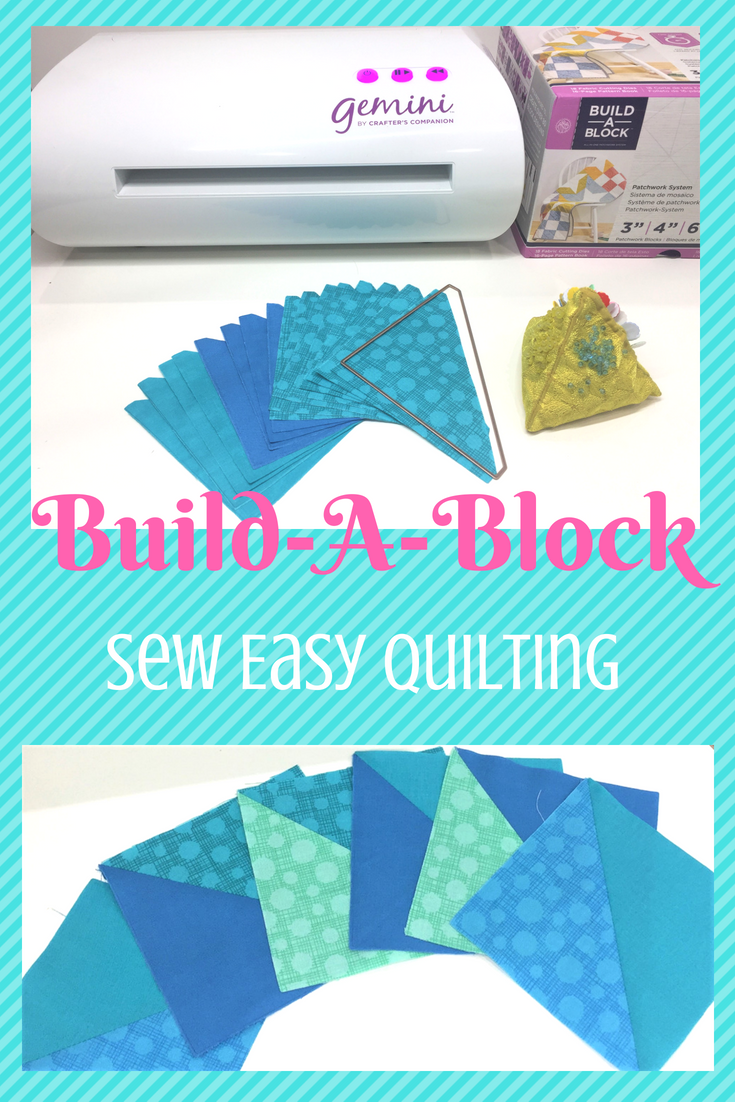
Build-A-Block: Are you ready to try THE die cutter?

A picture of some blue fabric and the words " build-a block sew easy quilting ".


I have some really awesome news to share with you this week!  I’ve partnered with Crafter’s Companion as a Brand Partner to show you their awesome new product, The Build-A-Block Patchwork System for the Gemini Die Cutter.  A box of gemini quilt blocks with instructions.I’ve never used a die cutter for sewing or quilting prior to this, just because I honestly was not impressed.  I thought it was just another thing that would take up space in my sewing room, and you know that’s prime real estate!

But here’s the thing:  I make a LOT of half-square triangles.  Like more than half of my quilts have some form of HSTs in them.  Sometimes I get in a hurry and my HSTs aren’t accurate, so most of the time I cut them bigger than they need to be, sew, press, and then trim down to the correct size.  Oh and don’t forget about trimming off those annoying little dog ear points too.  It’s a necessary evil for me.  I never considered that there would be a die cutter that has half-square triangle dies that cut the fabric (and multiple layers of fabric at that) to the exact size I need, and trim those little points away!  The first time I saw the Gemini in action was in May at the Janome Education Summit when Jennifer Tryon demonstrated it, and I was blown away.  Crafter’s Companion sent me the Build-A-Block Patchwork System and Gemini to try out and I love it so much!

So here’s the skinny:

  • The Build-A-Block is a set of dies made specifically with quilters in mind.
  • There are 18 fabric cutting dies to create a huge variety of blocks (and they have tons of other dies you can get separate from the Build-A-Block System).
  • Of those 18 dies, there is a set of squares, half-square-triangles, and quarter-square triangles.  If you think about it, the combination of those shapes into unique blocks is really unlimited.  A square with two triangles in it
  • The Build-A-Block Patchwork System offers a fast and easy alternative to hand cutting with a rotary cutter, with MINIMAL waste.
  • It isn’t just for quilts.  I’m currently making a tote bag with a two color combination out of half-square triangles, and it’s going SO fast!
  • The Build-A-Block is an intuitive system that’s easy to use for quilters of all skill levels, even beginners.  True story:  I unboxed my Gemini and Build-A-Block dies and had my first fabric cut within ten minutes.  There is no software to mess with, or difficult instructions to muddle through.
  • The Build-A-Block dies are capable of cutting a wide range of material, including faux leather and denim.
  • You also get a Block Guide with the Build-A-Block with instructions to create tons of blocks.  A purple quilt block with the numbers 5 1, 4 7, 1 0 and 2 9.

I was so impressed with the Build-A-Block that I spent an entire afternoon just pulling fabric from my scraps and trying all the dies.  It’s fun and addicting!A table with some papers and a paper cutter

You can see a great demo video of the Build-A-Block in action, and take a peek at the Quilt-Along happening now, hosted by Jennifer Tryon, using the Build-A-Block and Gemini.

Deals!!!

  • On September 1, 2018 I’ll be sharing a free tutorial using the Build-A-Block and there might be a little giveaway going on, so stay tuned!
  • Use the promo code QUILTEASY to purchase the Build-A-Block and you’ll receive a set of threads and a six-piece fat quarter bundle valued at $41.95!!  A close up of some fabric and sewing supplies
  • Between August 17-23, Crafter’s Companion is offering 15% off of the Gemini machines with the purchase of a Build-A-Block System (no promo code needed, the discount will automatically be applied at checkout)!

I hope you’re as jazzed about the Build-A-Block as I am.  It is a phenomenal tool to have in your quilting toolbox and it’s quickly becoming a staple in my sewing studio.  I’m so glad I have it to make my life a little bit easier!  Hang around for the free tutorial coming up–you won’t want to miss it 🙂

Posted on 6 Comments

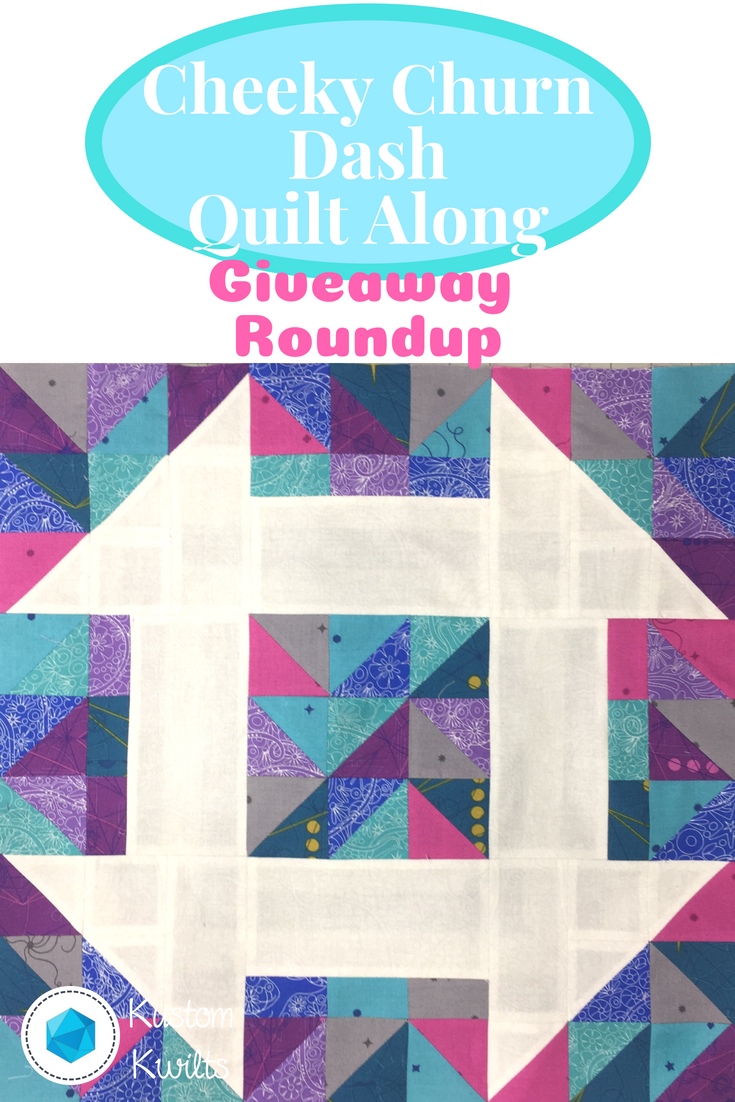
Cheeky Churn Dash Quilt Along – Official Post

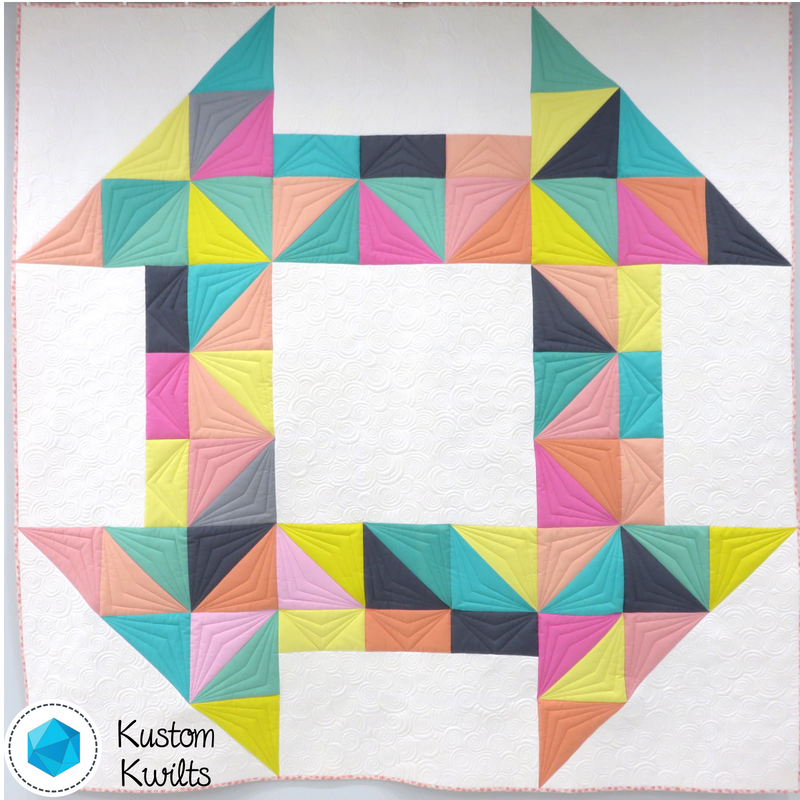
A quilt with colorful squares and triangles on it.


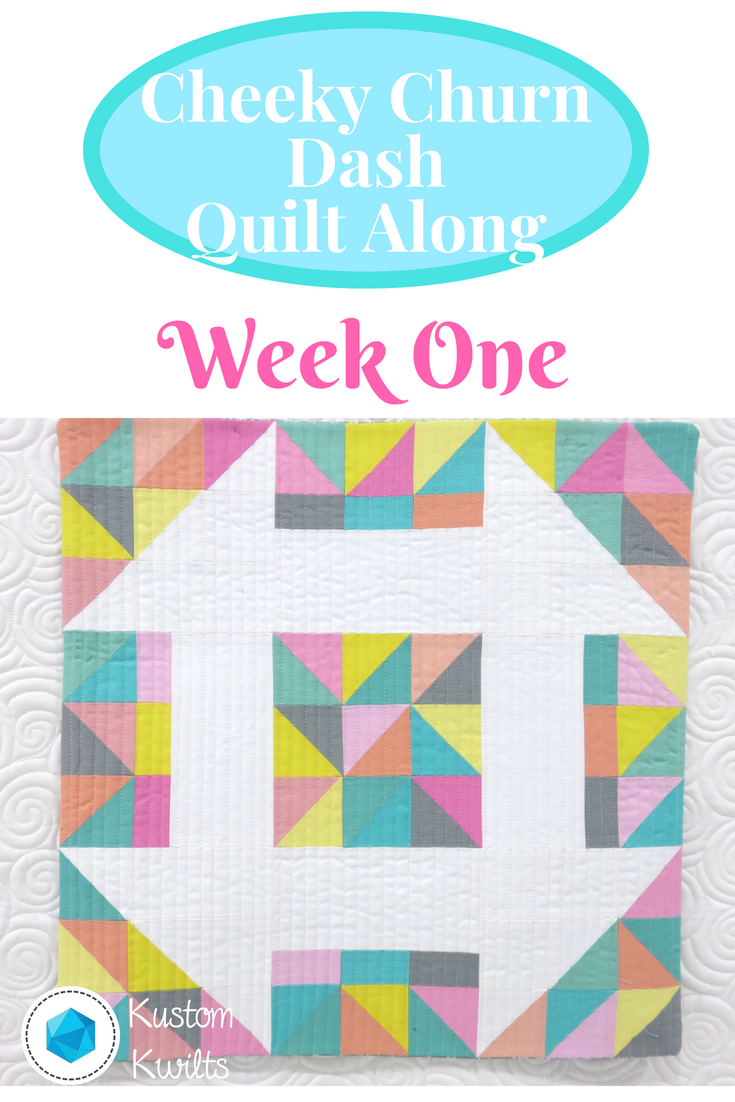
I’m so excited to announce the Cheeky Churn Dash Quilt Along!

I’ve been wanting to host a quilt along for a long time now, and I thought the Cheeky Churn Dash would be the perfect pattern to make!  You can RSVP for the quilt along to sign up for weekly updates and get insider tips and tricks with bonus material.  I love quilting, but it’s so much more fun to make a quilt with a fun group, right?

DATES

September 15, 2018 – November 16, 2018

Why join a quilt along?

I don’t know about you, but sometimes when I start a project, I need a little more motivation to finish.  Sewing with a group of quilters and sharing our progress together will give you inspiration and answer any questions you might have while making your quilt.  I like to know when I make a pattern that I’m going to have some help, and quilt alongs are a great way to get that support!  This quilt along will take place on Instagram using the hashtag #cheekychurndashquiltalong.  Use this hashtag when you post your weekly progress so others can see your awesome progress (and you’ll be able to see what everyone else is doing)!

Also, you might be thinking…good grief.  This is right at the beginning of the school year?  Why???  I know.  I was a high school teacher in my past life.  I get it.  I planned this quilt along with that in mind–I know everyone has busy schedules.  There’s a catch up week included in the quilt along, and I’ve divided the steps up into very doable tasks, even if you have a very limited schedule.

The Cheeky Churn Dash Quilt

You can click over to the original Cheeky Churn Dash Post to read more about it and my inspiration for making this quilt.  I just finished making another Cheeky Churn Dash with Alison Glass Sun Print 2018, and I’m loving the gem tone colors in that one!  This pattern is great for showing off your favorite fabric collections or going purely scrappy.

A quilt with colorful squares and triangles on it.

Not sure you have the skills to make this quilt?

That’s a question I used to ask myself all the time when I started quilting.  If you are able to sew a consistent 1/4″ seam allowance and cut your fabrics fairly accurately, you’ll be fine!  And if you aren’t comfortable with those things, you’ll never learn if you don’t try.  6 years ago, I didn’t even know how to thread a needle, much less use a rotary cutter!  Quilt alongs provide great community for asking questions and discovering new tips and tricks you might not have known before.

What will you learn?

You’ll get to practice your 1/4″ seam allowance AND I’m going to show you Beth Helfter’s Accordian Sewn HSTâ„¢ method for sewing half-square triangles.  It is an absolutely BRILLIANT technique that you’ll find yourself wondering how you ever did without.  You can always use your preferred method of piecing HSTs, as well.  You’ll also get tons of inspiration from other participants in the quilt along.

What will you need?

Fabric Discount!

Jennifer at Knotted Threads on Etsy has joined in the Quilt Along fun to bring all Cheeky Churn Dash QAL participants a 10% discount on fabrics purchased from her shop!  She has a great selection of current and modern fabrics, so you’ll want to take advantage of this :)  Use the coupon code: CHEEKYCHURNDASH at checkout.

Schedule September 15-November 16, 2018

September 15-21 Week One:

RSVP for the quilt along, gather your pattern, fabrics, and materials and introduce yourself using the hashtag #cheekychurndashquiltalong.  I’ll be randomly picking one winner from week one (you have to post on instagram with the hashtag) to win an awesome prize!

September 22-28 Week Two:

Starch fabrics if needed (you won’t need to do this if you plan on using Beth Helfter’s Accordian Sewn HSTâ„¢ Method.  Cut all fabric according to the option you are making.

September 29-October 5 Week Three:  

Draw one diagonal line on the backs of the squares we’ll be using to make half-square triangles if using the Accordian Sewn HSTâ„¢ Method.  Assemble the half-square triangles and press.

October 6-12 Week Four:  

Square up the half-square triangles to 9.5″ square for the quilt size and 2.5″ square for the mini and pillow sizes.

October 13-19 Week Five:

Assemble sections 1, 3, 7, and 9.

October 20-26 Week Six:

Catch up week if you’re behind!

October 27-November 2 Week Seven: 

Assemble sections 2, 4, 6, and 8

November 3-9 Week Eight:

Assemble section 5

November 10-16 Week Nine:

Sew the quilt top together!

Location

This Quilt Along will take place primarily on Instagram, so be sure to follow along on Instagram and use

#cheekychurndashquiltalong

to participate!  Instagram now lets you follow hashtags, so you can get inspiration and encouragement from everyone participating.  Don’t worry if you don’t have Instagram.  There will also be weekly blog posts with photos and tips, and be sure to sign up for the quilt along e-mail updates! (Just a note–there’s a double opt in for the updates, so be sure to check your spam folder, and add me to your address book to make sure you get the updates)

JOIN THE QUILT ALONG UPDATES!

Rules

There aren’t many rules for this quilt along, unless you want to be considered for giveaway prizes.

There will also be some awesome giveaways sprinkled throughout the quilt along, so be sure you post one picture to your Instagram account of that week’s progress before the next week’s starting date in order to qualify for prizes (see the schedule above for specific dates).

There will be one grand prize winner at the end of the quilt along for one lucky person who completed and posted their quilt top (must be the 81″ x 81″ version) by November 16, 2018.  You’re still in the running for the grand prize, even if you missed posting throughout the quilt along, so long as you post your finished quilt top to your Instagram account by November 16.

The giveaway prizes are only for US participants and cannot be shipped outside the US.  Sorry!

Thank you for joining in the fun, and I can’t wait to start sewing with you!  I’ll see you in the quilt along!

-Joanna
Posted on 3 Comments

Cheeky Churn Dash Quilt Pattern

A quilt with different colored triangles on it.


Cheeky Churn Dash Quilt Pattern

Pattern will be on sale and available for purchase Monday, August 13, 2018.

The Cheeky Churn Dash Quilt Pattern is my newest pattern with a fresh color palette.   One of the very first quilts I ever made was a traditional churn dash quilt, and I just love that block.  My mom and I gave the little churn dash quilt to my Mamaw Florence for her birthday one year, and then I got the quilt back when she passed away.  You’d think churn dashes would make me sad, but I smile and think about what an amazing Mamaw I had and how much I miss her.  She was such an inspiration to me and was an awesome artist.  This quilt is kind of my tribute to her.  I really like traditional quilt blocks with a modern spin, so what better way to make a big churn dash made up of other blocks to show off your favorite fabrics?

This pattern was first featured in Love Patchwork and Quilting magazine.  You can pick up Issue 54 or find the pattern in my Pattern Shop.

A quilt with colorful squares and triangles on it.

Cheeky Churn Dash is a really fun pattern to put together, and by joining in the quilt along, I’ll introduce you to an awesome new way to sew together half-square triangles.  You’ll seriously be amazed, and you’ll want to use this method all the time!  There are two layout options for making the 81″ square quilt, mini, or pillow, and you can choose the one that you like the best.  The quilt is layer cake friendly and the mini and pillow versions are mini charm pack friendly–great for quick piecing.  This is a great way to use up your favorite fabrics that you’ve been hoarding for ages!  And there is a Quilt Along for this pattern that will start in September.  RSVP to the quilt along to sign up for all the details and save your spot!

The Cheeky Churn Dash PDF Pattern in my shop includes coloring diagrams for easy planning, fabric cutting diagrams to make the most of your fabric if you aren’t using precuts, and tons of step by step pictures that will make this quilt a breeze.

I quilted my Cheeky Churn Dash Quilts in a couple of different ways–one of my favorites was just straight line quilting.  It’s modern and simple and really shows off the quilt without distraction.  I quilted another version with some geometric lines and swirls in the background fabric.  There are so many great options for quilting this quilt, the sky is the limit!

A quilt with colorful squares and triangles on it.

MATERIALS USED:

Kona Cotton Solids Robert Kaufman Fabrics
Backing and binding:  Elizabeth Hartman Pond Flower Dots for Robert Kaufman
Batting:   Quilter’s Dream Wool Batting

A quilt with colorful squares and triangles on it.

Posted on

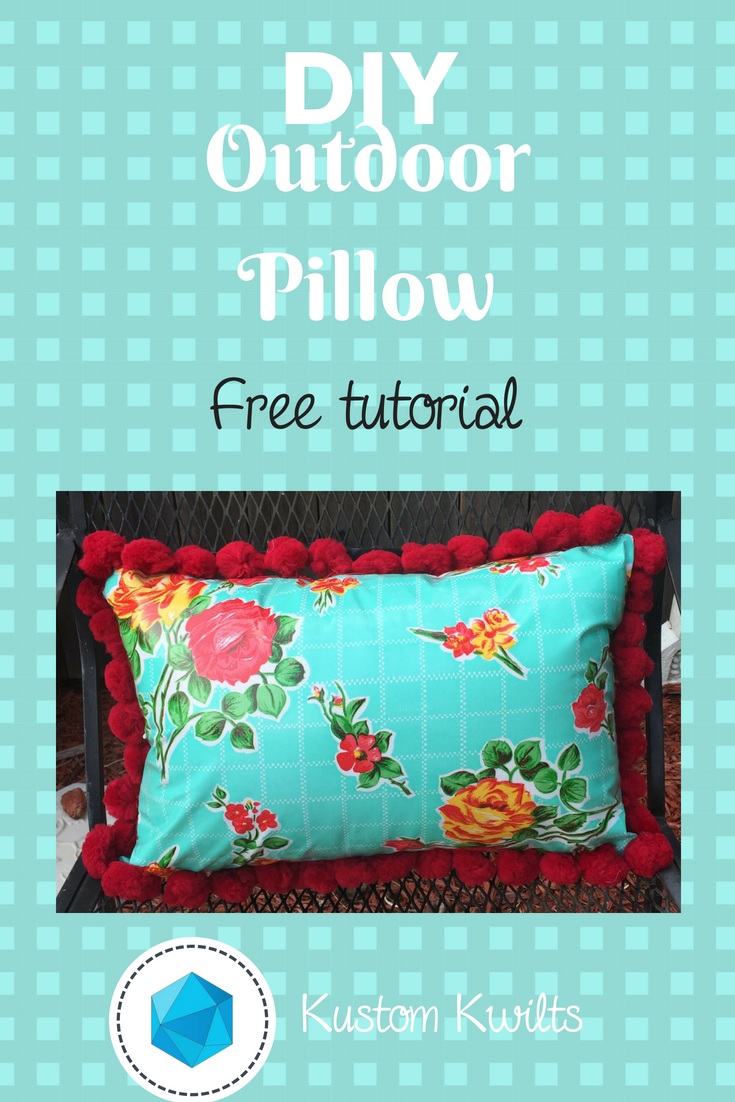
DIY Outdoor Pillow free tutorial

A pillow with red and yellow flowers on it.


DIY Outdoor Pillow tutorial

Are you looking for a way to brighten up your patio with some fun home dec pillows?  Make your own DIY outdoor pillow with this quick and easy tutorial to create a super cute oilcloth pillow with pom pom trim, and give your deck a cheery look!  I used my Janome Horizon Memory Craft 9400QCP and the Janome Ultra Glide Needle Plate and Ultra Glide Foot to stitch up this oilcloth pillow.  Start sewing with some new fabrics and try out a new foot attachment that will take your sewing projects to the next level. The Ultra Glide Needle Plate and Ultra Glide Foot set is perfect for working with fabrics that might not smoothly feed under the standard foot A, such as oilcloth and laminated cotton.  Also, check out my previous post on TOP TIPS FOR SEWING WITH OILCLOTH.  This is a great tutorial for beginners, and will take approximately 4 hours from start to finish.  The finished pillow size is 12″ x 18″.

Supplies: Sewing machine, Janome Ultra-Glide foot and Ultra Glide Needle Plate (Teflon foot for all other sewing machine brands), Zipper foot (Foot E for Janome), Needle, Pre-wound bobbin.

Fabric/notions required:

  • Circle Template printed at 100% and cut out
  • 1 yard Aqua Rose gall oilcloth (Fabric A) sub cut into:
    • (2) 6-3/4†x 19†(zippered back of pillow)
    • (1) 13†x 19†(front of pillow)
  • 3 yds. Jumbo Pom Pom Trim/ball fringe
  • 40 wt. Black sewing thread (or white for less contrast)
  • 20†zipper
  • 12†x 18†Weather proof pillow form/Outdoor pillow form
  • Marking pen
  • Rotary cutter/ruler/mat
  • Binding clips
  • Scissors
A collage of four photos showing how to make a quilt.
Figures 1-4

Prepare the back of the pillow and install the zipper

  1. Take the two 6-3/4†x 19†pieces of Fabric A and measure and mark the center of one 19†edge. Take the 20†zipper and measure and mark the center on both edges of the zipper tape (see figure 1).

Tip:  Use binding clips instead of pins when working with oilcloth.  The fabric does not heal when holes are made in the oilcloth.  Any holes made in the oilcloth will be permanent.  Also, use a slightly longer stitch length to minimize the amount of puncture holes made in the fabric when sewing.  Typically, adjusting the stitch length from the standard 2.4 to 3.0 is a good adjustment.  The raw edges of oilcloth don’t fray, so there isn’t a need to finish raw edges as there would be with a regular woven fabric.    

  1. Place one of the 6-3/4†x 19†pieces of fabric A RSU and align the zipper tape with the 19†raw edge, matching the marked centers of the zipper and the pillow back. The zipper and the fabric should be RST (see figure 2).  Use binding clips to secure the zipper in place.
  2. Remove the standard needle plate from the MC9400 and install the Ultra Glide Needle Plate. Using this needle plate with the Ultra Glide Foot will keep the oilcloth gliding smoothly under the presser foot.  Select a zipper sewing stitch to move the needle position to the left.  Lengthen the stitch length to 3.0.  Attach zipper foot E to the presser foot and sew the zipper to the fabric A with a 1/4″ seam allowance (see figure 3).  Finger press the seam allowance of the zipper away from the zipper teeth, under the oilcloth.  Fold the remaining edge of the zipper over (see figure 4).
  3. Place the remaining 6-3/4†x 19†piece of fabric A RSU. Take the remaining side of the zipper tape and match the marks on the zipper tape edge and the pillow back edge, with the zipper right side down.  Line up the raw edges and clip in place with binding clips (see figure 5).  Sew the zipper in place with a 1/4†seam allowance (see figure 6).
  4. Once again, finger press the zipper tape seam allowance away from the zipper teeth so it is under the oilcloth pieces (see figure 7).
  5. Remove the zipper foot E from the presser foot and attach the Janome Ultra Glide Foot to the presser foot (see figure 8).
    A collage of photos showing how to use the sewing machine.
    Figures 5-8

    Topstitch 1/8†away from the folded edge of the oilcloth (see figure 9).

  6. Select stitch #1 from the utility menu. Move the zipper head towards the middle of the zipper tape (see figure 11).  Use a binding clip to keep the ends of the zipper together.  Sew a few stitches and then backstitch to connect the zipper ends, about 1/8†away from the edge of the oilcloth fabric (see figure 10).  This will act as a zipper stop until the front and back of the pillow are sewn together.  Keep the zipper unzipped at least half way.

Round the corners and baste the pom pom trim

  1. Take the circle template that you printed and cut out, and place it with the edges touching the corner edges of the pillow. Trace around the curved edge of the circle with a marking pen.
  2. Cut the edge to round the corner (see figure 12).

    A collage of photos showing how to use the sewing machine.
    Figures 9-12
  3. Repeat steps 8 and 9 with the remaining corners of the back of the pillow and the four corners of the front of the pillow.
  4. Set aside the zippered back of the pillow. Take the 13†x 19†piece for the pillow front and the jumbo pom pom trim. Place the pillow front RSU.  Starting in the middle of one of the 19†edges of the pillow front, align the edge of the trim with the edge of the oilcloth.  Trail the end of the trim off the edge of the pillow by 2-3 inches figure (see figure 13).  The pom poms should be pointing inward towards the center of the pillow front.
  5. Align the edge of the trim and the edge of the pillow front all the way around the perimeter of the pillow. When you reach the point you started the trim at, overlap the trim and trail the end off by 2-3 inches, as you did to start (see figure 14). If the jumbo poms overlap, carefully trim one or two away to decrease the bulk.  Use binding clips to clip the trim in place.
  6. Move the needle position to the left. Lengthen the stitch length to 5.0 for a basting stitch. Baste the trim in place with a 1/8â€-1/4†seam allowance (see figure 15). 

Sew the pillow together and finish

  1. Place the basted pillow front RSU (see figure 16).

    A collage of photos showing how to use the sewing machine.
    Figures 13-16
  2. Place the zippered back of the pillow right side down on top of the pillow front (see figure 17). Line up all the edges and make sure the pom poms are all facing in towards the center of the pillow. Double check to be sure the zipper is unzipped at least half way.  Use binding clips to secure all the edges together.
  3. Remove the Ultra Glide Foot and attach the zipper foot E to the presser foot. Keep the needle position moved to the left, as if you were sewing a zipper. Sew around the perimeter of the pillow using a 1/4†seam allowance (see figure 18).  Double check that none of the pom poms are getting caught in the seam allowance while you are sewing.
  4. Use a pair of scissors to trim away the excess ends of the zipper so the ends are flush with the pillow edges (see figure 19).
  5. Turn the pillow right side out and carefully push out all the curved edges (see figure 20).

    A collage of photos showing how to use the sewing machine.
    Figures 17-20

Tip:  Oilcloth has little to no stretch, unlike cotton fabrics you might be used to working with.  A zipper closure helps to keep seams sewn together versus using an envelope closure.  Be careful to not stretch the fabric when inserting the pillow form.  For a fully weather-resistant pillow, you can opt to sew this pillow without the ball fringe trim.

  1. Insert the 12†x 18†pillow form and use to liven up your patio!
    A pillow with red flowers and blue squares on it
    Finished Pillow!

    Now get out there and party with your new DIY outdoor pillow 😉

Posted on 2 Comments

Moroccan Tiles Quilt – Love Patchwork & Quilting Issue 63

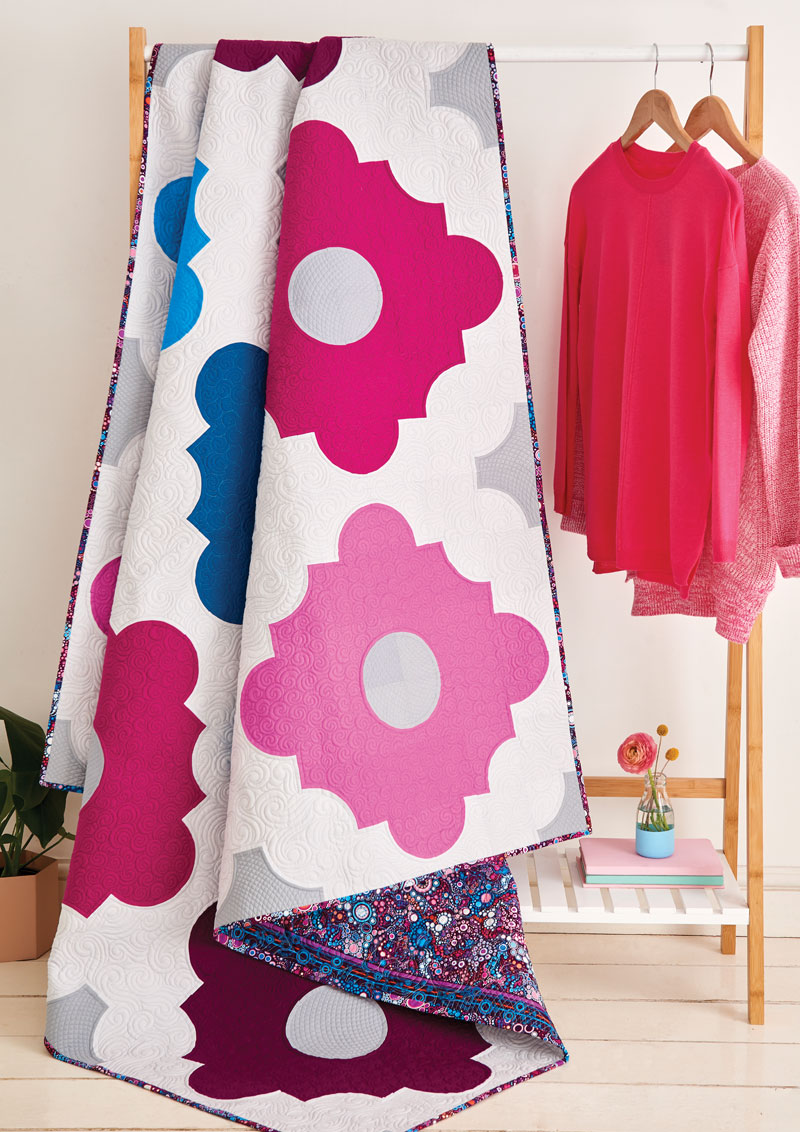
A quilt hanging on the wall next to clothes.


Do you have a favorite crafting or quilting magazine?  There are so many great magazines filled with exciting new patterns, and I have quite a few favorites of my own!  I’m so excited to finally be able to share with you the Moroccan Tiles Quilt in Love Patchwork and Quilting Issue 63.

A magazine cover with some quilt designs on it
LPQ Issue 63 Cover Photo Provided by LP&Q

Issue 63 isn’t yet available in the US, but it is on shelves in the UK now.  I’m anxiously awaiting my copy in the mail any day now!

I designed the Moroccan Tiles quilt because I have a secret love of traditional quilt blocks–specifically the different variations that can be made from drunkard’s path blocks.

A group of four napkins that are folded in half.
Sewing curves

I used to be scared stiff of sewing curves, but there really is nothing to it once you practice a little bit.  The shapes I created by rotating and flipping the drunkard’s path blocks reminded me of gorgeous tile work and design shapes.

I chose a gem toned palette from some of my favorite Robert Kaufman Kona Cotton Solids and rather than using the standard go-to white background fabric, I love to use Kona Silver!  I like to think it makes the background such a shocking contrast, and gives it a softer glow so the other colors can shine on their own.

A quilt hanging on the wall next to clothes.
LPQ Issue 63 Moroccan Tiles Quilt Photo provided by LP&Q

For the backing, I was dying to use Robert Kaufman’s Effervescent fabric.  It is a beautiful fabric that looks like it has little champagne bubbles overflowing on the entire surface.  The color way I chose coordinated exactly with the colors of Kona Cotton I had selected, so it was definitely a match made in heaven!

I hope you’ll grab your very own issue of the magazine and check out all of the awesome projects and all of the great contributors, and maybe try something a little new this week that involves sewing some curves?  You might fall head over heels for them, just like I did–so you won’t know if you don’t try!  Happy sewing!


Posted on 1 Comment

Top Tips for Sewing with Oilcoth

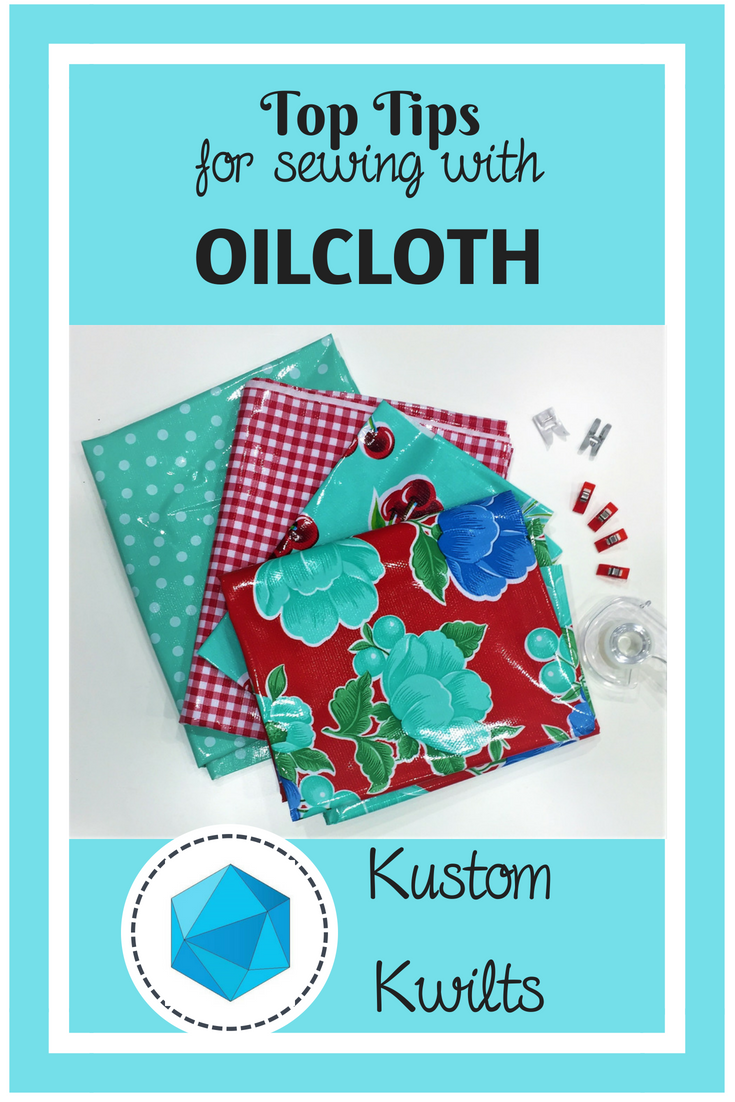
A close up of three different fabric swatches


So I know what you’re thinking…this blog is called “Kustom Kwilts”…what gives with the oilcloth?

There are so many skills in sewing and quilting that can be transferred to other things-garments, bags, household and decor items.  If you can sew a straight line, there are so many other amazing things you could be creating if you’re willing to do a little exploring.  I just released my new Mamacita Tote pattern, which is a perfect fit for using quilting cotton AND alternative fabrics!  The pattern suggests using oilcloth for the lining, and I don’t want to leave you hanging on how to do that (you can also use quilting cotton).  I love to quilt, but I also adore sewing clothing and bags.  I hope I can share some of that love with you!

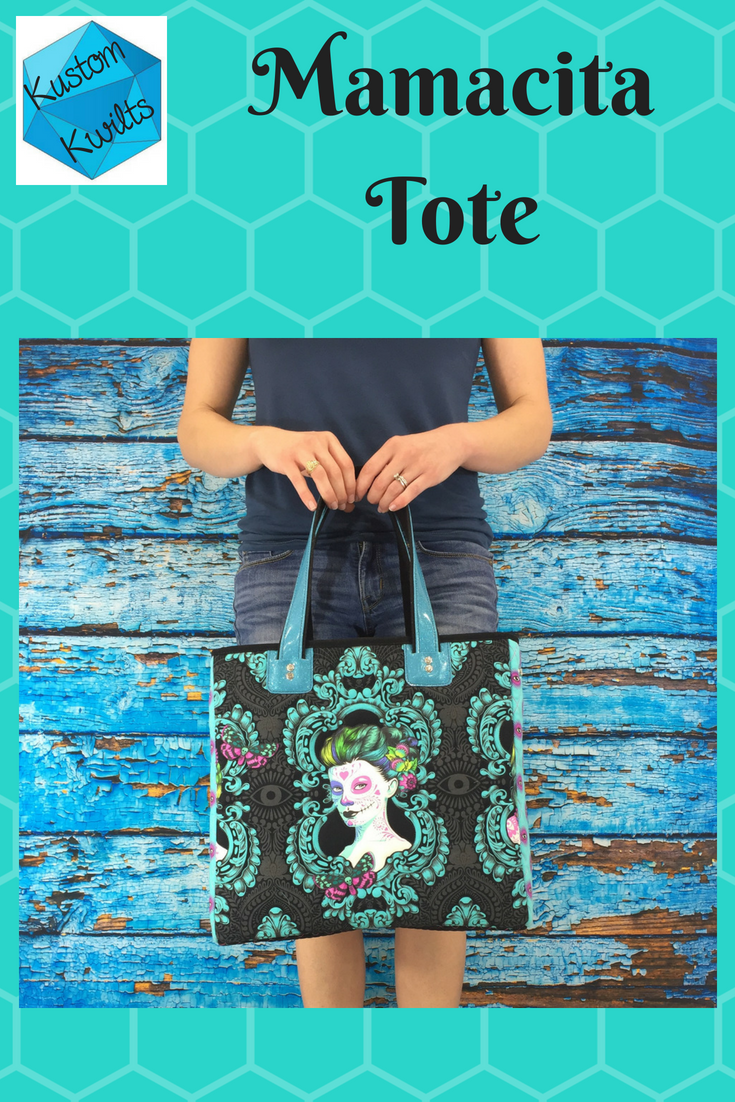
A woman is holding onto a bag with a picture of a girl.
Mamacita Tote in Quilting Cotton

What do I mean by alternative fabrics??  I’m talking about vinyl, leather, faux leather, and one of my personal favorites, OILCLOTH.  I’d love it if you were willing to read on and open yourself up to some great new possibilities for yourself!

A table with some fabric and some clips
Some of my favorite oilcloth prints 🙂

Let me break it down for you:  A lot of the things you need to know about oilcloth also goes for other vinyl fabrics and faux leathers.  Here are some things you need to know before buying your first yard of oilcloth–

  • It’s water resistant/doesn’t absorb water.
  • It’s relatively inexpensive.
  •  It is super-duper easy to clean.  All you need is a wet paper towel and you can wipe off pretty much anything.
  •  It doesn’t fray.
  •  It’s more stable than quilting cotton, so most of the time it doesn’t need extra interfacing when used in bags.
  • When you use it as a purse lining, it wipes clean and is SO easy to maintain!

    A close up of the inside of a bag
    Mamacita Tote with an Oilcloth lining

I’m sure I’m leaving a few important things out, but these things alone are pretty fantastic.  There are some things you’ll want to know about sewing with oilcloth and what you want to do a little differently than if you were sewing with regular quilting cotton.

Here are my Top Tips for sewing with OILCLOTH~

  • Don’t ever use an iron to get the wrinkles out!  You will melt the fabric, and more than likely ruin your iron.  I like to either use a blow dryer on low heat to relax wrinkles , or lay the fabric out in the sun on a flat surface for a few hours (I live in Texas, so sometimes it doesn’t take long!)
  • The holes your needle makes in the fabric are permanent.  That means you want to use a longer stitch length (somewhere around 3.5) so you have less perforations in the fabric.  If you’re using a teeny tiny stitch length, your needle is making a ton of holes that’s making your fabric weaker.
  • Don’t use sewing pins!  The holes they make will be permanent.  When securing oilcloth, use clips instead of pins.

    A close up of the cherries on a table
    Pins and oilcloth are a big No-No!  Don’t do it!
  • Use a Teflon or non-stick sewing foot to help the oilcloth slide under your foot with ease.  If you don’t have a Teflon foot, you can also stick a piece of satin scotch tape under your sewing foot, and that will help ease the fabric instead of sticking to it.  You can also use tissue paper between the presser foot and the oilcloth, then tear it away when you’re done.
  • Since oilcloth is a little thicker than cotton, try using a slightly larger needle, like one suited for leather or denim.  If you try a smaller needle and it works okay for you, stick with it–because that means the holes the needle makes will be smaller :).

I buy all of my oilcloth at Jack’s Country Store (not an affiliate link).  It seems like an unlikely place to get it, but it’s a pretty fun site, and they have tons of options and cheap shipping.  Are you ready to try it?  Go ahead, be brave!  I have a total oilcloth addiction now, and it’s so easy to work with.  I’d love it if you gave it a go and shared with me how you used oilcloth in your next sewing project!  Happy sewing 🙂

Posted on

It’s finally here! The Mamacita Tote Pattern Release!!!

A woman holding onto a black bag with a picture of a woman on it.


Today is the official release day for the Mamacita Tote Pattern!  Hip hip hooray!!!  I’d love to tell you the story behind this pattern and why it’s so dear to me.

A brown bag with three arrows on it
Mamacita Tote with Serape

When I first started sewing, I loved to make things that were useful (that still applies today).  I love the feeling I get when I plan a project and sewing that last stitch, and the overwhelming feeling of pride I get when I know I made something that I love (or someone else will love).  I loved quilting, but I loved making bags even more.  I used to be an agriculture science teacher, so my purses were always getting filthy from being at stock shows and around livestock all the time.  I did some research on fabrics that were easy to clean, and I came across oilcloth.  Long story short, oilcloth is a wonderful fabric that doesn’t fray, wipes clean, and, in my experience, has a ridiculously long life.  So I’m going to show you my very first go at what evolved into today’s Mamacita Tote:

A red bag with cherries on it sitting on top of a table.
My very first oilcloth bag

It isn’t exactly swoon worthy, but I loved it.  I used this bag for about a week before I realized the importance of interfacing and stabilizer in a bag this size, and made from all oilcloth.  It didn’t stand up on its own and was pretty floppy.  Also, when you sew with oilcloth, the holes made by the needle are permanent.  That means if you don’t lengthen your stitches, you’ll get lots of perforations that will weaken the fabric.  Hence, sewing the straps directly to the oilcloth where all the weight will be stressing the fabric = terrible idea.  I still have this bag in my sewing room and love to bring it out and see how far my design has come since January 2013.  That’s right.  This pattern has been FIVE YEARS in the making.

I needed a better way to attach the straps and I wanted a more stable, sturdy bag.  So another year of trying out different things and I came up with using large drapery grommets as the strap attachments.  I really loved this, but after I got a package of grommets from the manufacturer and they were all cracked from shipping, it was time to rethink using them.  I couldn’t risk having one break and then go through the hassle of replacing them all the time.  Quality supplies are my top priority.

A cross on the front of a purse.
The second generation Mamacita Loca bag

I really like embroidering the vinyl or quilting it (or both!) and adding unique embellishments to make each bag unique.  Late in 2017, I have the absolute best version of this bag that I could dream of.  I’ve made over 200 of these bags, and even sell custom Mamacitas on Etsy.  They have an updated strap attachment that is stylish and functional, and I love the look of them.  I recently made my favorite Mamacita Tote EVER from Tula Pink’s latest line- De La Luna in quilting cotton.  Although I really like using oilcloth for the lining since it’s so easy to clean, I love the bright and vibrant colors in Tula’s line, so I’ll sacrifice the wipability for that, and just try really hard to keep my 1.5 year old from spilling her milk in it 😉

A woman holding onto a bag with a picture of a lady on it
Mamacita Tote in De La Luna

The Mamacita Tote has been my ultimate labor of love, and I know this pattern by heart.  I love that the lining keeps me organized with all the pockets, and that I can still be stylish or trendy with my fabrics.  Every time I make one, I remember how much I’ve grown as a sewist and how much I’ve learned from all my trial and error and fearlessness as a novel sewer.  I’d love to see your take on the Mamacita Tote and I hope you’ll share your creations with me (use the hashtag #mamacitatote or tag me @kustomkwilts) so I can see the amazing work you’ve done!

A group of bags that are sitting on the ground.
Embroidered Mamacita Totes

Posted on 2 Comments

Quilting Tips – How to plan your quilting designs

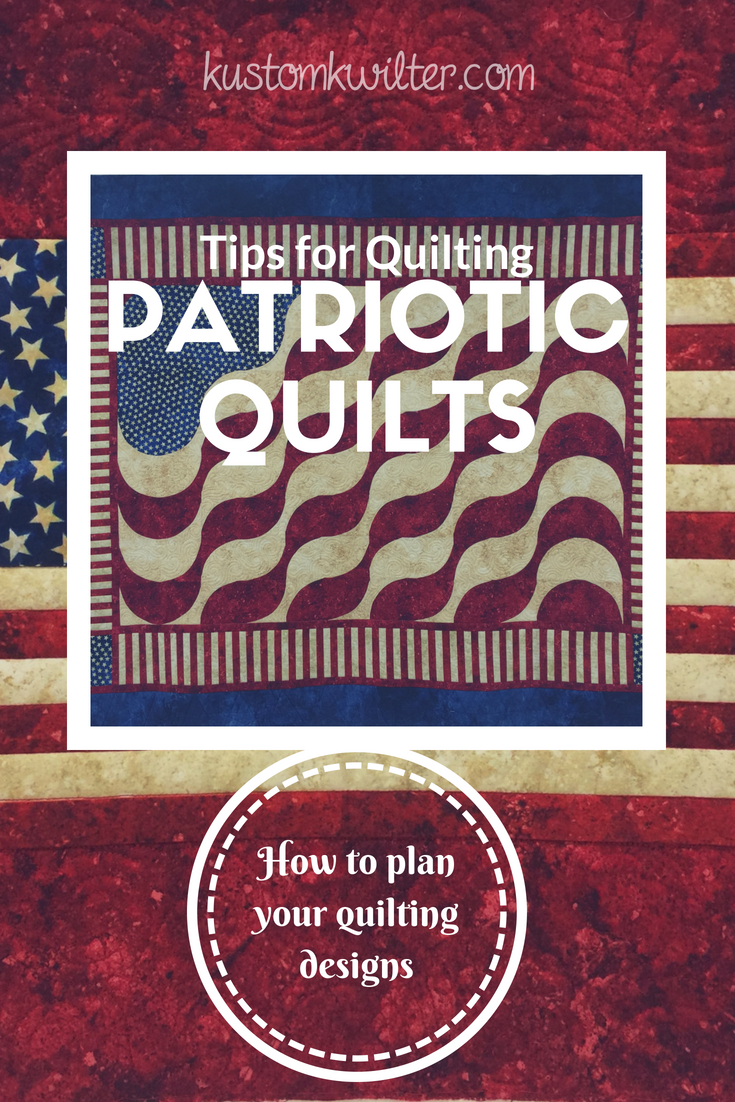
A patriotic quilt is displayed on the cover of a book.


Happy 4th of July!  I hope you’re getting to enjoy family and friends and all the great festivities that the 4th brings!  In my neck of the woods, it’s hotter than Hades and we haven’t had a decent rain shower since March, so we may not be enjoying tons of fireworks this evening…we’re definitely praying for the little rain shower than is a minor possibility tonight.  Now lets talk quilting tips and how to tackle planning your quilting design!

I recently got to quilt an American Wave Quilt (pattern by Lisa Moore of Quilts with a Twist) for my mother-in-law and thought it would be a good opportunity to share some of my quilting tips for adding texture and movement to your quilt tops and planning your overall quilting design.  Even though I love bright colors and modern-traditional quilt designs, I have a great appreciation for traditional colors and patriotic quilts.  Some of the first quilts I made when I was learning to sew were with traditional, warm colors and American designs.  I’m using this quilt to talk about the 8 things I usually think about before I start quilting, but these tips can be applied to any quilt top.

My MIL didn’t follow the pattern exactly as shown below, but this is the original pattern, by Lisa Moore, pictured below.  If you’re interested in purchasing the pattern, you can grab a PDF copy at Quilts with a Twist (this is not an affiliate link, I’m just crediting the original designer in case you want to purchase the pattern).

A quilt with an american flag design on it.
American Wave Quilt Pattern by Lisa Moore – Photo from Quilts with a Twist Pattern Page

Here are my top quilting tips for devising your quilting plan:

  1.  Consider the quilting as a design element of your quilt.
    When you get a quilt top completed that has so much work put into it–much as this one does–it’s important to consider the quilting as another design element and not an afterthought.  In my opinion, a basic meander or other edge to edge can take away from the overall impact of the quilt.Since our goal was to enhance the movement already present in the piecing, we decided to stitch in the ditch, quilt swirly waves, add some stars to go with the theme, and quilt piano keys on the striped fabric border.

    A close up of the quilt pattern
    SID and swirly waves
  2. Examine the layout of the quilt and follow the lines in the quilt to enhance the design.This quilt design already shows lots of movement in the piecing.  I opted to stitch in the ditch on the waves and within the different fabric colors, I quilted swirly waves.  Another great quilting motif would have been to echo the wavy lines within the quilt to complement the already wavy lines.The red and white striped fabric wasn’t exactly stitched in the ditch (SID), since it was one piece of fabric and not pieced stripes, but I followed the lines of the colors and did a faux SID to make it appear that it was pieced.
  3. Consider thread color.
    I used three different thread colors on this quilt–red, cream, and blue.  I matched the thread colors to the fabrics I was quilting and changed them often.  This isn’t always necessary, but it’s important to consider before you stick with just one thread color for the entirety of the quilt.  If you want the quilting to really pop, then using just one of those colors–like cream would be a great idea.  The cream will blend into the cream colored fabrics, but contrast highly against the darker values of the red and blue.

    A machine cutting fabric with a large circle.
    Blending thread

    Ask yourself — Do I want my quilting to blend or POP?  If your goal is great subtle quilting, then select your thread colors to blend or melt into the fabric.  If your goal is high contrast quilting that will POP against your fabric, select thread colors that contrast with the fabric.
    Also, if you’re a beginning quilter, matching your thread colors to your fabric colors will help conceal any minor mistakes you might make.  This is a great confidence building technique to get you started on your quilting journey!

  4. What color is your backing?
    Some people prefer the quilting to blend into the backing, but in this case, the red and blue threads really pop on the cream colored muslin that was used for the backing.  It’s a good idea to think about your backing and what the quilting will look like on the back prior to starting quilting.

    A close up of the fabric for a mattress.
    Backing
  5. Look at your borders (if there are borders).
    So there were two “borders” on this quilt top.  The outer border was a dark navy blue, and the inner border was the red and white striped fabric.  I quilted stars that connected to each other in navy blue thread on the outer border and the faux SID on the striped fabric.  It’s a little difficult to see because of the thread matching, but it’s there :).  Select quilting motifs that will complement your border designs.

    A close up of the american flag quilt
    Border designs
  6. Think about the theme of the quilt.
    In this case, the theme is pretty straightforward.  It’s obviously a patriotic themed quilt, so think about designs that go with that theme.  Stars, stripes, waves, etc. would all be good choices to go with this quilt top.  maybe you have a quilt top that has cats on it, and the cats are made from triangles–you could quilt triangle motifs in the borders, or a ball of yarn, or little mice.  Stars probably wouldn’t be a good choice to go with a cat quilt, so you’d want to pick something in theme with the quilt top.
  7. Evaluate the purpose of the quilt. 
    This will help you decide the density of quilting that is appropriate and what type of batting you may want to use.  If it’s a quilt that’s going to be a wall hanging, you’d probably want to use a stiffer batting, or maybe double batt with a puffy top like wool.  If the quilt is intended to be used often, you might select a poly-cotton blend  or 100% cotton-something that would stand up to being washed and laundered frequently.The batting you select might also dictate how far apart the quilting can be.  If you buy packaged batting, it will usually tell you how far apart the quilting lines can be (example-up to 8″ apart).  Keep in mind the denser the quilting, the stiffer it will feel.  A looser quilted quilt will be softer and drape better than a heavily quilted one.
  8. Stitch in the ditch might be a lot of work, but the payoff is worth it.
    I’m a big fan of SID.  I haven’t ever quilted a quilt with stitch in the ditch and regretted it, but there have been instances where I didn’t do it and wished I had.  It gives the overall quilt a more finished look (in my opinion), and a very polished look.

    A red and white quilt with a large moon on it.
    SID detail

    The overall idea is to think of your quilting plan and how it will affect the overall impact of your finished quilt.  These 8 tips are small things you can consider that will really impact your finished quilt.  I hope these tips are helpful in planning your next quilting project!  Have a safe and happy 4th, and happy quilting 🙂

Posted on 2 Comments

Wonky Logs Quilt Release!

A quilt with squares in the middle of it.


Who loves free quilt patterns??  I do!  Today is the release day for the Wonky Logs Quilt Pattern (if you subscribe to my newsletter, you got access early!), and I can’t wait to share it with you!

A close up of the wonky logs quilt pattern
Wonky Logs Quilt Pattern

I don’t know about you, but when I started sewing a few years ago, I had absolutely zero intention of ever making clothing.  The thought of doing so actually made me break out into a cold sweat.  (I promise I’m getting to the quilt–hang in there for just a hot minute!)  I can still remember sitting on my mom and dad’s bed, worrying over a dress pattern that my mom desperately wanted to make for me.  We (I say we, but I was mostly there for moral support 😉 had managed to cut the pattern pieces out of the flimsy tissue paper, and pinned it to the fabric that was destined to be the dress.  I honestly can’t recall what happened after that, but I don’t think were able to finish it.  I remember the feeling of frustration and not understanding the horribly written pattern that was intended for beginners.  It was even more frustrating because my Mamaw was an excellent seamstress, and my mom didn’t inherit those skills, or really want to.  Her calling is gardening and home making, and she does it all perfectly.  My point in telling you this story is that it left me with a bad taste in my mouth for sewing.  I didn’t attempt any kind of sewing related feat, with the exception of cross stitch, for the next 20 years.

A close up of the square quilt pattern
Some angled straight line quilting on my Wonky Logs Quilt

Fast forward 20 years, and I’ve gotten the basic knowledge down of quilting.  I joined a modern quilt guild and went on a retreat where many of the members were making their first (or second or third) garments.  I decided they could have it and waited another couple of years before finally sewing my very first School House Tunic by Sew Liberated.  It wasn’t pretty, but I wore it with so much pride, you’d have thought it was Chanel (the pattern is great–it wasn’t pretty because my fabric choices were A-W-F-U-L).  That feeling of accomplishment and pride–isn’t that what we all get when we complete a new challenging project?  I want to encourage you to broaden your horizons and challenge yourself to take on the sewing tasks you think you’re not good enough for.  That’s how I felt with garments.  And now I am obsessed with sewing my own clothing and clothing for my daughter and husband.  I’d like to help you get there.

Okay, that was a long intro, but I needed to tell you WHY I wrote the Wonky Logs Quilt pattern.  It’s free.  It’s fat quarter friendly!  It’s a quilt pattern you can put together with your serger.

A person using a sewing machine to sew fabric.
Bust out your serger!

WHAT???  Yup.  (Don’t run away just yet–you can piece it with your sewing machine too)  If you don’t have a serger, no worries.  You can still use the pattern with a traditional sewing machine and a 1/4″ seam allowance just like normal.  If you DO have a serger, and it’s sitting in the corner of your closet with old raincoats and Halloween decorations, then it’s time to pull that puppy out and dust it off.  Give it a little cleaning, find the manual and give it some oil, if necessary.  Think of this quilt pattern as your gateway pattern to garments.  You can still have fun picking out your fabrics and making a really gorgeous quilt, but you can do it while getting to know your serger a little better.  Starting to work with “wovens” with your serger will take a lot of the intimidation out of it because your fabrics won’t be stretchy like knits are.  I’ll be posting more on some fun garment construction and sharing some tips with you along the way, but for now–grab your free copy of the Wonky Logs quilt pattern and gather your fabric and have fun!!!

A woman is standing in front of a wall with squares on it.
Picking your fabrics is half the fun!

Posted on

DIY Starfish Tote – Sewing Camp with Janome

A pink bag with a starfish on it


Are you looking for some cute and quick Summer sewing projects?  Then you’ve got to hop over to the 2018 Summer Sewing Camp with Janome!  The first three weeks of projects are already available, and there’s even a cut file for a camp t-shirt.  It’s all the fun and creativity of summer camp without the hefty price tag, so you really can’t go wrong :).  Every Monday, through July 30, a new sewing project will be released that can be finished in a couple of hours with minimal supplies.  You have to check out the DIY Starfish Tote tutorial!

My contribution was Week 3– A DIY starfish tote bag with the option to use an embroidery design (if you have an embroidery machine) and an option to applique the star with a regular sewing machine.  If you want a really quick finish, you can purchase a ready-made tote bag or follow my simple instructions to make your own!

A pink bag with a star on it
Embroidered/Appliqued Starfish

I used an embroidery/applique design from the Janome Embroidery website and it was so quick and easy to do, I was literally done in 30 minutes with the applique!  I hope you enjoy this quick and easy FREE tutorial–you can download it from the Janome site linked above, or you can download the DIY Starfish Tote here as well 🙂

This is a great project to do with your kids to combat boredom and then load the bag up with some beach towels, sunscreen, and snacks and head over to your local watering hole.  Or if you really want to score some points, gather up some of your kids’ friends and really create the camp feeling!  If you participate in any of the projects, be sure to share what you make with the #janomecamp18 to be entered in the giveaway drawing that will end on August 13, 2018.  They’re giving away a sewing machine AND some other awesome sewing related items, so you’ll definitely want to get in on this!

Happy sewing friends!