Posted on 4 Comments

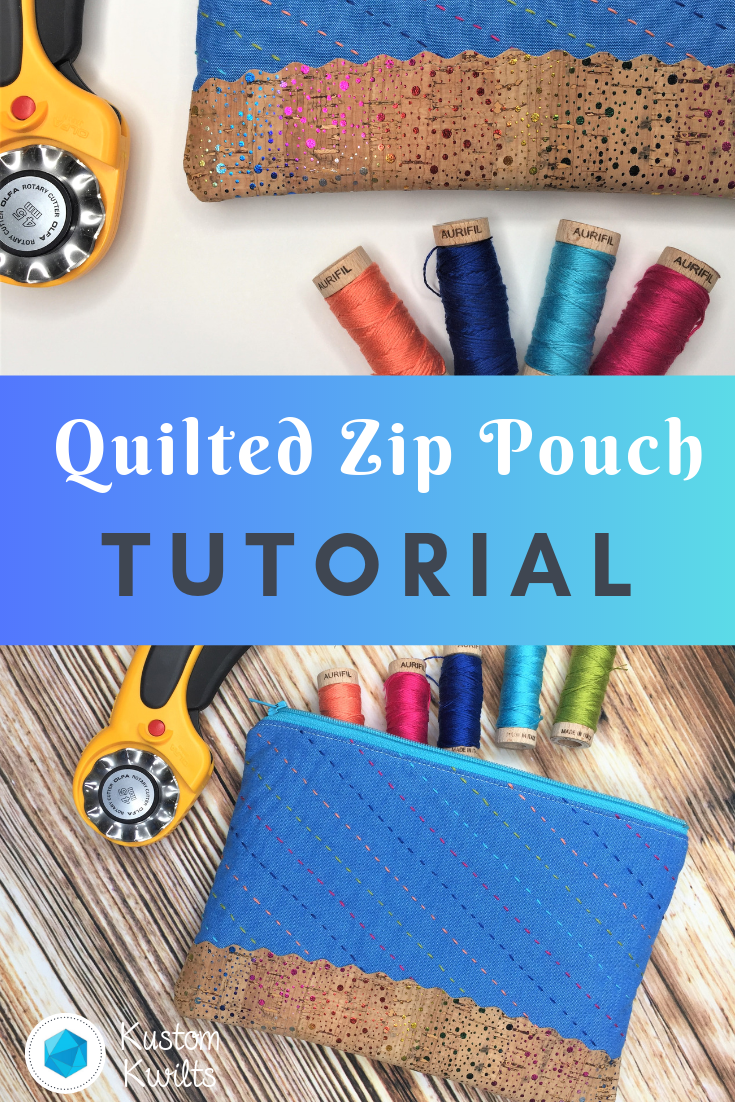
Easy Zip Pouch Tutorial

A wooden table with sewing supplies and a quilted zip pouch.

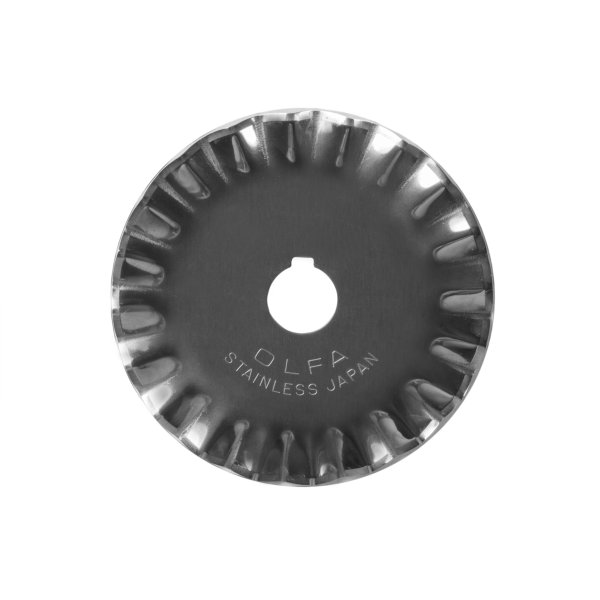
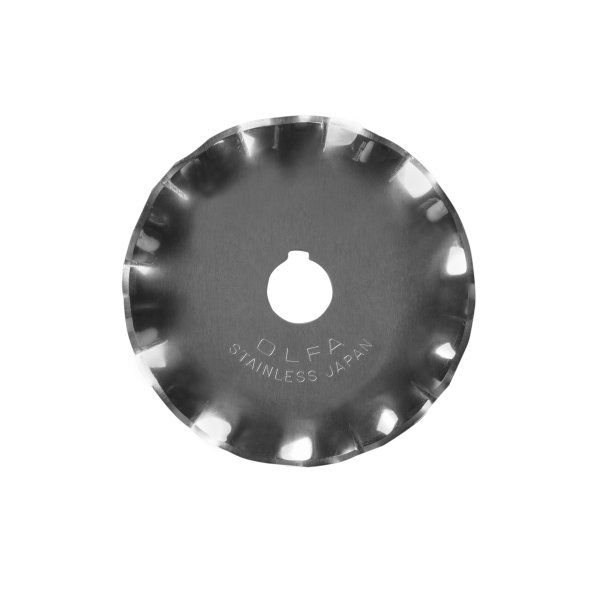
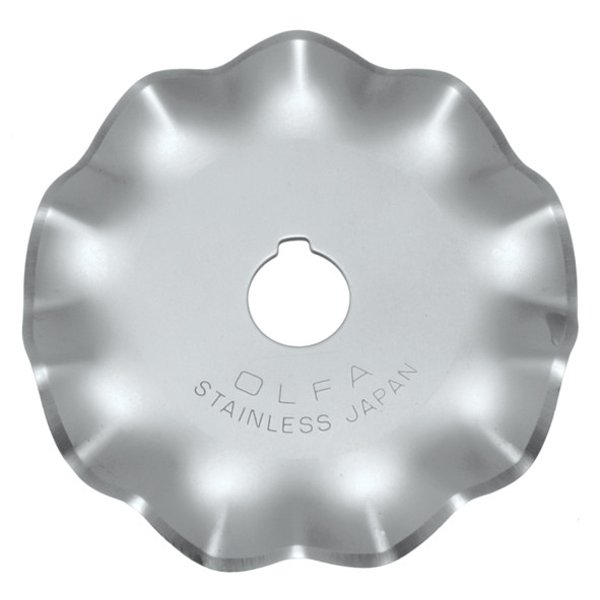
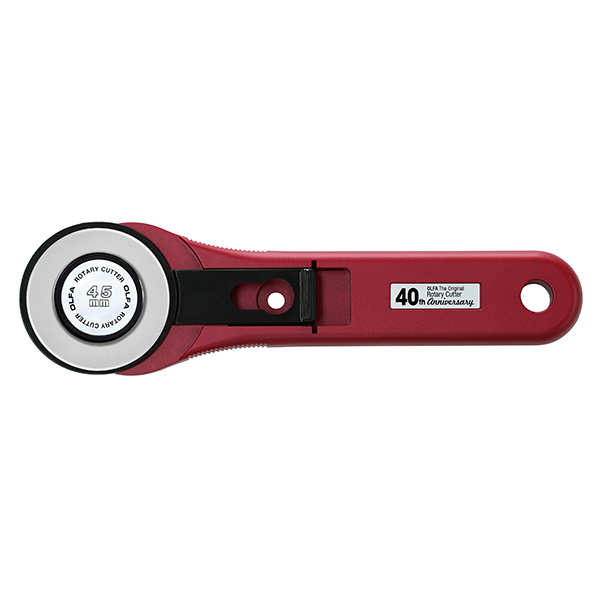
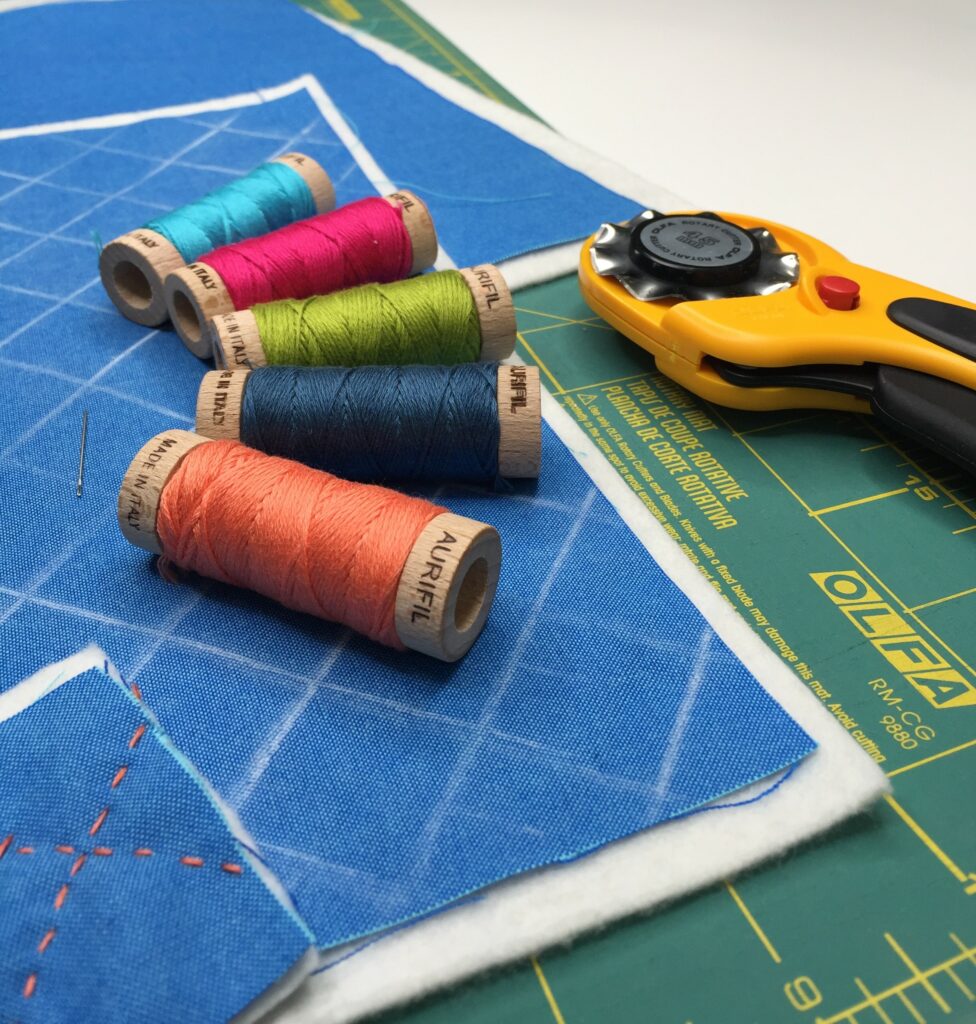
OLFA is celebrating their 40th Anniversary this year and has teamed up with Aurifil to create the Slice and Stitch Challenge! I was asked to be part of the challenge, and I’m so excited to included in this talented group of makers, showing you how to use handy tools to create things you’ll love :). I don’t know about you, but if you sneak into my sewing room, you’re sure to find several OLFA tools (and cutting mats) and LOTS of yummy Aurifil thread. Some of my favorite (and quite possibly underappreciated) tools are specialty rotary cutter blades. You can (carefully) pop one of these blades into your regular rotary cutter and quickly achieve a decorative finish that will look like it took you forever to cut…but that can be our little secret! I also just LOVE the new OLFA RUBY rotary cutter…I use it daily (photos below are from OLFA’s website). For the Slice and Stitch challenge, I saw those decorative blades paired with Aurifloss and knew immediately I just had to make a zip pouch!

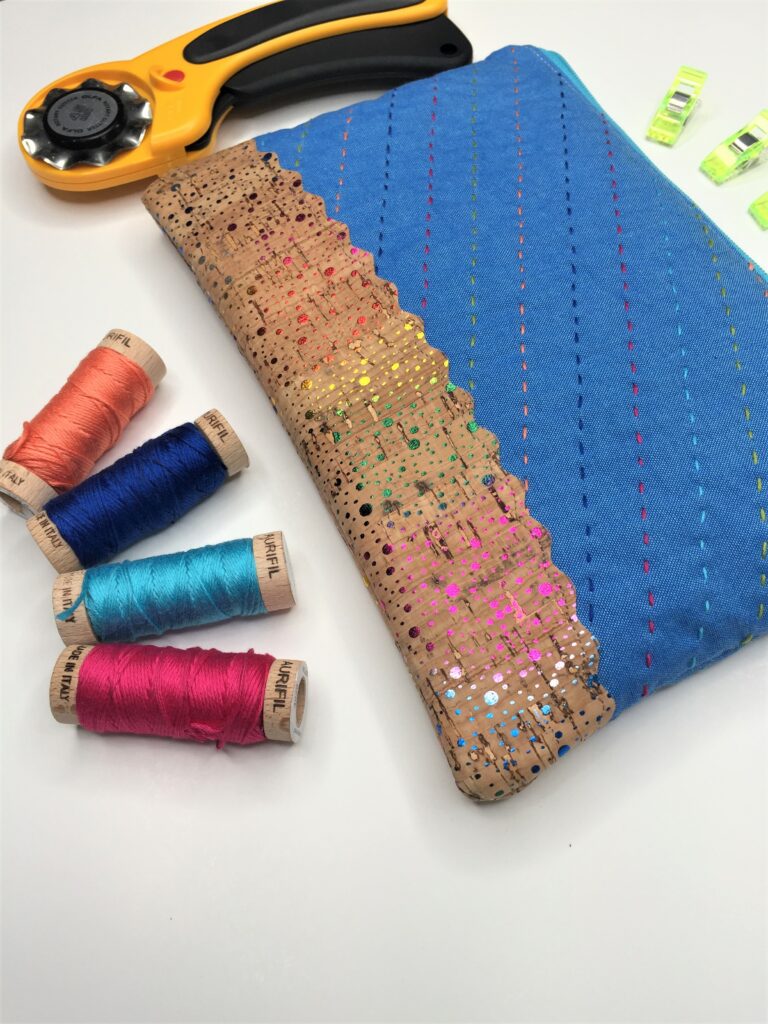
You can see the dreamy Aurifloss colors I chose for the hand quilting on my zip pouch. Love those blues with a punch of bright colors! Let’s get moving and start sewing up your own zip pouch!
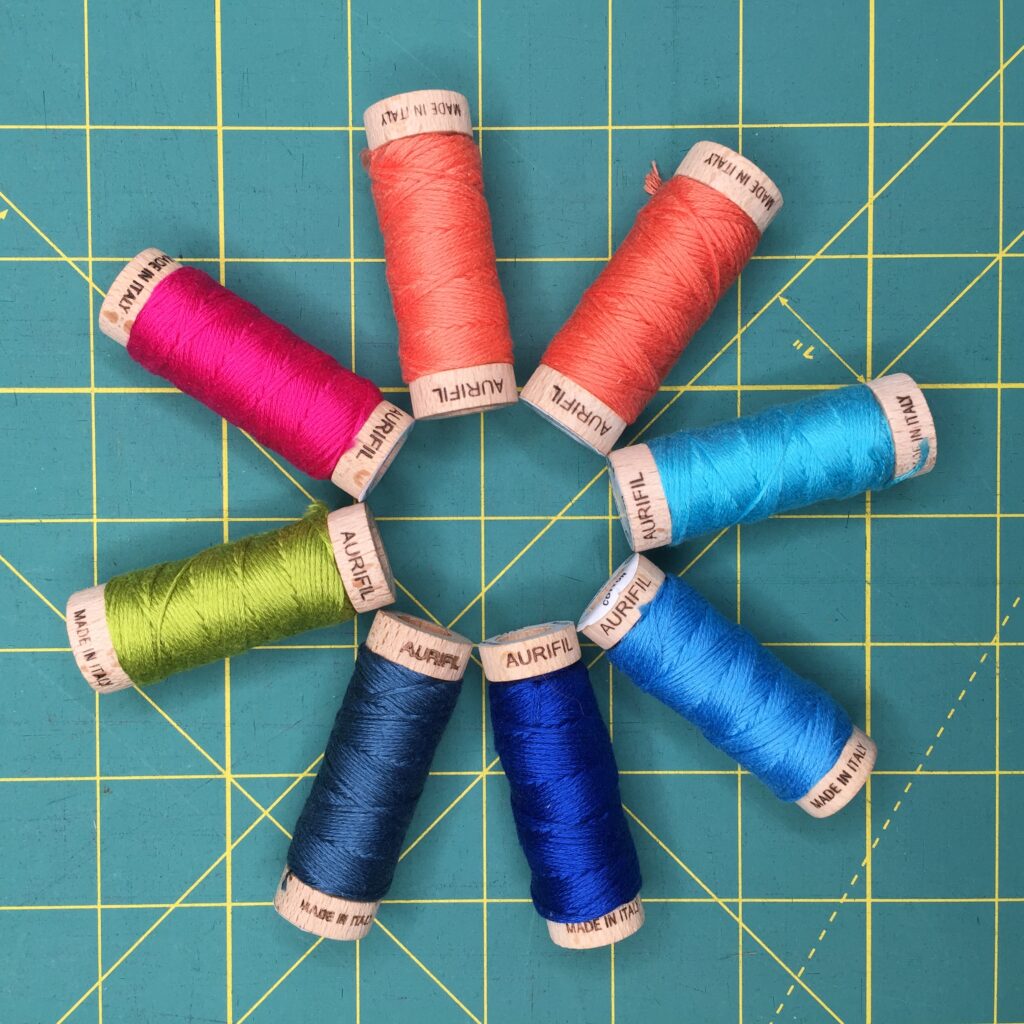
A circle of thread in different colors on a table.
Exact Aurifloss colors are listed below

Supplies needed:

  • Zip pouch template, printed at 100%
  • 10″ zipper
  • Aurifloss in your favorite colors (I used #1320 Bright teal, 2225 Salmon, 2220 Light salmon, 4020 Fucshia, 5005 Bright turquoise, 2735 Medium blue, 1147 Leaf green, and 4644 Smoke blue)
  • OLFA 45 mm Wave rotary blade and OLFA 45 mm Deluxe Handle Rotary Cutter
  • (2) 2.5″ x 9.5″ pieces of cork leather
  • Hand quilting needle
  • 1 FQ lining fabric, sub cut into
    • (2) 6.5″ x 9.5″
  • 1 FQ Solid fabric for the exterior, sub cut into
    • (2) 6.5″ x 9.5″
  • (2) 8″ x 11″ pieces of batting
  • Binding Clips
  • Turning tool (optional)
  • Basting spray/safety pins
  • Chalk marker or Hera marker
  • Zipper foot, sewing machine
  • Thread for piecing and basic sewing supplies
  • Iron and pressing mat

Hand Quilt it!

To begin, you’ll need to take the two exterior pieces of fabric cut at 6.5″ x 9.5″ and center each one on top of a piece of batting. Use a Hera marker or chalk pencil to mark your hand quilting lines, then hand quilt a pattern or random stitches onto each exterior piece. I like to make my stitches about 1/4″ in length, and spaced the same distance apart.
A pair of scissors and some thread on top of a table.

Grab your template:

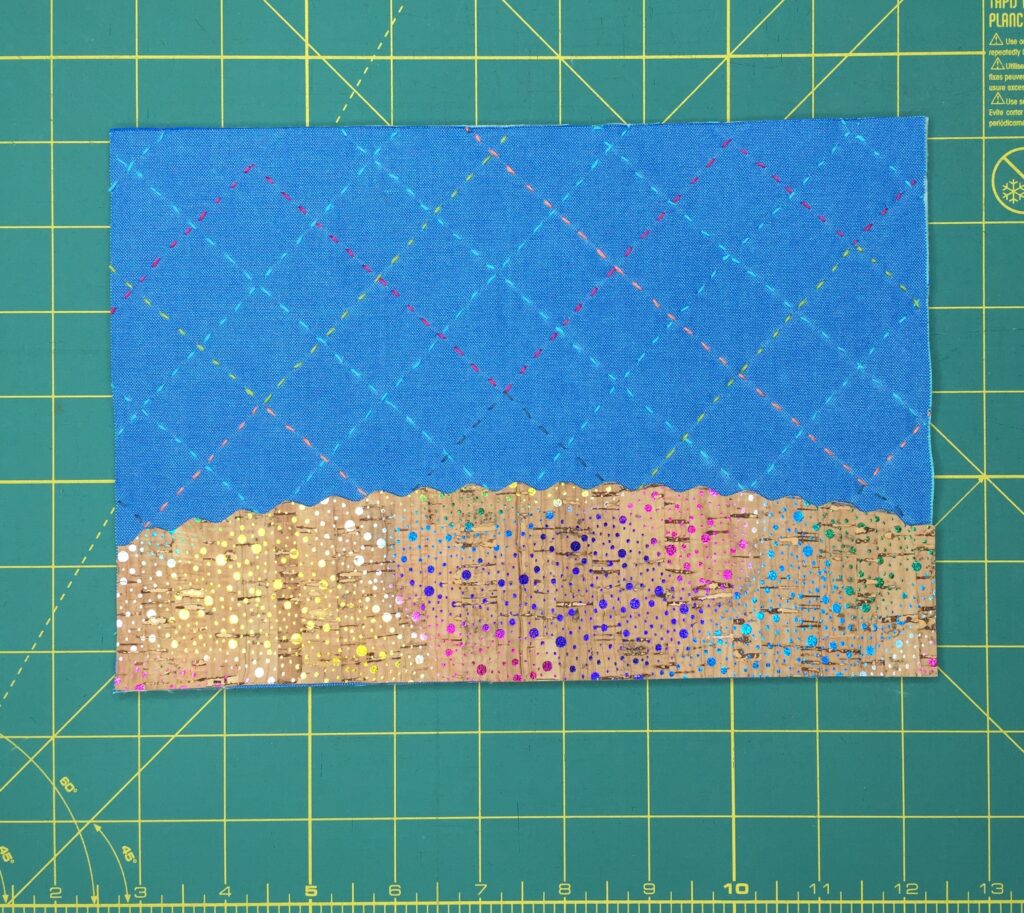
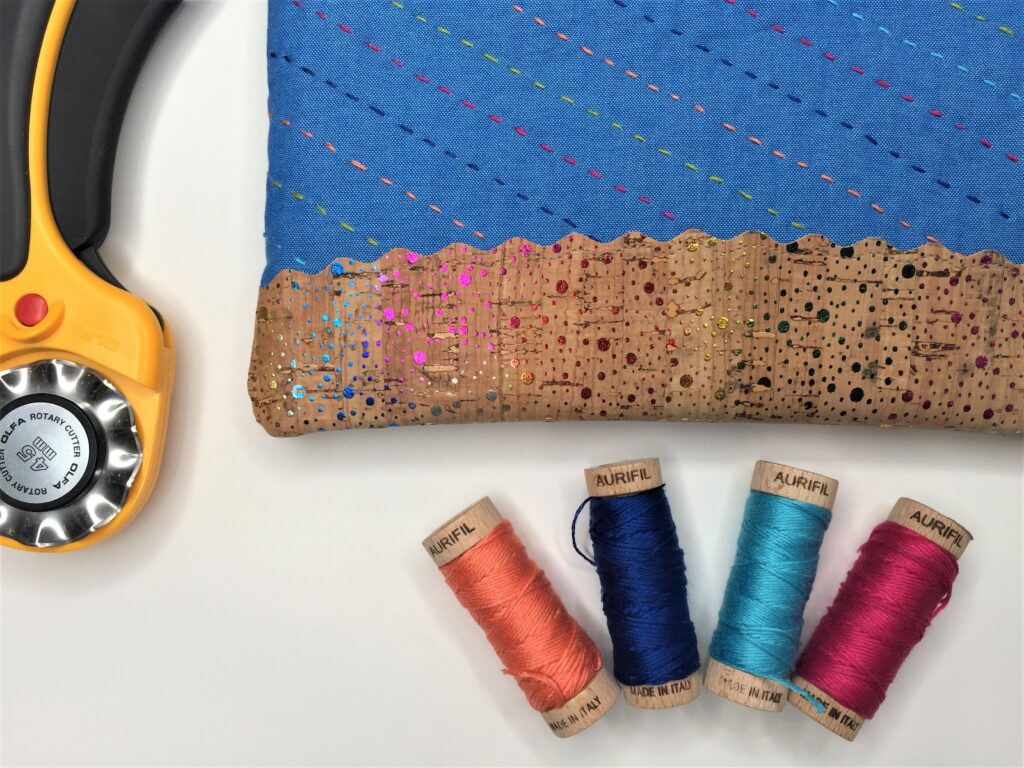
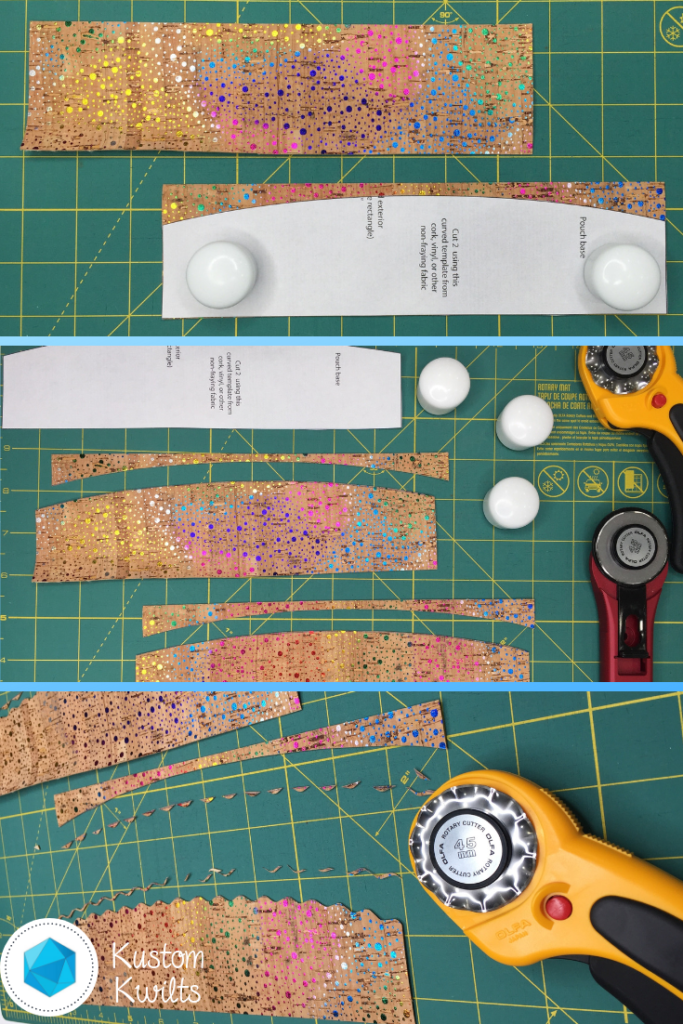
Now you’ll take the cork pieces, and the bottom portion of the template printed from your supply list and line the template up along the bottom 9.5″ of the cork. Use a standard OLFA 45 mm Rotary blade to trim along the curved edge. I used my OLFA Ruby Rotary Cutter for this part. Once you’ve trimmed the curved portion, take the Wave Rotary blade and trim just along the curved edge to leave a cute wavy edge.
A cutting board with some fabric and scissors

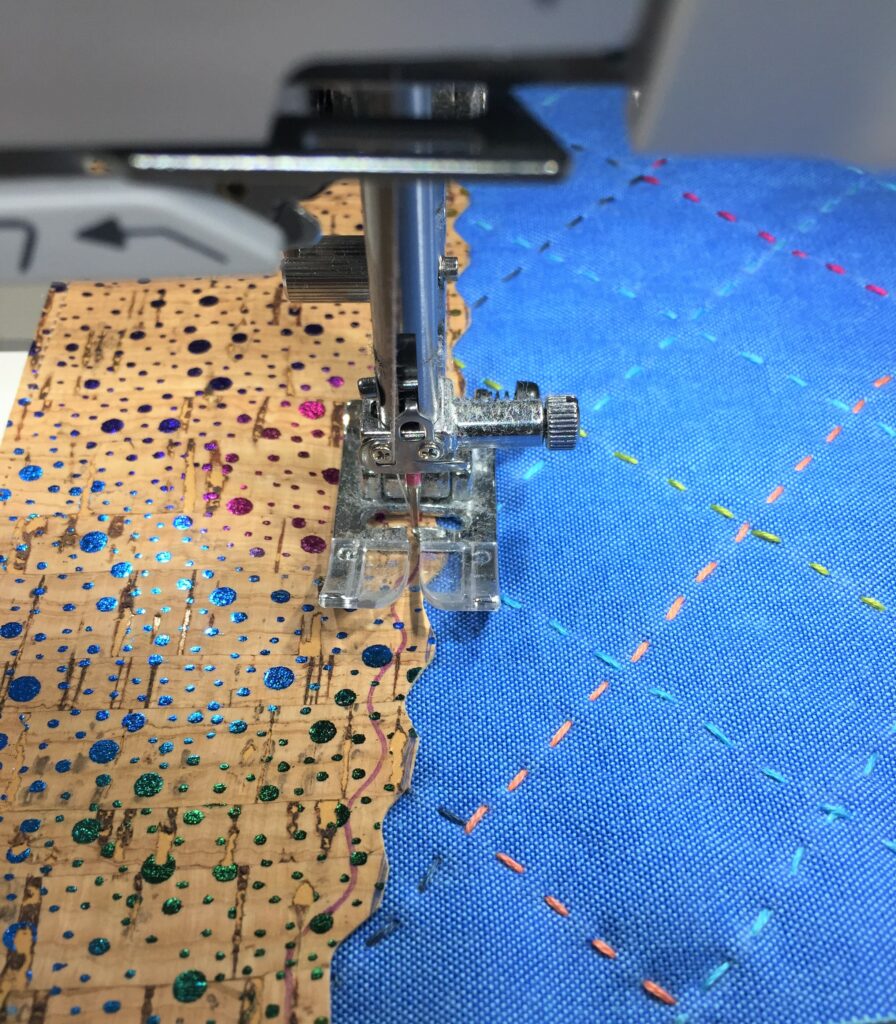
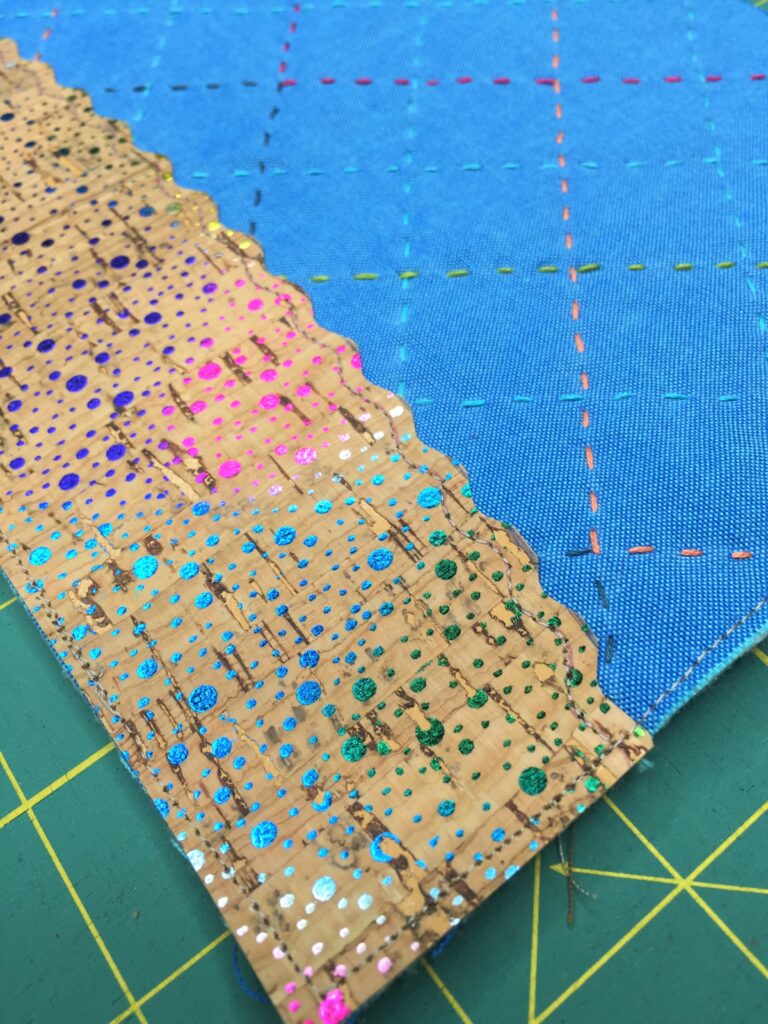
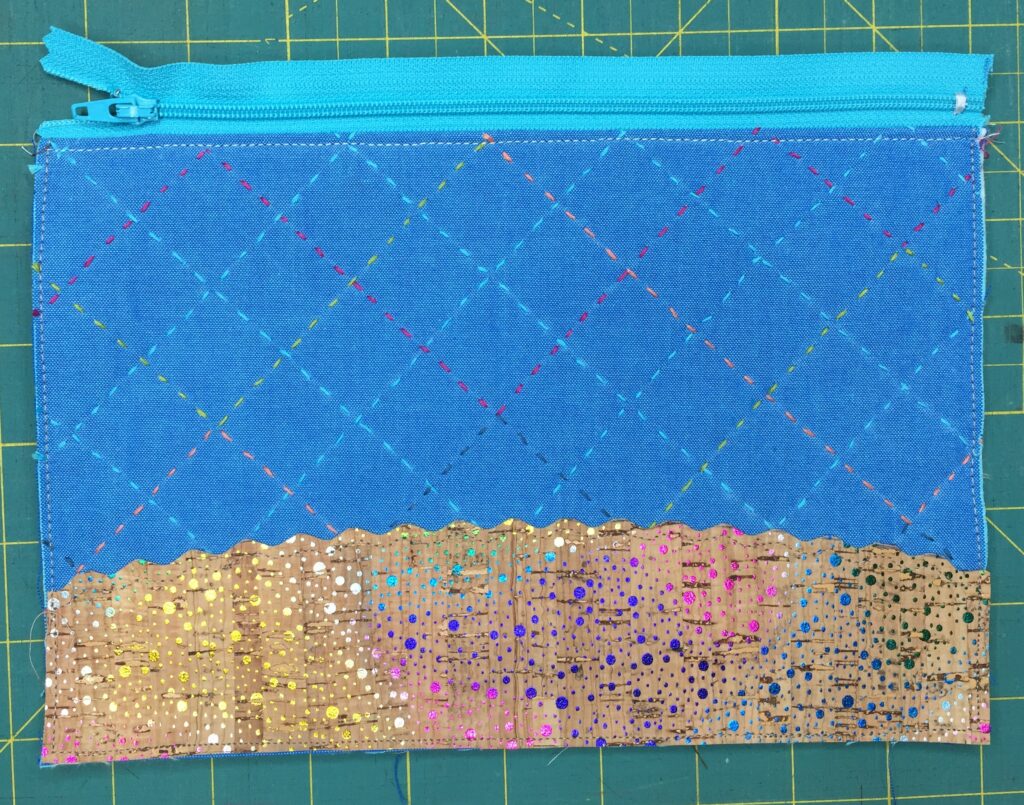
Take one of the quilted exterior pieces and place the decorative cork on the bottom 9.5″ edge. Use clips to hold in place, or use some wash away hem tape to secure. At this point, I like to take an air erasable marker and echo the line of the wave just below the wavy edge of the cork – about 1/8″ from the curvy edge – as a stitching guide. Take this piece to the sewing machine and topstitch along the guideline you drew with a coordinating thread. Then stitch around the remaining edges of the cork, about 1/8″ away from the raw edge to secure it in place. Don’t worry — the cork won’t fray, so it’s great for special decorative finishes with the OLFA rotary cutter!

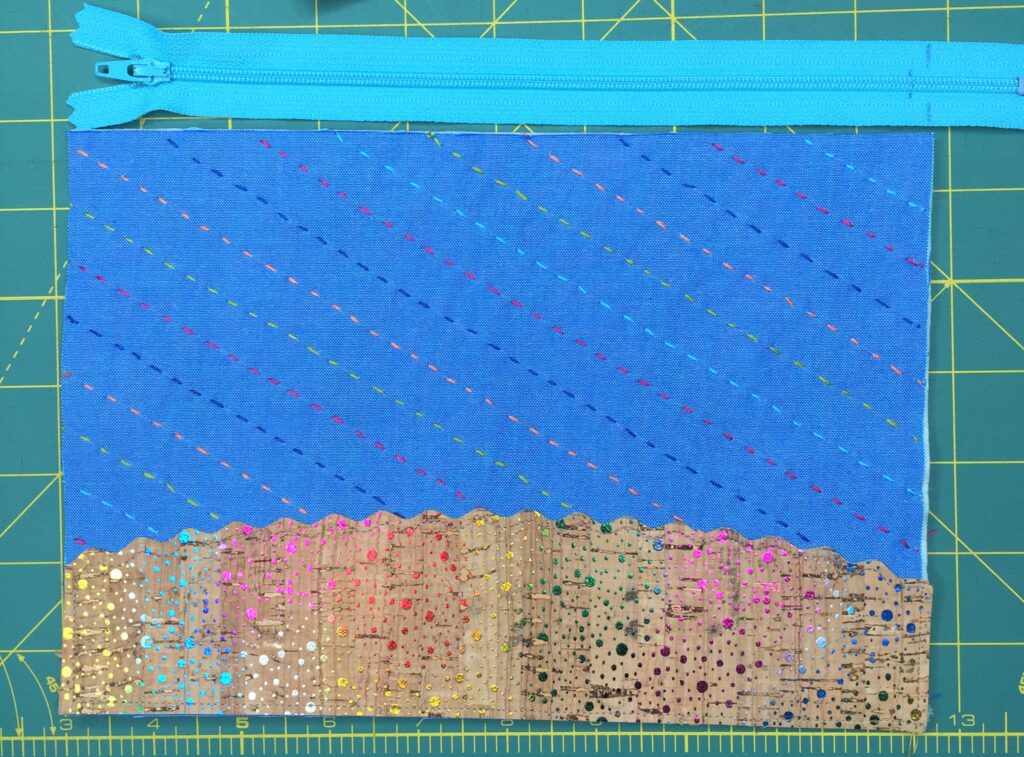
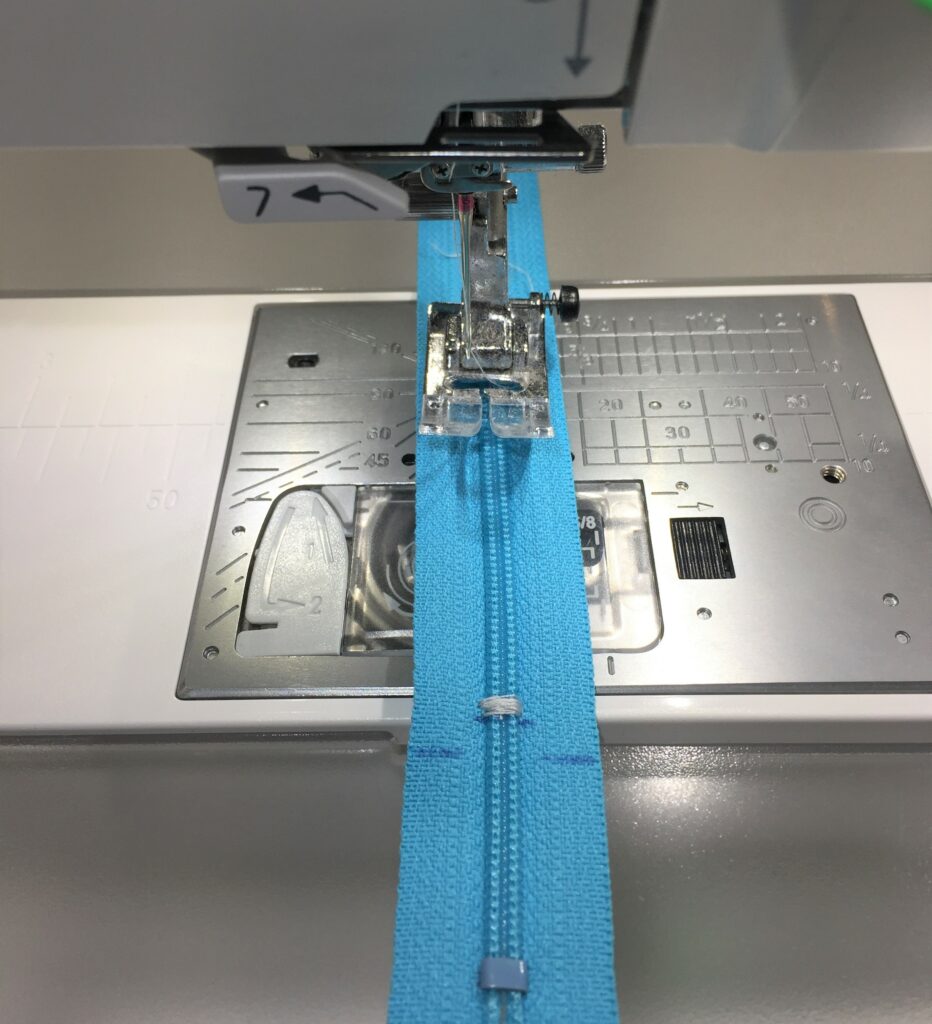
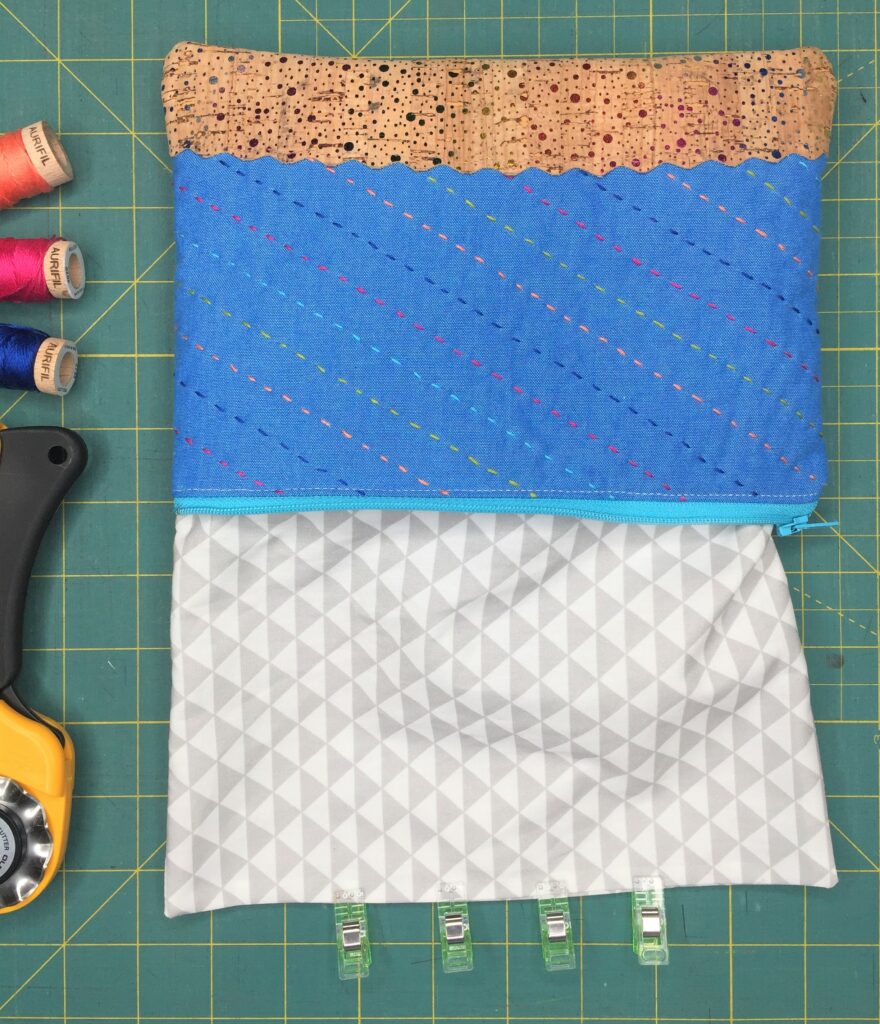
Take your zipper and place it lined up with the top edge of one exterior, as shown in the picture below. Mark the end of the zipper (the end with the metal stopper) where it meets the end of the right side of the fabric, then mark about 1/4″ in from that mark as well. Take the zipper to the sewing machine and use a zig zag stitch to sew a new zipper stop on the mark furthest in. Trim away the rest of the zipper on the outermost mark.

Install the zipper

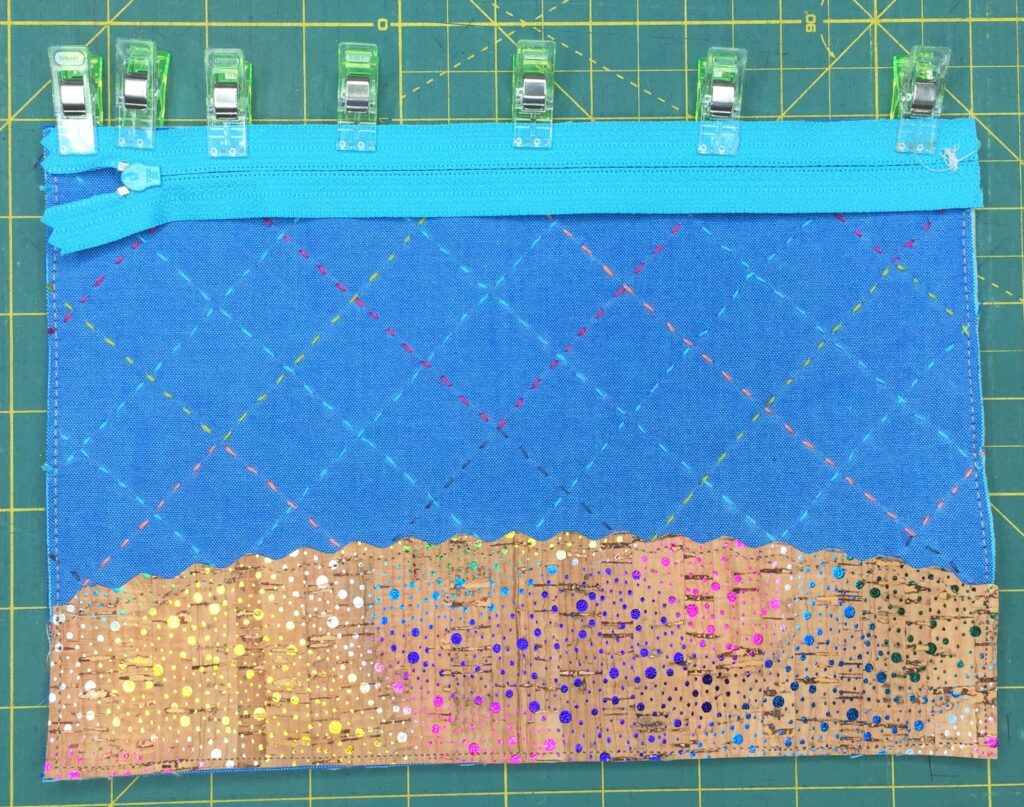
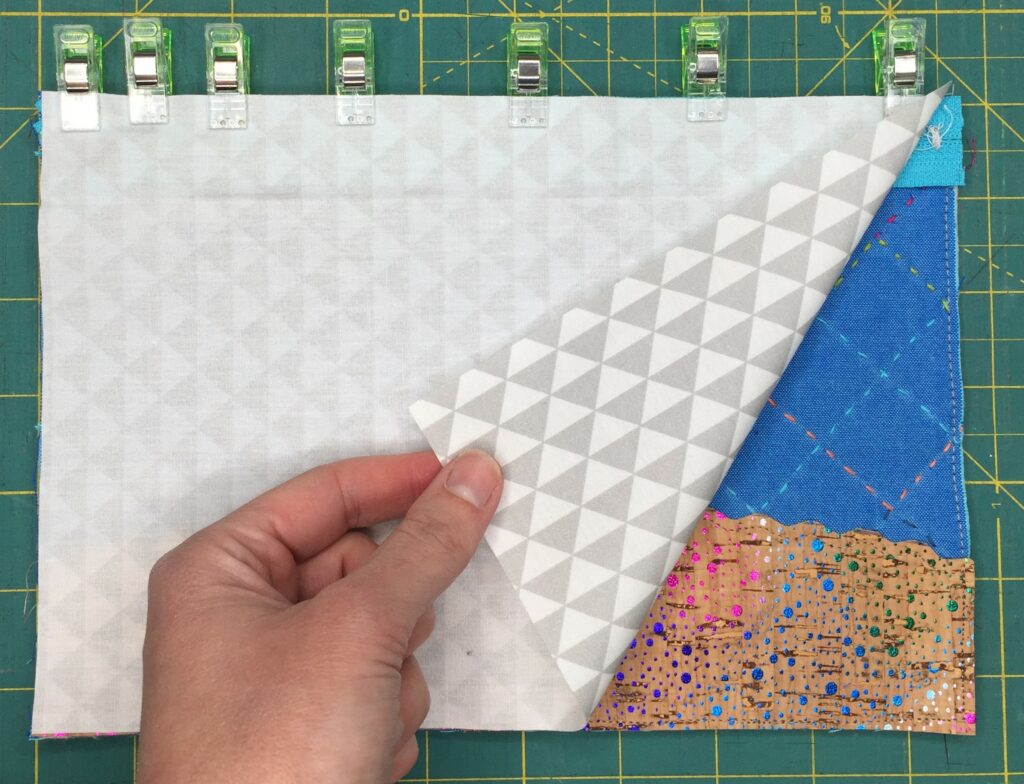
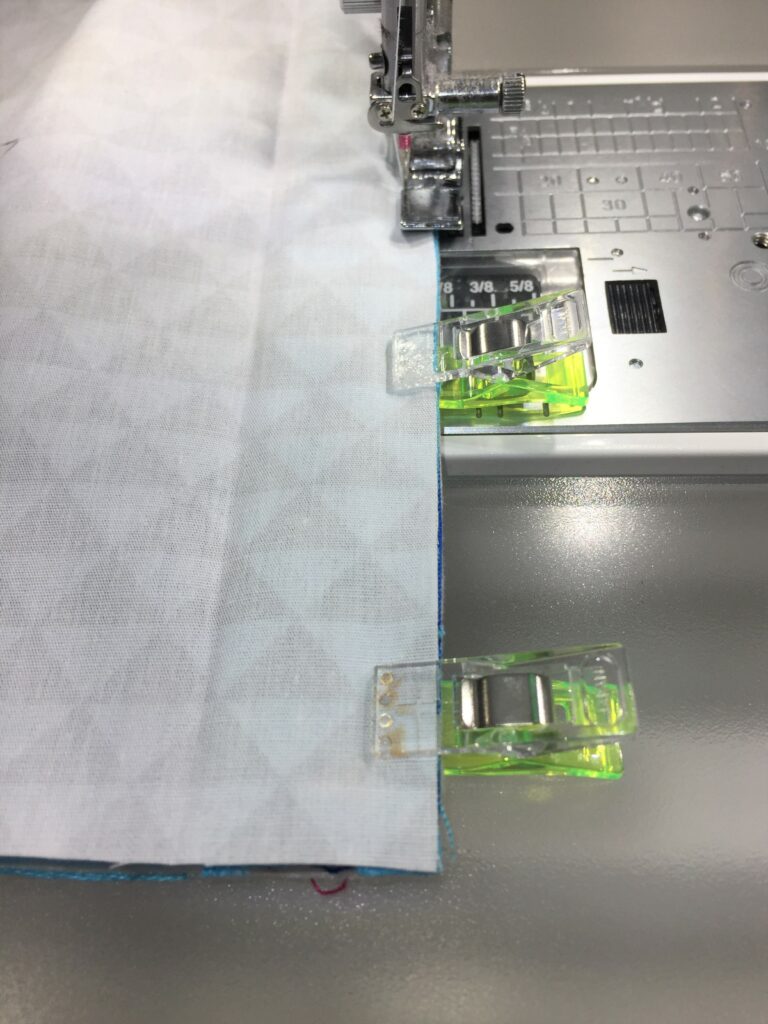
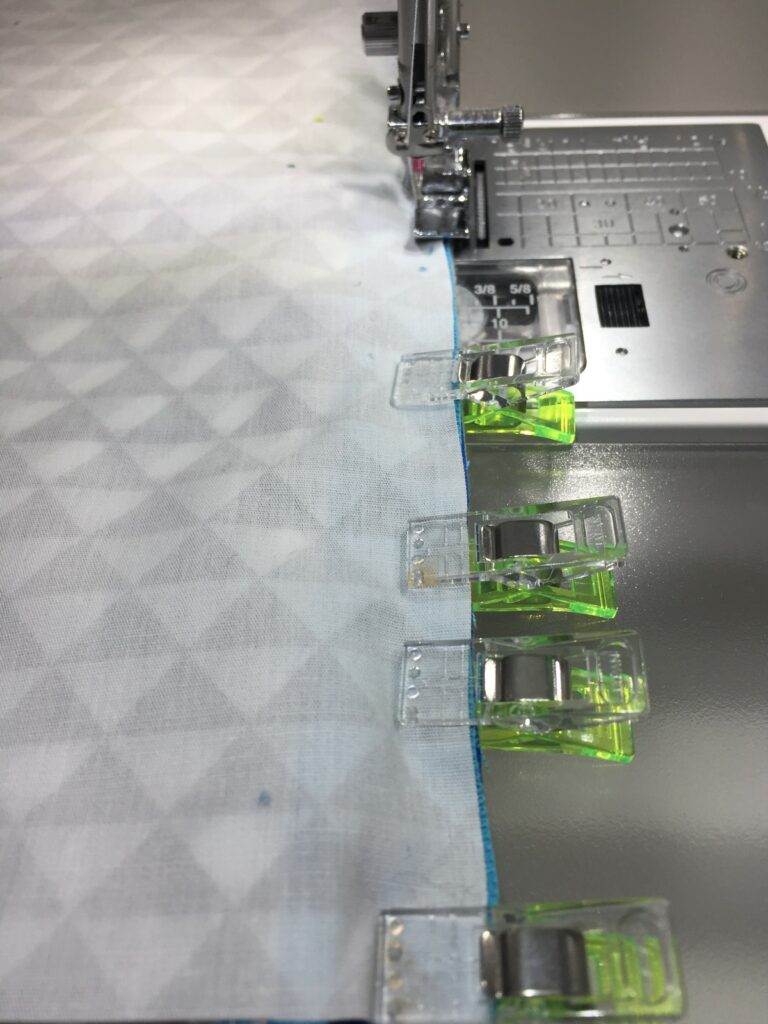
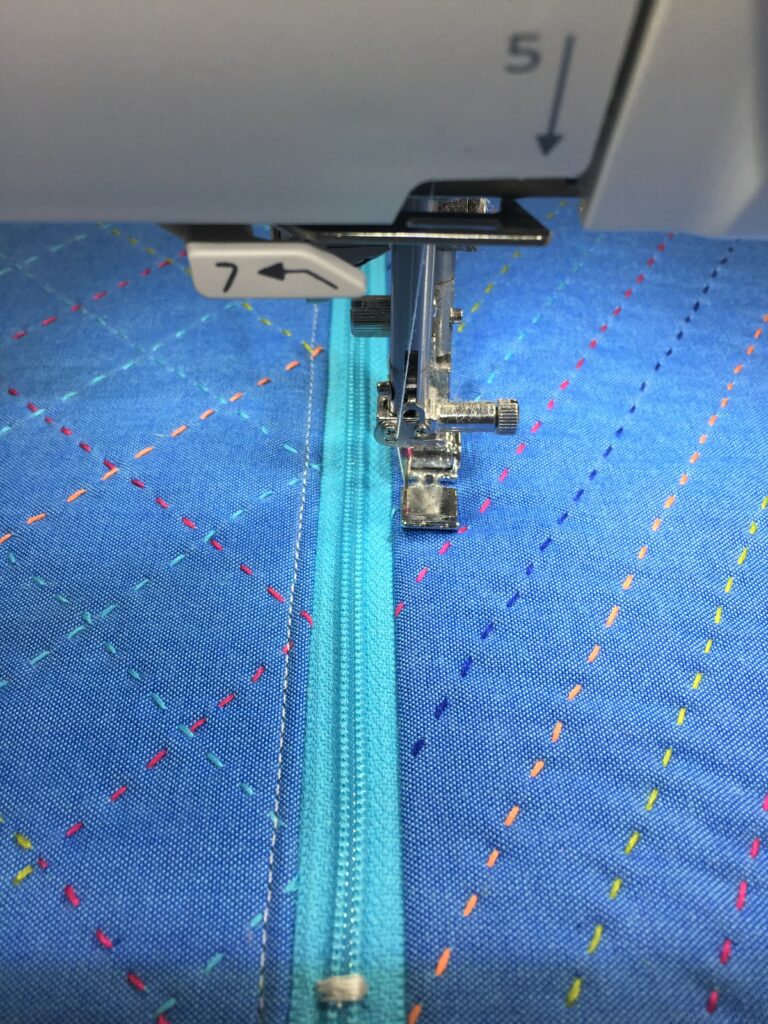
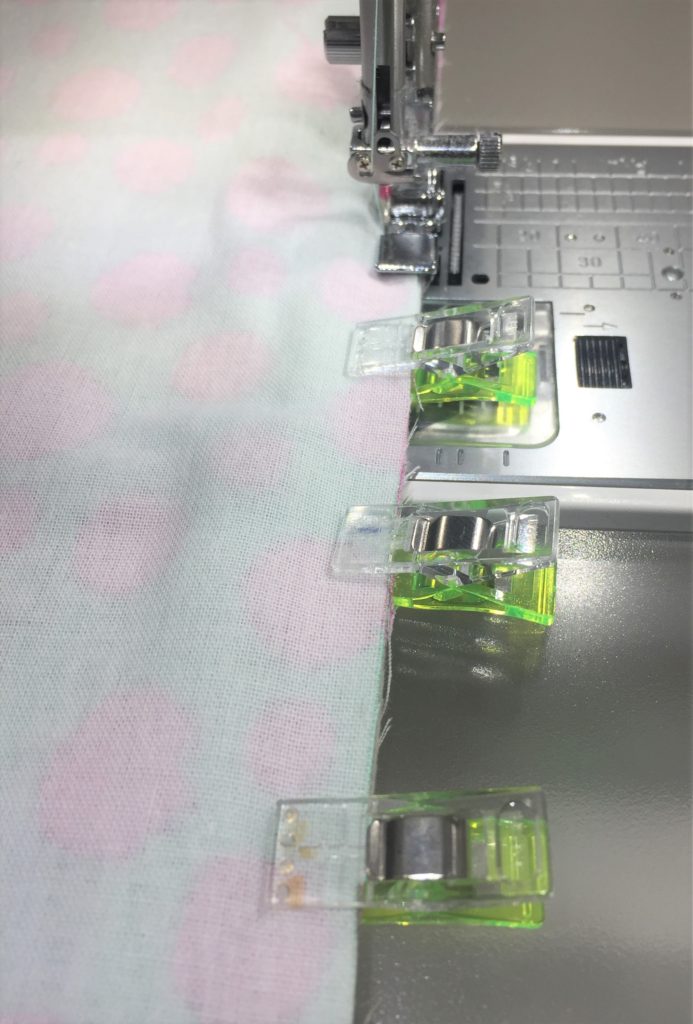
Take the newly trimmed down zipper and place it RSD on top of one side of the hand quilted exterior. Use binding clips to clip the zipper in place. Take one of the lining pieces and place it RSD on top of the zipper, the replace the clips to include all three layers. Use a zipper foot to sew through the three layers with a 1/4″ seam allowance, beginning at one end of the fabric and sewing to the opposite end, all the way to the edge of the fabric.

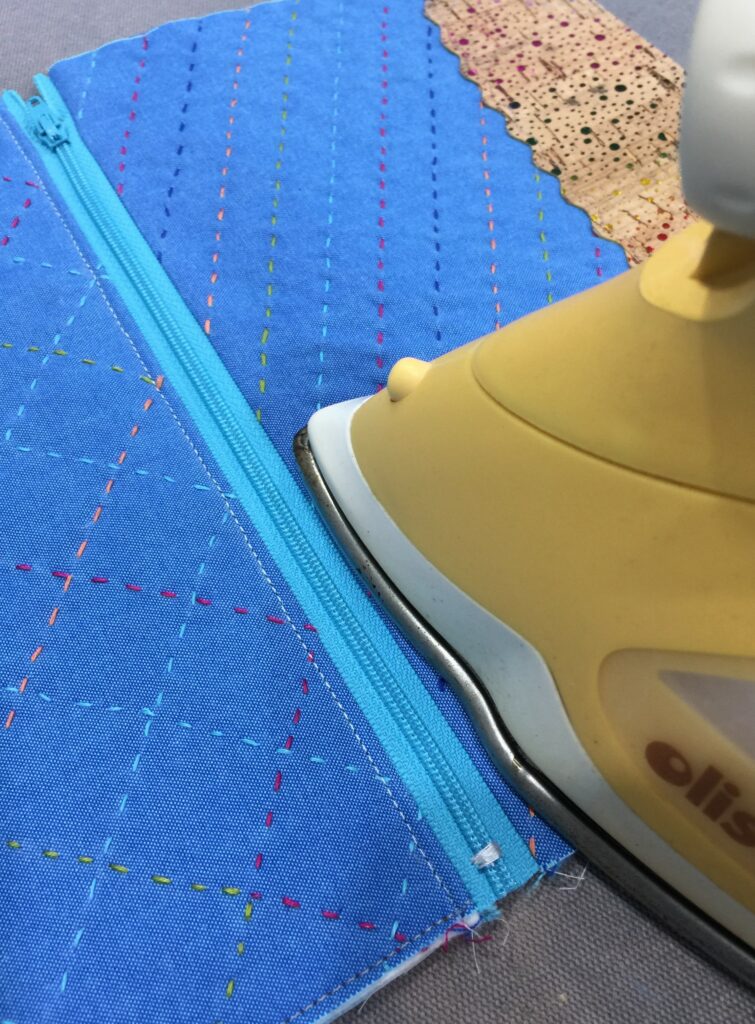
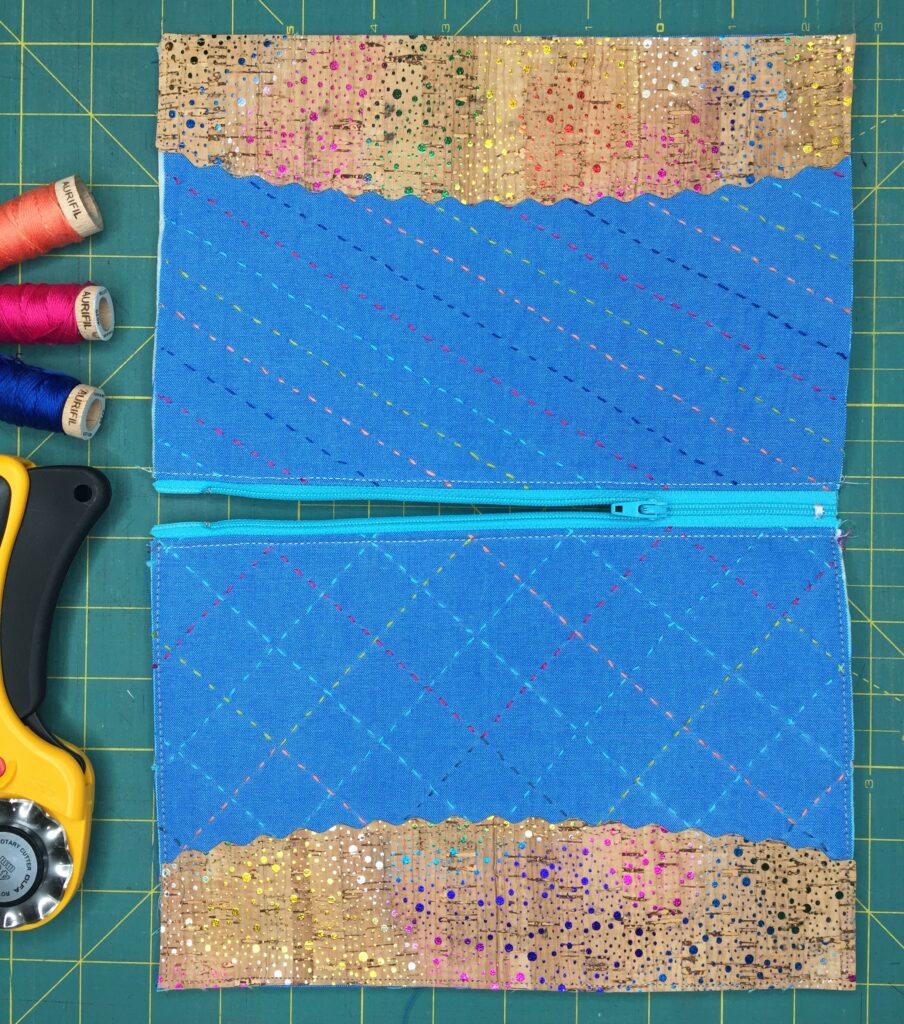
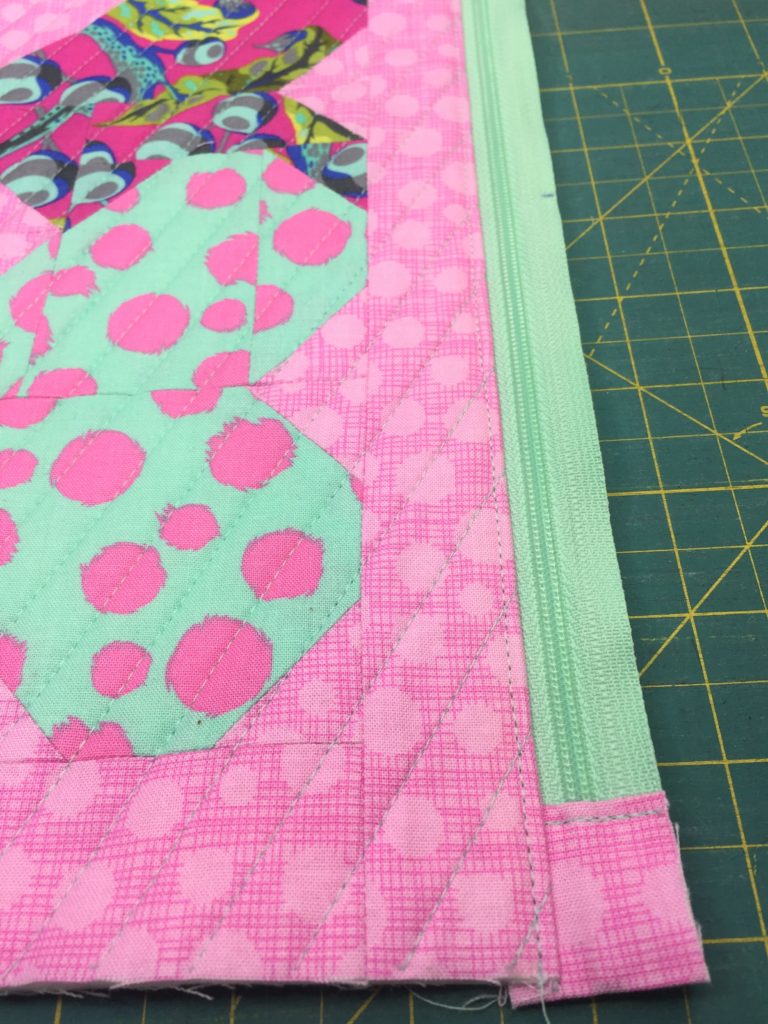
Press the lining and exterior away from the zipper with your iron, and topstitch 1/8″ away from the folded edge of the fabric.
A close up of the back of a blue purse

Repeat the steps above with the remaining exterior and lining pieces.

Assembling the zip pouch

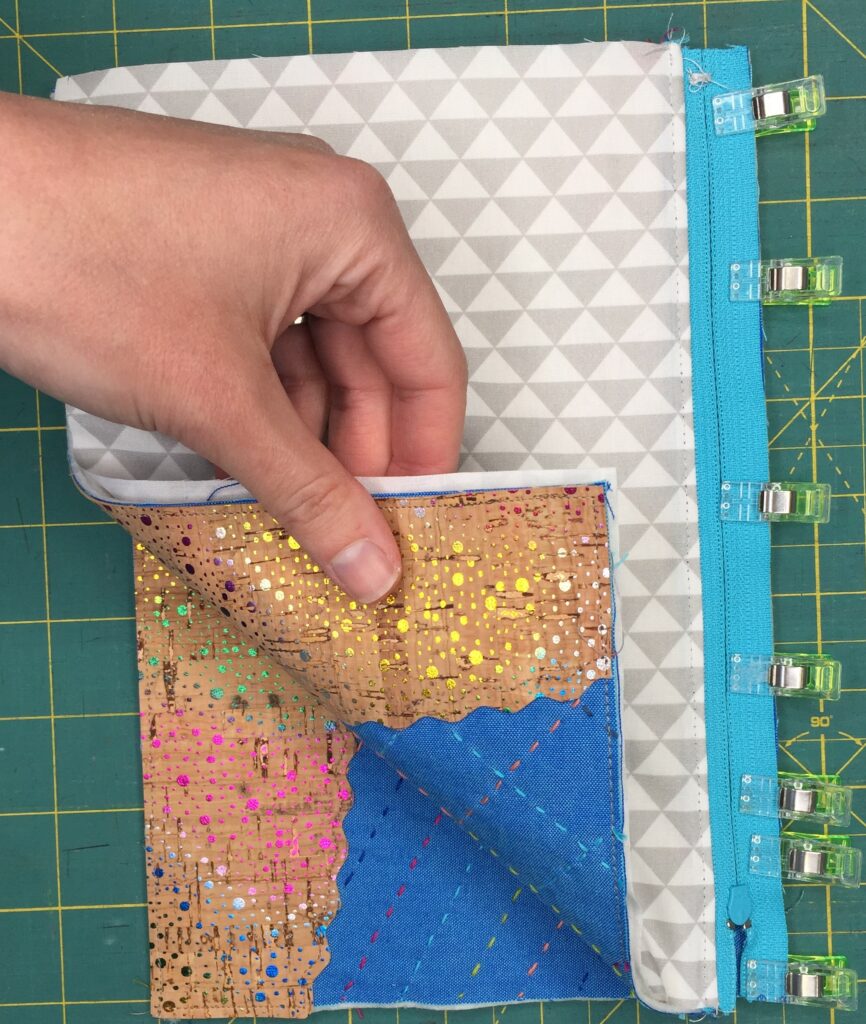
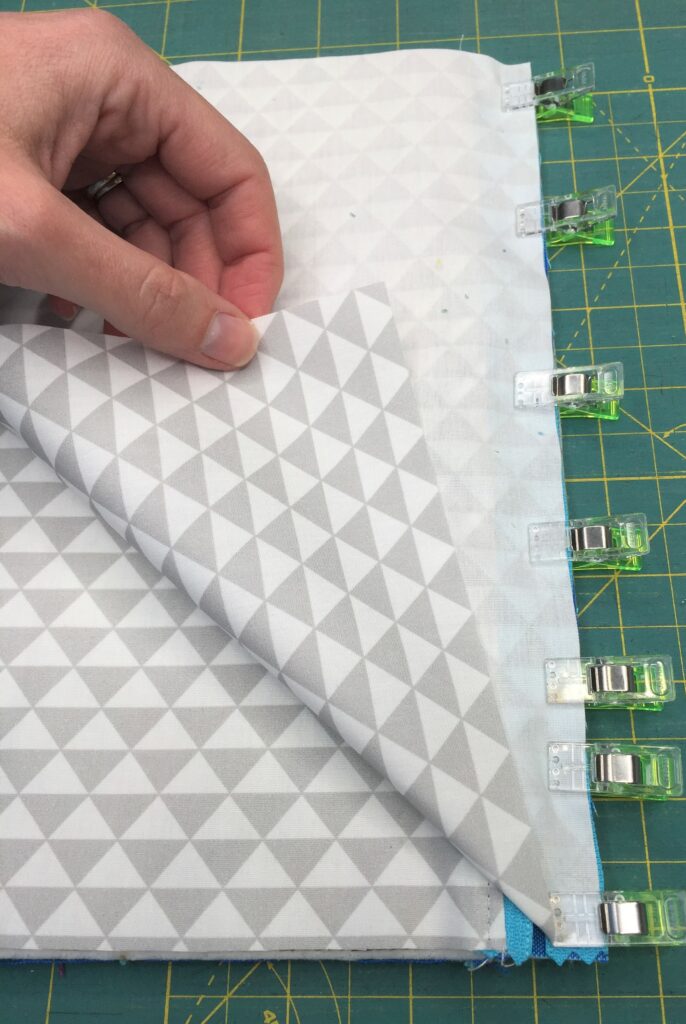
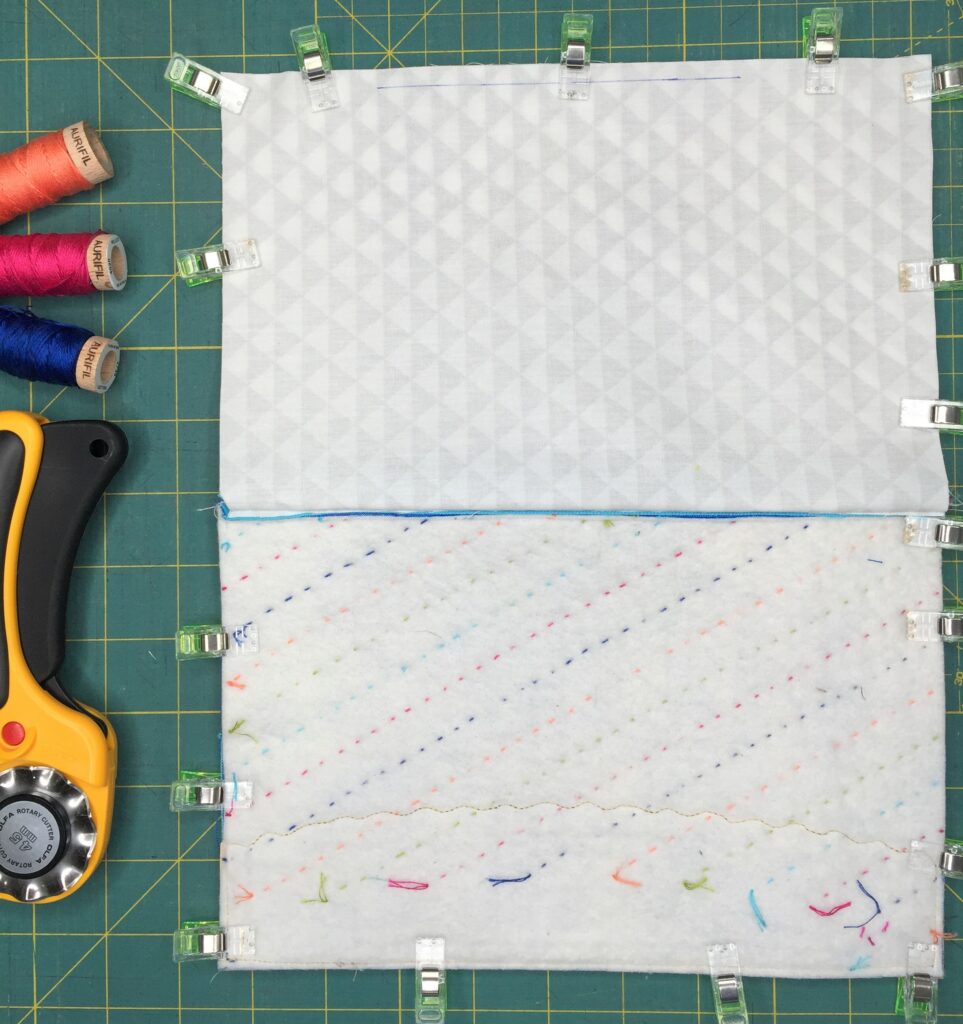
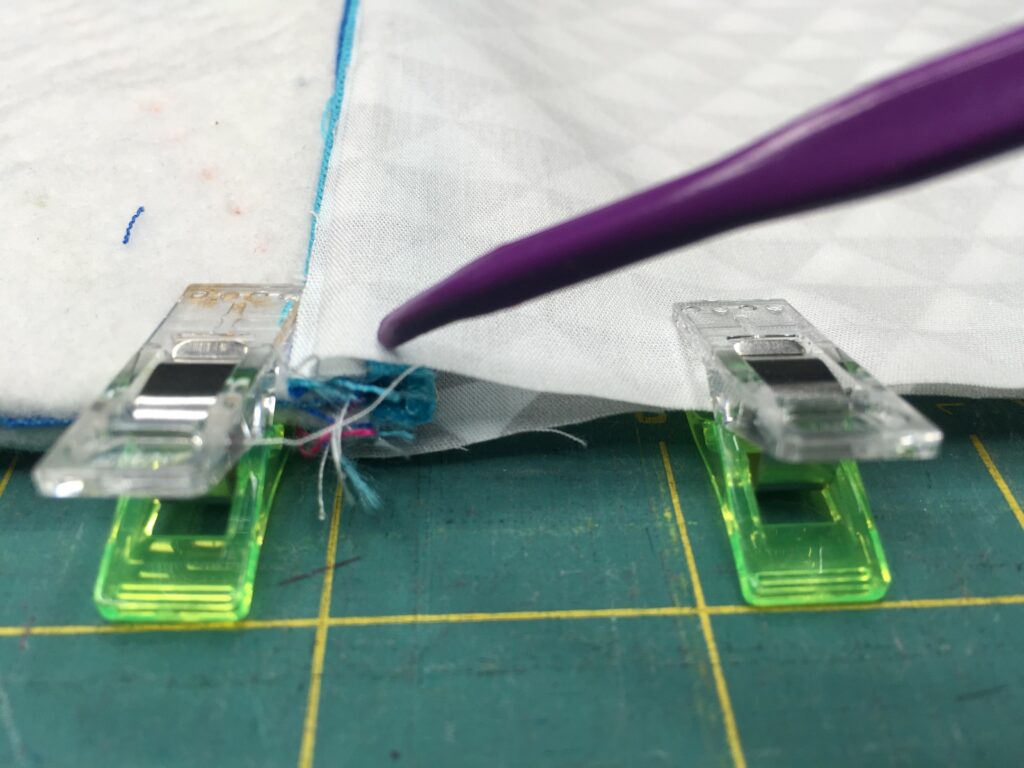
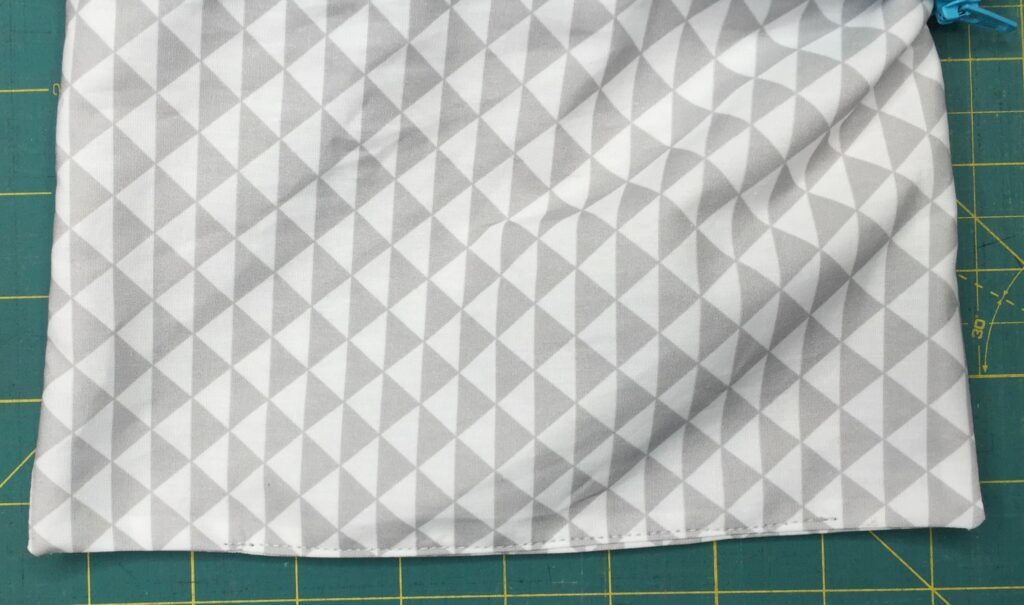
Open the zipper part way, then match the exteriors, placing them right sides together. Pull the linings together and match them, right sides together. Pin or clip in place, and mark about a 5″ opening along the bottom center of the lining to leave open in the next step. Pull the zipper pieces towards the lining, as shown below.

Sew all the way around the perimeter of the zipper pouch, leaving the 5″ opening unsewn. Clip the corners for crisp turning. Turn the zipper pouch right side out through the opening in the lining. You can use a turning tool for crisper turning, if needed. Fold the opening of the lining in 1/4″ and press. Clip in place. Topstitch the opening closed, then push the lining down inside the pouch.

And you’re done! Fill this pretty pouch up with all the sewing things you need on the go 🙂

Posted on 2 Comments

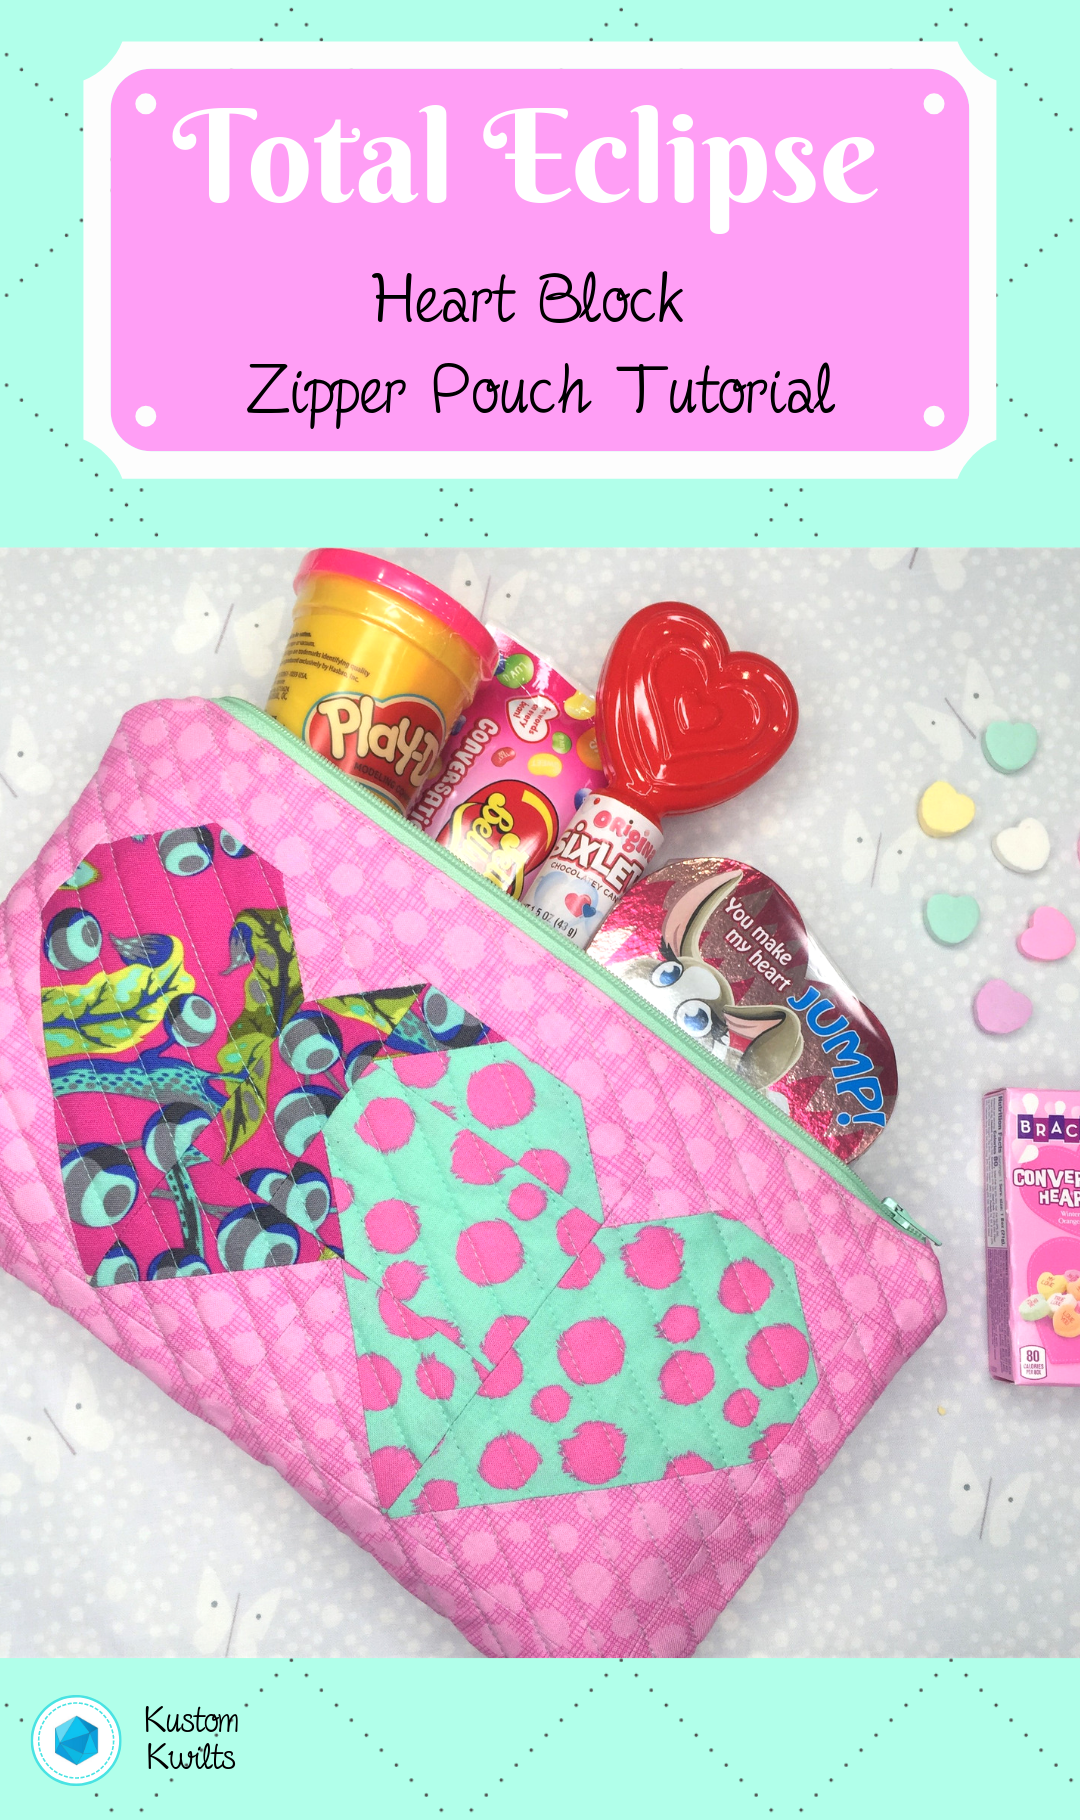
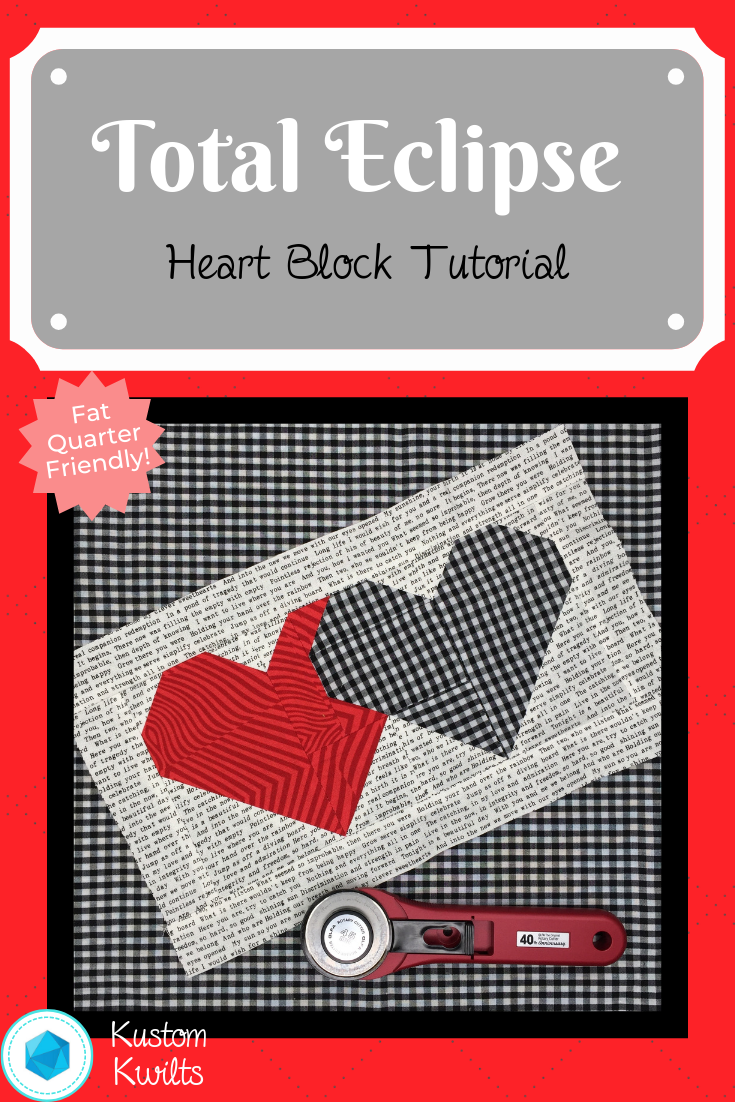
Total Eclipse Heart Pouch Tutorial

A pink and green zippered pouch with lots of items inside.

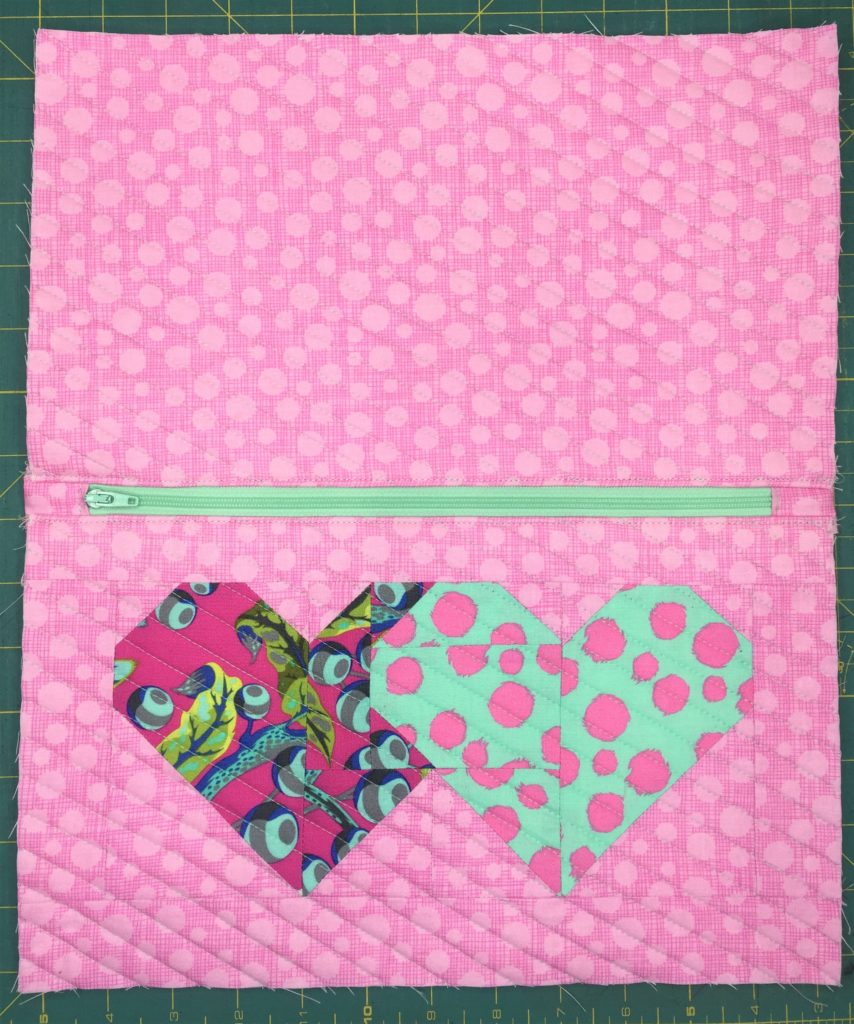
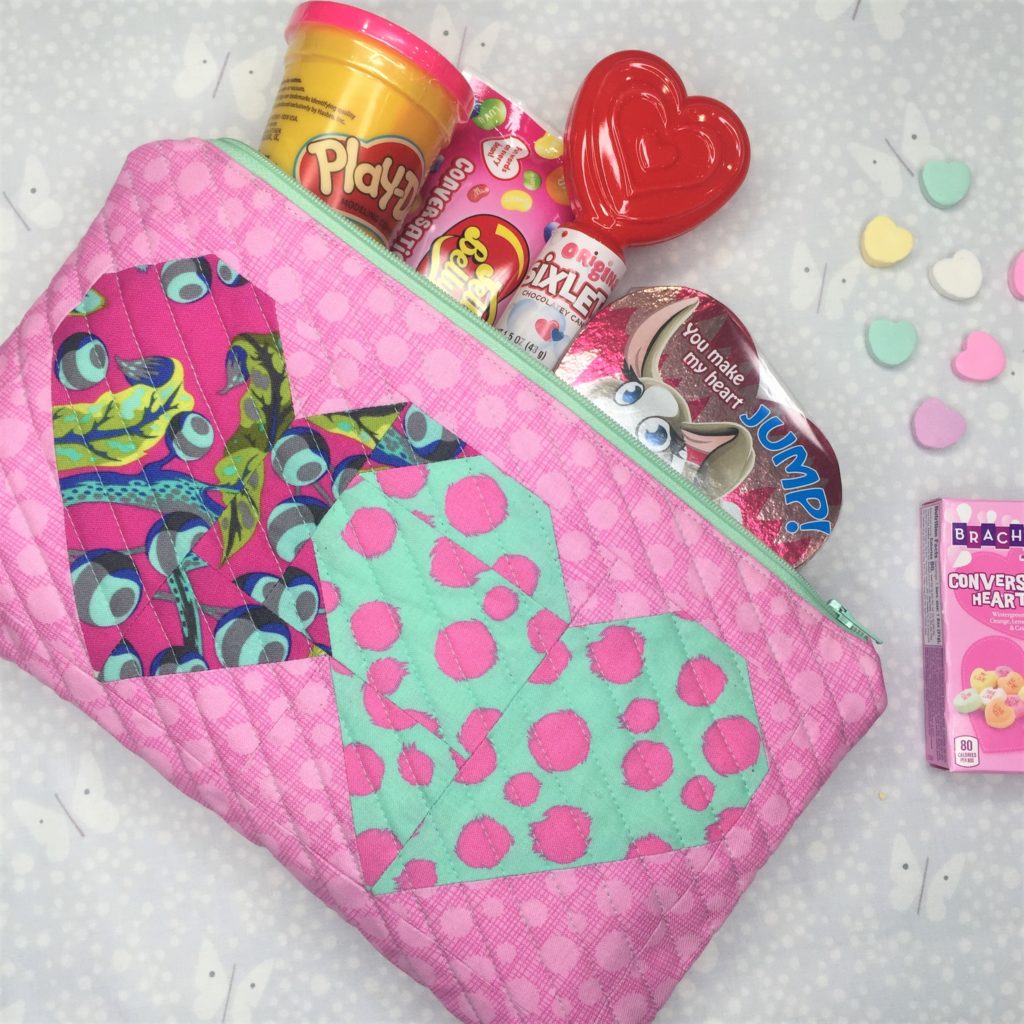
Grab your copy of the Total Eclipse Heart Block and check out this free zip pouch tutorial to turn it into a quick and easy zippered pouch for some serious cuteness!

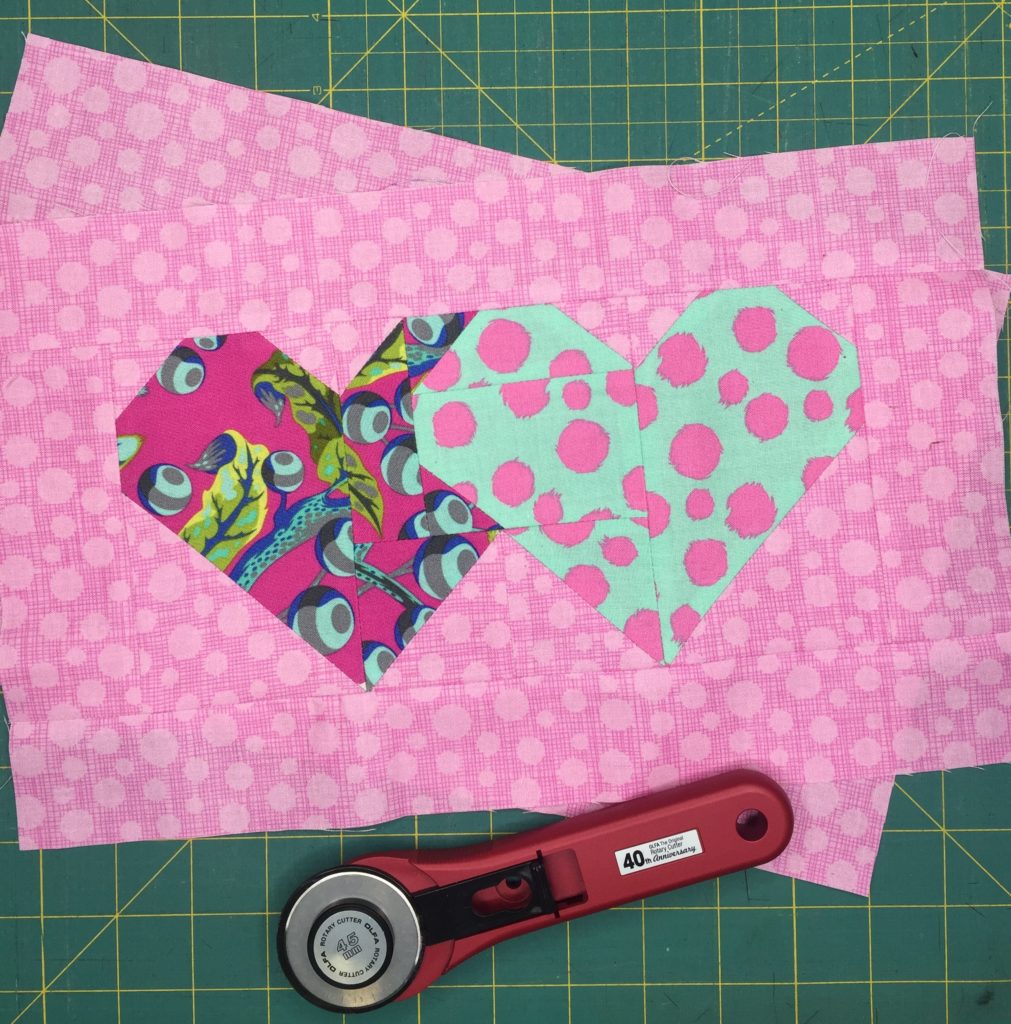
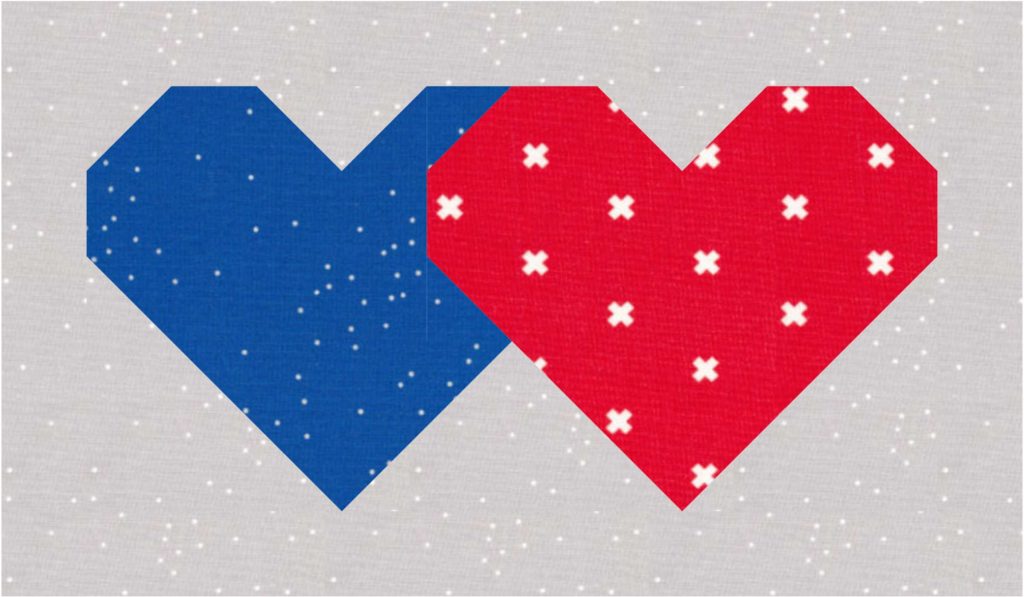
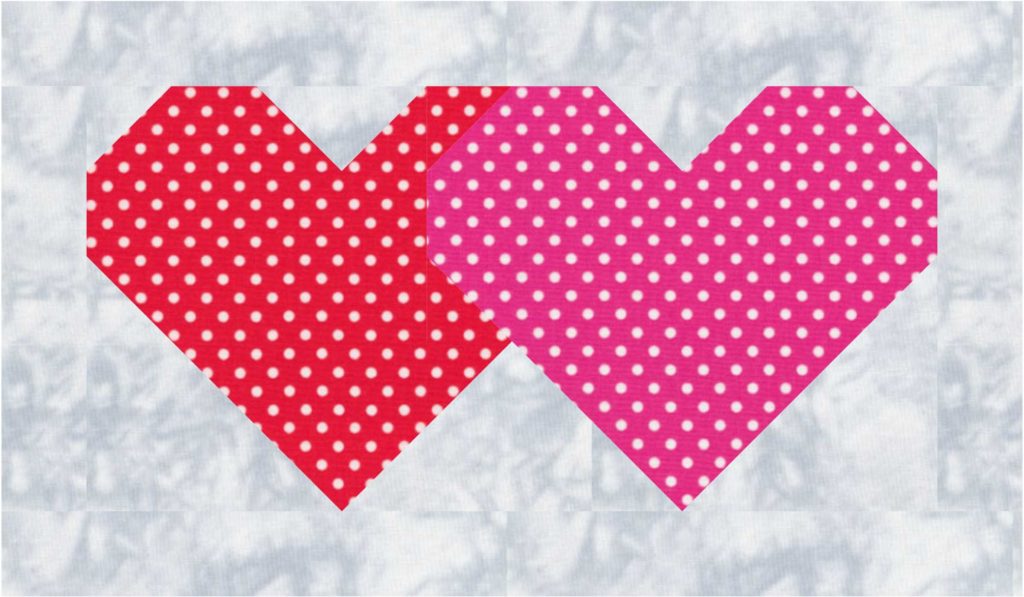
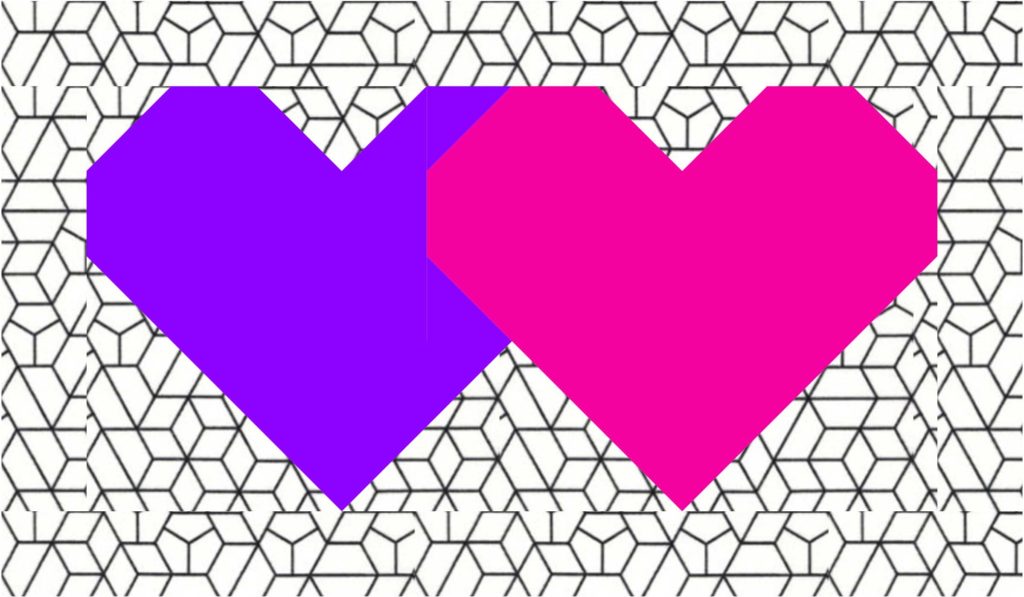
Two hearts are shown in a row.
Total Eclipse Heart Block in Tula Pink’s Tabby Road and Michael Miller Hashdot

Supplies

  • Supplies/fabrics listed in the Total Eclipse Heart Block pattern – we’ll be making the 7″ x 12″ block.
  • Additional fabric cuts:
    • (2) 1.5″ x 4″ zipper ends cut from exterior fabric
    • (2) 7.5″ x 12.5″ lining for zip pouch
    • (2) 7.5″ x 12.5″ pieces of SF101 fusible interfacing for the lining
    • (1) 7.5″ x 12.5″ for Exterior back of pouch (cut this at 8.5″ x 13.5″ if you plan to quilt it, then trim down to 7.5″ x 12.5″. You may also want to alter your border pieces on the Total Eclipse Heart Block and cut them at (2″ x 5.5″ and 2″ x 13.5″) if you’re quilting the front exterior or the quilt block.)
      • If quilting, you’ll also need (2) 10″ x 15″ batting pieces.
      • If not quilting, cut (2) 7.5″ x 12.5″ pieces of SF101 fusible interfacing for the exterior.
  • 14″ closed end nylon zipper
  • Erasable marking tool (I like to use Frixion pens)
  • Turning tool or chopstick

Instructions

  • To begin, follow the instructions in the Total Eclipse Heart Block pattern to make the 7″ x 12″ block. You’ll need to decide if you want to quilt your zipper pouch or not.
    • If quilting – cut the border pieces at (2) 2″ x 5.5″ and (2) 2″ x 13.5″, instead of the 1.5″ width to give a little extra room for shrinkage. Then sew the pieces on as directed.
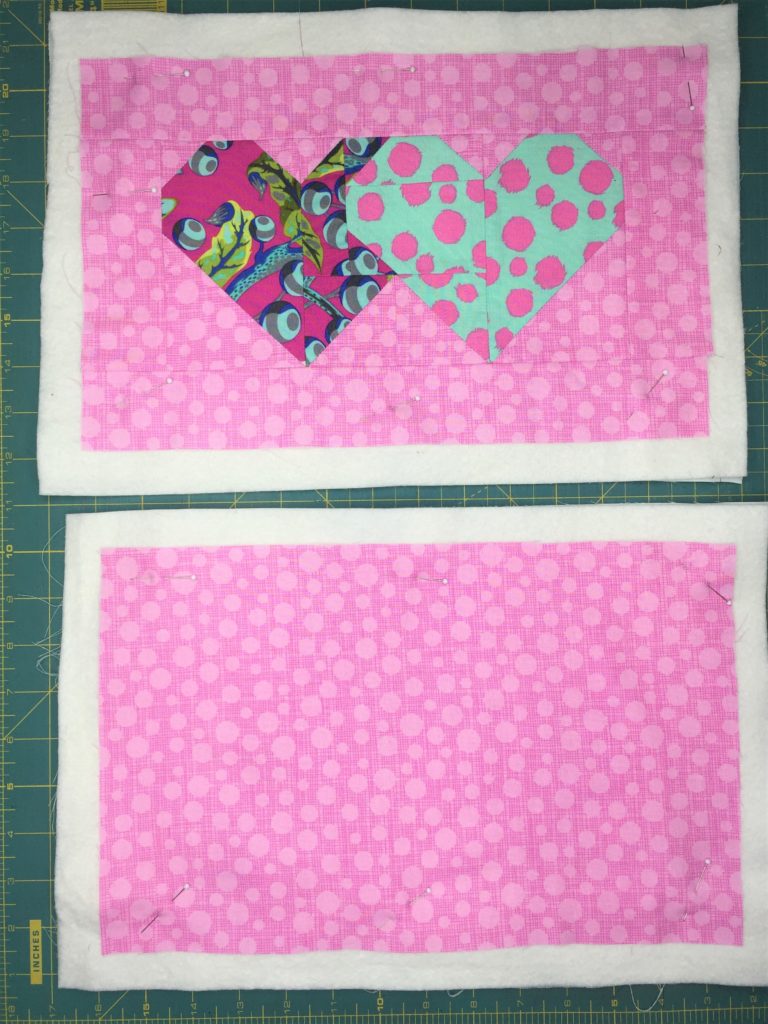
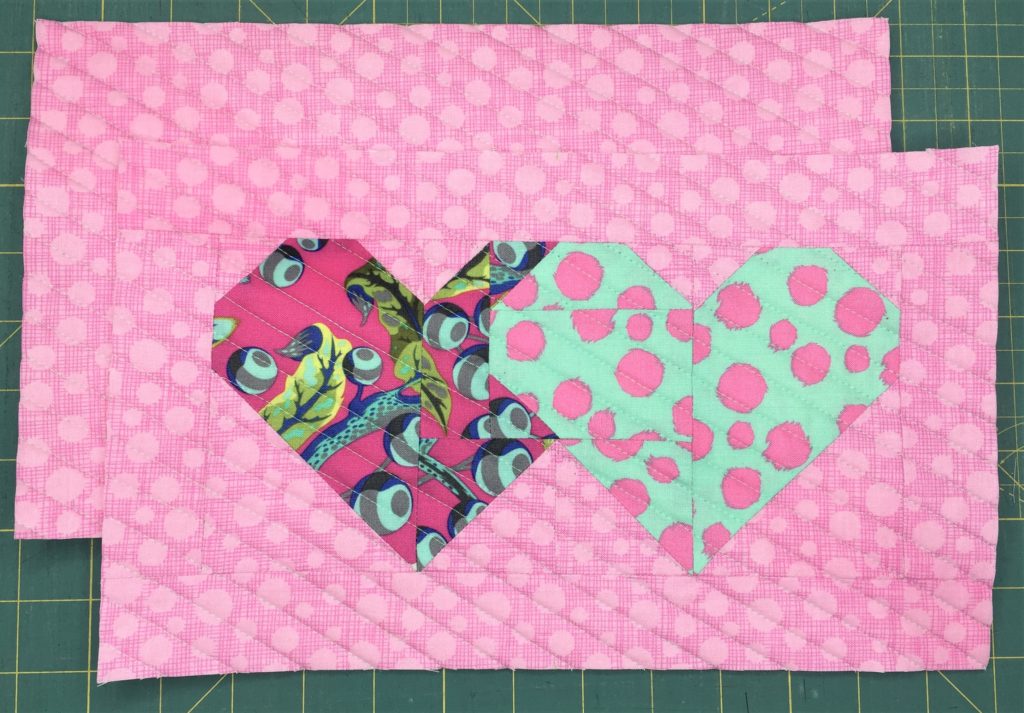
    • Make a quilt sandwich, using 2 pieces of scrap fabric (these won’t be seen in the finished pouch) measuring 10″ x 15″ as the back of your quilt sandwich. Place the scrap piece wrong side up, place the batting piece on top of that, then center the 8.5″ x 13.5″ block on top of that and baste the layers together using your favorite method. Make another quilt sandwich with the 8.5″ x 13.5″ Exterior back piece. Quilt as desired, then square up the quilted pieces to measure 7.5″ x 12.5″.
  • If not quilting – Follow the cutting/sewing instructions to make the block, then apply the fusible interfacing to the wrong side of the 7.5″ x 12.5″ quilt block, following the manufacturer’s instructions. Do the same for the 7.5″ x 12.5″ Exterior back of pouch.
    • Apply the fusible interfacing to the wrong side of each lining piece.
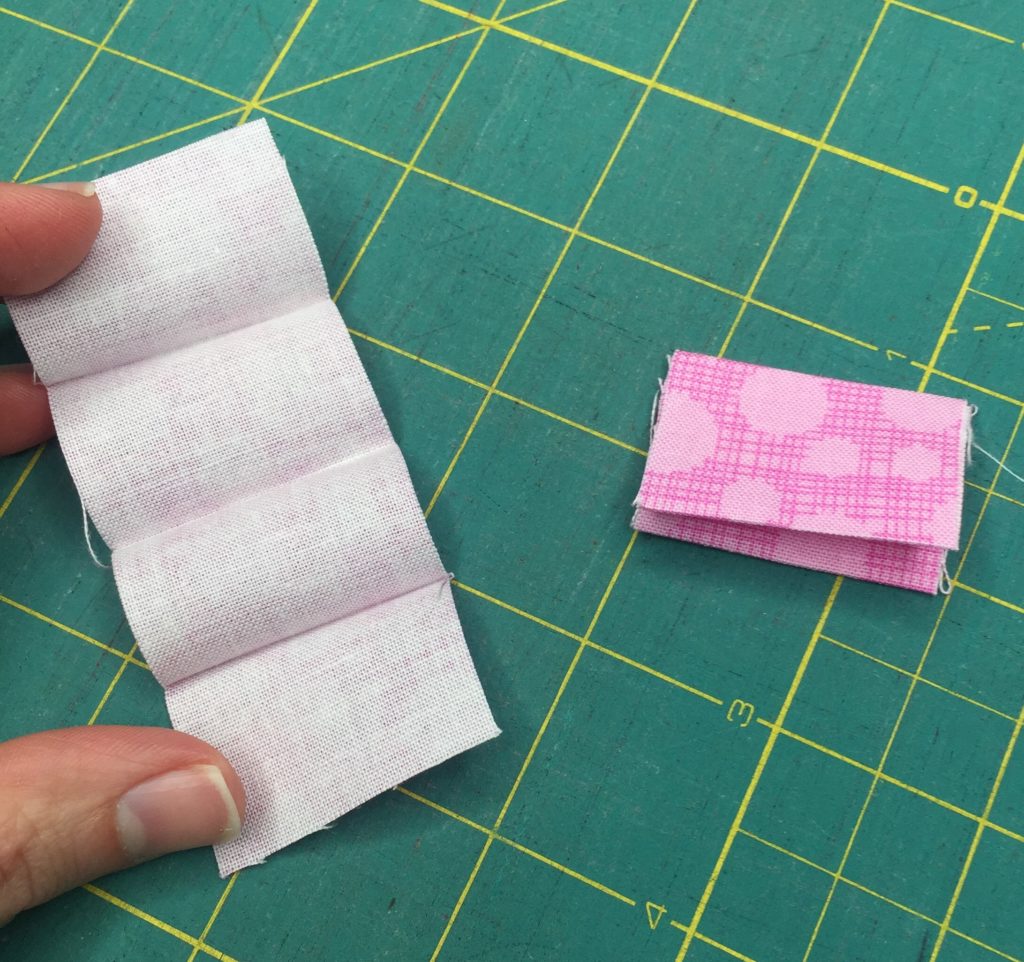
    • Take the 1.5″ x 4″ zipper end pieces and fold the 1.5″ ends to meet in the center. Press. Fold them in once more to conceal all raw edges and press.
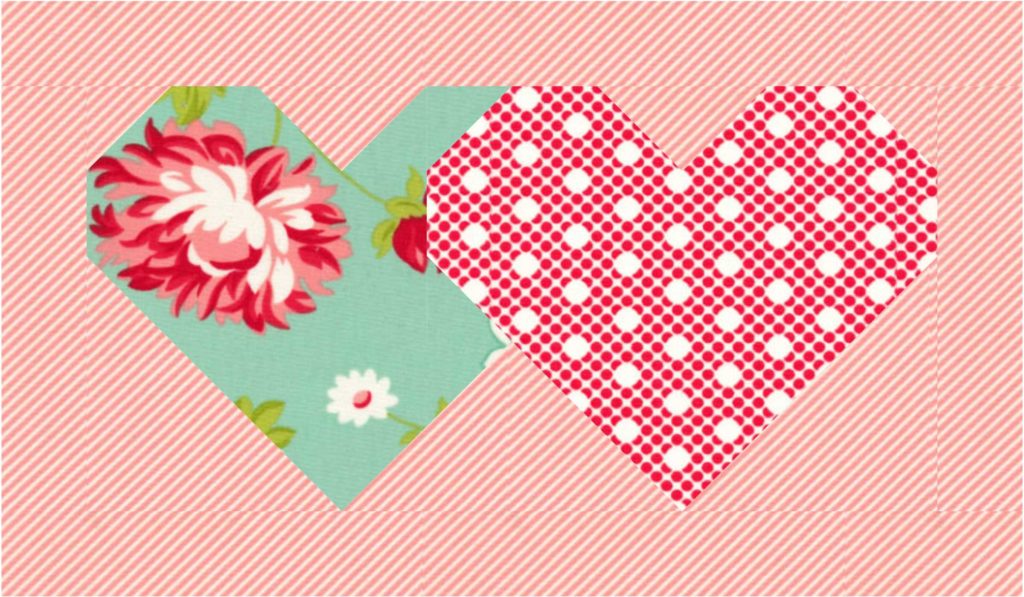
Two hearts are shown in a row on the same color.
  • Take the 14″ zipper and move the zipper pull in away from the metal teeth a little. Trim your zipper down to measure exactly 12.5″, and make sure you trim the metal bits off when you trim it down. Be very careful to not pull your zipper head off.
A colorful heart with many colors on it
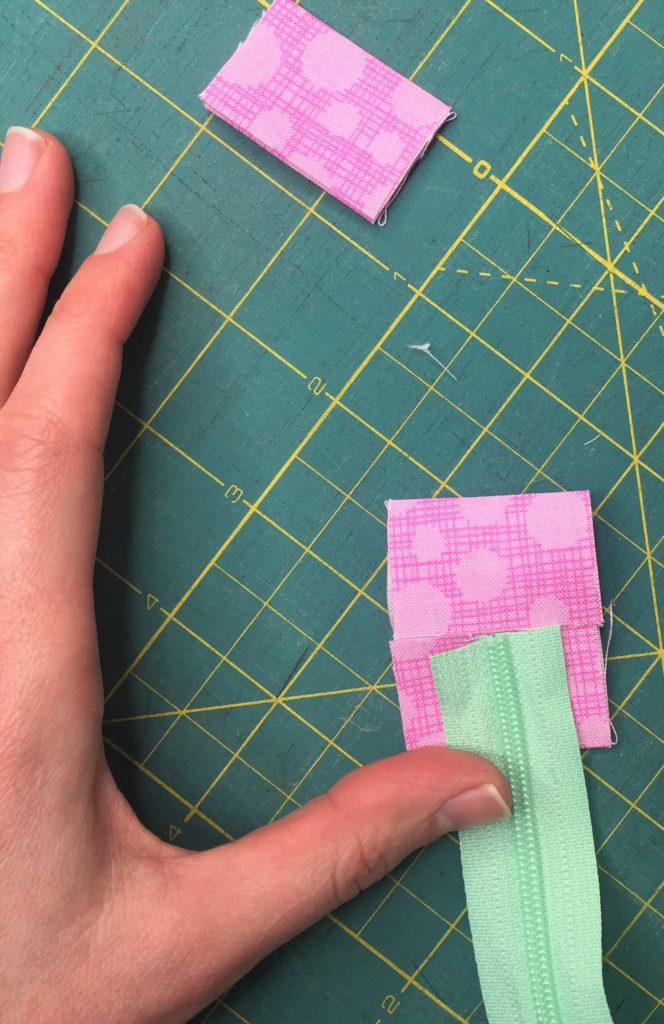
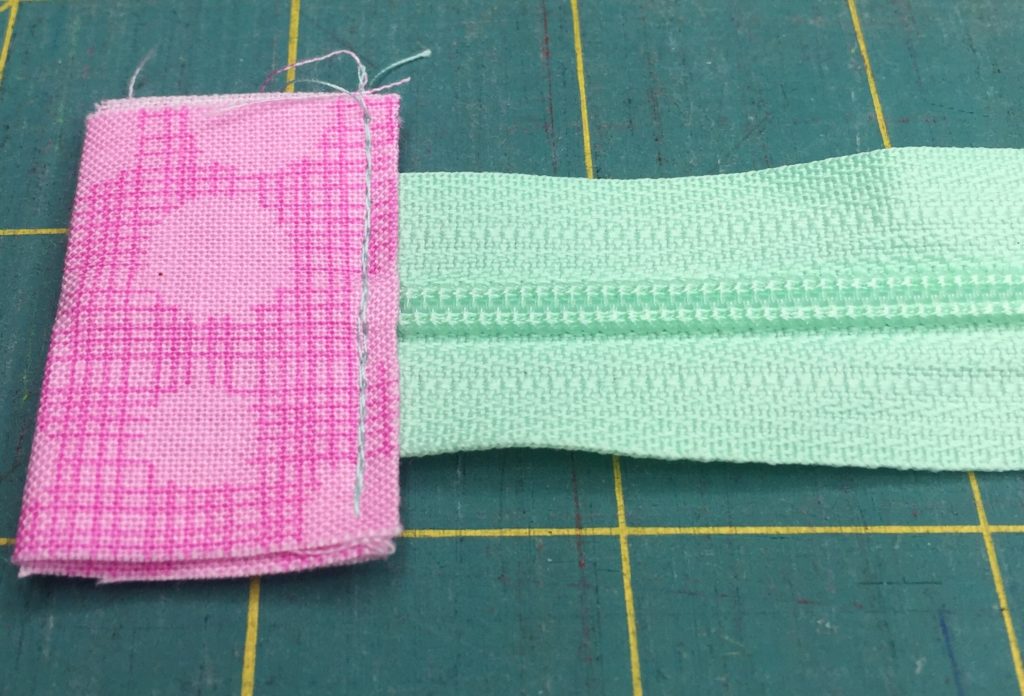
  • Take the zipper end pieces and place one end of the zipper butted into the middle of the folded piece. Use clips or pin in place. Repeat for the other end of the zipper. Take to your sewing machine and topstitch 1/8″ from the folded edge to contain the zipper. Trim away the edges of the zipper pieces so they’re even with the zipper tape.
A heart shaped fabric with flowers and polka dots.
Two hearts are shown with different patterns on them.
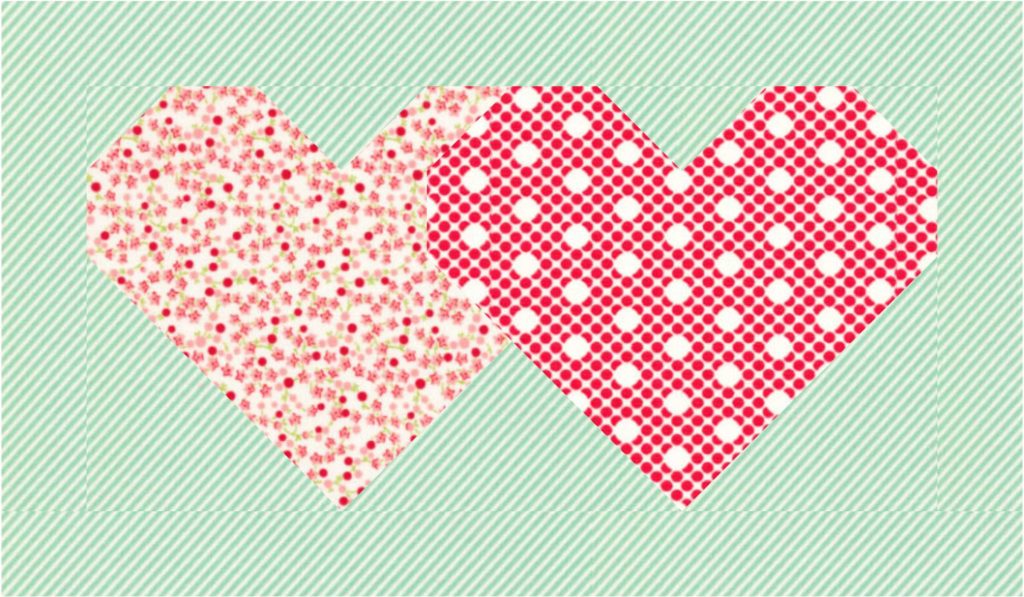
Two hearts are shown with polka dots on them.
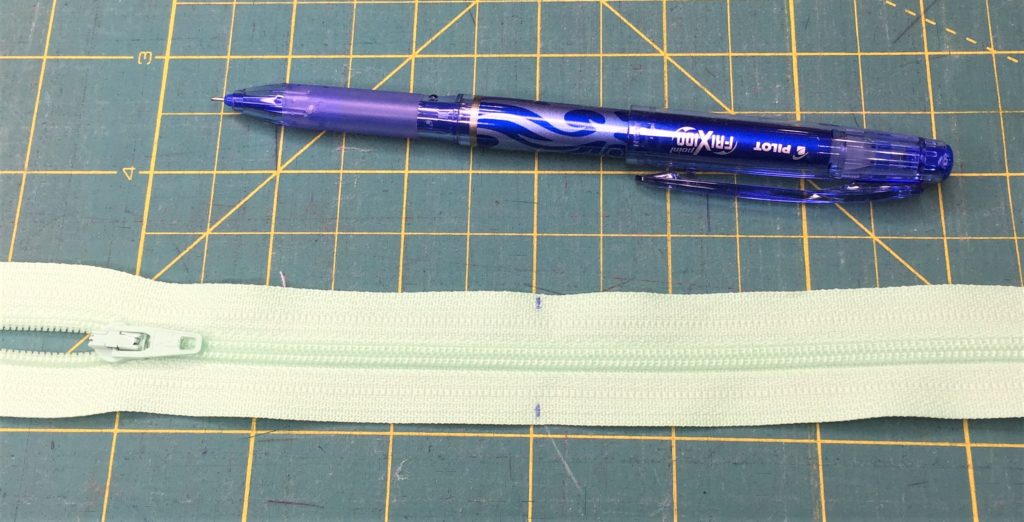
  • Measure and mark the center top 12.5″ edges of all 4 of your fabric pieces. Measure and mark the center of the zipper.
Two hearts are shown in a row.

Assembling the Zipper pouch

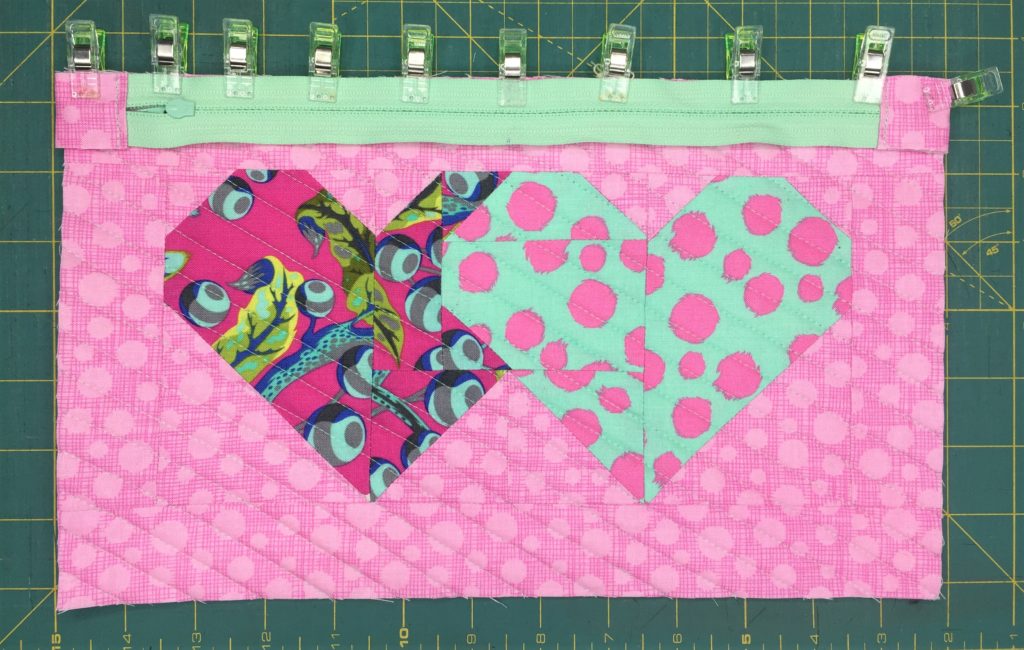
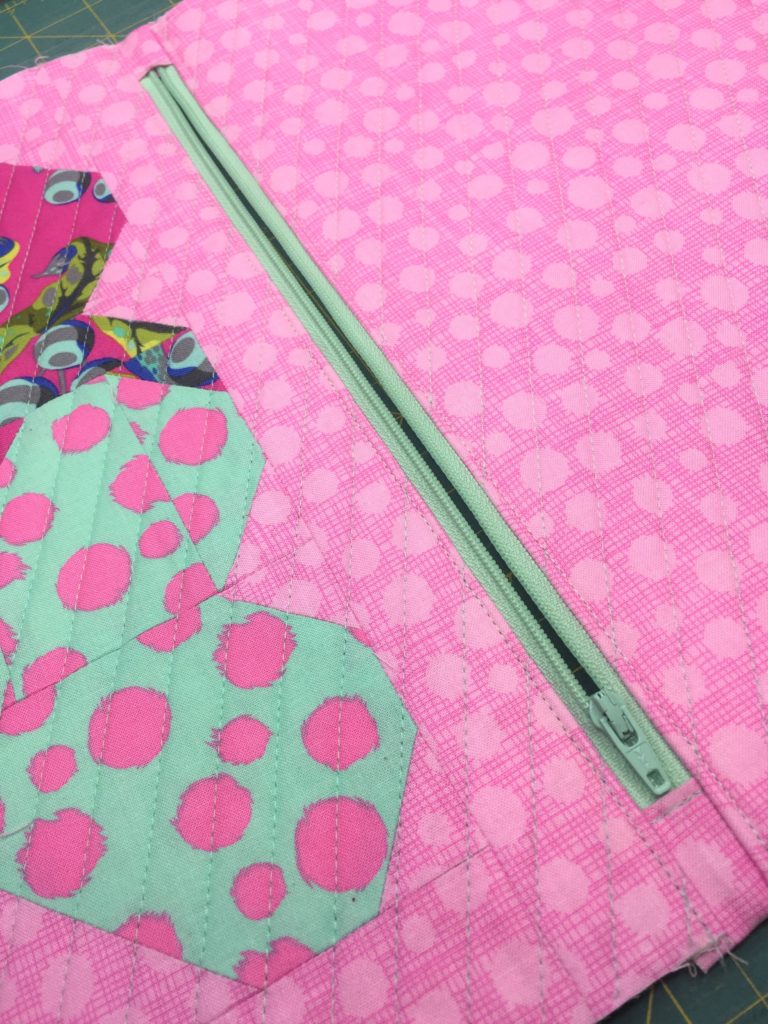
  • Take the assembled quilt block (quilted or not) and place it right side up. Take the zipper and place it right side down, lining up the centers and the edge of the zipper tape to the top edge of the block. Use clips or pin to secure. Place one lining piece right side down on top of the zipper, sandwiching the zipper between the two layers and matching the centers again. Clip or pin in place. Use a zipper foot to sew through all three layers with a 1/4″ seam allowance. Press the fabrics wrong sides together away from the zipper and topstitch 1/8″ from the folded edge of the fabric.
  • Take the exterior 7.5″ x 12.5″ piece (quilted or not) and place it
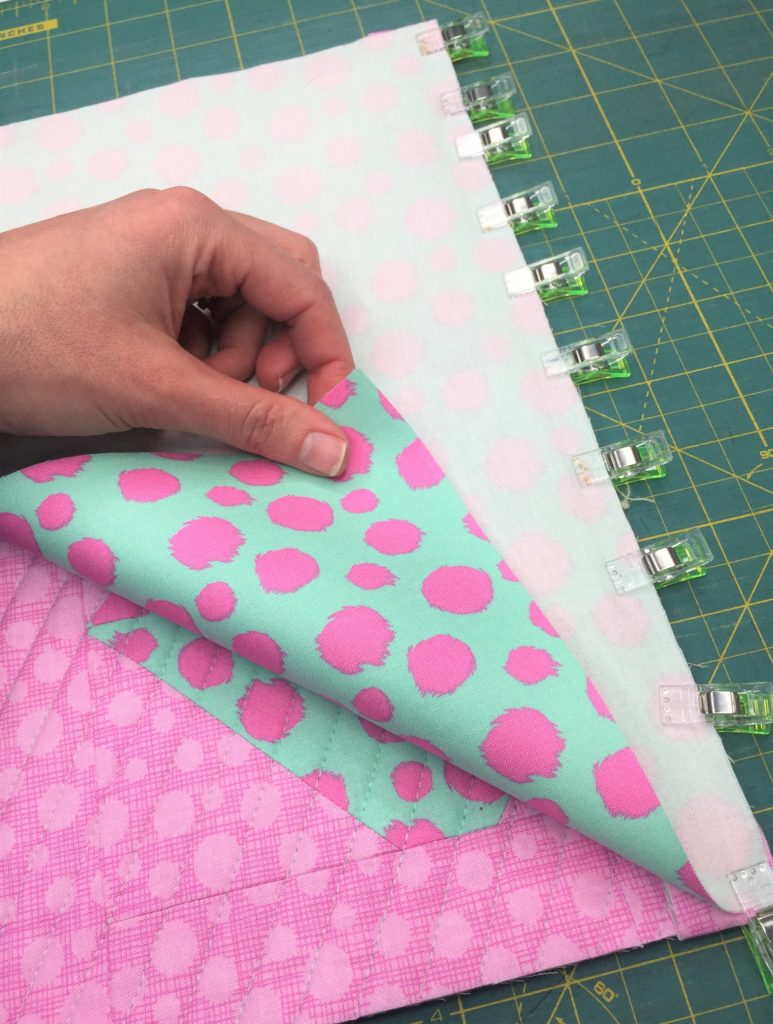
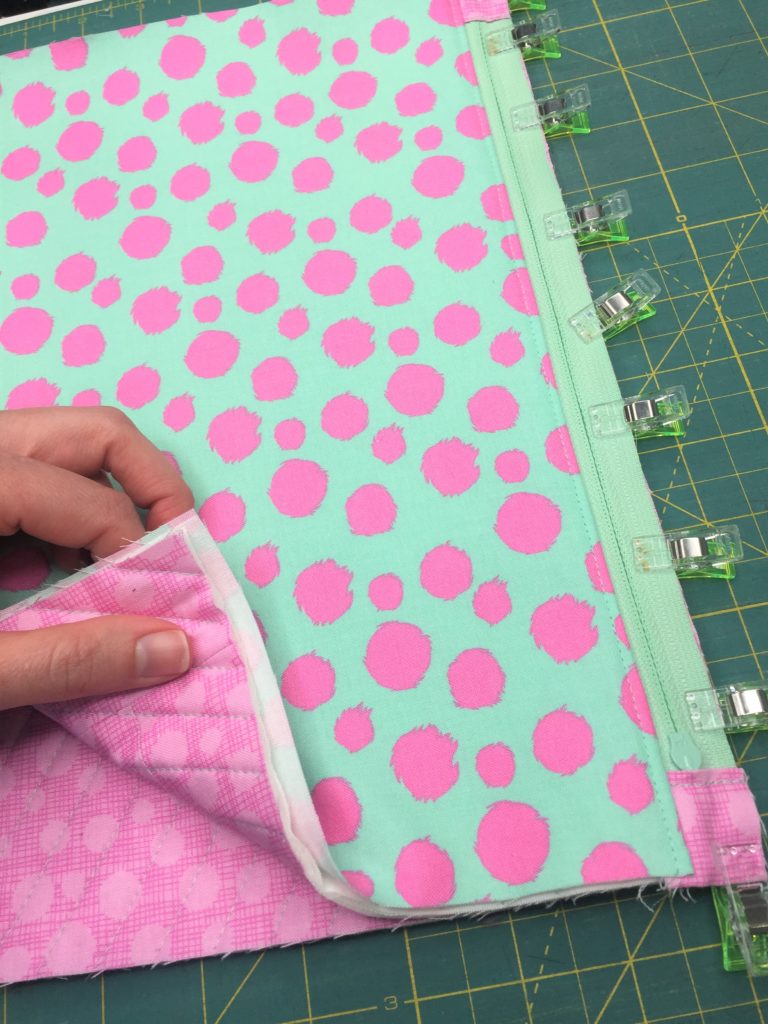
    right side up. Take the zipper (now attached to the quilt block) and place it right side down, lining up the centers and the edge of the zipper tape to the top edge of the block. Use clips or pin to secure. Place the remaining lining piece right side down on top of the zipper, sandwiching the zipper between the two layers and matching the centers again. Clip or pin in place. Use a zipper foot to sew through all three layers with a 1/4″ seam allowance. Press the fabrics wrong sides together away from the zipper and topstitch 1/8″ from the folded edge of the fabric.
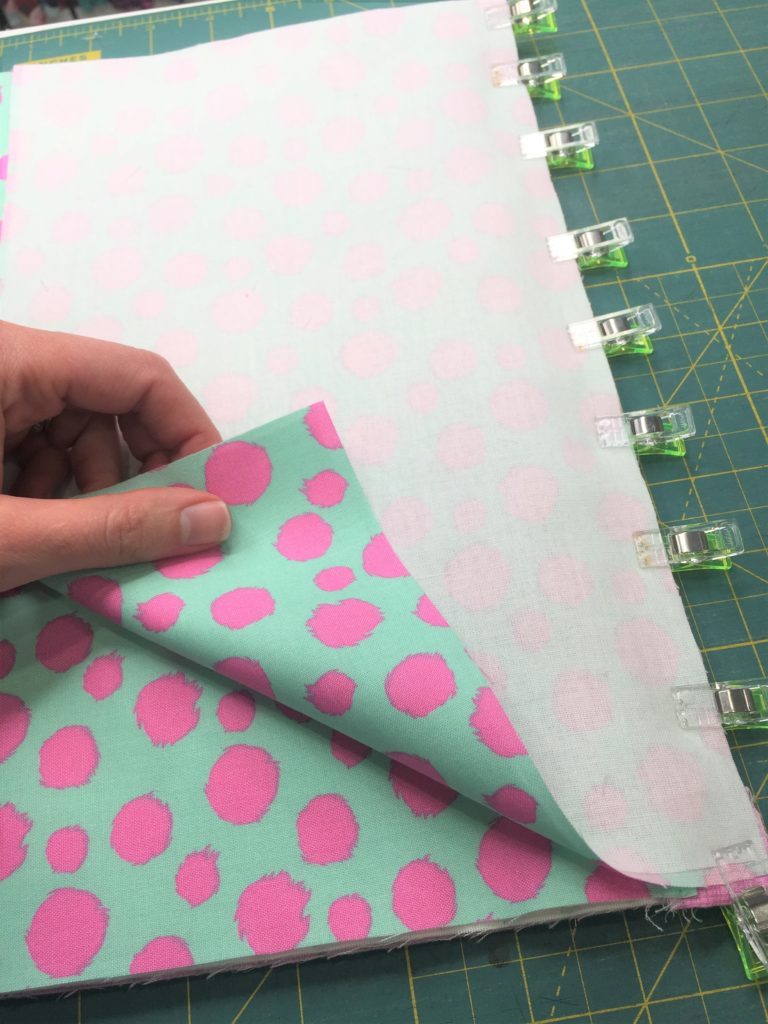
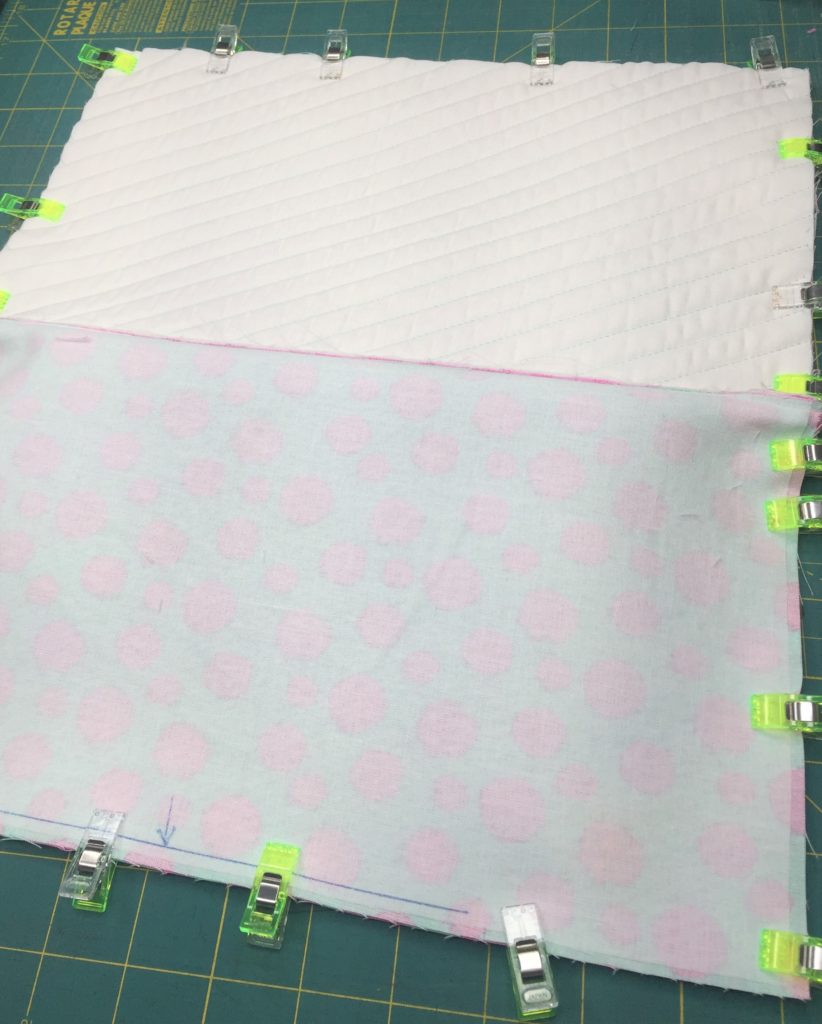
  • Open the zipper. Pull the exteriors and linings apart from eachother and pin the edges of the exterior RST. Do the same with the lining pieces. Pin or clip in place. Mark a 5″ opening centered on the bottom of the lining. This will be left open for turning. Start sewing with your regular pressing foot, and sew all the way around the zip pouch, leaving the opening unsewn.
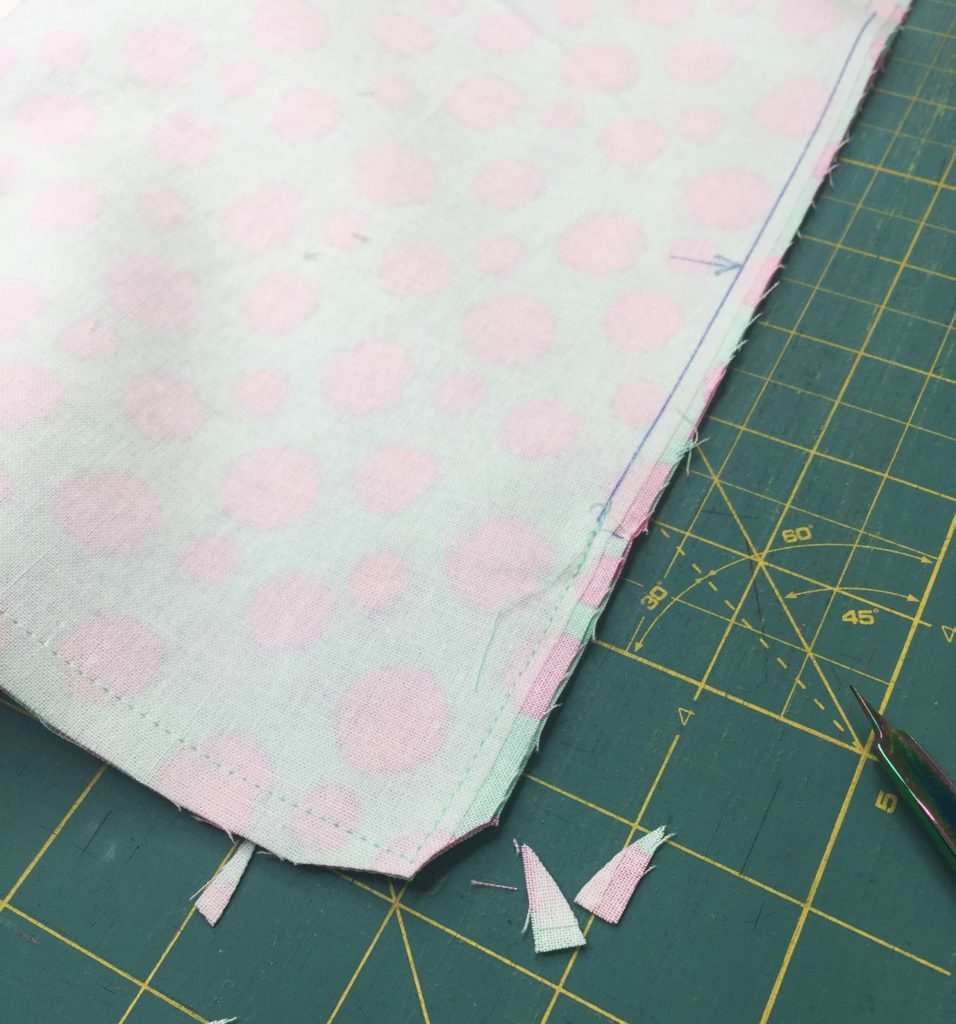
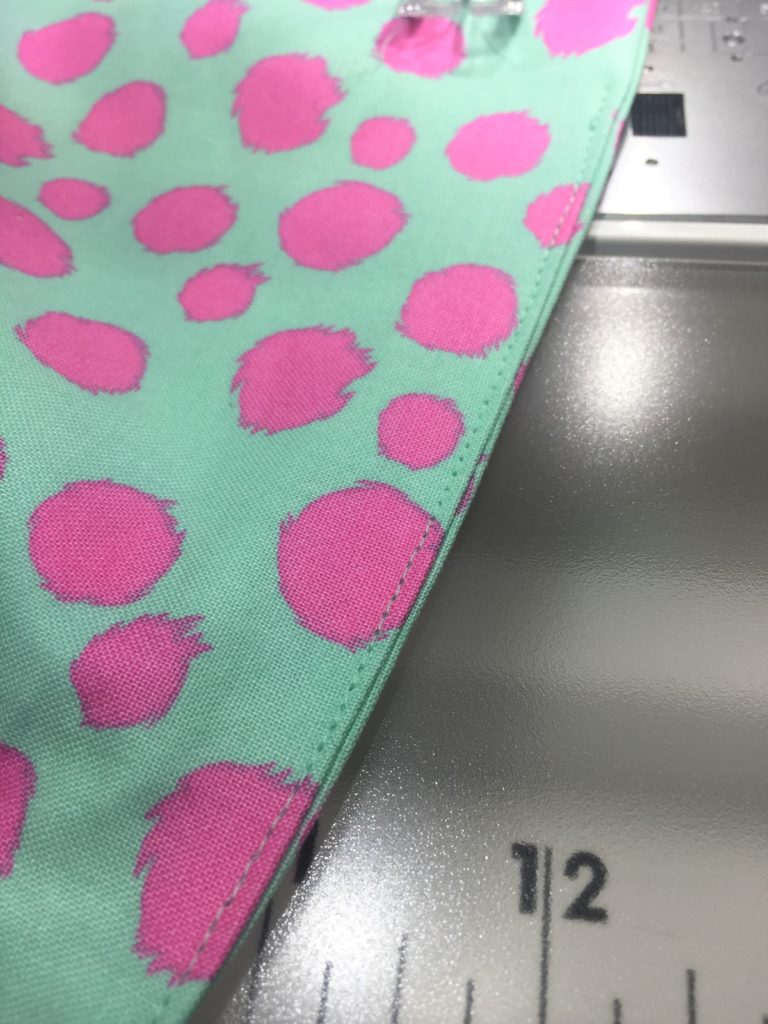
  • Trim the corners away being careful not to clip the stitches. Turn the bag right side out through the opening in the lining and push the corners out with a chopstick or turning tool.
A pink and blue heart on top of black and white stripes.
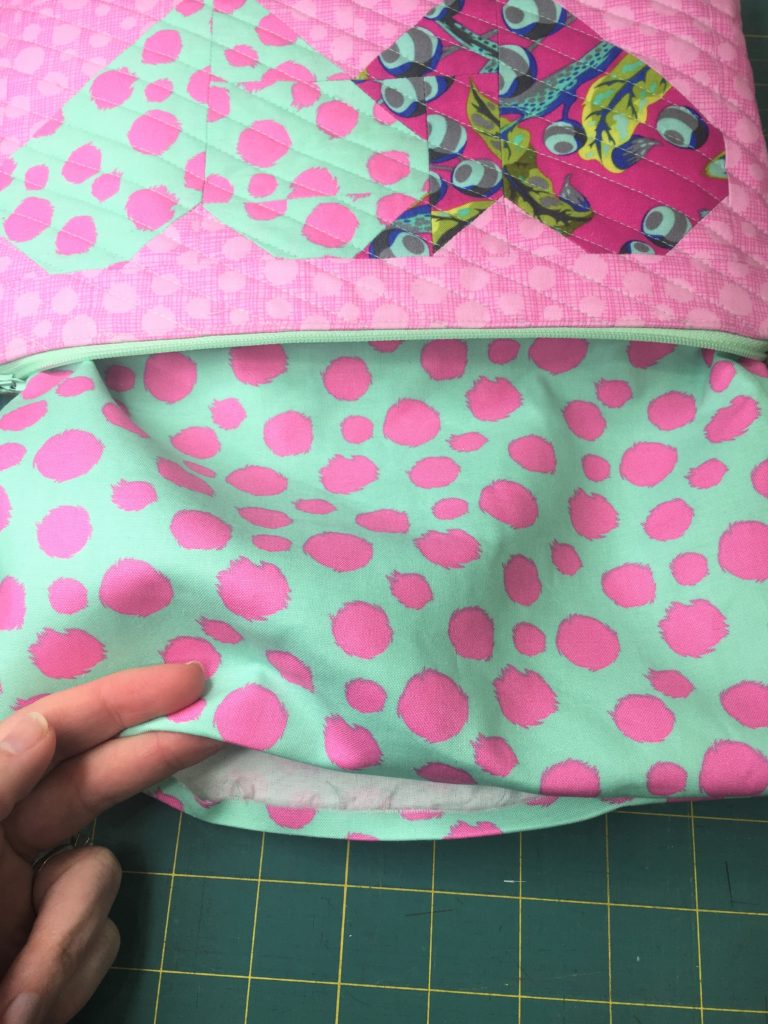
  • Fold the raw edges of the opening in by 1/4″ and press. Clip the folded edges together and topstitch or whipstitch closed to close the opening. Push the lining down into the bag and you’re done! Fill that cute little zip pouch up with some goodies and it’s ready to be gifted.
Posted on

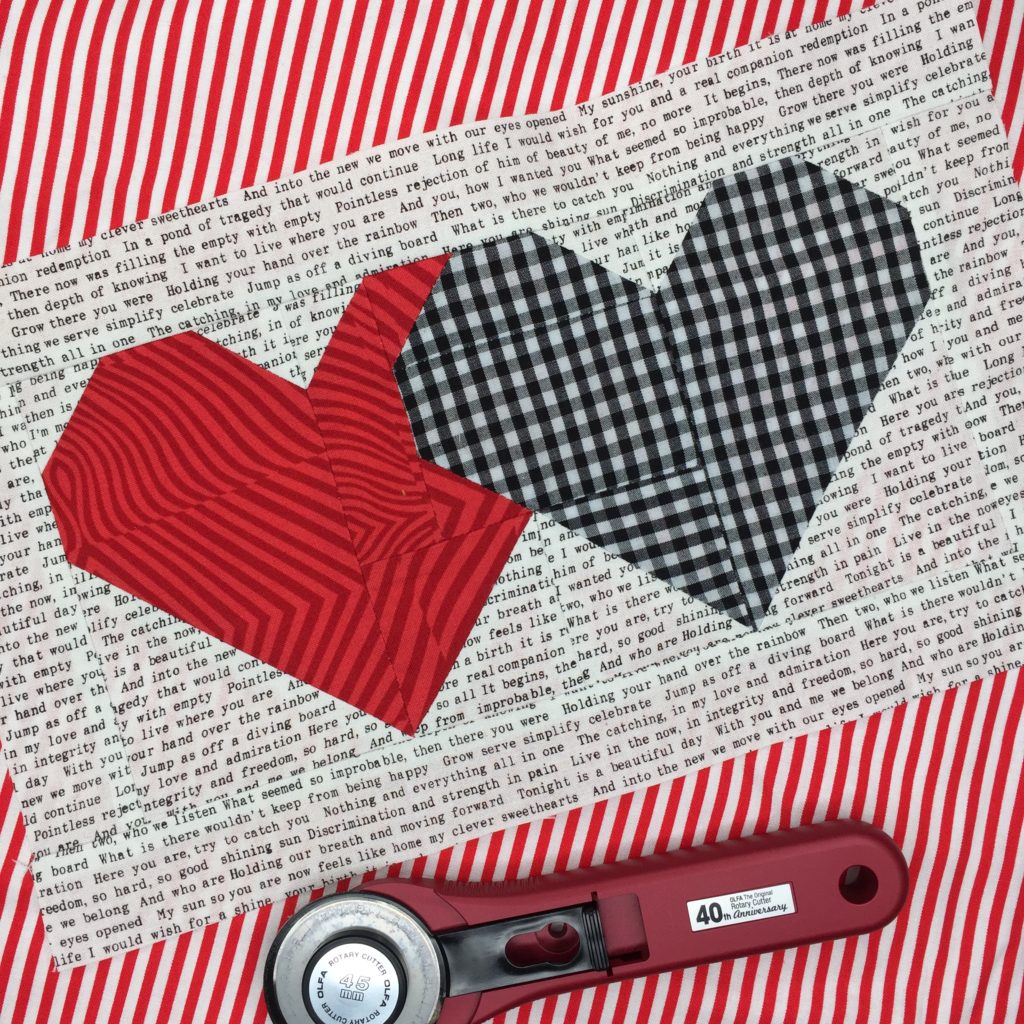
Total Eclipse Heart Block

A black and white picture of a heart quilt block.

Once upon a time, I was falling in love…

I’ve been working so hard on this heart block for you! This pair of hearts is so dear to me because it reminds me of one of my favorite songs (that was released my birth year–how’s that for coincidence?), and I swear, I’ve been singing it all week while I’ve been sewing these 😉 This is a great block to make for your love or your BFF, and you can pick the fabrics to fit each person to make it extra special!

A red and white striped table cloth with two hearts on it.
7″ x 12″ Total Eclipse Heart block

You can get your pattern download HERE, and I hope you’ll share your finished block on Instagram using #totaleclipseheartblock . These cute blocks come in three sizes: 5″ x 10″, 7″ x 12″ and 12″ x 12″ for you to customize and make into whatever your heart desires.

If you want a sweet little discount, you can head over to subscribe to my newsletter to grab this one for free! You’ll get a welcome e-mail with your coupon code in it and you can start sewing asap.

Need a little inspiration?

I had so much fun making this block, and I hope you love making it too! I used my new 40th Anniversary Ruby Rotary Cutter from OLFA to cut all my pieces out, and I felt SO fancy 🙂
Posted on

Ringing in 2019 with OLFA

A black and yellow logo for alfa passador

Hey guys!! If you can’t tell from the heading on this post, I’ve got some exciting news to announce! I’m excited to share that I’ll be among a team of greatly talented makers to serve as a 2019 OLFA Ambassador!!! I’m so pumped to share this brand with you. OLFA truly makes the best products with us in mind. Be on the lookout for tips and tricks, and maybe even some great new tutorials coming up in the next few months. I have a fun project coming up in March using OLFA and Aurifil floss and I think you’re going to love it!

A red and black cutter is on the side of a white background
Check out the Limited Edition Ruby Anniversary Rotary Cutter that was just released!

If you aren’t familiar with OLFA products, they create some of the most amazing tools like rotary cutters, cutting mats, and rulers, to name a few. When I started sewing about 10 years ago, I was exploring the aisles of my local Joann’s. I was in the scissor aisle and remember seeing rotary cutters for the first time (mind you, I didn’t come from a sewing background!). I remember thinking…why in the world do they have pizza cutters over here in the scissor department? Have these folks lost their minds?? Then, I made my first quilt–I made my own cardstock templates and traced them on each piece of fabric and *GULP* cut all the pieces out by hand with a pair of scissors.

If you’ve been down this road, you know this took literally FOREVER. A few months later, I signed up for my first Craftsy class on machine quilting as you go, and saw a cutting mat and rotary cutter in the background…did some research…and proceeded straight back to that scissor aisle to buy my first OLFA rotary cutter and mat. Once you’ve done something the long and hard way, and you find out there’s been a much better way all along you kind of feel like a fool! But there was so much satisfaction in cutting that first piece of fabric and not having my knuckles kill me from scissor overuse.

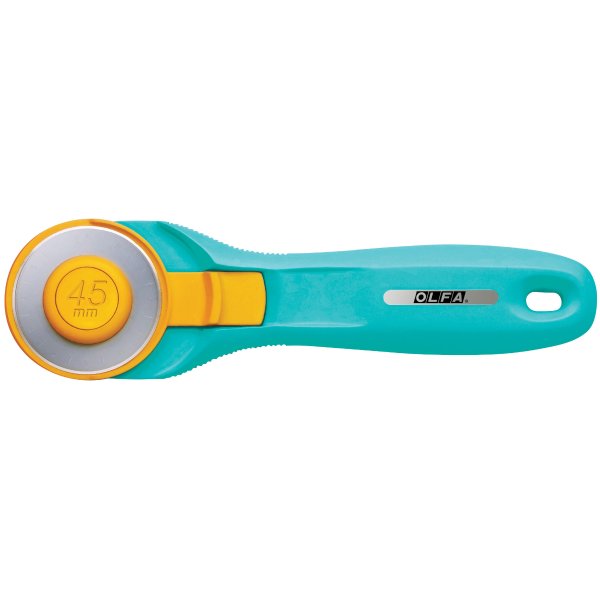
OLFA has some great rotary cutters, and the Aqua Splash rotary cutter is my favorite color. I use it daily and it brightens up my cutting area (along with being super cute!)

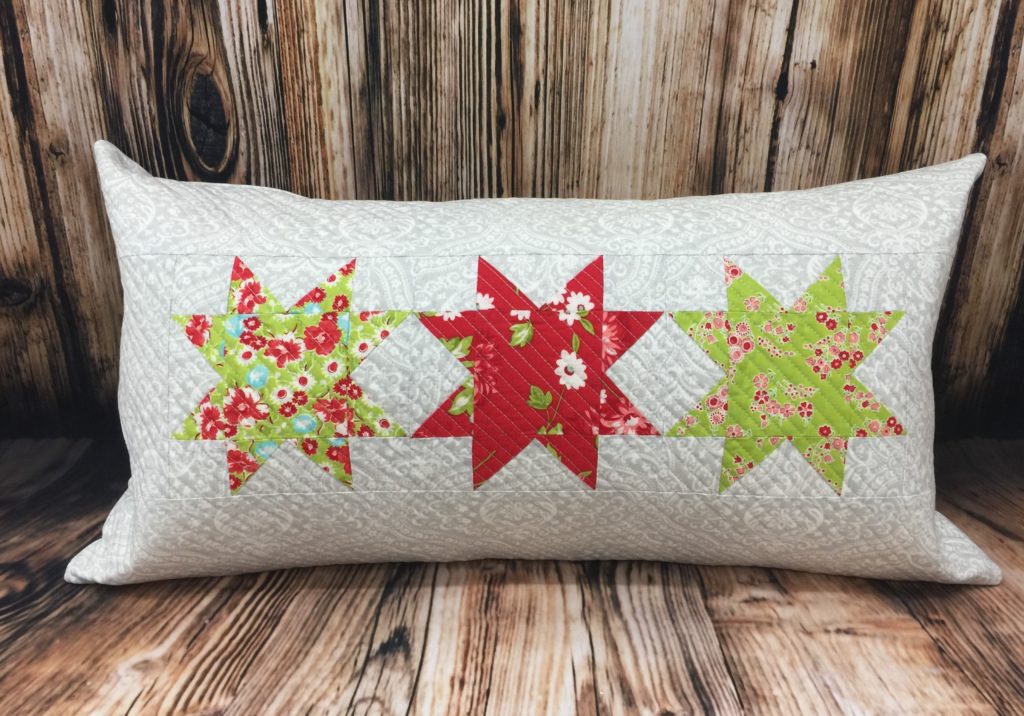
A pillow with three different colored stars on it.
OLFA Splash Rotary cutter in Aqua

I’m so excited to share this news with you! Can’t wait to share some great projects with you and get sewing 🙂
Posted on 1 Comment

All is Bright Pillow tutorial

A free pillow tutorial for all is bright

Are you tired of your throw pillows and need a quick way to freshen up your home dec? Grab a few sewing supplies, a pillow form, and some fabric and you’ll be on your way to piecing and quilting up this simple pillow cover in no time at all! I made my pillow on the Janome MC9400, but it can easily be adapted to work with any sewing machine and it’s helpful if you’ve got a walking foot (or some sort of dual feed device), but not a deal breaker! This tutorial consists of piecing some flying geese units and doing a little straight line quilting to add a modern punch to your home dec. Check out the supply list below, then click on the PDF instructions “All is Bright” below for the complete project.

Supplies

  • Janome HMC9400QCP (or other sewing machine)
  • Janome supplies (or other sewing machine supplies): Dual feed foot holder, Dual Feed Foot AD, 1/4″ Foot, Standard Foot A, Purple Tip Needle, Empty Bobbin, Pre-wound Bobbin
  • 1 FQ bright green floral fabric (fabric A) sub cut into:
    • (4) 2-3/8†square
    • (1) 3-1/2†square
  • 1 FQ true red floral fabric (fabric B) sub cut into:
    • (4) 2-3/8†square
    • (1) 3-1/2†square
  • 1 FQ bright green and true red mix fabric (fabric C) sub cut into:
    • (4) 2-3/8†square
    • (1) 3-1/2†square
  • 1-3/4 yds. light grey patterned fabric (fabric D) sub cut into:
    • (12) 2″ squares
    • (3) 3-1/2†square
    • (1) 18†x 30†(back of the quilted pillow top)
    • (2) 4-1/2†x 6-1/2†(borders)
    • (2) 4-1/2†x 26-1/2†(borders)
    • (2) 13-1/2†x 15†(pillow back)
  • 1 yd. SF101 woven fusible interfacing sub cut into:
    • (2) 13-1/2†x 15â€
  • 16†x 28†piece of batting
  • Coordinating all-purpose sewing thread for piecing and quilting
  • 12†x 24†pillow form
  • Other miscellaneous supplies: Spray baste/basting pins, Spray starch, sewing pins, thread snips, marking pen/tailor’s chalk, rotary cutter/ruler/mat, iron and pressing board

Piece the Flying geese units and assemble the pillow (PDF instructions)

A pillow with three different colored stars on it.

I can’t wait to see how your pillow turns out! I hope you’ll tag me on Instagram @kustomkwilts when you finish your awesome project 🙂

Posted on 2 Comments

Build-A-Block: Are you ready to try THE die cutter?

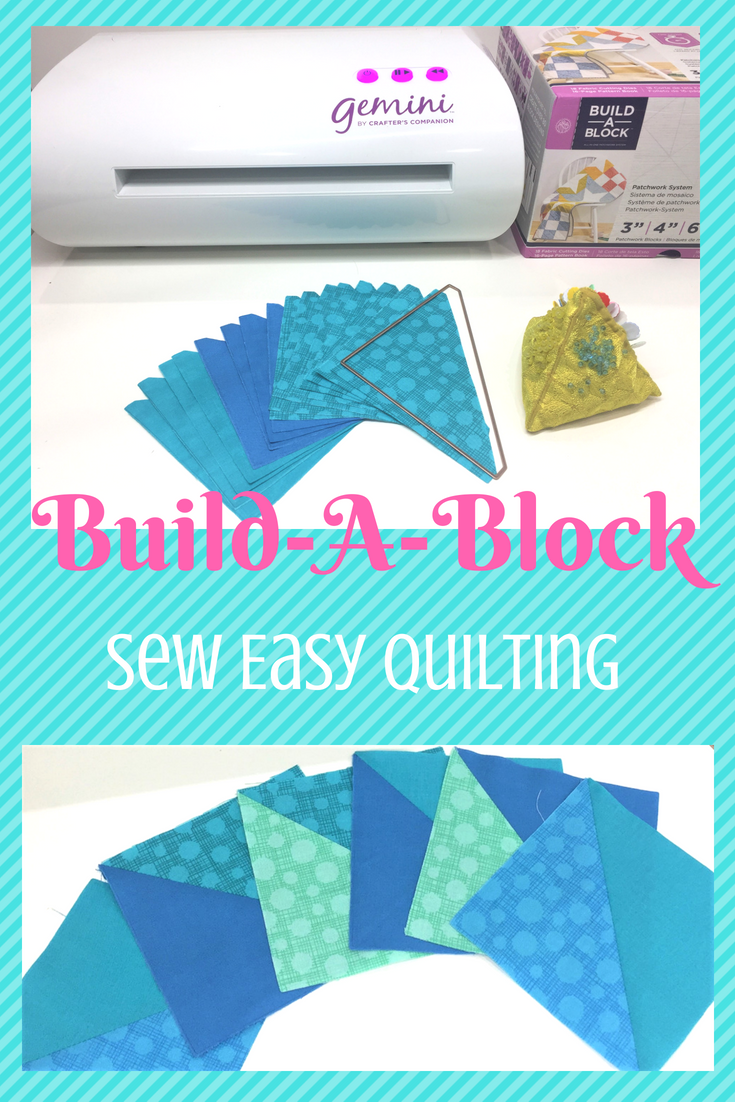
A picture of some blue fabric and the words " build-a block sew easy quilting ".


I have some really awesome news to share with you this week!  I’ve partnered with Crafter’s Companion as a Brand Partner to show you their awesome new product, The Build-A-Block Patchwork System for the Gemini Die Cutter.  A box of gemini quilt blocks with instructions.I’ve never used a die cutter for sewing or quilting prior to this, just because I honestly was not impressed.  I thought it was just another thing that would take up space in my sewing room, and you know that’s prime real estate!
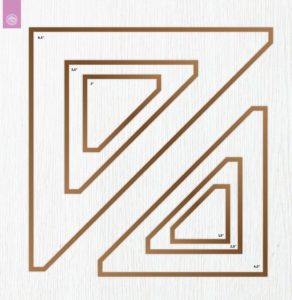
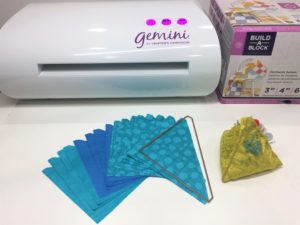
But here’s the thing:  I make a LOT of half-square triangles.  Like more than half of my quilts have some form of HSTs in them.  Sometimes I get in a hurry and my HSTs aren’t accurate, so most of the time I cut them bigger than they need to be, sew, press, and then trim down to the correct size.  Oh and don’t forget about trimming off those annoying little dog ear points too.  It’s a necessary evil for me.  I never considered that there would be a die cutter that has half-square triangle dies that cut the fabric (and multiple layers of fabric at that) to the exact size I need, and trim those little points away!  The first time I saw the Gemini in action was in May at the Janome Education Summit when Jennifer Tryon demonstrated it, and I was blown away.  Crafter’s Companion sent me the Build-A-Block Patchwork System and Gemini to try out and I love it so much!

So here’s the skinny:

  • The Build-A-Block is a set of dies made specifically with quilters in mind.
  • There are 18 fabric cutting dies to create a huge variety of blocks (and they have tons of other dies you can get separate from the Build-A-Block System).
  • Of those 18 dies, there is a set of squares, half-square-triangles, and quarter-square triangles.  If you think about it, the combination of those shapes into unique blocks is really unlimited.  A square with two triangles in it
  • The Build-A-Block Patchwork System offers a fast and easy alternative to hand cutting with a rotary cutter, with MINIMAL waste.
  • It isn’t just for quilts.  I’m currently making a tote bag with a two color combination out of half-square triangles, and it’s going SO fast!
  • The Build-A-Block is an intuitive system that’s easy to use for quilters of all skill levels, even beginners.  True story:  I unboxed my Gemini and Build-A-Block dies and had my first fabric cut within ten minutes.  There is no software to mess with, or difficult instructions to muddle through.
  • The Build-A-Block dies are capable of cutting a wide range of material, including faux leather and denim.
  • You also get a Block Guide with the Build-A-Block with instructions to create tons of blocks.  A purple quilt block with the numbers 5 1, 4 7, 1 0 and 2 9.

I was so impressed with the Build-A-Block that I spent an entire afternoon just pulling fabric from my scraps and trying all the dies.  It’s fun and addicting!A table with some papers and a paper cutter

You can see a great demo video of the Build-A-Block in action, and take a peek at the Quilt-Along happening now, hosted by Jennifer Tryon, using the Build-A-Block and Gemini.

Deals!!!

  • On September 1, 2018 I’ll be sharing a free tutorial using the Build-A-Block and there might be a little giveaway going on, so stay tuned!
  • Use the promo code QUILTEASY to purchase the Build-A-Block and you’ll receive a set of threads and a six-piece fat quarter bundle valued at $41.95!!  A close up of some fabric and sewing supplies
  • Between August 17-23, Crafter’s Companion is offering 15% off of the Gemini machines with the purchase of a Build-A-Block System (no promo code needed, the discount will automatically be applied at checkout)!

I hope you’re as jazzed about the Build-A-Block as I am.  It is a phenomenal tool to have in your quilting toolbox and it’s quickly becoming a staple in my sewing studio.  I’m so glad I have it to make my life a little bit easier!  Hang around for the free tutorial coming up–you won’t want to miss it 🙂

Posted on

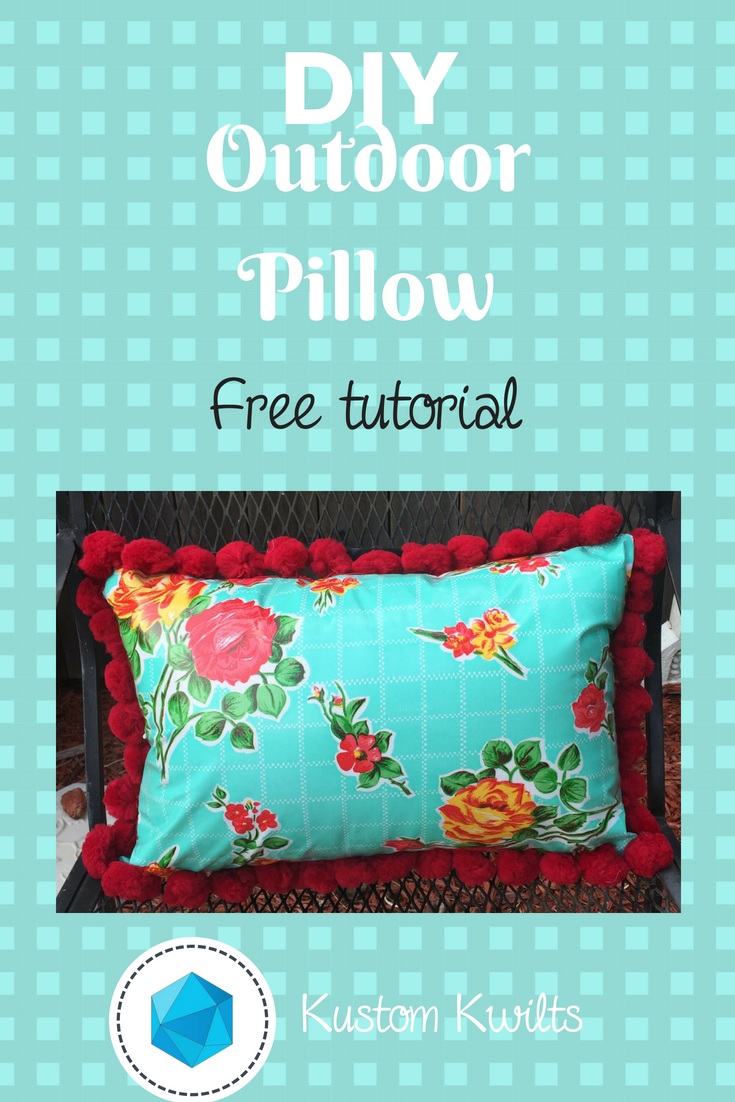
DIY Outdoor Pillow free tutorial

A pillow with red and yellow flowers on it.


DIY Outdoor Pillow tutorial

Are you looking for a way to brighten up your patio with some fun home dec pillows?  Make your own DIY outdoor pillow with this quick and easy tutorial to create a super cute oilcloth pillow with pom pom trim, and give your deck a cheery look!  I used my Janome Horizon Memory Craft 9400QCP and the Janome Ultra Glide Needle Plate and Ultra Glide Foot to stitch up this oilcloth pillow.  Start sewing with some new fabrics and try out a new foot attachment that will take your sewing projects to the next level. The Ultra Glide Needle Plate and Ultra Glide Foot set is perfect for working with fabrics that might not smoothly feed under the standard foot A, such as oilcloth and laminated cotton.  Also, check out my previous post on TOP TIPS FOR SEWING WITH OILCLOTH.  This is a great tutorial for beginners, and will take approximately 4 hours from start to finish.  The finished pillow size is 12″ x 18″.

Supplies: Sewing machine, Janome Ultra-Glide foot and Ultra Glide Needle Plate (Teflon foot for all other sewing machine brands), Zipper foot (Foot E for Janome), Needle, Pre-wound bobbin.

Fabric/notions required:

  • Circle Template printed at 100% and cut out
  • 1 yard Aqua Rose gall oilcloth (Fabric A) sub cut into:
    • (2) 6-3/4†x 19†(zippered back of pillow)
    • (1) 13†x 19†(front of pillow)
  • 3 yds. Jumbo Pom Pom Trim/ball fringe
  • 40 wt. Black sewing thread (or white for less contrast)
  • 20†zipper
  • 12†x 18†Weather proof pillow form/Outdoor pillow form
  • Marking pen
  • Rotary cutter/ruler/mat
  • Binding clips
  • Scissors

A collage of four photos showing how to make a quilt.
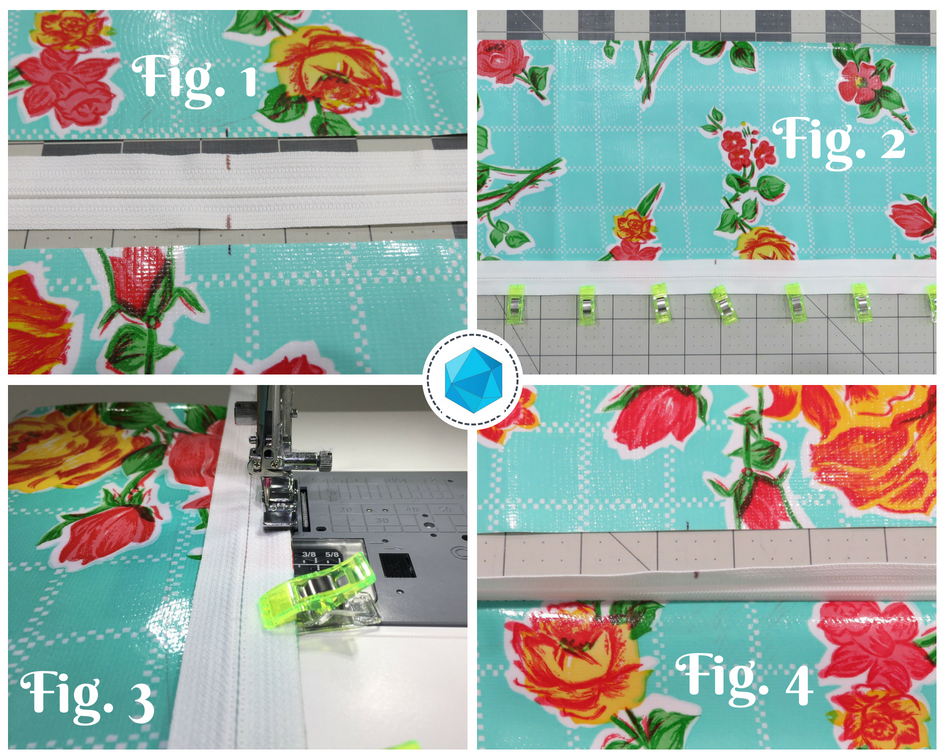
Figures 1-4

Prepare the back of the pillow and install the zipper

  1. Take the two 6-3/4†x 19†pieces of Fabric A and measure and mark the center of one 19†edge. Take the 20†zipper and measure and mark the center on both edges of the zipper tape (see figure 1).

Tip:  Use binding clips instead of pins when working with oilcloth.  The fabric does not heal when holes are made in the oilcloth.  Any holes made in the oilcloth will be permanent.  Also, use a slightly longer stitch length to minimize the amount of puncture holes made in the fabric when sewing.  Typically, adjusting the stitch length from the standard 2.4 to 3.0 is a good adjustment.  The raw edges of oilcloth don’t fray, so there isn’t a need to finish raw edges as there would be with a regular woven fabric.    

  1. Place one of the 6-3/4†x 19†pieces of fabric A RSU and align the zipper tape with the 19†raw edge, matching the marked centers of the zipper and the pillow back. The zipper and the fabric should be RST (see figure 2).  Use binding clips to secure the zipper in place.
  2. Remove the standard needle plate from the MC9400 and install the Ultra Glide Needle Plate. Using this needle plate with the Ultra Glide Foot will keep the oilcloth gliding smoothly under the presser foot.  Select a zipper sewing stitch to move the needle position to the left.  Lengthen the stitch length to 3.0.  Attach zipper foot E to the presser foot and sew the zipper to the fabric A with a 1/4″ seam allowance (see figure 3).  Finger press the seam allowance of the zipper away from the zipper teeth, under the oilcloth.  Fold the remaining edge of the zipper over (see figure 4).
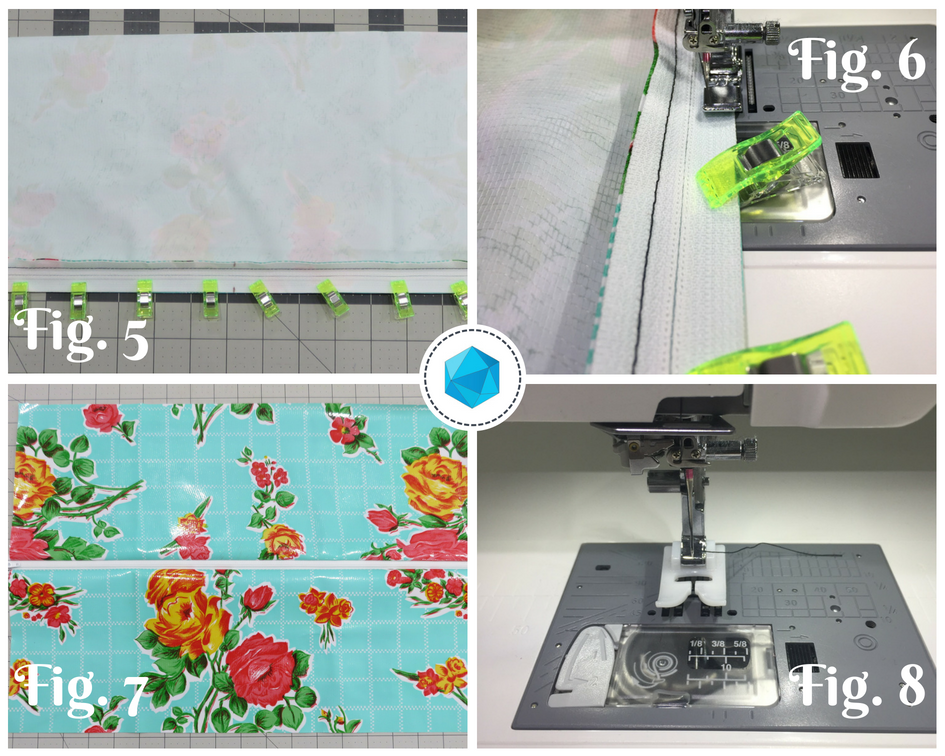
  3. Place the remaining 6-3/4†x 19†piece of fabric A RSU. Take the remaining side of the zipper tape and match the marks on the zipper tape edge and the pillow back edge, with the zipper right side down.  Line up the raw edges and clip in place with binding clips (see figure 5).  Sew the zipper in place with a 1/4†seam allowance (see figure 6).
  4. Once again, finger press the zipper tape seam allowance away from the zipper teeth so it is under the oilcloth pieces (see figure 7).
  5. Remove the zipper foot E from the presser foot and attach the Janome Ultra Glide Foot to the presser foot (see figure 8).

    A collage of photos showing how to use the sewing machine.
    Figures 5-8

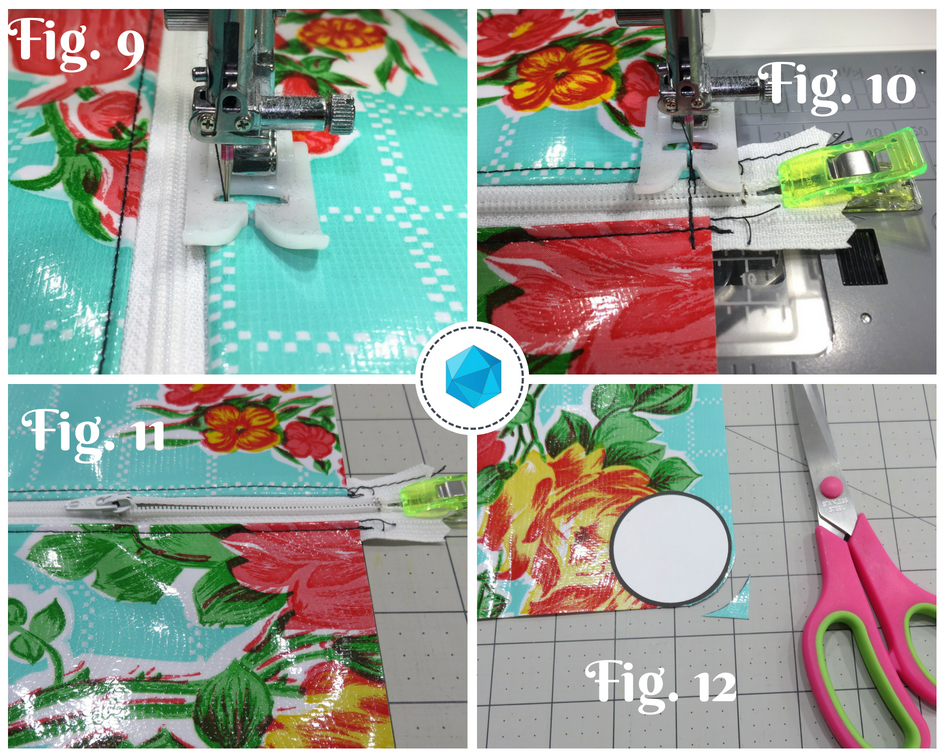
    Topstitch 1/8†away from the folded edge of the oilcloth (see figure 9).

  6. Select stitch #1 from the utility menu. Move the zipper head towards the middle of the zipper tape (see figure 11).  Use a binding clip to keep the ends of the zipper together.  Sew a few stitches and then backstitch to connect the zipper ends, about 1/8†away from the edge of the oilcloth fabric (see figure 10).  This will act as a zipper stop until the front and back of the pillow are sewn together.  Keep the zipper unzipped at least half way.

Round the corners and baste the pom pom trim

  1. Take the circle template that you printed and cut out, and place it with the edges touching the corner edges of the pillow. Trace around the curved edge of the circle with a marking pen.
  2. Cut the edge to round the corner (see figure 12).

    A collage of photos showing how to use the sewing machine.
    Figures 9-12
  3. Repeat steps 8 and 9 with the remaining corners of the back of the pillow and the four corners of the front of the pillow.
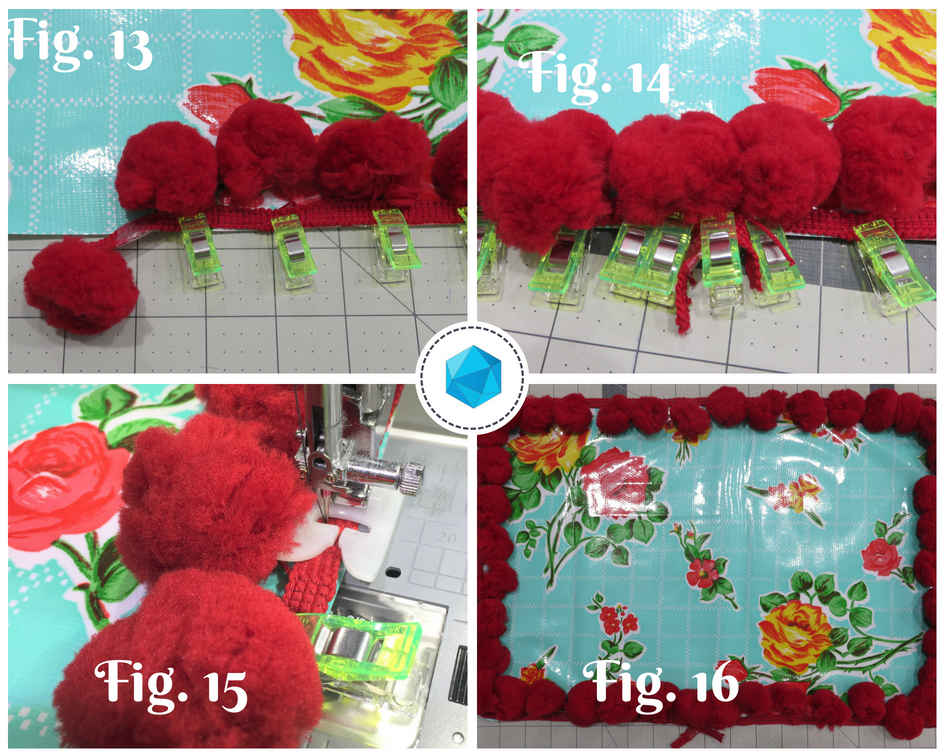
  4. Set aside the zippered back of the pillow. Take the 13†x 19†piece for the pillow front and the jumbo pom pom trim. Place the pillow front RSU.  Starting in the middle of one of the 19†edges of the pillow front, align the edge of the trim with the edge of the oilcloth.  Trail the end of the trim off the edge of the pillow by 2-3 inches figure (see figure 13).  The pom poms should be pointing inward towards the center of the pillow front.
  5. Align the edge of the trim and the edge of the pillow front all the way around the perimeter of the pillow. When you reach the point you started the trim at, overlap the trim and trail the end off by 2-3 inches, as you did to start (see figure 14). If the jumbo poms overlap, carefully trim one or two away to decrease the bulk.  Use binding clips to clip the trim in place.
  6. Move the needle position to the left. Lengthen the stitch length to 5.0 for a basting stitch. Baste the trim in place with a 1/8â€-1/4†seam allowance (see figure 15). 

Sew the pillow together and finish

  1. Place the basted pillow front RSU (see figure 16).

    A collage of photos showing how to use the sewing machine.
    Figures 13-16
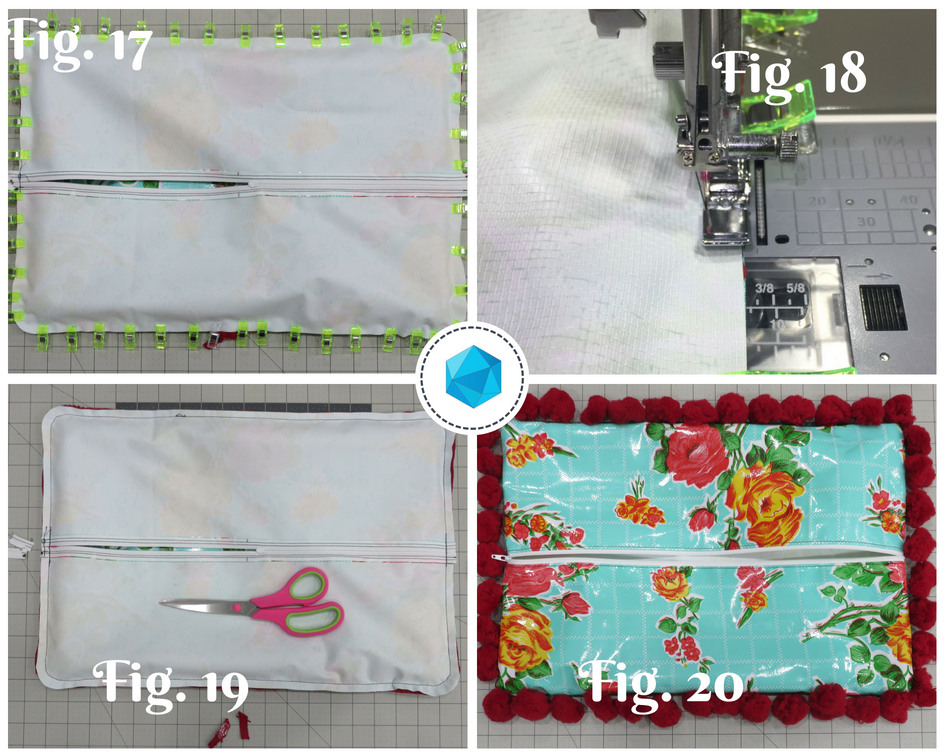
  2. Place the zippered back of the pillow right side down on top of the pillow front (see figure 17). Line up all the edges and make sure the pom poms are all facing in towards the center of the pillow. Double check to be sure the zipper is unzipped at least half way.  Use binding clips to secure all the edges together.
  3. Remove the Ultra Glide Foot and attach the zipper foot E to the presser foot. Keep the needle position moved to the left, as if you were sewing a zipper. Sew around the perimeter of the pillow using a 1/4†seam allowance (see figure 18).  Double check that none of the pom poms are getting caught in the seam allowance while you are sewing.
  4. Use a pair of scissors to trim away the excess ends of the zipper so the ends are flush with the pillow edges (see figure 19).
  5. Turn the pillow right side out and carefully push out all the curved edges (see figure 20).

    A collage of photos showing how to use the sewing machine.
    Figures 17-20

Tip:  Oilcloth has little to no stretch, unlike cotton fabrics you might be used to working with.  A zipper closure helps to keep seams sewn together versus using an envelope closure.  Be careful to not stretch the fabric when inserting the pillow form.  For a fully weather-resistant pillow, you can opt to sew this pillow without the ball fringe trim.

  1. Insert the 12†x 18†pillow form and use to liven up your patio!

    A pillow with red flowers and blue squares on it
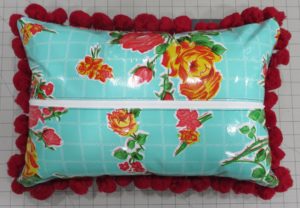
    Finished Pillow!

    Now get out there and party with your new DIY outdoor pillow 😉

Posted on 1 Comment

Top Tips for Sewing with Oilcoth

A close up of three different fabric swatches


So I know what you’re thinking…this blog is called “Kustom Kwilts”…what gives with the oilcloth?

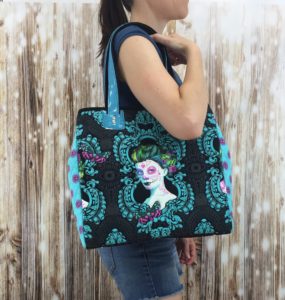
There are so many skills in sewing and quilting that can be transferred to other things-garments, bags, household and decor items.  If you can sew a straight line, there are so many other amazing things you could be creating if you’re willing to do a little exploring.  I just released my new Mamacita Tote pattern, which is a perfect fit for using quilting cotton AND alternative fabrics!  The pattern suggests using oilcloth for the lining, and I don’t want to leave you hanging on how to do that (you can also use quilting cotton).  I love to quilt, but I also adore sewing clothing and bags.  I hope I can share some of that love with you!

A woman is holding onto a bag with a picture of a girl.
Mamacita Tote in Quilting Cotton

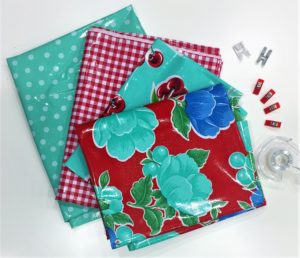
What do I mean by alternative fabrics??  I’m talking about vinyl, leather, faux leather, and one of my personal favorites, OILCLOTH.  I’d love it if you were willing to read on and open yourself up to some great new possibilities for yourself!

A table with some fabric and some clips
Some of my favorite oilcloth prints 🙂

Let me break it down for you:  A lot of the things you need to know about oilcloth also goes for other vinyl fabrics and faux leathers.  Here are some things you need to know before buying your first yard of oilcloth–

  • It’s water resistant/doesn’t absorb water.
  • It’s relatively inexpensive.
  •  It is super-duper easy to clean.  All you need is a wet paper towel and you can wipe off pretty much anything.
  •  It doesn’t fray.
  •  It’s more stable than quilting cotton, so most of the time it doesn’t need extra interfacing when used in bags.
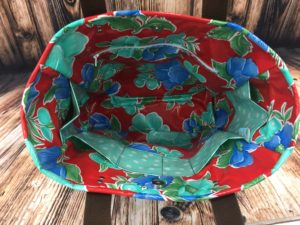
  • When you use it as a purse lining, it wipes clean and is SO easy to maintain!

    A close up of the inside of a bag
    Mamacita Tote with an Oilcloth lining

I’m sure I’m leaving a few important things out, but these things alone are pretty fantastic.  There are some things you’ll want to know about sewing with oilcloth and what you want to do a little differently than if you were sewing with regular quilting cotton.

Here are my Top Tips for sewing with OILCLOTH~

  • Don’t ever use an iron to get the wrinkles out!  You will melt the fabric, and more than likely ruin your iron.  I like to either use a blow dryer on low heat to relax wrinkles , or lay the fabric out in the sun on a flat surface for a few hours (I live in Texas, so sometimes it doesn’t take long!)
  • The holes your needle makes in the fabric are permanent.  That means you want to use a longer stitch length (somewhere around 3.5) so you have less perforations in the fabric.  If you’re using a teeny tiny stitch length, your needle is making a ton of holes that’s making your fabric weaker.
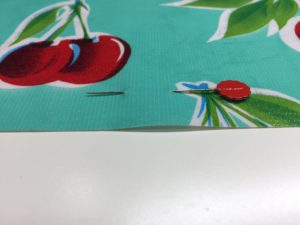
  • Don’t use sewing pins!  The holes they make will be permanent.  When securing oilcloth, use clips instead of pins.

    A close up of the cherries on a table
    Pins and oilcloth are a big No-No!  Don’t do it!
  • Use a Teflon or non-stick sewing foot to help the oilcloth slide under your foot with ease.  If you don’t have a Teflon foot, you can also stick a piece of satin scotch tape under your sewing foot, and that will help ease the fabric instead of sticking to it.  You can also use tissue paper between the presser foot and the oilcloth, then tear it away when you’re done.
  • Since oilcloth is a little thicker than cotton, try using a slightly larger needle, like one suited for leather or denim.  If you try a smaller needle and it works okay for you, stick with it–because that means the holes the needle makes will be smaller :).

I buy all of my oilcloth at Jack’s Country Store (not an affiliate link).  It seems like an unlikely place to get it, but it’s a pretty fun site, and they have tons of options and cheap shipping.  Are you ready to try it?  Go ahead, be brave!  I have a total oilcloth addiction now, and it’s so easy to work with.  I’d love it if you gave it a go and shared with me how you used oilcloth in your next sewing project!  Happy sewing 🙂

Posted on 2 Comments

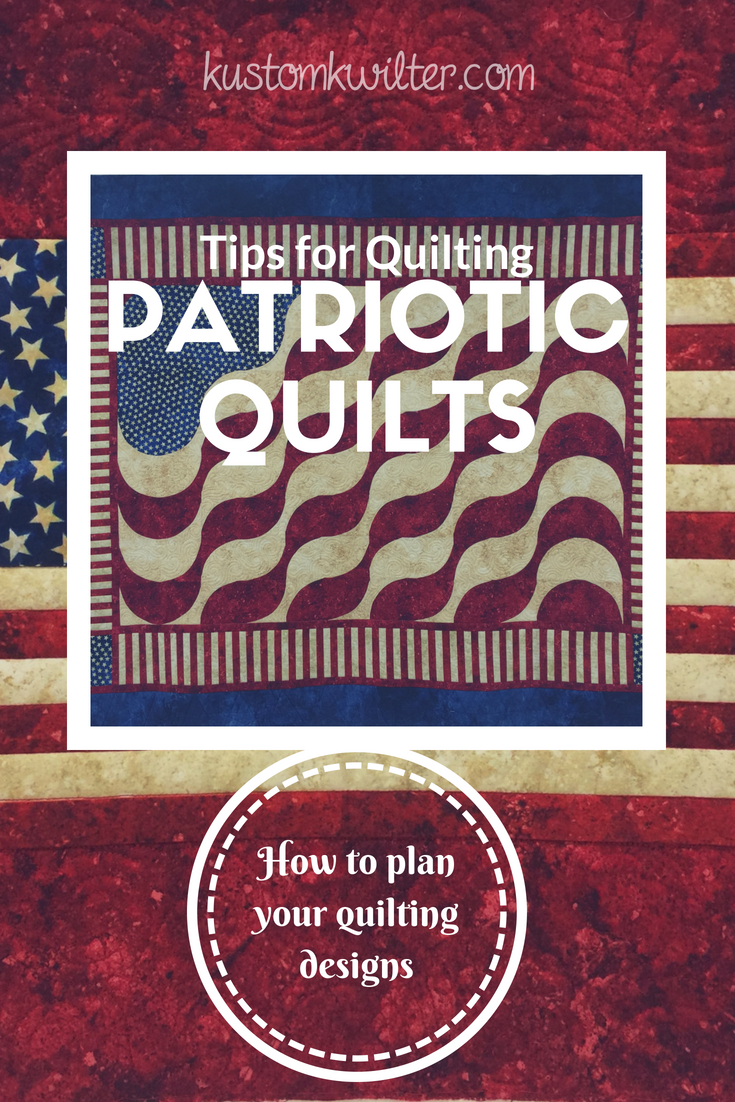
Quilting Tips – How to plan your quilting designs

A patriotic quilt is displayed on the cover of a book.


Happy 4th of July!  I hope you’re getting to enjoy family and friends and all the great festivities that the 4th brings!  In my neck of the woods, it’s hotter than Hades and we haven’t had a decent rain shower since March, so we may not be enjoying tons of fireworks this evening…we’re definitely praying for the little rain shower than is a minor possibility tonight.  Now lets talk quilting tips and how to tackle planning your quilting design!

I recently got to quilt an American Wave Quilt (pattern by Lisa Moore of Quilts with a Twist) for my mother-in-law and thought it would be a good opportunity to share some of my quilting tips for adding texture and movement to your quilt tops and planning your overall quilting design.  Even though I love bright colors and modern-traditional quilt designs, I have a great appreciation for traditional colors and patriotic quilts.  Some of the first quilts I made when I was learning to sew were with traditional, warm colors and American designs.  I’m using this quilt to talk about the 8 things I usually think about before I start quilting, but these tips can be applied to any quilt top.

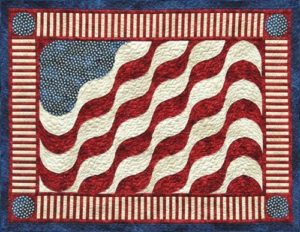
My MIL didn’t follow the pattern exactly as shown below, but this is the original pattern, by Lisa Moore, pictured below.  If you’re interested in purchasing the pattern, you can grab a PDF copy at Quilts with a Twist (this is not an affiliate link, I’m just crediting the original designer in case you want to purchase the pattern).

A quilt with an american flag design on it.
American Wave Quilt Pattern by Lisa Moore – Photo from Quilts with a Twist Pattern Page

Here are my top quilting tips for devising your quilting plan:

  1.  Consider the quilting as a design element of your quilt.
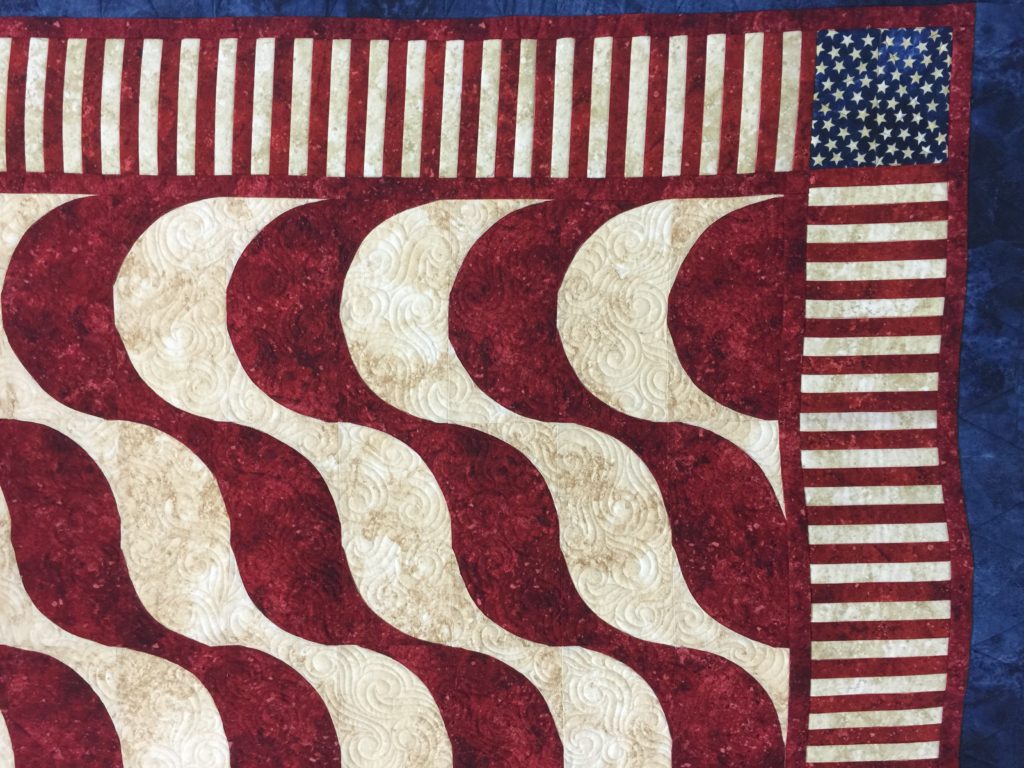
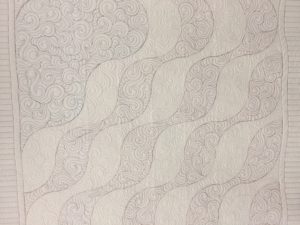
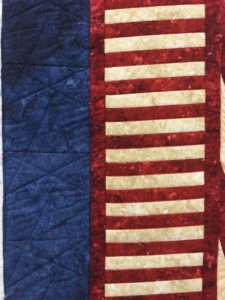
    When you get a quilt top completed that has so much work put into it–much as this one does–it’s important to consider the quilting as another design element and not an afterthought.  In my opinion, a basic meander or other edge to edge can take away from the overall impact of the quilt.Since our goal was to enhance the movement already present in the piecing, we decided to stitch in the ditch, quilt swirly waves, add some stars to go with the theme, and quilt piano keys on the striped fabric border.

    A close up of the quilt pattern
    SID and swirly waves
  2. Examine the layout of the quilt and follow the lines in the quilt to enhance the design.This quilt design already shows lots of movement in the piecing.  I opted to stitch in the ditch on the waves and within the different fabric colors, I quilted swirly waves.  Another great quilting motif would have been to echo the wavy lines within the quilt to complement the already wavy lines.The red and white striped fabric wasn’t exactly stitched in the ditch (SID), since it was one piece of fabric and not pieced stripes, but I followed the lines of the colors and did a faux SID to make it appear that it was pieced.
  3. Consider thread color.
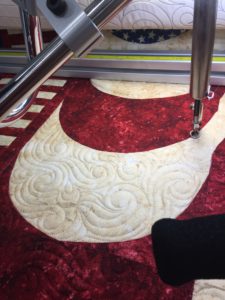
    I used three different thread colors on this quilt–red, cream, and blue.  I matched the thread colors to the fabrics I was quilting and changed them often.  This isn’t always necessary, but it’s important to consider before you stick with just one thread color for the entirety of the quilt.  If you want the quilting to really pop, then using just one of those colors–like cream would be a great idea.  The cream will blend into the cream colored fabrics, but contrast highly against the darker values of the red and blue.

    A machine cutting fabric with a large circle.
    Blending thread

    Ask yourself — Do I want my quilting to blend or POP?  If your goal is great subtle quilting, then select your thread colors to blend or melt into the fabric.  If your goal is high contrast quilting that will POP against your fabric, select thread colors that contrast with the fabric.
    Also, if you’re a beginning quilter, matching your thread colors to your fabric colors will help conceal any minor mistakes you might make.  This is a great confidence building technique to get you started on your quilting journey!

  4. What color is your backing?
    Some people prefer the quilting to blend into the backing, but in this case, the red and blue threads really pop on the cream colored muslin that was used for the backing.  It’s a good idea to think about your backing and what the quilting will look like on the back prior to starting quilting.

    A close up of the fabric for a mattress.
    Backing
  5. Look at your borders (if there are borders).
    So there were two “borders” on this quilt top.  The outer border was a dark navy blue, and the inner border was the red and white striped fabric.  I quilted stars that connected to each other in navy blue thread on the outer border and the faux SID on the striped fabric.  It’s a little difficult to see because of the thread matching, but it’s there :).  Select quilting motifs that will complement your border designs.

    A close up of the american flag quilt
    Border designs
  6. Think about the theme of the quilt.
    In this case, the theme is pretty straightforward.  It’s obviously a patriotic themed quilt, so think about designs that go with that theme.  Stars, stripes, waves, etc. would all be good choices to go with this quilt top.  maybe you have a quilt top that has cats on it, and the cats are made from triangles–you could quilt triangle motifs in the borders, or a ball of yarn, or little mice.  Stars probably wouldn’t be a good choice to go with a cat quilt, so you’d want to pick something in theme with the quilt top.
  7. Evaluate the purpose of the quilt. 
    This will help you decide the density of quilting that is appropriate and what type of batting you may want to use.  If it’s a quilt that’s going to be a wall hanging, you’d probably want to use a stiffer batting, or maybe double batt with a puffy top like wool.  If the quilt is intended to be used often, you might select a poly-cotton blend  or 100% cotton-something that would stand up to being washed and laundered frequently.The batting you select might also dictate how far apart the quilting can be.  If you buy packaged batting, it will usually tell you how far apart the quilting lines can be (example-up to 8″ apart).  Keep in mind the denser the quilting, the stiffer it will feel.  A looser quilted quilt will be softer and drape better than a heavily quilted one.
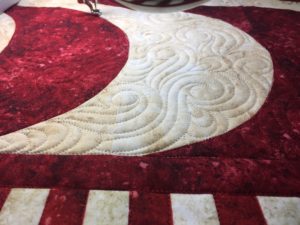
  8. Stitch in the ditch might be a lot of work, but the payoff is worth it.
    I’m a big fan of SID.  I haven’t ever quilted a quilt with stitch in the ditch and regretted it, but there have been instances where I didn’t do it and wished I had.  It gives the overall quilt a more finished look (in my opinion), and a very polished look.

    A red and white quilt with a large moon on it.
    SID detail

    The overall idea is to think of your quilting plan and how it will affect the overall impact of your finished quilt.  These 8 tips are small things you can consider that will really impact your finished quilt.  I hope these tips are helpful in planning your next quilting project!  Have a safe and happy 4th, and happy quilting 🙂

Posted on 2 Comments

Wonky Logs Quilt Release!

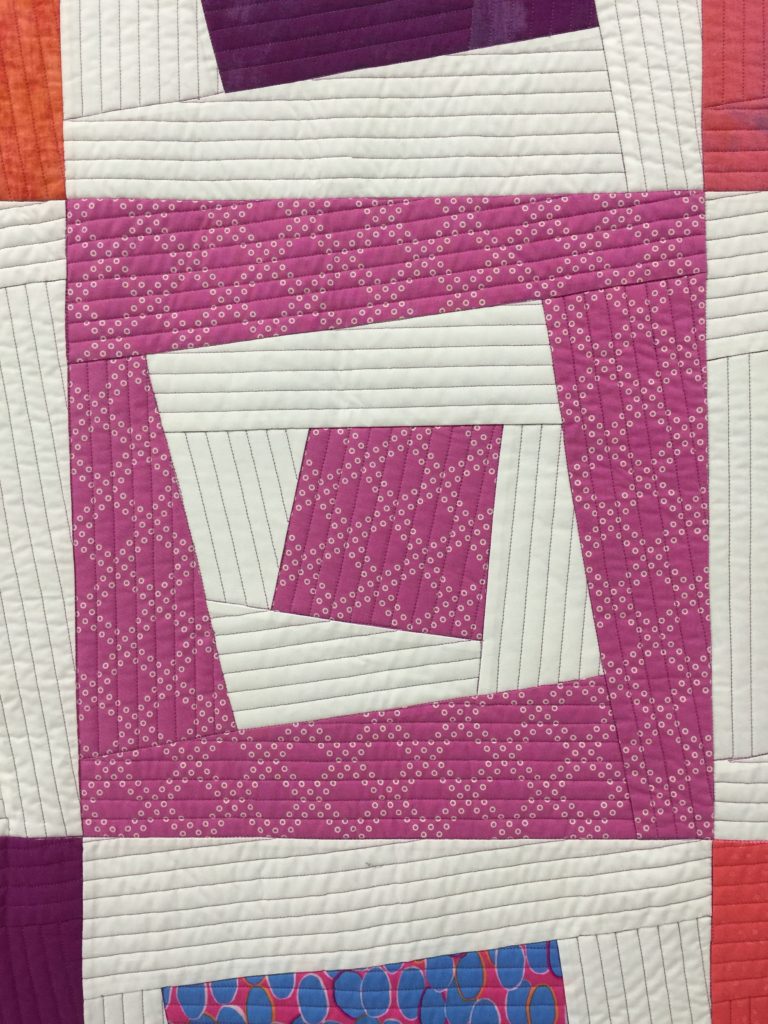
A quilt with squares in the middle of it.


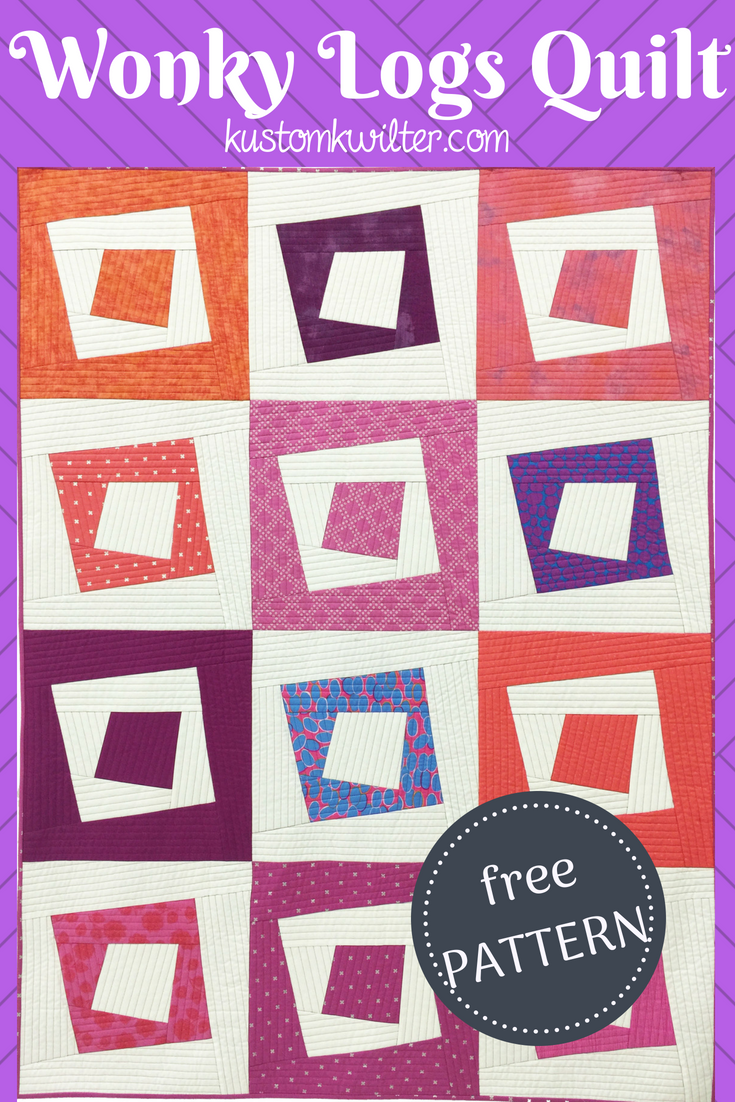
Who loves free quilt patterns??  I do!  Today is the release day for the Wonky Logs Quilt Pattern (if you subscribe to my newsletter, you got access early!), and I can’t wait to share it with you!

A close up of the wonky logs quilt pattern
Wonky Logs Quilt Pattern

I don’t know about you, but when I started sewing a few years ago, I had absolutely zero intention of ever making clothing.  The thought of doing so actually made me break out into a cold sweat.  (I promise I’m getting to the quilt–hang in there for just a hot minute!)  I can still remember sitting on my mom and dad’s bed, worrying over a dress pattern that my mom desperately wanted to make for me.  We (I say we, but I was mostly there for moral support 😉 had managed to cut the pattern pieces out of the flimsy tissue paper, and pinned it to the fabric that was destined to be the dress.  I honestly can’t recall what happened after that, but I don’t think were able to finish it.  I remember the feeling of frustration and not understanding the horribly written pattern that was intended for beginners.  It was even more frustrating because my Mamaw was an excellent seamstress, and my mom didn’t inherit those skills, or really want to.  Her calling is gardening and home making, and she does it all perfectly.  My point in telling you this story is that it left me with a bad taste in my mouth for sewing.  I didn’t attempt any kind of sewing related feat, with the exception of cross stitch, for the next 20 years.

A close up of the square quilt pattern
Some angled straight line quilting on my Wonky Logs Quilt

Fast forward 20 years, and I’ve gotten the basic knowledge down of quilting.  I joined a modern quilt guild and went on a retreat where many of the members were making their first (or second or third) garments.  I decided they could have it and waited another couple of years before finally sewing my very first School House Tunic by Sew Liberated.  It wasn’t pretty, but I wore it with so much pride, you’d have thought it was Chanel (the pattern is great–it wasn’t pretty because my fabric choices were A-W-F-U-L).  That feeling of accomplishment and pride–isn’t that what we all get when we complete a new challenging project?  I want to encourage you to broaden your horizons and challenge yourself to take on the sewing tasks you think you’re not good enough for.  That’s how I felt with garments.  And now I am obsessed with sewing my own clothing and clothing for my daughter and husband.  I’d like to help you get there.

Okay, that was a long intro, but I needed to tell you WHY I wrote the Wonky Logs Quilt pattern.  It’s free.  It’s fat quarter friendly!  It’s a quilt pattern you can put together with your serger.

A person using a sewing machine to sew fabric.
Bust out your serger!

WHAT???  Yup.  (Don’t run away just yet–you can piece it with your sewing machine too)  If you don’t have a serger, no worries.  You can still use the pattern with a traditional sewing machine and a 1/4″ seam allowance just like normal.  If you DO have a serger, and it’s sitting in the corner of your closet with old raincoats and Halloween decorations, then it’s time to pull that puppy out and dust it off.  Give it a little cleaning, find the manual and give it some oil, if necessary.  Think of this quilt pattern as your gateway pattern to garments.  You can still have fun picking out your fabrics and making a really gorgeous quilt, but you can do it while getting to know your serger a little better.  Starting to work with “wovens” with your serger will take a lot of the intimidation out of it because your fabrics won’t be stretchy like knits are.  I’ll be posting more on some fun garment construction and sharing some tips with you along the way, but for now–grab your free copy of the Wonky Logs quilt pattern and gather your fabric and have fun!!!

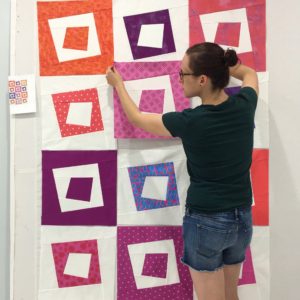
A woman is standing in front of a wall with squares on it.
Picking your fabrics is half the fun!