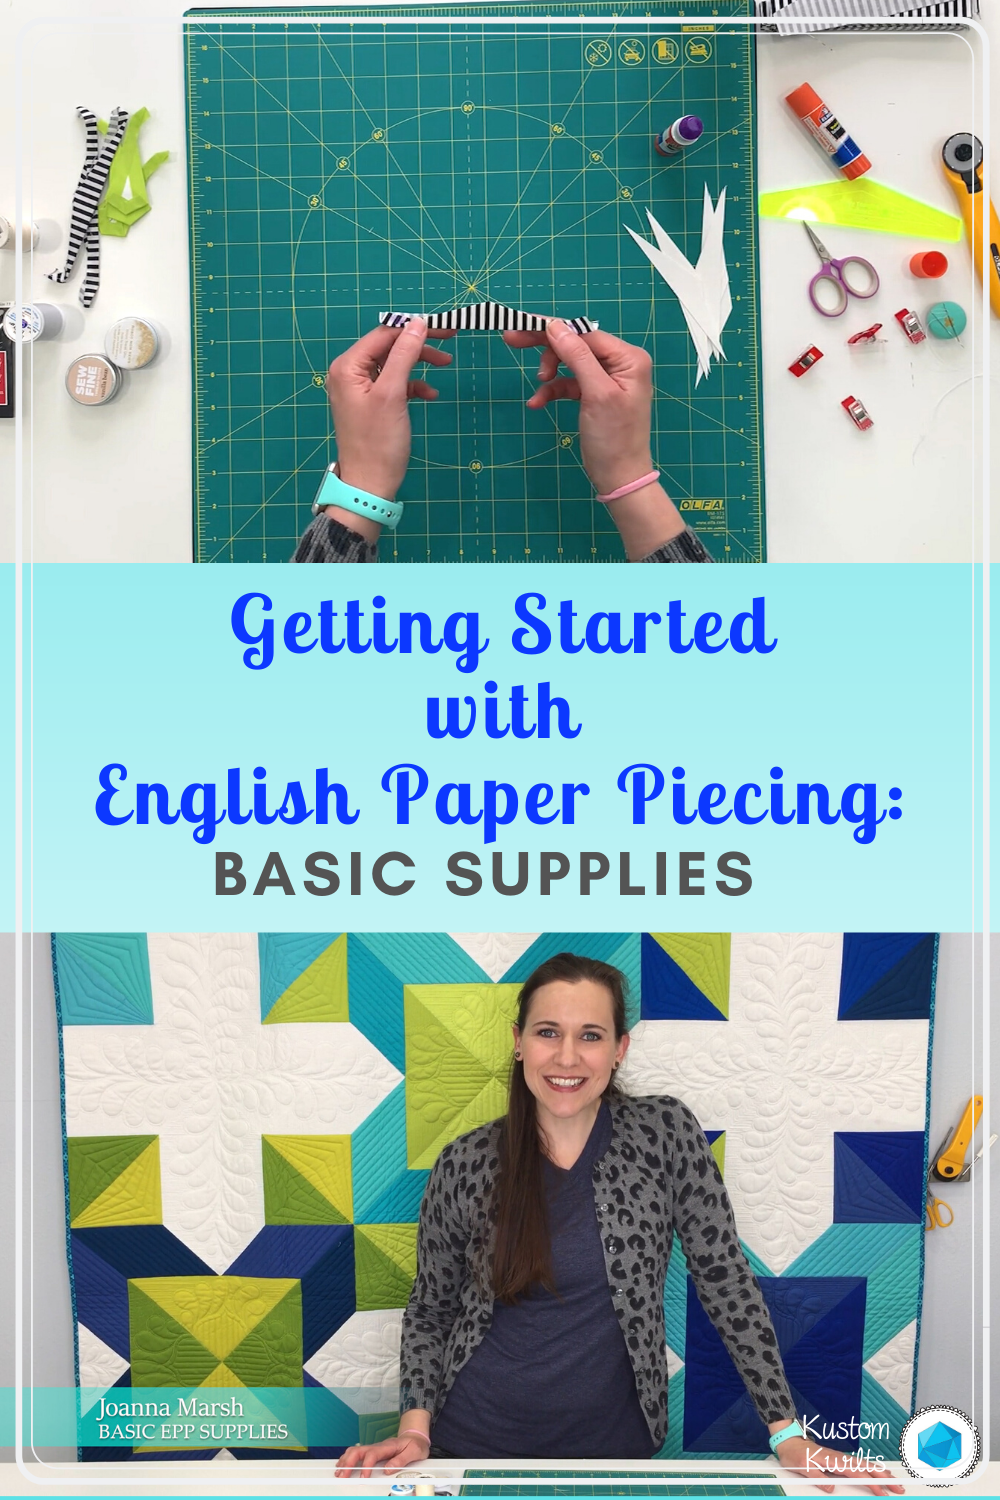
If you’ve spent any amount of time on my blog or Instagram, you know by now that I LOVE sewing and quilting. SO much so that I like to have a travel-friendly project I can take with me, whether it’s in the car, waiting at the doctor’s office, taking my daughter to the dentist, etc., to help pass the time. While English paper piecing is fun, it is much slower than powering up your sewing machine and zipping through a few seams. There’s something meditative about it that helps the craziness of the world to fade away for just a moment and let you appreciate the thoughtfulness of a stitch. English paper piecing appealed to me first when I was still an ag teacher. A lot of times, I’d be on a school bus with kids and nothing to do for hours while we traveled to judging contest OR I’d be stuck in a hotel room at night, not able to go to sleep and wishing for something productive to do. So I started dabbling in EPP. My husband bought me the La Passacaglia kit (Pattern by Willyne Hammerstein) for my birthday and I was totally hooked. I want to take the time to share my favorite English Paper Piecing supplies and tips in the video below.
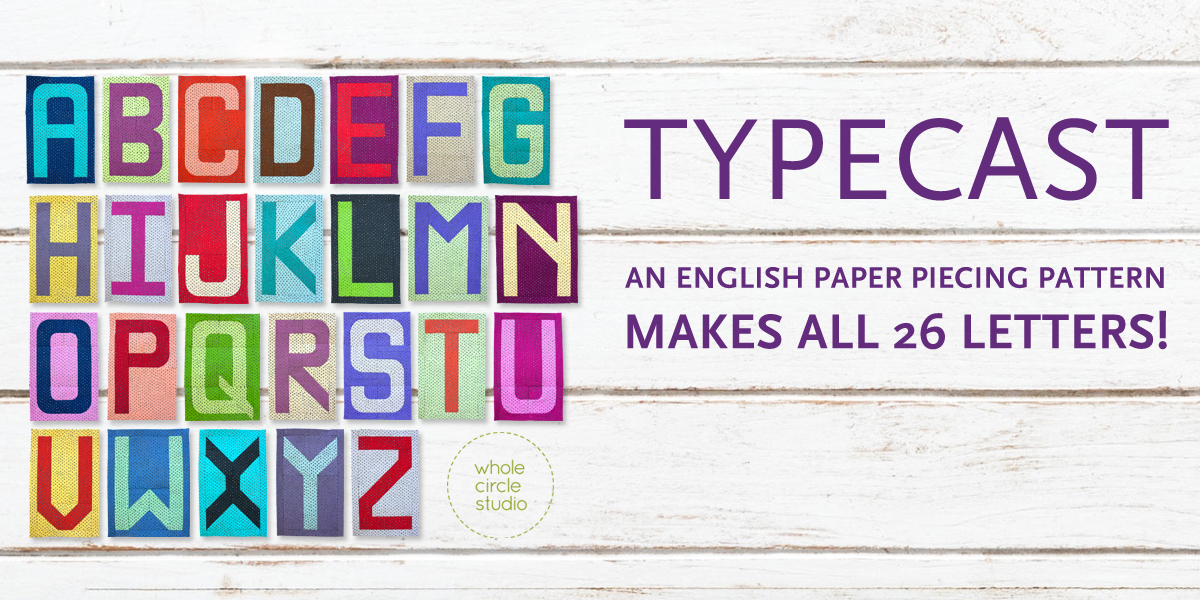
Have you guys seen Sheri of Whole Circle Studio’s newest pattern? It’s called the Typecast of Characters, and it’s an amazingly fun English Paper Piecing pattern that lets you create the entire alphabet and customize it to your heart’s desire. You can snag your copy of the pattern guide and paper packs here.
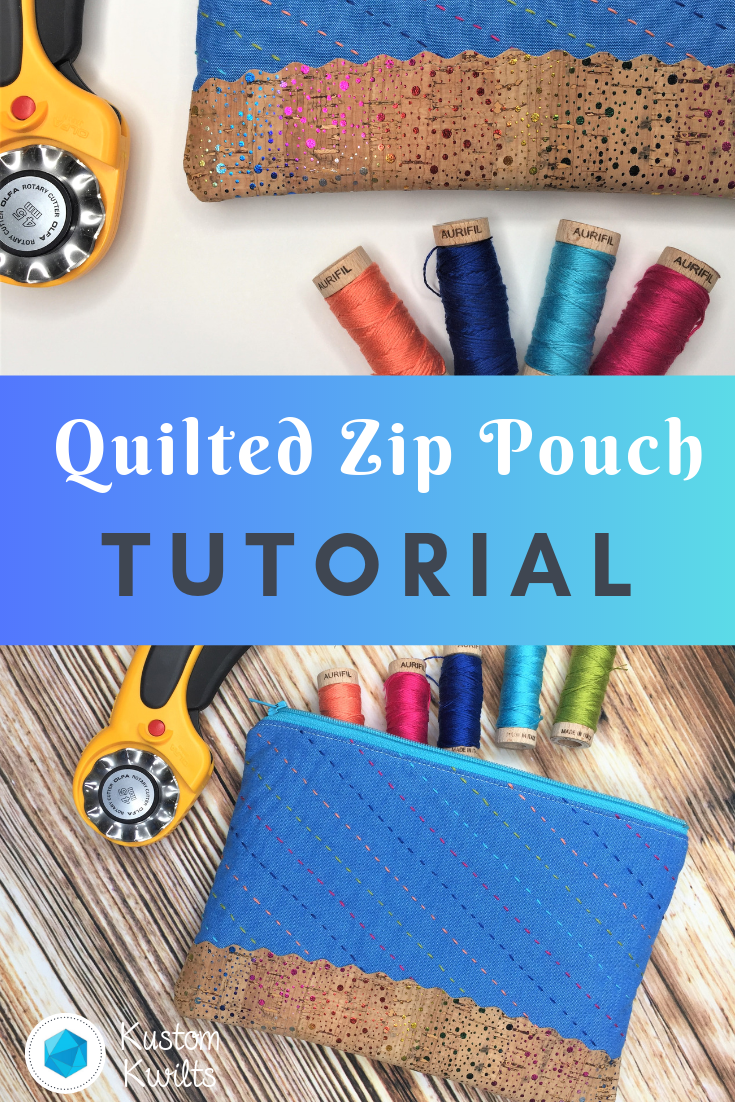
OLFA is celebrating their 40th Anniversary this year and has teamed up with Aurifil to create the Slice and Stitch Challenge! I was asked to be part of the challenge, and I’m so excited to included in this talented group of makers, showing you how to use handy tools to create things you’ll love :). I don’t know about you, but if you sneak into my sewing room, you’re sure to find several OLFA tools (and cutting mats) and LOTS of yummy Aurifil thread. Some of my favorite (and quite possibly underappreciated) tools are specialty rotary cutter blades. You can (carefully) pop one of these blades into your regular rotary cutter and quickly achieve a decorative finish that will look like it took you forever to cut…but that can be our little secret! I also just LOVE the new OLFA RUBY rotary cutter…I use it daily (photos below are from OLFA’s website). For the Slice and Stitch challenge, I saw those decorative blades paired with Aurifloss and knew immediately I just had to make a zip pouch!
Pinking blade
Scallop blade
Wave blade
Ruby Rotary Cutter
You can see the dreamy Aurifloss colors I chose for the hand quilting on my zip pouch. Love those blues with a punch of bright colors! Let’s get moving and start sewing up your own zip pouch!
Aurifloss in your favorite colors (I used #1320 Bright teal, 2225 Salmon, 2220 Light salmon, 4020 Fucshia, 5005 Bright turquoise, 2735 Medium blue, 1147 Leaf green, and 4644 Smoke blue)
To begin, you’ll need to take the two exterior pieces of fabric cut at 6.5″ x 9.5″ and center each one on top of a piece of batting. Use a Hera marker or chalk pencil to mark your hand quilting lines, then hand quilt a pattern or random stitches onto each exterior piece. I like to make my stitches about 1/4″ in length, and spaced the same distance apart.
Grab your template:
Now you’ll take the cork pieces, and the bottom portion of the template printed from your supply list and line the template up along the bottom 9.5″ of the cork. Use a standard OLFA 45 mm Rotary blade to trim along the curved edge. I used my OLFA Ruby Rotary Cutter for this part. Once you’ve trimmed the curved portion, take the Wave Rotary blade and trim just along the curved edge to leave a cute wavy edge.
Take one of the quilted exterior pieces and place the decorative cork on the bottom 9.5″ edge. Use clips to hold in place, or use some wash away hem tape to secure. At this point, I like to take an air erasable marker and echo the line of the wave just below the wavy edge of the cork – about 1/8″ from the curvy edge – as a stitching guide. Take this piece to the sewing machine and topstitch along the guideline you drew with a coordinating thread. Then stitch around the remaining edges of the cork, about 1/8″ away from the raw edge to secure it in place. Don’t worry — the cork won’t fray, so it’s great for special decorative finishes with the OLFA rotary cutter!
Take your zipper and place it lined up with the top edge of one exterior, as shown in the picture below. Mark the end of the zipper (the end with the metal stopper) where it meets the end of the right side of the fabric, then mark about 1/4″ in from that mark as well. Take the zipper to the sewing machine and use a zig zag stitch to sew a new zipper stop on the mark furthest in. Trim away the rest of the zipper on the outermost mark.
Install the zipper
I opted to quilt each exterior a little differently 🙂
Take the newly trimmed down zipper and place it RSD on top of one side of the hand quilted exterior. Use binding clips to clip the zipper in place. Take one of the lining pieces and place it RSD on top of the zipper, the replace the clips to include all three layers. Use a zipper foot to sew through the three layers with a 1/4″ seam allowance, beginning at one end of the fabric and sewing to the opposite end, all the way to the edge of the fabric.
Press the lining and exterior away from the zipper with your iron, and topstitch 1/8″ away from the folded edge of the fabric.
Repeat the steps above with the remaining exterior and lining pieces.
Assembling the zip pouch
Open the zipper part way, then match the exteriors, placing them right sides together. Pull the linings together and match them, right sides together. Pin or clip in place, and mark about a 5″ opening along the bottom center of the lining to leave open in the next step. Pull the zipper pieces towards the lining, as shown below.
Sew all the way around the perimeter of the zipper pouch, leaving the 5″ opening unsewn. Clip the corners for crisp turning. Turn the zipper pouch right side out through the opening in the lining. You can use a turning tool for crisper turning, if needed. Fold the opening of the lining in 1/4″ and press. Clip in place. Topstitch the opening closed, then push the lining down inside the pouch.
And you’re done! Fill this pretty pouch up with all the sewing things you need on the go 🙂
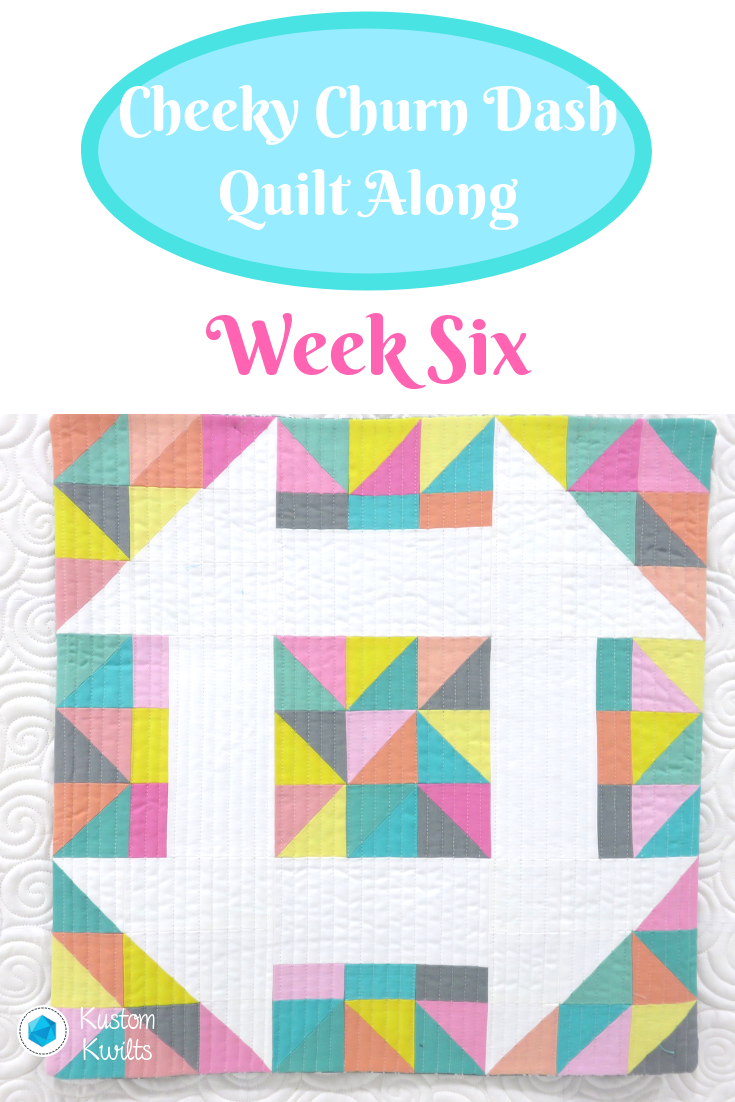
We’re moving right along into Week Six of the Cheeky Churn Dash Quilt Along! Head over to the Original QAL Post to review the details and schedule, if you need to.
A quick review of what we’ve done so far–scroll to the bottom of this page for links to each weekly post.
Congratulations to Erica M. for snagging the Week Four prize-a Quilter’s Planner from The Quilter’s Planner! This prize was sponsored by the awesome people at The Quilter’s Planner. These were Erica’s trimmed and squared up HSTs from Week Four:
Be sure to include the hashtag when you post to Instagram so everyone else can see what you’re up to, and if you’re in the US, you can enter to win prizesÂ
Stay in the loop!
If you haven’t signed up for the weekly emails that will go out for the Quilt Along, sign up here. There might be some added info and bonus content for you as a little treat!
Alright, so here’s the breakdown for Week Six:
In Week Five, we assembled sections 1, 3, 7, and 9. Here’s the action list to complete for Week Six!
And here is where irritating elevator music starts playing until the start of Week Seven ;)Â (Or, if you’re a mom, it might be Momma Shark da da da da….)
If you fell behind, go ahead and use this free week to catch up with us!
If you’re an overachiever–I see you there in the front with your quilt nearly done–You can work ahead, if you like. Just make sure you follow the original schedule (linked at the top of this post) so you have pictures to post to Instagram for the prizes.
This week, you can post a picture of anything Cheeky Churn Dash related on Instagram using the #cheekychurndashquiltalong hashtag. Be sure you post your IG picture with the hashtag before the start of Week Seven to qualify for this week’s prize. Week Six’s prize is sponsored by Aurifil. The amazing folks at Aurifil are giving away a small spool thread set, and man…their thread is top notch. A huge thank you to Aurifil for sponsoring Week Six’s prize!
Next week, we’ll be assembling sections 2, 4, 6, and 8.
Cheeky Churn Dash Quilt Along Posts:
Week One – Introduce yourself and gather your fabrics
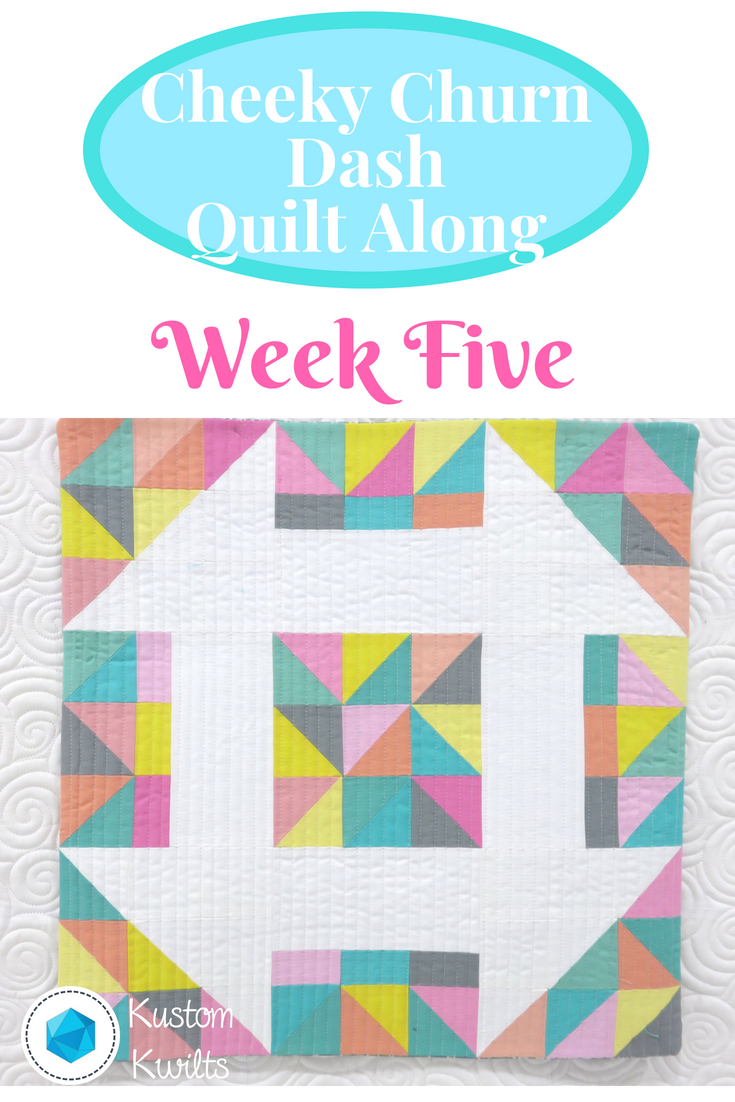
We’re moving right along into Week Five of the Cheeky Churn Dash Quilt Along!
Congratulations to Tracie M. for snagging the Week Three prize-a sweet fat quarter bundle and thread set from Crafter’s Companion! This bundle was sponsored by Crafter’s Companion. This were Tracies’s HSTs and accordion from week three:
A quick review of what we’ve done so far–scroll to the bottom of this page for links to each weekly post.
Fabric Discount!
Jennifer at Knotted Threads on Etsy has joined in the Quilt Along fun to bring all Cheeky Churn Dash QAL participants a 10% discount on fabrics purchased from her shop! She has a great selection of current and modern fabrics, so you’ll want to take advantage of this  Use the coupon code: CHEEKYCHURNDASH at checkout.
Be sure to include the hashtag when you post to Instagram so everyone else can see what you’re up to, and if you’re in the US, you can enter to win prizesÂ
Stay in the loop!
If you haven’t signed up for the weekly emails that will go out for the Quilt Along, sign up here. There might be some added info and bonus content for you as a little treat!
Alright, so here’s the breakdown for Week Five:
In Week Four, we squared up and trimmed all our HST blocks to the correct size, based on the selected option. Here’s the action list to complete for Week Five!
Take a look at your coloring sheet–if you have a specific layout in mind for your HSTs.
I like to have a pretty specific plan for my Cheeky Churn Dash before I start sewing, so I lay out the HST blocks for section 1 (we’re on pages 8-11 for Option A, and 19-20 for Option B in your pattern), then sew them together and press.
Assemble sections 1, 3, 7, and 9. These are the outermost corners of your quilt. They all have the same construction, except they are slightly rotated 90 degrees each time.
Make sure you check that you pin at your seam intersections whenever you have a seam intersection so everything lines up as it should:
Double check your layout prior to sewing each section together, and press when you’re done!
This week, post a picture of your completed sections 1, 3, 7, and 9 on Instagram using the #cheekychurndashquiltalong hashtag. The sections can be all in one picture, or you can do multiple pics in one post, or multiple posts. As long as all four completed sections are posted, you’ll be good to go. Be sure you post your IG picture with the hashtag before the start of Week Six to qualify for this week’s prize!
This week’s prize is sponsored by Olfa! I love using Olfa Rotary cutters because they precisely cut whatever I need and have great safety features. I’m so excited that they’ve jumped on board to sponsor a great prize for Week Five.
Next week is a catch up week, so don’t fret if you’re behind 🙂
Cheeky Churn Dash Quilt Along Posts:
Week One – Introduce yourself and gather your fabrics
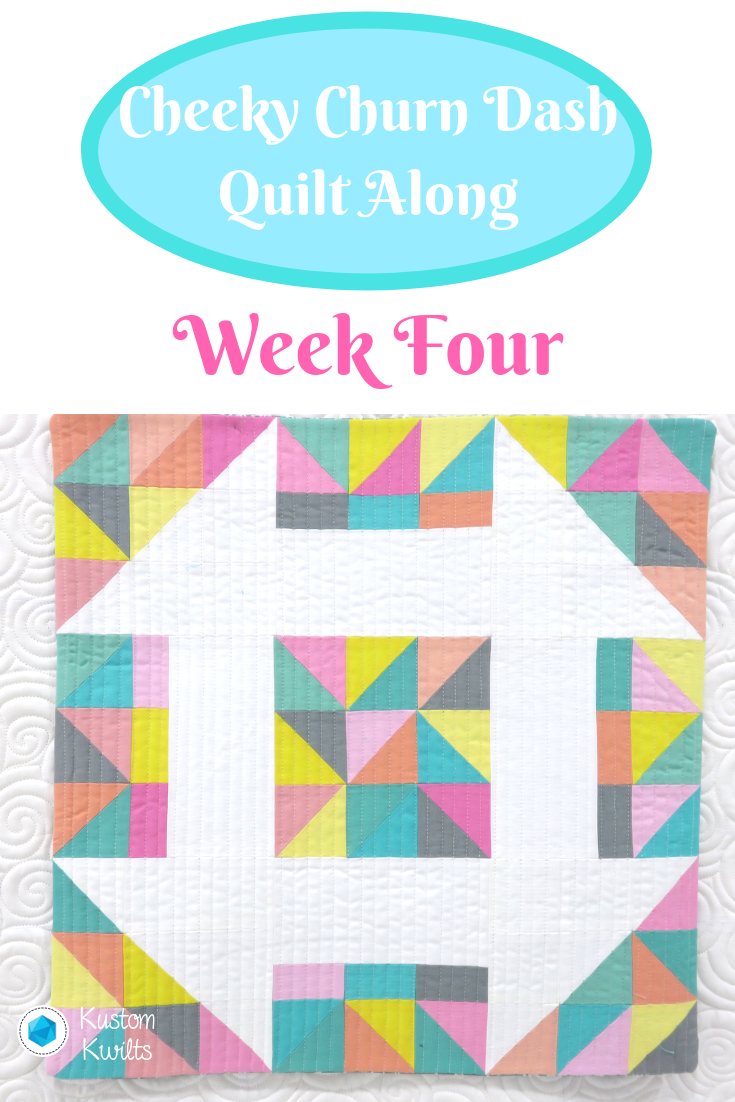
We’re moving right along into Week Four of the Cheeky Churn Dash Quilt Along!
Congratulations to Ruth B. for snagging the Week Two prize-a Tula Pink De La Luna fat quarter bundle! This bundle was sponsored by Kustom Kwilts (me!). This was Ruth’s stack of fabric cuts for week 2:
A quick review of what we’ve done so far–scroll to the bottom of this page for links to each weekly post.
Fabric Discount!
Jennifer at Knotted Threads on Etsy has joined in the Quilt Along fun to bring all Cheeky Churn Dash QAL participants a 10% discount on fabrics purchased from her shop! She has a great selection of current and modern fabrics, so you’ll want to take advantage of this  Use the coupon code: CHEEKYCHURNDASH at checkout.
Be sure to include the hashtag when you post to Instagram so everyone else can see what you’re up to, and if you’re in the US, you can enter to win prizesÂ
Stay in the loop!
If you haven’t signed up for the weekly emails that will go out for the Quilt Along, sign up here. There might be some added info and bonus content for you as a little treat!
Alright, so here’s the breakdown for Week Four:
In Week Three, we sewed all the half square triangles for either Option A or Option B. Then we pressed all of our HSTs. Here’s the action list to complete for Week Four!
Week Four is pretty easy. Grab your rotary cutter and a quilting ruler and slide your HSTs over to a cutting mat.
For the 81″ square quilt size–Option A and Option B, you’ll square up all your HSTs to measure 9.5″ square.
For the mini or pillow size, you’ll square up all your HSTs to measure 2.5″.
To do this, you’ll need to make sure the diagonal of your HST is exactly centered within the square measurement. Then trim off any excess as needed. Â
Check out a quick video tutorial of how to line up your ruler when trimming your HSTs.
That’s it! It is a little labor intensive, but it’s worth it to go back and check that all your HST blocks measure correctly before we start putting this quilt together.
This week, post a picture of your stacks of trimmed and squared up HST blocks (and trimmings/rotary cutter if you have them!) on Instagram using the #cheekychurndashquiltalong hashtag. Be sure you post your IG picture with the hashtag before the start of Week Five to qualify for this week’s prize!
This week’s prize is sponsored by The Quilter’s Planner! I just purchased my 2019 Quilter’s Planner, and it’s amazing! I’m so excited that they’ve jumped on board to sponsor a 2019 Quilter’s Planner for Week Four.
Next week, we’ll be assembling sections 1, 3, 7, and 9!
Cheeky Churn Dash Quilt Along Posts:
Week One – Introduce yourself and gather your fabrics
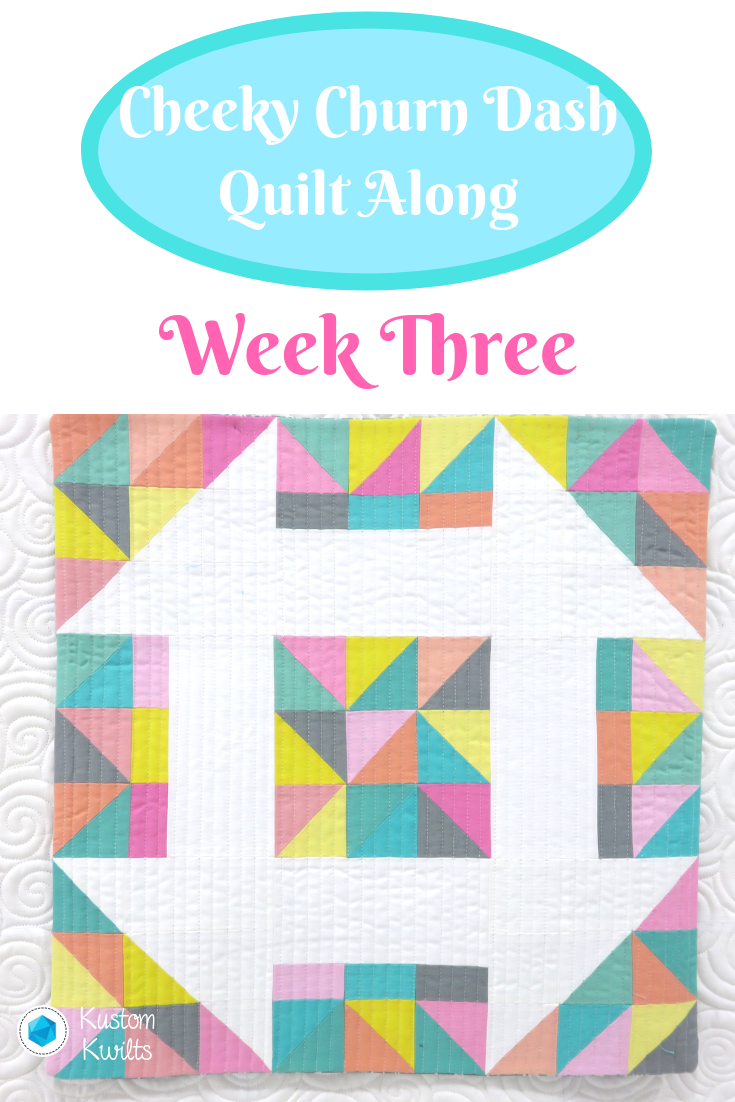
We’re moving right along into Week Three of the Cheeky Churn Dash Quilt Along! Head over to the Original QAL Post to review the details and schedule, if you need to.
Congratulations to Marcy S. for winning the week one prize- the Alison Glass Insignia FQ bundle sponsored by Knotted Threads! Marcy posted a lovely picture of her bluebonnet fabric for the week one prompt:
A quick review of what we’ve done so far–scroll to the bottom of this page for links to each weekly post.
Fabric Discount!
Jennifer at Knotted Threads on Etsy has joined in the Quilt Along fun to bring all Cheeky Churn Dash QAL participants a 10% discount on fabrics purchased from her shop! She has a great selection of current and modern fabrics, so you’ll want to take advantage of this  Use the coupon code: CHEEKYCHURNDASH at checkout.
Be sure to include the hashtag when you post to Instagram so everyone else can see what you’re up to, and if you’re in the US, you can enter to win prizesÂ
Stay in the loop!
If you haven’t signed up for the weekly emails that will go out for the Quilt Along, sign up here. There might be some added info and bonus content for you as a little treat!
Alright, so here’s the breakdown for Week Three:
In Week Two, you should have decided on which Option of the Cheeky Churn Dash you’re making–Option A or Option B. You also should have kind of looked over the Accordion Sewn HSTâ„¢ Method and decided if you’ll be using that method of piecing your HSTs or the standard piecing method outlined on pages 6-7 of your pattern. If you chose the method outlined in pages 6-7, you starched your fabric already. So here’s the action list to complete for Week Three!
For Option A
If using the Accordion Sewn HSTâ„¢ Method, draw a diagonal line from one corner to the other on the wrong side of each square designated for half-square triangles.
If using the standard method, follow the instructions outlined in pages 6-7 to make the HST blocks.
Assemble a total of 24 half square triangles made from combining fabrics B, C, D, E, F, G, H, I. Assemble a total of 12 half square triangles made from combining one Fabric A with one fabric B-I. So for Option A you will have 36 HSTs.
For Option B
If using the Accordion Sewn HSTâ„¢ Method, draw a diagonal line from one corner to the other on the wrong side of each square designated for half-square triangles.
If using the standard method, follow the instructions outlined in pages 6-7 to make the HST blocks.
Assemble a total of 33 half square triangles made from combining fabrics B, C, D, E, F, G, H, I. Assemble a total of 12 half square triangles made from combining one Fabric A with one fabric B-I. So for Option A you will have 45 HSTs.
For both options-press your HSTs well.
This week, post a picture of your stacks of completed HST blocks on Instagram using the #cheekychurndashquiltalong hashtag. Be sure you post your IG picture with the hashtag before the start of Week Four to qualify for this week’s prize! Week Three’s prize is sponsored by Crafter’s Companion– and they’re offering up a gorgeous fat quarter bundle and thread set!
These are my completed HSTs for week three! I can’t wait to see yours!
Next week, we’ll be squaring up all the half-square triangles!
Cheeky Churn Dash Quilt Along Posts:
Week One – Introduce yourself and gather your fabrics
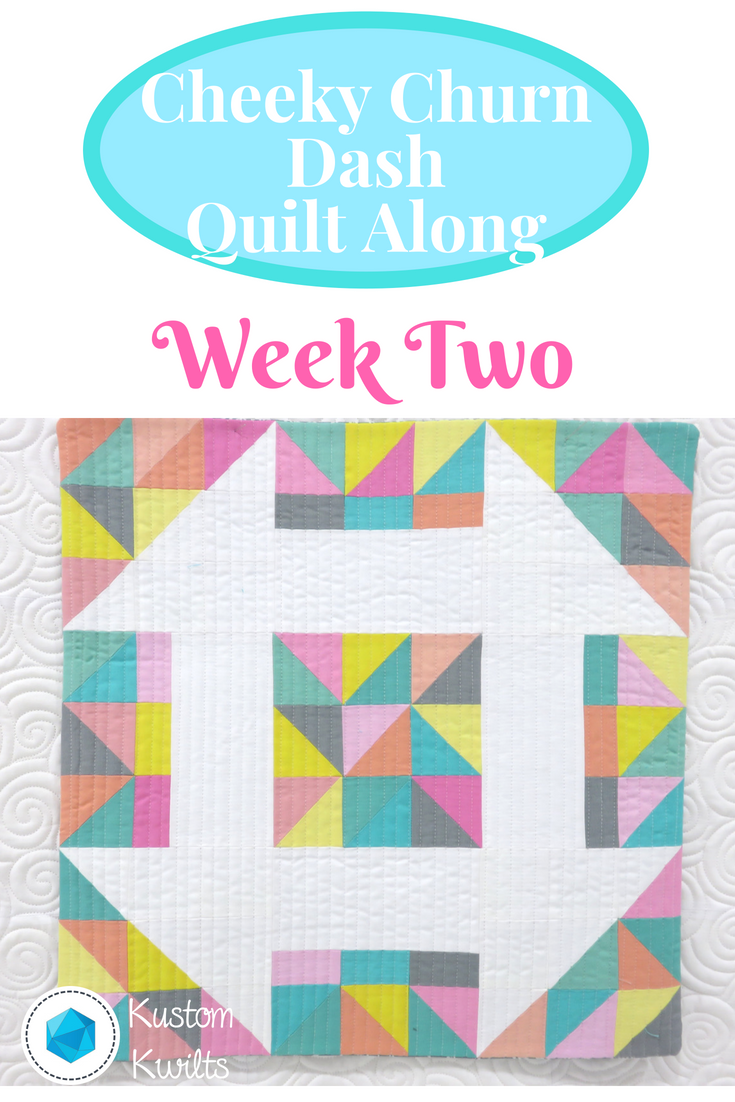
We’re moving right along into Week Two of the Cheeky Churn Dash Quilt Along! Head over to the Original QAL Post to review the details and schedule, if you need to.
Select the Option you want to make (Option A or Option B) and grab your fabric:
Fabric Discount!
Jennifer at Knotted Threads on Etsy has joined in the Quilt Along fun to bring all Cheeky Churn Dash QAL participants a 10% discount on fabrics purchased from her shop! She has a great selection of current and modern fabrics, so you’ll want to take advantage of this  Use the coupon code: CHEEKYCHURNDASH at checkout.
Be sure to include the hashtag when you post to Instagram so everyone else can see what you’re up to, and if you’re in the US, you can enter to win prizes :). Just make sure you post the weekly prompt to IG by 11:59 CST on the Friday that ends that week.
Stay in the loop!
If you haven’t signed up for the weekly emails that will go out for the Quilt Along, sign up here. There might be some added info and bonus content for you as a little treat!
Alright, so here’s the breakdown for Week Two:
Starch all your fabric prior to cutting (unless you’re using the Accordion Sew HSTâ„¢ method)
Tips for starching:Â I recommend using a starch with body–like the Faultless brand, or another inexpensive option from your grocery store’s laundry aisle–it will stiffen your fabric and lessen the chance for distortion if you’re going to be messing with bias cuts.
I like to spray the entire piece of fabric so it’s damp all over, then let it sit and soak in the starch. I let it air dry, then come back and hit it with the iron. I do this so there isn’t a lot of that flaky mess you get when you press immediately after spraying the starch.  Make sure you pre-wash your fabric if you think the colors might bleed–but not if you’re using precuts.
You don’t need to starch if you’re planning to use Beth Helfter’s Accordion Sewn HSTâ„¢ Method.
There’s a link to Beth’s videos in the pattern on page 4 or you can check out the video I made here.
Decide which Cheeky Churn Dash you’re going to make and cut out your fabrics accordingly. You’ll need to make a large quilt option to qualify for the grand prize at the end of the Quilt Along, so keep that in mind.
Quilt Option A cut list is found on page 5 of your pattern
Quilt Option B cut list is found on page 17 of you pattern
Mini/Pillow cut list is found on page 23 of your pattern
There’s a note on page 4 of your pattern–if you have a hard time sewing a consistent 1/4″ seam allowance (don’t we all??), you can cut the squares that will be used for HSTs a little larger than the cut list calls for. So instead of cutting 10″ squares for the large quilt option, you can cut them at 10-1/4″.
If you need help–there are cutting diagrams for each option that will maximize your fabric use.
This week, post a picture of your stacks of cut fabric on Instagram using the #cheekychurndashquiltalong hashtag.
I’ll be randomly picking one winner from week two (you have to post the week 2 prompt on Instagram with the hashtag by 9/28/2018 at 11:59 CST) to win an awesome prize! This week’s prize is a FQ bundle of De La Luna, sponsored by Kustom Kwilts (me!) that I purchased from Knotted Threads. Check out the Prize Roundup post for more details & the rules.
Next week, we’ll be assembling all the half-square triangles!
Cheeky Churn Dash Quilt Along Posts:
Week One – Introduce yourself and gather your fabrics
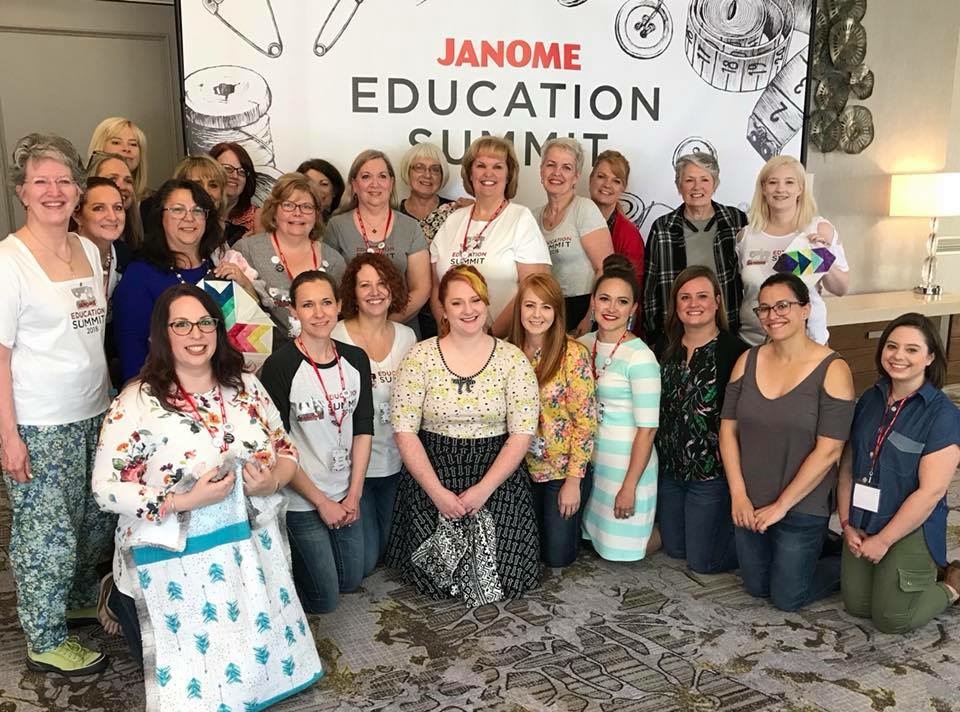
This past week was one I’ll never forget. I was invited to attend the first Janome Education Summit in Park Ridge, New Jersey to meet some amazing people and learn some awesome new things about what Janome has coming up! The Janome Education Summit consisted of Janome Educators, Artisans, and Makers–generally a group of the most amazing people, packed with three days of classes and collaboration.
It had been about 7 years since I had flown anywhere, and I was REALLY nervous about getting on a plane and leaving my 1.5 year old, but once I made it to NJ, I was SO excited to be there! I’ve been working with the amazing people at Janome America for almost three years now, and had never really gotten the chance to visit with them for longer than 5 minutes. We had a nice meet and greet to kick off the first night there, and the opening remarks were made by Janome’s new National Spokesperson-Kimberly Einmo.
Kimberly taught a great class showing us the HP foot and needle plate for the MC 9400 and we made a really cool block using her Flying Geese ruler (it virtually eliminates ALL waste) and a design roll of her new Solid-ish line of fabrics. If you’ve never taken a class with Kimberly, I highly recommend it. She is so inspiring and has such a genuinely fun personality!
Professional HP Foot
I’ve been using the Quarter inch foot for precision sewing on my MC9400 and had never thought to try the HP foot and needle plate. Total game changer!!! If I thought my seams were accurate before, this foot is even more precise.
My finished block from Kimberly’s class using Solid-ish
Amy Johnson of Amy’s Quilting Adventures demonstrated a set of rulers for ruler work on the domestic sewing machine. Amy provided all of the attendees with a printed piece of fabric to practice our ruler work on. I had never tried to use rulers (except maybe a straight edge) on a domestic sewing machine, but these rulers from Janome are so versatile and fun to work with. Here’s a picture I took of Amy’s sample quilt she quilted–and it’s AMAZING!!!
Amy Johnson’s sampler quilt
And this is my very first try at ruler work on the MC9400–it’s definitely one of those things you have to practice a few times. And some tools that would be good to have on hand–grab a Supreme Slider for the bed of the machine and some quilting gloves to keep your rulers from sliding.
Practicing Ruler work on the Janome MC9400
The second night at the Janome Education Summit, we had a pajama party and worked on some of our group quilt blocks that each attendee designed and brought with them to the summit. We were also treated to Liz Thompson (Janome Canada) showing off the awesome quilt binder attachment to save time and fabric when binding quilts!
Liz teaching us about the quilt binder attachment
Liz has the best sense of humor and is such a fun person to chat with! I can’t wait to start using the quilt binder–you only have to sew the binding down once–no stitch and flip to do the other side!
On the second day of Janome Education Summit, Sheryl and Rachel from Shannon Fabrics brought us some delightful Shannon Cuddle and Embrace blanket kits. They shared some super soft fabrics with us and walked us through a blanket pattern that seemed like it would take all day–but we finished them in under 2 hours with the quilt as you go method!
Eileen Roche from DIME (Designs in Machine Embroidery) shared with us her amazing software to customize our own fabrics called My Fabric Designs–and it’s so much fun to play with. I already have plans to create some custom fabrics for some bag linings to include my logo and colors–and there are so many fabric substrates!
We were also treated to a lesson in the Acusketch app from Janome by Tamara Kate (a Michael Miller Fabrics Designer). Tamara is so talented and her fabrics and quilts are absolutely gorgeous! I was blown away by what the app is capable of, but you can make drawings within the app and transfer them to the MC15000 to be embroidered on your fabric. Essentially, you could have your child draw something special and have it forever preserved as an embroidery design (that’s what came to my mind when I was playing with it–but of course it could be utilized in countless other ways!)
Tamara Kate Designs
The Janome America team surprised all of the attendees with a dinner cruise on the Hudson River, touring New York City. The weather was wonderful and the sunset was just breathtaking.
Dinner Cruise in NYC
NYC at sunset
To wrap up our final day at the Janome Education Summit, our last class was led by Heather Peterson of Girl Charlee to make a quick and elegant pencil skirt with Janome sergers and coverstitch machines. Heather shared all of the knit substrates offered on the site (holy cow, there are a LOT!), and provided each attendee with a pencil skirt kit. I thought there was no way we could go from start to finish in under two hours and have a completed skirt, but we did! We also got a sneak peek and got to use the new Janome serger that will be out shortly–I was squealing with delight!
Heather Peterson, Girl Charlee
I selected a super cute blue floral knit from the kits Heather brought for us, and it turned out so cute! Trish from Trish Stitched posed for a quick picture with me with our finished skirts 🙂
Our Girl Charlee pencil skirts
Every moment of the Janome Education Summit was jam packed with great information that I can’t wait to share with you in future posts. I can’t believe I almost forgot to mention the swag bag–I literally had to fill an entire suitcase with nothing but goodies from all the sponsors and contributors (A huge thank you to all the sponsors!!!). I think the plane flying me home was struggling with that extra load! There were so many talented Educators, Artisans, and Makers in attendance, and each person has so many inspiring things to show with their Janome sewing machines! Thank you so much to Janome America for hosting such a wonderful and inspiring event.
After a long day at work, picking the kiddo up from daycare, fixing dinner and doing the dishes…I like to relax by doing English Paper Piecing. I started my EPP journey before Gemma was born by sewing up La Passacaglia (pattern by Willyne Hammerstein). I’d pick my fabrics in the morning before I went to work (this was when I was still teaching high school), then when I got home, I’d cut the fabrics out as quickly as I could, make dinner, etc., then start glue stick basting all the papers on the couch. I’d organize all my rosettes into little zip lock baggies so I could just grab and go. I also had color coded templates I made so I wouldn’t get my little papers confused. I’d throw a prepped ziplock into my purse when I knew I’d be travelling with students and had some time alone at the hotel at night and sew when I had a chance. That project really hooked me into EPP.
Fast forward to now…I sew full time and any extra time in the morning is spent prepping for the day’s work ahead. Now I have a sweet & sour toddler who demands most of my extra time in the evenings, and I’m so wiped after she goes to bed that the last thing I want to do is think about anything. That is…until I got Blair Stocker’s Wisecraft Quilts book. It’s such an organically creative book about repurposing and it really pulls at my creative heartstrings.
Wise Craft Quilts
There’s an EPP project in Blair’s book called “Handstitched” that made me fall in love with English Paper Piecing all over again. It’s a project I was confident I could complete, even with my never ending checklist and a needy toddler. If you’re so inclined, you can pick up a paper template kit from Blair’s website HERE. (Full disclosure-none of these are affiliate links. I don’t get anything out of you making a purchase other than the satisfaction of knowing you’ll love this project as much as I do!) Below is a picture from Blair’s book of the project and my beginning planning phase of the EPP. Anytime I do EPP, I always sketch out a “map” of the project with a key for what fabric goes where. I can’t ever remember what my original plan is without writing it down!
Handstitched EPP planning
You can see in the finished/progress pictures that I didn’t end up using some of my fabric selections. I’m a die hard Anna Maria Horner lover, and I ended up mainly using one print of hers that I’m a sucker for fussy cutting. There’s so much going on in the pattern of that one fabric that you can basically fussy cut it all over and get dozens of different looks.
Handstitched step 1
I started by assembling the center with my fussy cut pieces.
Handstitched step 2
I absolutely LOVE incorporating stripes and straight lines into EPP. I’m always surprised by the outcome. See above.
Handstitched step 3
There’s just something about those dull gold and maroons working with that magenta and mint that make them almost glow.
Spray basting onto my pillow front
So I decided this project would be a perfect throw pillow. Once I started it, I knew I needed to see this EPP on a daily basis and not just hanging out in my sewing studio. I grabbed my favorite spray baste and cut a pillow front a little larger than it needed to be finished so I could quilt it as well. I used Chaco liner to mark the pillow front into quarters to easily find the center and centered the English Paper Piecing piece on the pillow front. After I used just a smidge of spray baste, I hand appliqued it to the fabric (also AMH fabric-loominous). All while sitting on my cozy couch with the husband 🙂
Appliqueing the EPP to the pillow front
I used Wonderfil 100 wt. thread to hand stitch.  I quilted some simple straight lines on the pillow front to add a little texture. The Loominous fabric already has a grid motif on it, so I only did straight lines one way to save me some time.
Quilting
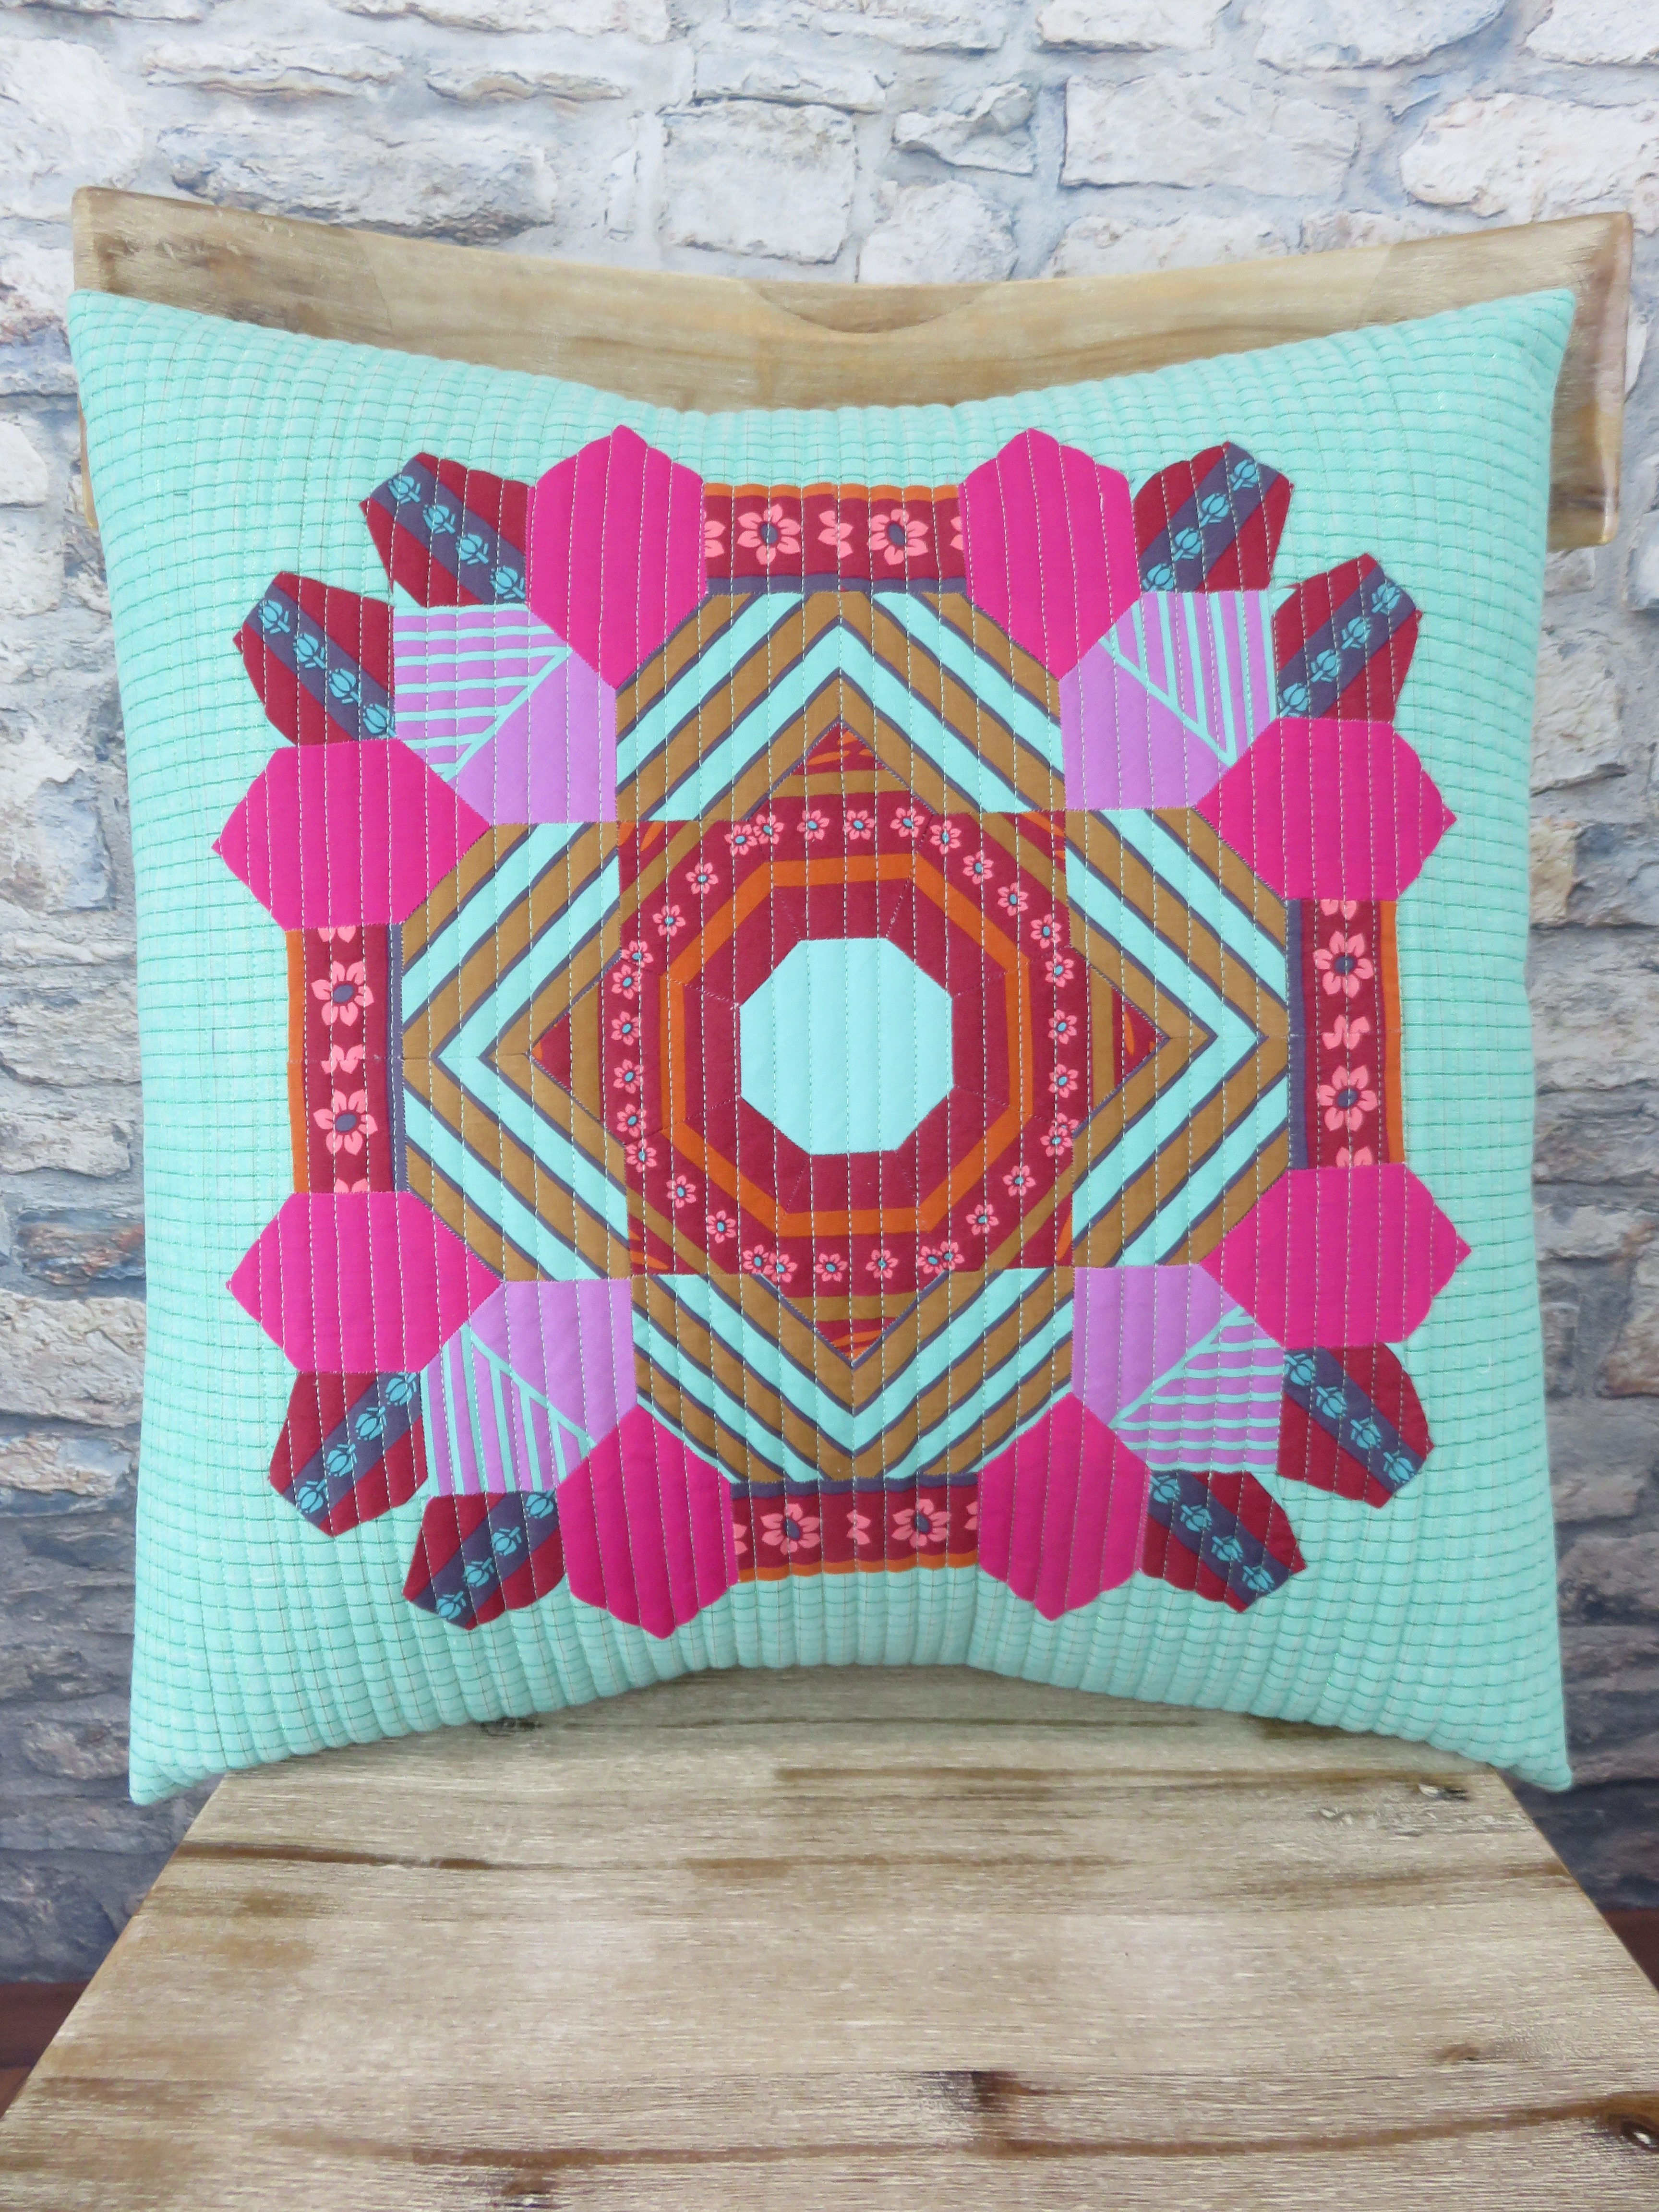
My finished EPP pillow
I could have just stitched up the project and made a mini out of it, but we’re a pillow household. I love how you have to really look at the center to see the English Paper Piecing template shapes. The stripes really break it up and make you have to search for it. I’m really hoping to start another of these soon once I get some other projects off my plate because it is so enjoyable to sew. I put a lot of thought and even auditioned some of the fabrics before I started sewing, but you could just as easily make a scrappy version that would look outstanding as well. I believe Blair’s version in the book is all Liberty (insert all the heart-eyed emojis here!!!).
Basically, I love this project. I can sit my fanny on the couch and relax while my fingers do all the work. And it makes me still feel like I’m being productive (while not actually having to do anything strenuous). Win-win, right!?