Posted on 1 Comment

Gems in the Night Sky Quilt (Dear Jane-ISH Quilt)

I played with the quilt design for the Gems in the Night Sky Quilt in EQ7 for probably a week straight before I had my final layout the way I wanted it.  I changed the background fabric, moved blocks around, completely deleted blocks, changed color arrangement, the list goes on and on.  It’s funny how after you’re done with something, all the time you spent on it just kind of vanishes, and you don’t think about the labor of love you put into it.  


This quilt.  All the hearts.  I had the awesome chance to design and make this quilt for Janome’s brand new machine launch–the 9400.  I’m not going to lie, this quilt took FOREVER.  But packing it in a shipping box and saying goodbye forever was nearly as difficult as giving away your first born. 


And then I saw the picture of it on the Janome website once the machine was released, and it was like seeing photos of a long lost friend.  And I might have squealed out loud at the top of my lungs 🙂


So there were 81 blocks- with 9 different block constructions.  At first glance it kind of looks like someone took a Dear Jane quilt and dumped a bucket of modern over it (which is fine with me!), but if you look a little closer, you will see the blocks are just made with alternating colors and arranged in a way that it deceives you into thinking there are a lot of different blocks in this quilt.  


This was pieced with the Michael Miller Cotton Couture bundle that’s available at Janome dealers, and the background fabric is Anna Maria Horner’s True colors- filigree in dusk.  I think the combination is just dreamy.  


Sometimes I love the backs of quilts more than the front.  I like to press my seams open to eliminate a lot of bulk when I quilt.  


And then it was quilted with Stitch in the ditch around the bright colors and heavily quilted on all of the AMH fabric.  I had to keep this a secret for so long, that I nearly forgot about it once the machine was finally released.  So I’m finally able to share and show my little labor of love.  
Posted on

Free Quilt Pattern Alert! Super easy I Spy Quilt pattern to ease your pain on long road trips with the kids

How many times have you been in the car, loaded up the kids to go to grandma’s house, and heard that horrible, awful question…(queue the Jaws music)…”Are we there yet?”  or better yet…”I’m Boooooooored.”  

I Spy Quilt loaded up and ready to go!

I know we’re all super busy in the summer, and it makes finding time to sew pretty difficult.  But now you have a great reason to bust out the sewing machine–you’re going to cure the kids of their road trip boredom by making them an I Spy Quilt!  All you really need are some random novelty prints or scraps–even seasonal fabrics are great for this.  The great thing about this quilt is that NONE of the fabrics need to be cohesive for this to work.  You have a print with elephants?  Elves?  Pirates?  Cactus?  Ballerinas?  They’re all perfect!  The more random the assortment of your fabrics, the longer the kids will be staring at this quilt, absolutely stumped.  

Your layout can be totally random, too!  I tried to lay my squares out from dark to light,
but you can try grouping them by color, theme, etc.  


I had the privilege of teaming up with Janome to write this tutorial for American Quilter’s Society.  So follow this pretty little LINK and head over to get the skinny on how to put this awesome little lifesaver together!  

I quilted mine with some sweet little swirls that were fast and easy!  

Okay, so in all honesty, making this quilt won’t be the end of you ever hearing those two comments from the back seat again, but what the heck!  It’s worth a shot isn’t it?  ðŸ˜‰

Posted on

T-shirt quilts

Have you ever picked up someone’s journal or diary and caught a glimpse of who that person is and what drives them?  Even if it belonged to a total stranger?  That’s how I often feel when I get a t-shirt quilt commission.  Sometimes It’s t-shirts, sometimes ties, sometimes clothing from a deceased loved one, but what my clients may not realize is that by the time I am done with the finished item/quilt, I feel like I personally know the person the items belonged to. 


I recently completed a t-shirt quilt for a graduating senior who was an avid football player.  And let me tell you…Momma did an awesome job of saving shirts from elementary school on up!  This was probably the largest t-shirt quilt I’ve done, being nearly king-sized when completed. 

Seriously…this sucker was a monster.

This is going to sound totally lame, but I feel like I know this kid and went through each achievement with him!  While cutting out the shirt blocks, sometimes your mind just wanders.  A lot of things about this quilt reminded me of when I was in high school.  Thinking about football games and pep rallies and all the fun and carefree days. 

It is such a joyful process to make something that parents are putting so much thought into to gift their child.  Who wouldn’t want to be a part of that?  I am so happy that I’ve found my thing–and that it can bring other people a little joy and happiness.  
Posted on

Texas Road Trip QAL-Customer quilt

So, today I’m going to share a customer’s quilt that I recently worked on.  It was put together beautifully and I loved that I had the chance to work on this…

I had the awesome opportunity to quilt a very talented quilter’s Texas Road Trip QAL quilt.  The design for the quilting was fairly straight forward and not that complicated, but the impact was really breath taking.  Straight lines and curved lines work separately to really make the quilt pop.  

These are some of the great swirls that this quilter chose for her design.  So gorgeous and free flowing.  I really loved quilting this because there were lots of people in our guild completing this quilt along at the same time, and I enjoyed seeing how differently they were quilted.  In the picture above, you can see a little snippet of a post it that I pinned to the next section as a reminder to stop quilting swirly loops and switch to straight lines 🙂

Another great detail that this quilter chose was to put a heart over the center of San Antonio–in hot pink thread.  It really was so much fun to quilt, and the swirly loops are really relaxing to kind of get lost in.  

And here’s a picture of the finished quilt:  
I absolutely LOVE the scrappy reds in the Texas shape and the scrappy low volume background.  Normally, I’m not a red person…but this quilt…WOW!  I just had to share one of my favorite quilts that I’ve longarmed for someone else.  I hope you get to enjoy some time sewing, or doing whatever makes you happy this week!  Until next time….
Posted on

Longarm quilting a double wedding ring quilt

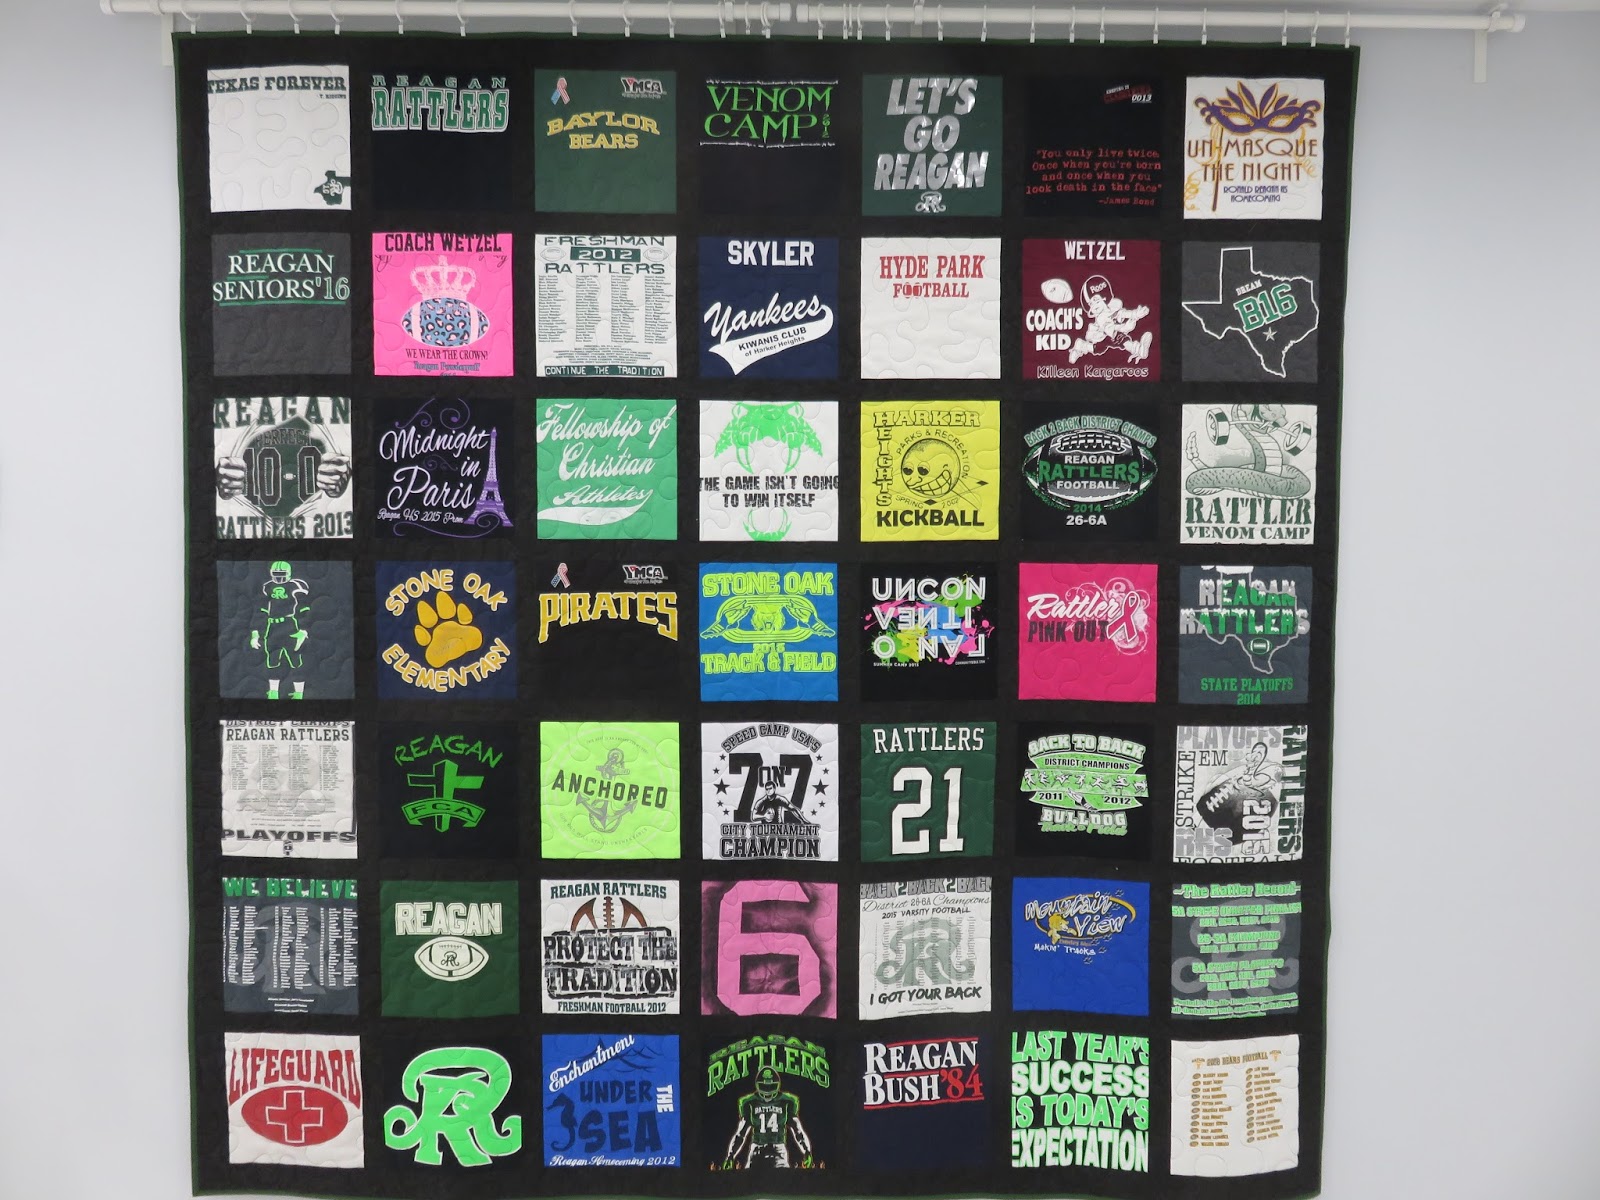
How many times have you looked at a quilt top and been totally stumped on how you would quilt it?  I feel like this is a skill that really is developed over time and trial and error.  I’ll be the first to admit that my very first quilts–after quilting–didn’t really showcase the quilt pattern with the quilting as they could have.  My quilting designs made little sense and didn’t work with the existing pattern to make the quilt pop.  Basically, I was just quilting to get it done and keep all the layers together.  

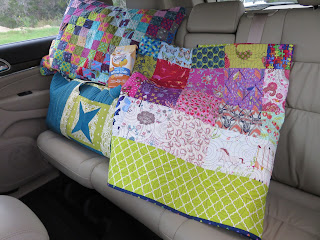
It’s a little difficult to see the quilting, but it’s orange thread in squiggly lines…obviously my photography skills were lacking as well 😉  This was the first quilt I ever made, in October of 2011.  
I think that typically, for beginning quilters, the quilting is all about function.  It’s difficult enough to remember 1/4″ seam allowance, minding your bobbin so you aren’t sewing without thread, etc.  I know that I was just relieved to be finished, and I was very proud of the quilting at the time.  

Fast forward 5 years, and quilting is now my favorite part.  I’m enamored with the process of evaluating a quilt top, selecting batting, figuring out what quilting design will best display the awesomeness of the quilt pattern.  I know that I still have a long way to go, and I pour over Instagram, Pinterest, blogs, books, etc. to find every piece of information and inspiration I can get before I start planning to quilt a quilt.  

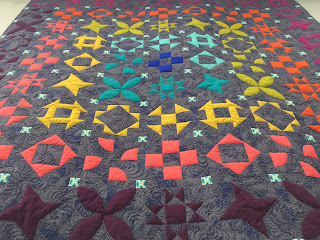
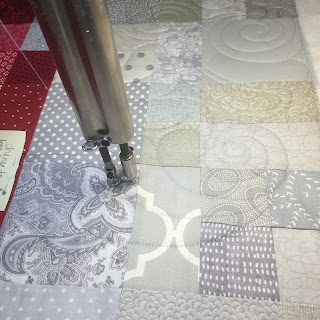
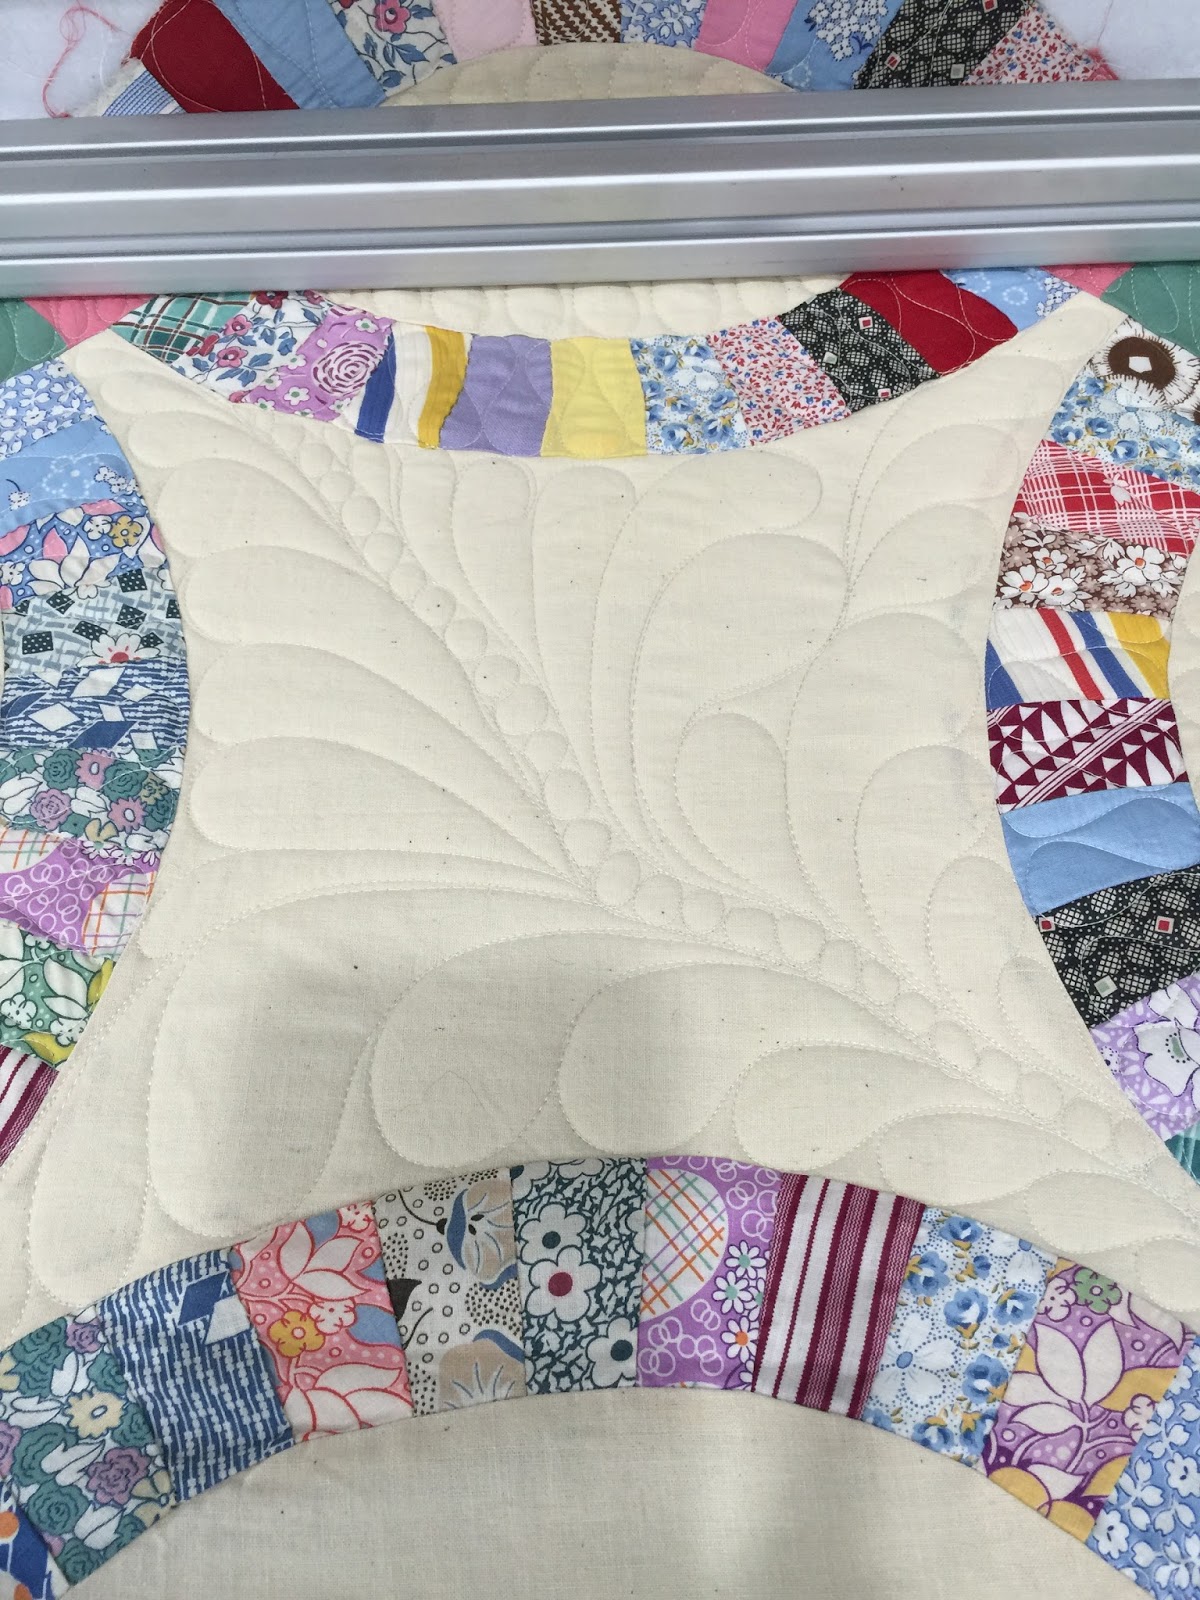
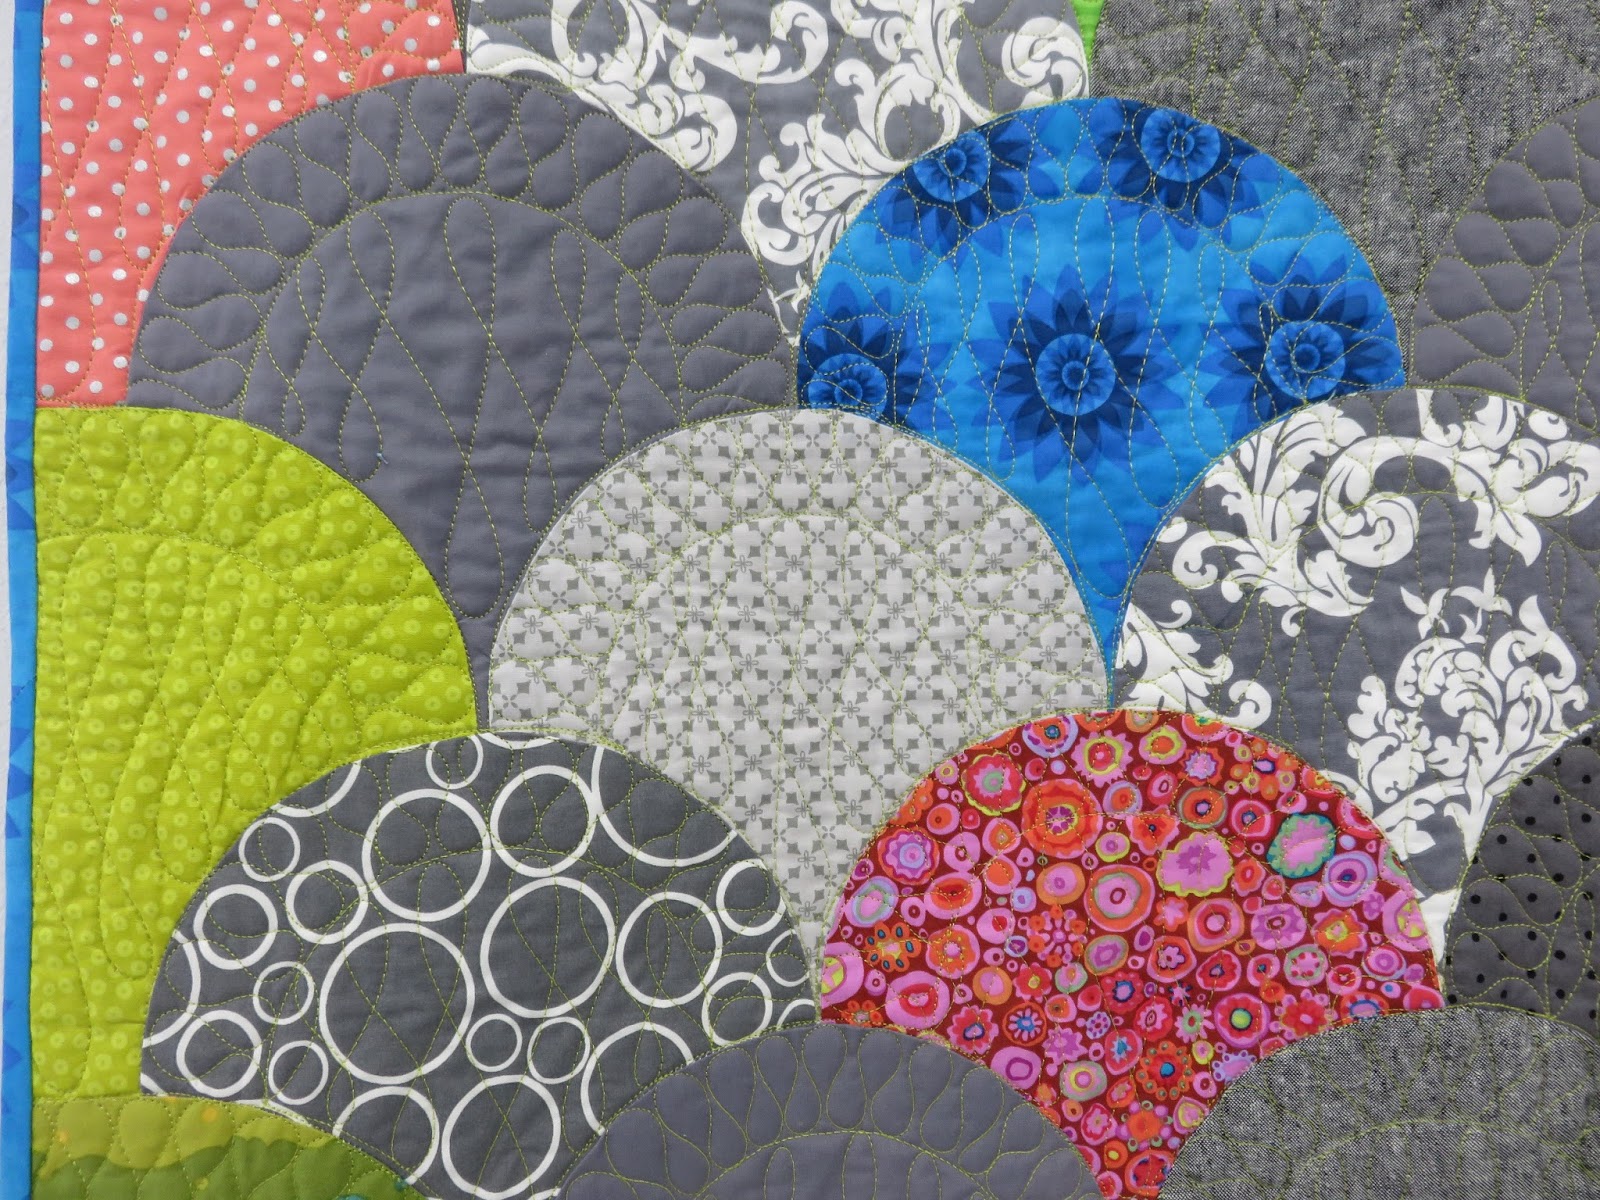
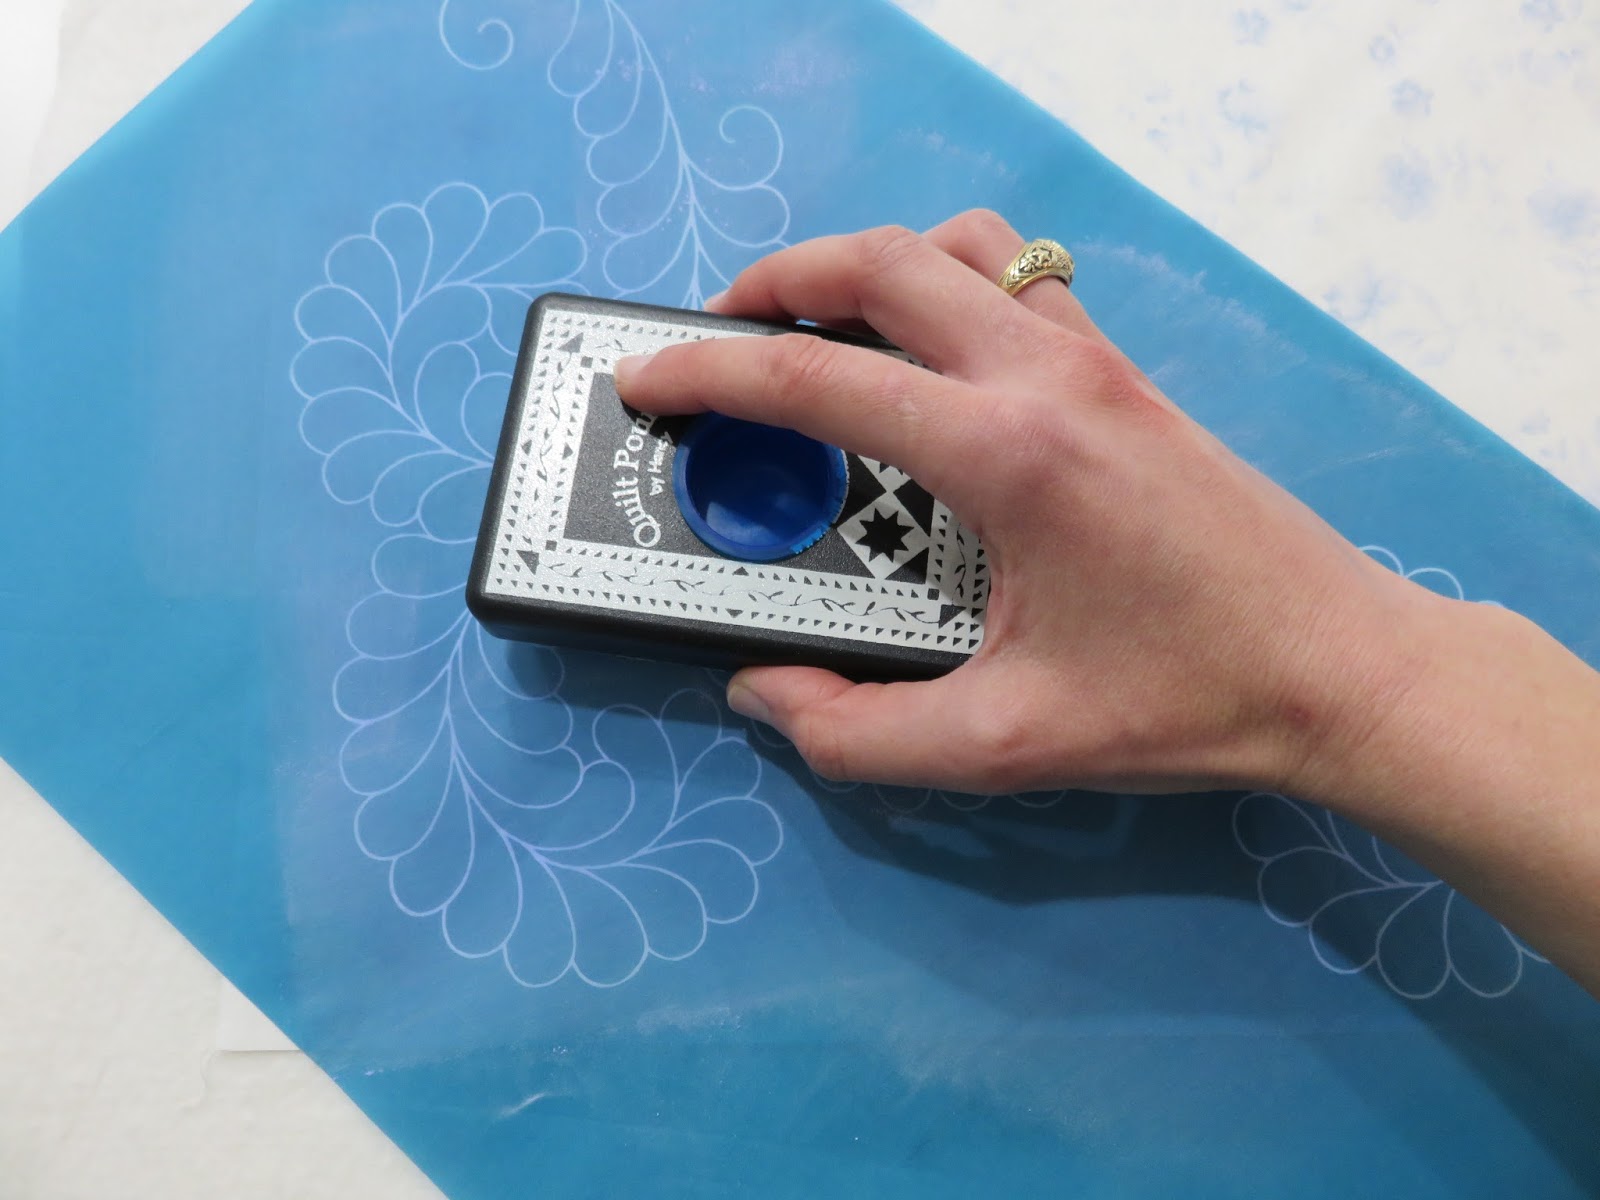
I recently had the opportunity to quilt my first Double Wedding Ring quilt.  My client’s quilt was pieced entirely by her grandmother (prior to her passing) from vintage fabrics and feed sacks.  It was the greatest honor to be trusted with a family heirloom.  I used plastic overlays to audition different quilting designs, and finally came up with a combination of a few simple designs that I felt would work well together and really make the quilt pop.  

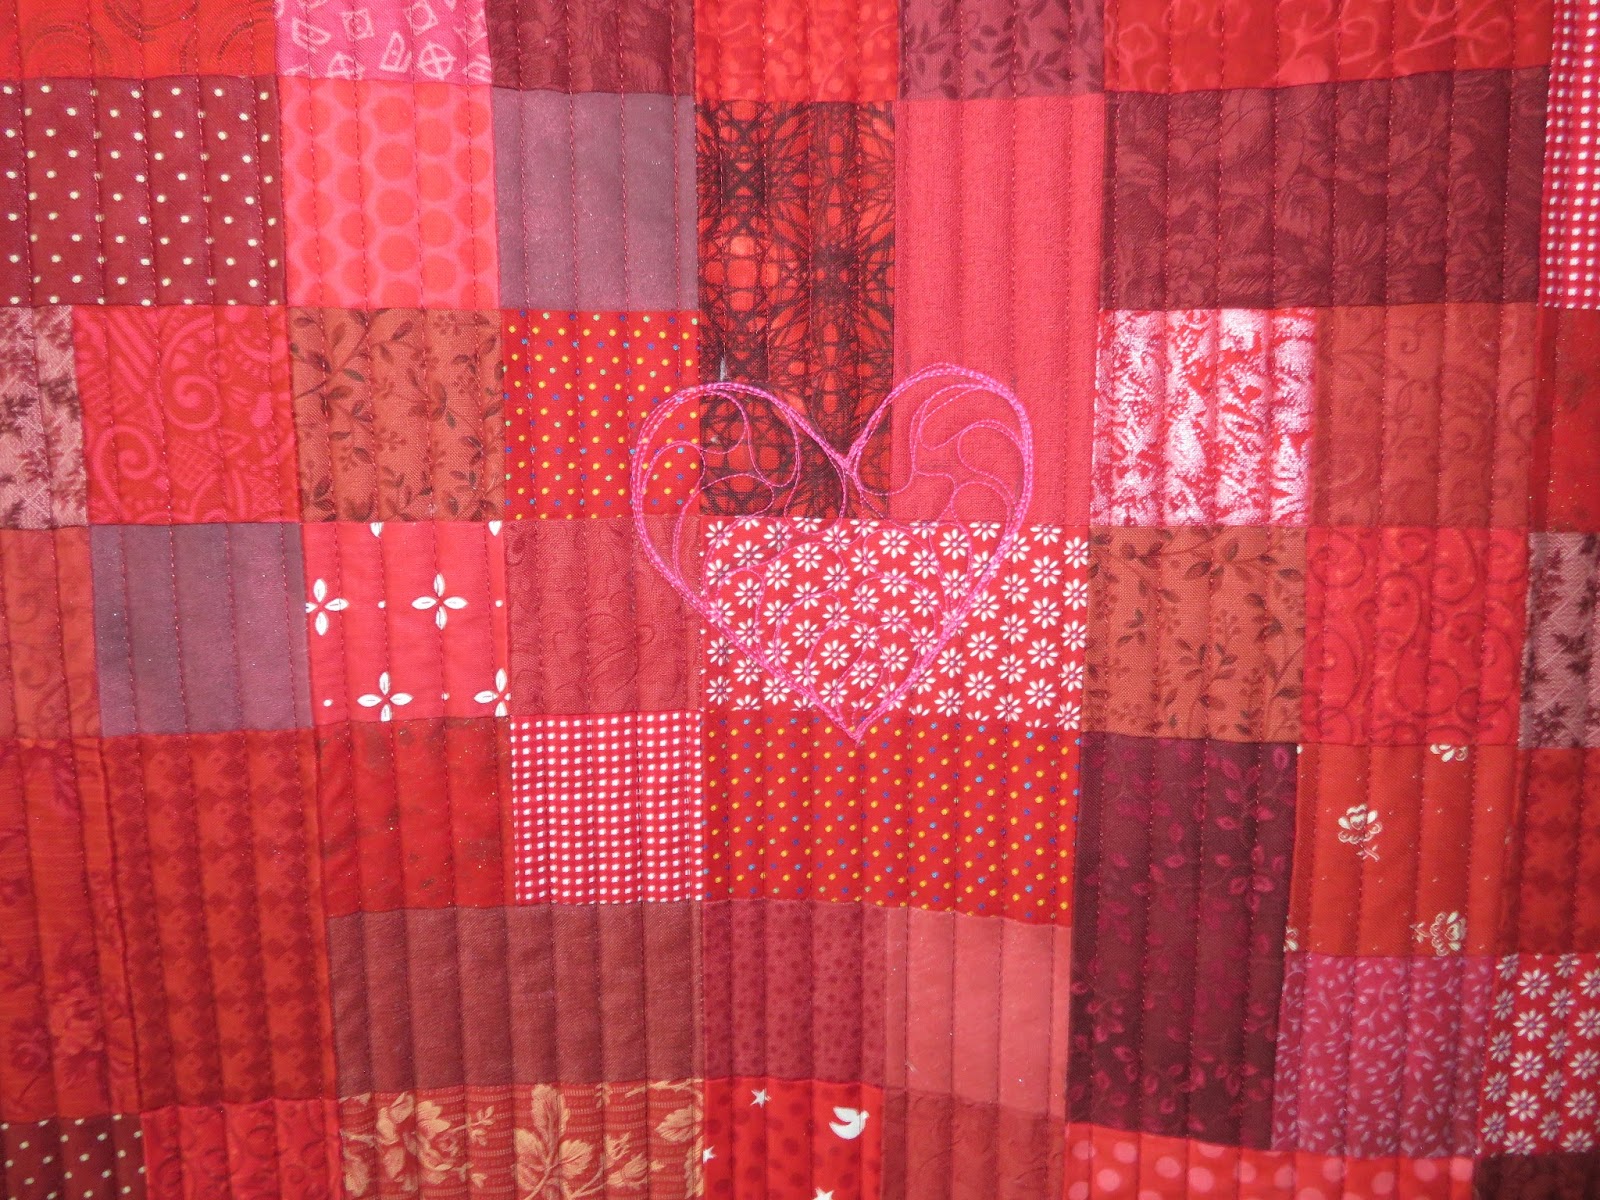
This was actually the first row that I quilted with a feather.  I hated them and ripped them all out and started over.  

I stewed over the newly blank quilt after ripping the first row out and finally re-started.  

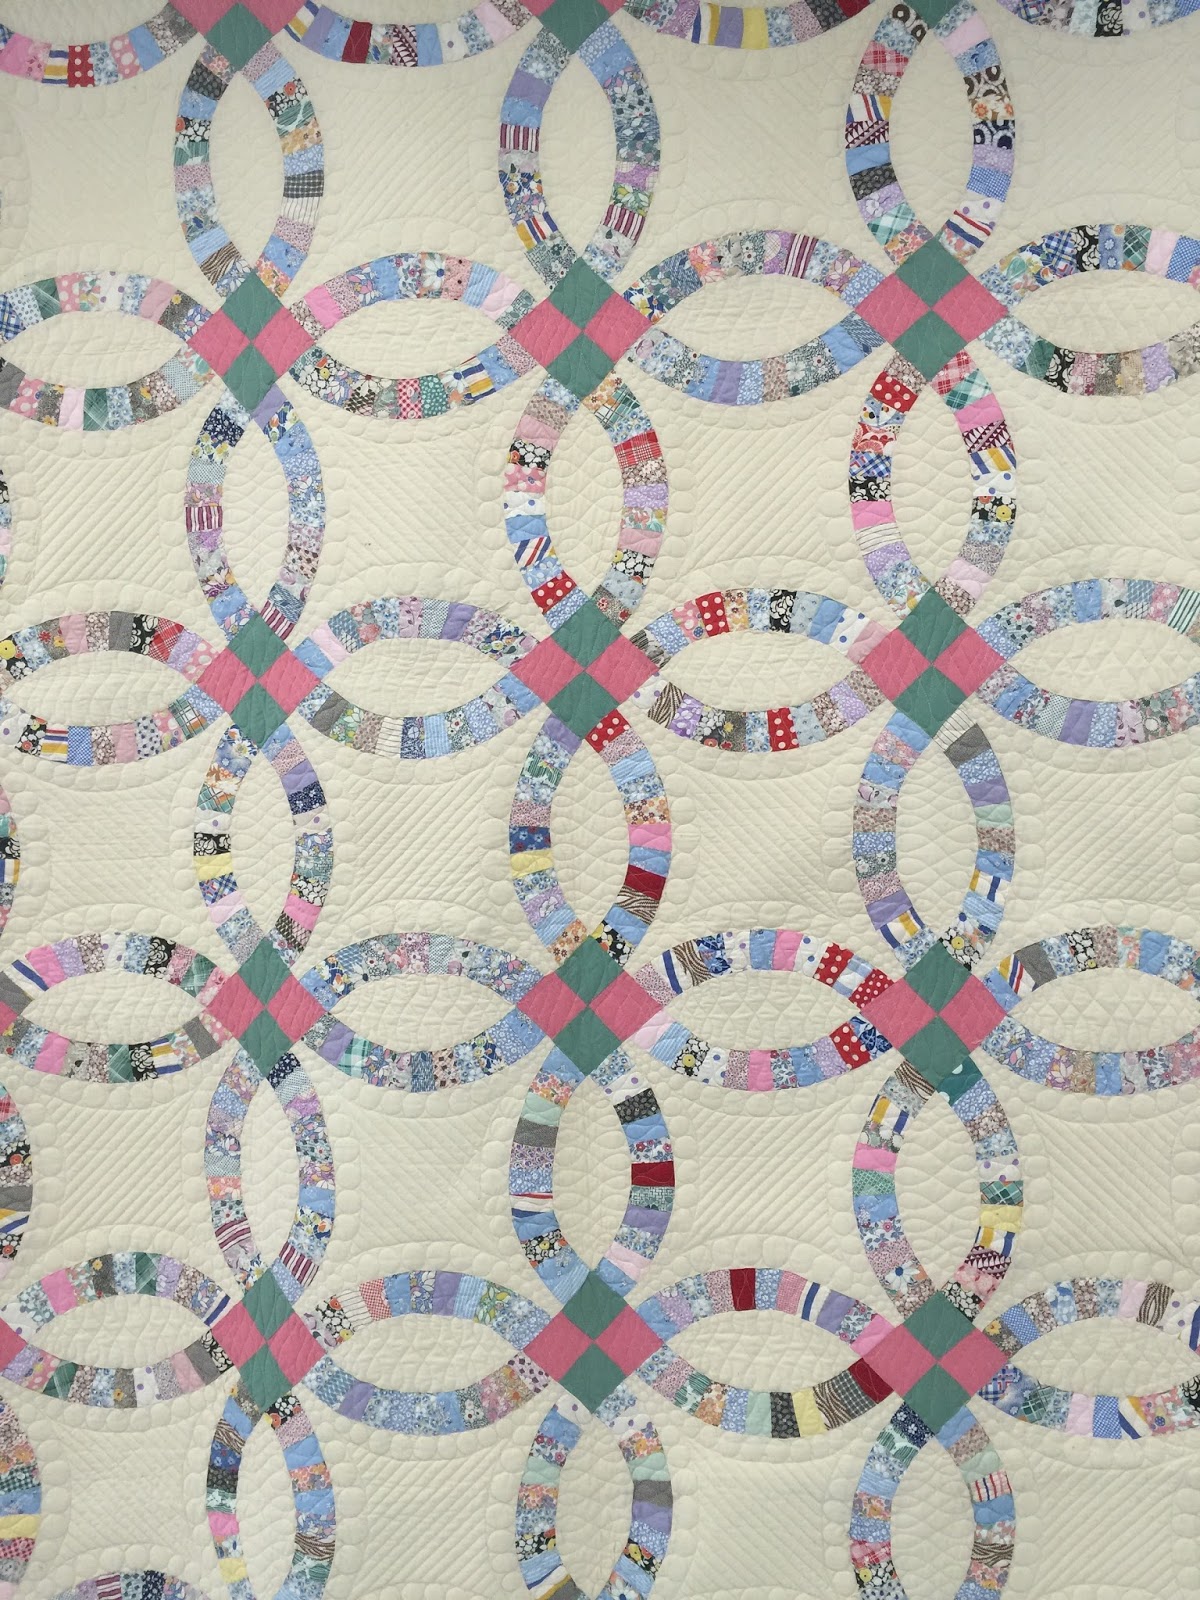
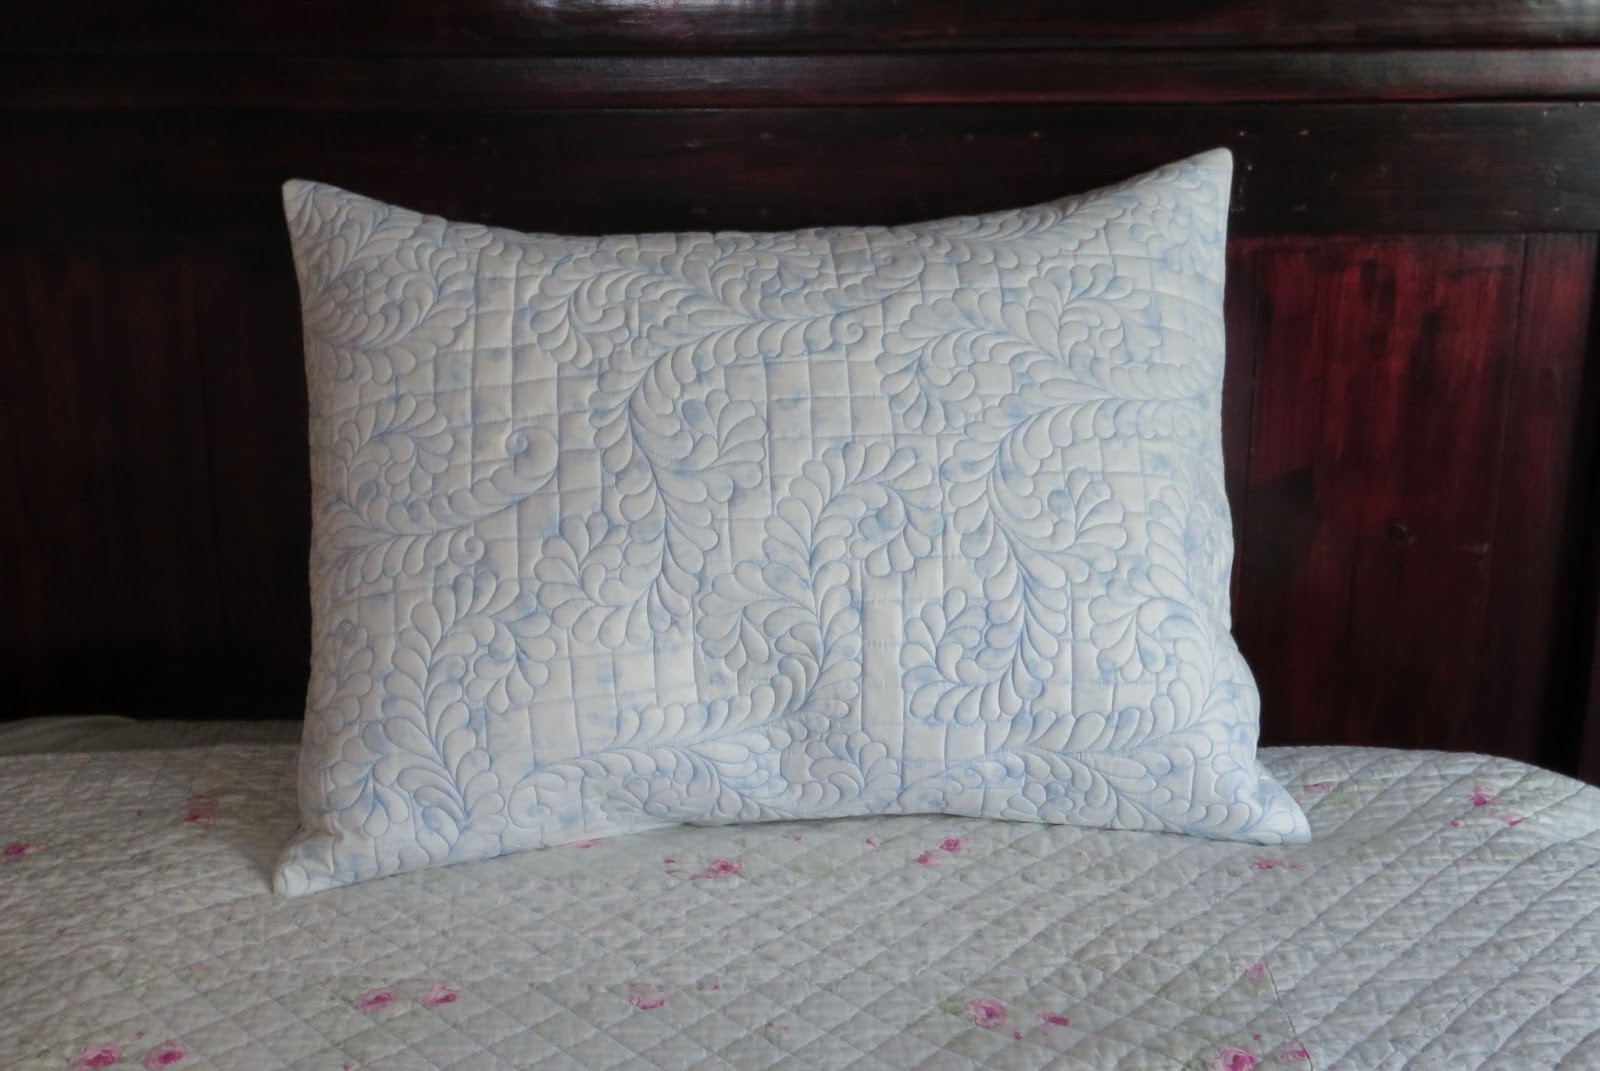
I was very pleased with the outcome and can’t wait until I can return it to the customer.  
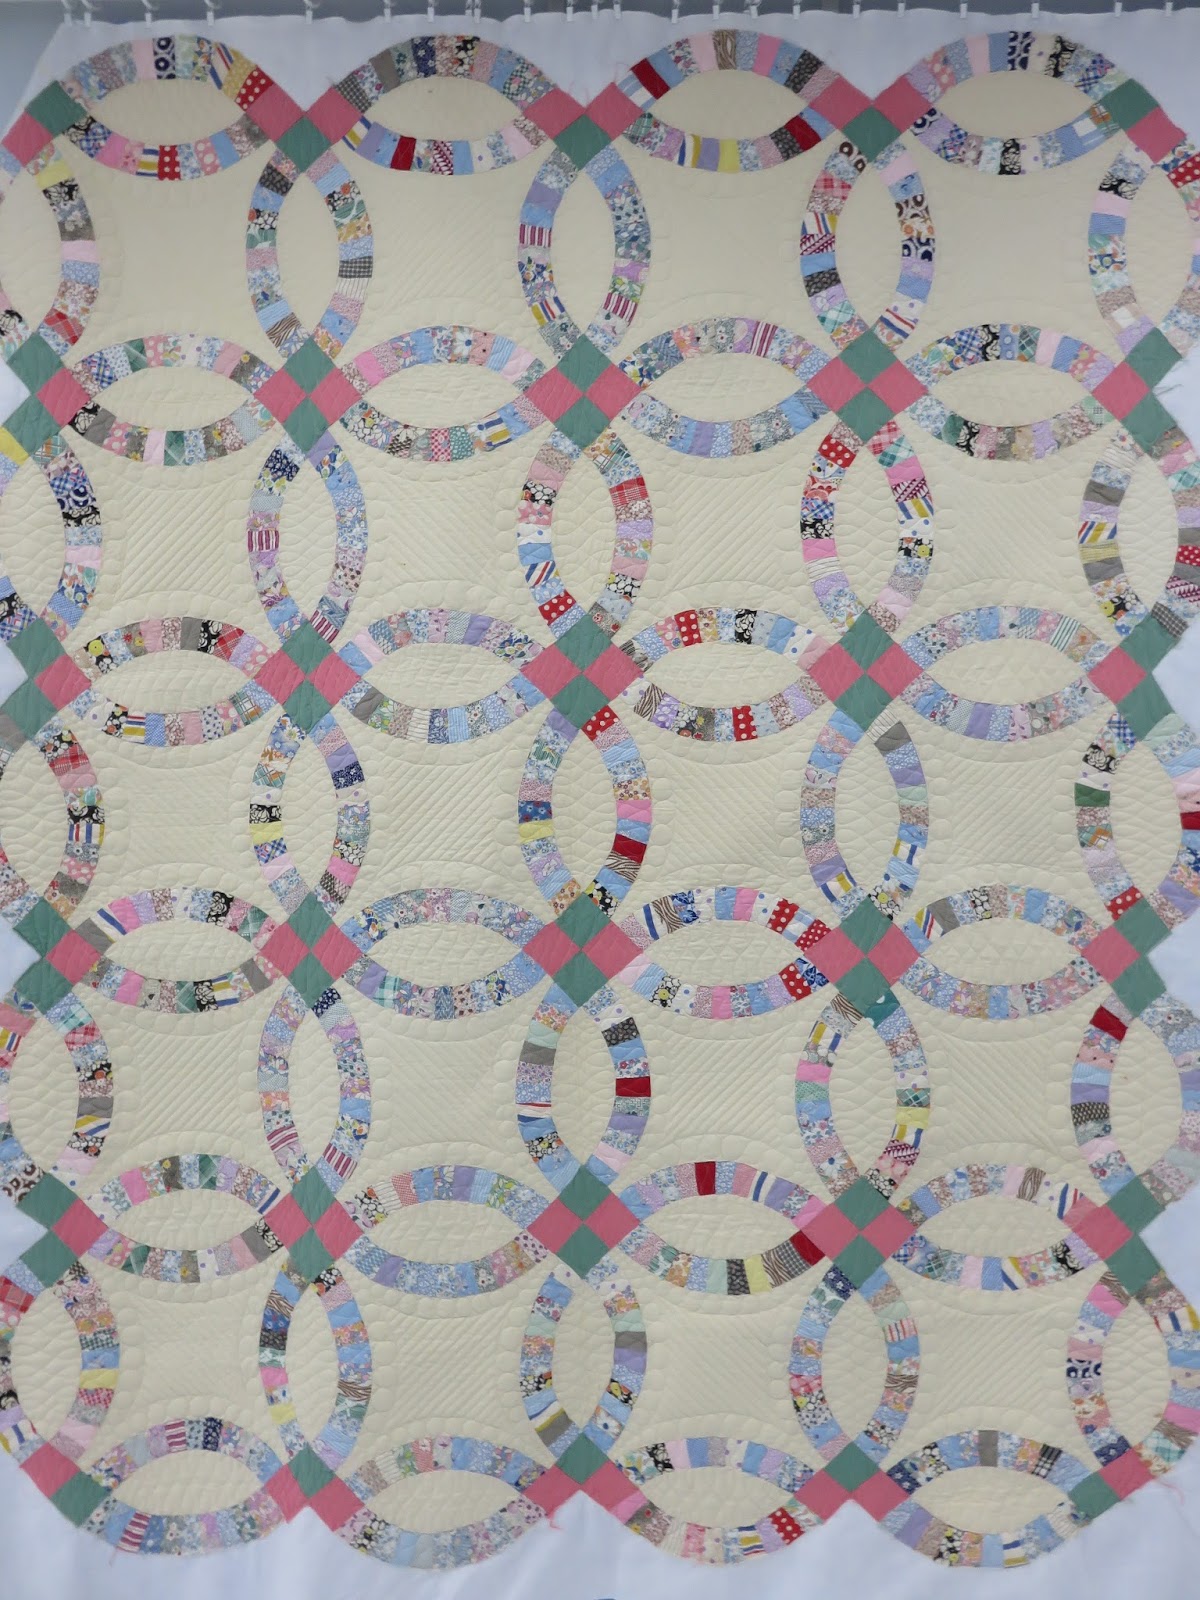
Here is the full quilt:

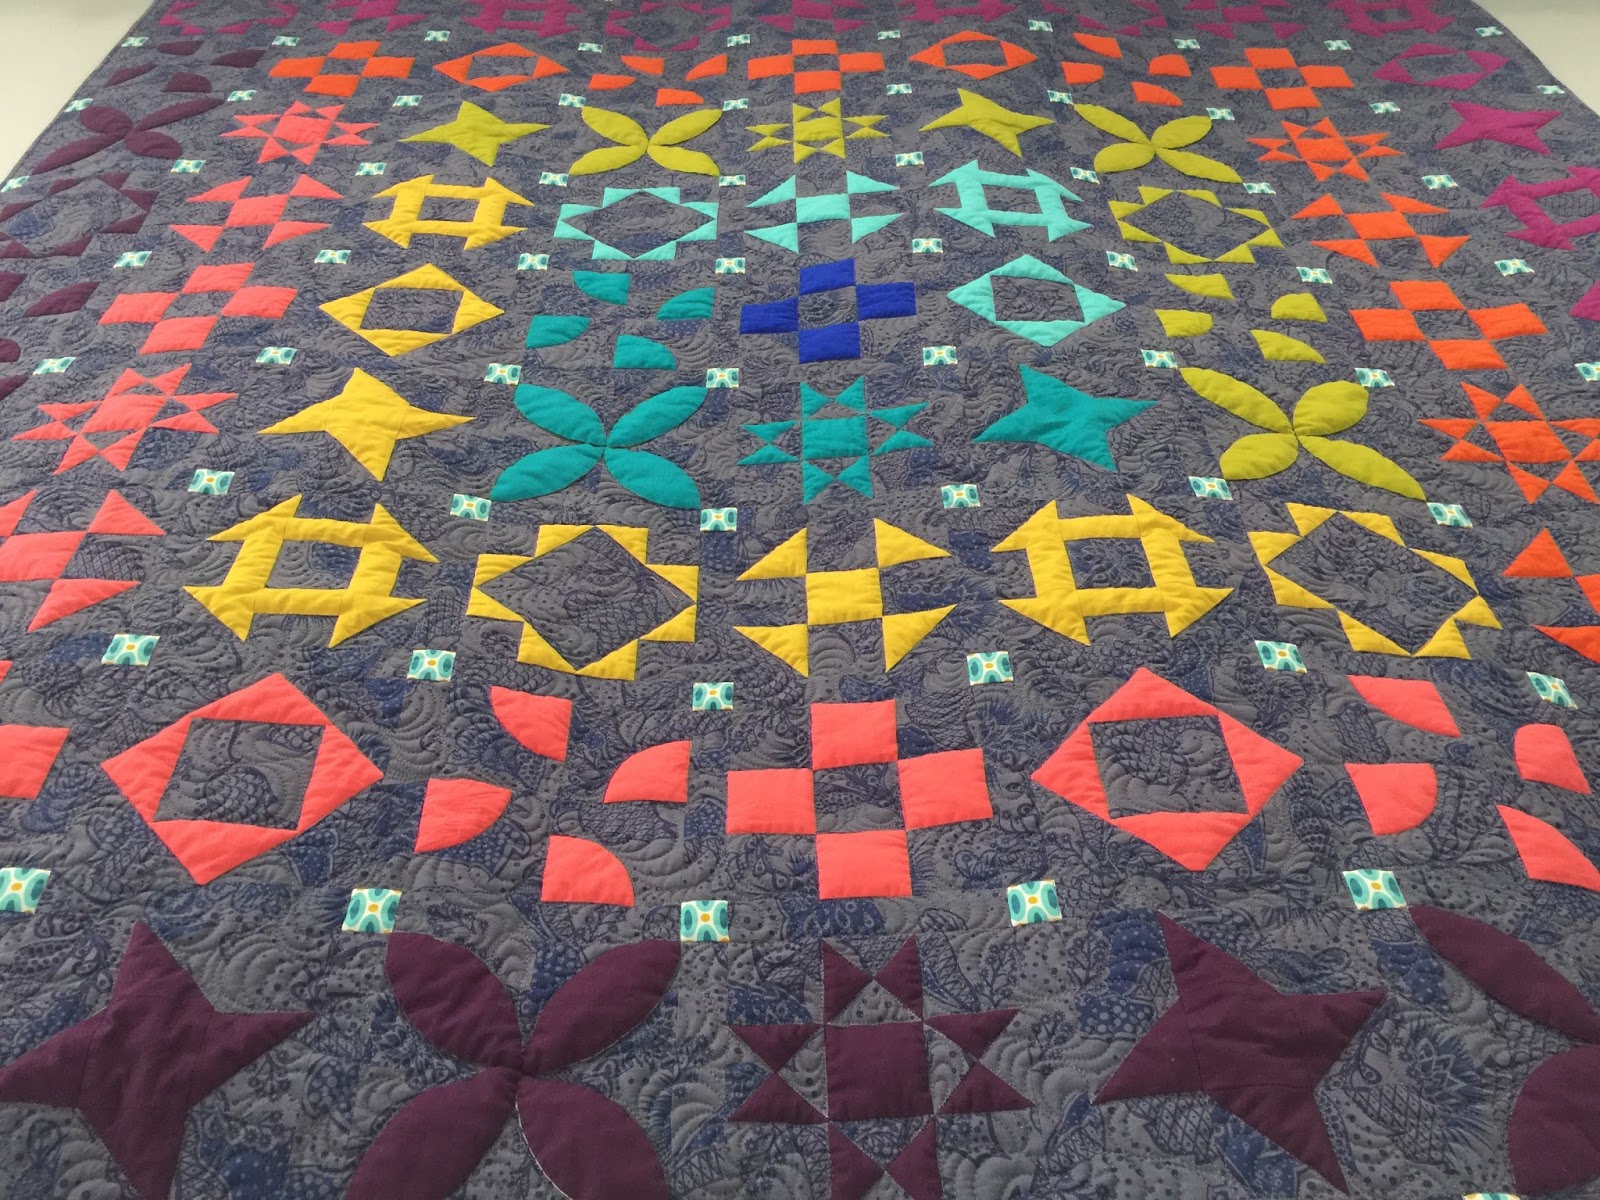
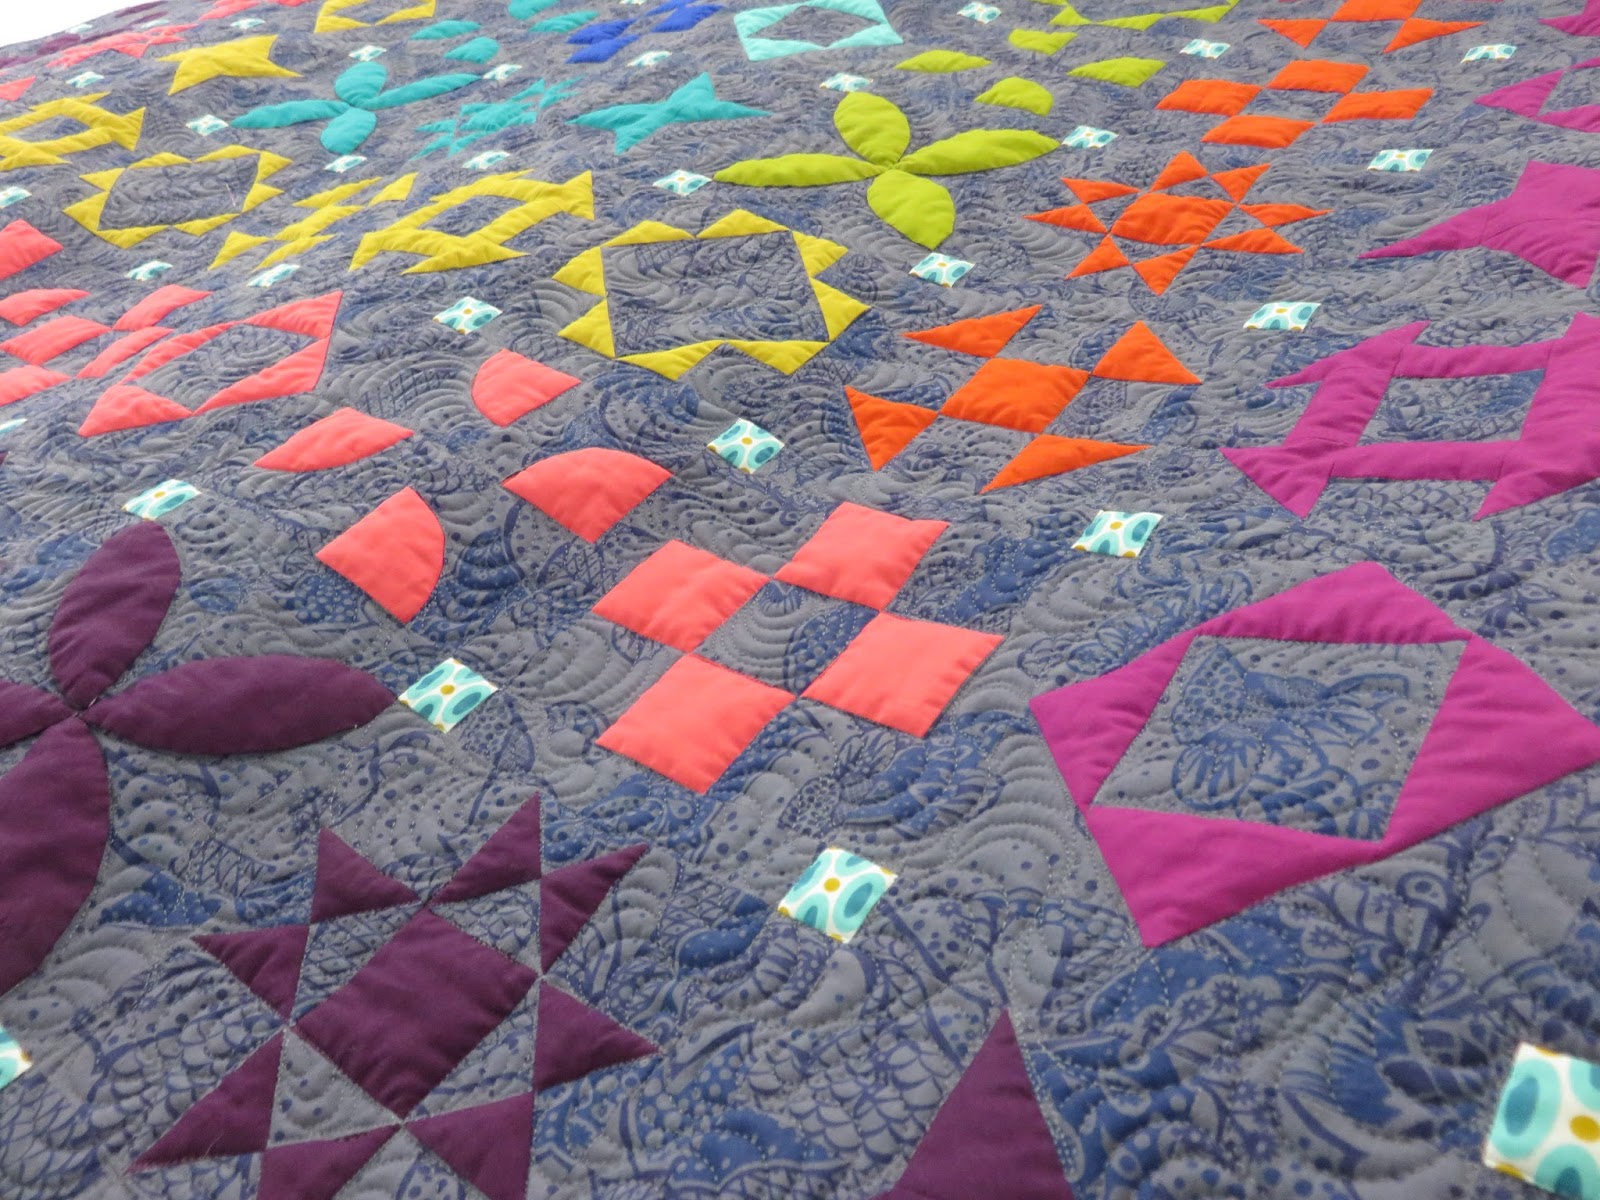
I love the finished look of ruler work with free motion quilting.  I think the structure really works well with the free-flowing quilting and I can’t wait to play around with this some more.  I can’t wait to see where my work is in another 5 years…


Posted on

My Finished Glam Clam Quilt

I am going to talk to you today about Latifah Saafir’s “Glam Clam” quilt pattern and my journey completing the quilt.  

I’m a member of the San Antonio Modern Quilt Guild, and we were fortunate enough to have Latifah Saafir do a trunk show AND teach 2 awesome workshops!  I was super excited…the clam shell style quilt has been on my quilting bucket list since I first started sewing, so this was a great excuse to get it done.  I immediately signed up for the workshop and picked my fabrics out after I got the pattern and templates.  I painstakingly cut out all of the pieces, labeled them, and organized them all into little ziplocs, until I would  attend the workshop.  I had the finished quilt in mind for a very special friend and was excited to gift her a really cool quilt.

About a week from the workshop date, my grandmother’s health was failing.  She passed away, and the funeral was scheduled for the same time as the workshop.  I missed the workshop and didn’t touch the pieces I’d cut for a few weeks after.  Once I started the quilt, I thought about my grandmother often.  I’m not crazy about piecing curves, but I must say that it was kind of a healing feeling to sit and sew without really thinking about anything.  It gave me a chance to think about relationships and friendships and how much people can impact your life.  

Quilting the finished top was even more fun that putting it together.  After doing a little bit of research, I found that many of the clam shell quilts are quilted with just an all over design, without much attention paid to the individual blocks.  I definitely didn’t want to just do edge-to-edge quilting.  

Latifah’s pattern is seriously so simple to follow, and her templates are to die for.  They are very mindful of how curved seams should be constructed, and here’s something even more awesome–NO PINS NEEDED!!!  I won’t lie…I didn’t believe that at first, but after sewing a couple together, I tried it without pins, and–life changing.

Here is a little more of the quilting–not really anything too difficult, but I felt it gave a better effect than an all over quilting design.  

Above is the top with no quilting or binding–I absolutely love how this quilt came together.  
And then this was the finished quilt after binding.  I shipped this beauty off to my friend in California and hope she uses it until the thing falls apart!  I must say, Latifah did an amazing job on the pattern and tutorial and I can’t wait to make my next Glam Clam quilt.  


Posted on

Free tutorial: Using chalk pounce and stencils to make gorgeous quilted pillow shams

Check out my newest tutorial for Janome on the AQS blog this week!  The tutoiral is for Quilted pillow shams that will really step up your bedroom decor and give an extra special touch.


Follow this LINK to see the full tutorial and add some new tools to your quilting toolbox!

I’ve always loved quilting, and was a little skeptical at the stencils.  Especially before I knew about the chalk pads.  I tried them when I first tried my hand at quilting, and used a water soluble pen to trace each stencil line.  And let me tell you…that will be a wonderful deterrent for anyone to never try stencils again.  Time consuming, inefficient, etc.  Then one of my friends had some of the chalk pounce and pads and so I thought I might just go ahead and try it again.  WAY better than tracing each line by hand.  What originally to hours literally changed to minutes.  So if you haven’t loved stencils, maybe try this and you’ll change your mind!

Posted on

A new-ish reverse applique

One of my guilty pleasures is Instagram.  One of the people I follow on Instagram, @orchidowlquilts, posted a photo of some awesome quilting and an astounding mini quilt.  It inspired me to try the technique as well.  If you’d like to give it a try, here are the steps you need to follow:

Supplies you’ll need:
Small (super sharp) embroidery scissors
seam ripper
pins
mini quilt (backing, batting, 2-3 layers of top fabric)
Quilting thread
Fray check

Tips and tricks:
-If you cut too closely to the quilting thread, your top fabric may come loose from the quilting.  Try to stay about 1/16″ away from the quilting thread.  You may need to go back and quilt again if you clip too closely.  
-Be careful not to slice the final layer of top fabric!!!  If you do, the batting will be exposed (sad panda).  
-I wouldn’t recommend this technique if you plan to wash the finished quilt, but it’s perfect for a mini quilt that will be a wall hanging or a display piece that won’t be handled much.
-There were a couple times that I sliced through the wrong fabric, but fray check is your friend, and you’ll be amazed at how well you can hide your mistakes with it!


1.  Choose two or three fabrics (solids work well for this).
2.  Make a quilt sandwich.  For my first time, I made a mini as well.  I think it’s good to try this out on a small quilt so you don’t get discouraged by the time involved…
3.  You will lay your backing fabric wrong side up, batting on top of that, then one of your solid fabrics on top of the batting (right side facing up).  Smooth to get all the wrinkles out.  
4.  Now you’re going to layer another solid fabric on top of the one you just smoothed.  This could be your final piece of fabric, or you could choose to layer one more on top of this.  I would keep it to three fabrics for the top for your first attempt.
5.  Smooth all the top fabric layers to remove wrinkles and baste in place.
6.  Mark the top fabric for quilting if you need to mark, or if you like to wing it like me, get ready to quilt!
7.  Quilt your mini quilt.  I would recommend not quilting too heavily or small for this.  It will make cutting the fabric much easier if the space between your quilting lines is at least an inch.

8.  You can do smaller quilting (like in the picture above), but plan on not cutting those teeny tiny pieces–to keep your sanity.
9.  Once you finish quilting, you should decide which areas you want to cut.  I marked the areas to be cut with a small marking pen that irons away so I wouldn’t get confused after the fact.  
10.  You’ll need a small pair of embroidery scissors and a seam ripper before you get down and dirty with this!
11.  In the photos, the gray is my top fabric, the green is the middle top fabric, and the blue is the last top fabric.  When you see the green, I am only cutting through the gray fabric.  When you see the blue, I am cutting away both the gray and the green fabric.  
12.  Use a pin or a seam ripper to pull the top layer of fabric away from the next layer of fabric (without grabbing the layer of fabric you want to leave alone.  I use a seam ripper to pull it away and make a small slice so I can get my embroidery scissors in to do the cutting.  You can see in the picture below that some of the gray fabric has been sliced with a seam ripper already.  
13.  Once you have a large enough space to get your embroidery scissors, start clipping the top fabric away.  
14.  Put on your favorite Netflix shows and clip, clip, clip.  Then clip some more!  


15.  When you finish clipping fabric away, go back with fray check and outline all the cuts you made with it to keep the fraying in check!  Allow to dry completely, then you’re ready to put your binding on and call it a day (or week)!

I really love how mine turned out, but I would definitely make the quilting spaces a little larger and less dense on the next go-round.  This is not your typical reverse applique, but it is a fun spin on an oldie.  Give it a try and see what you can do!

Posted on

Longarming…my Love!

Since the last time I posted (I know…it’s been a while!), I have taken up long arm quilting.  Somewhere along the line, I had this idea in my head that long arm quilting was “cheating”, and if a quilt was quilted on a long arm, then it wasn’t really “your” work.  I could not have been MORE wrong.  

The time and skill that go into this type of quilting is ridiculous!  I also had no idea that there were multiple types of long arm quilting.  I just assumed that all “long arm” quilting was a computer program that you just pressed play, and BOOM! it’s done.  Once I realized there was a niche of long arm quilting that I would absolutely adore, I’ve been hooked ever since.  (And plus…there’s no more basting with safety pins on your living room floor!  You can’t beat that!!!)  

The category of quilting that I specialize in is free motion quilting.  That means no pantographs, no computer programs…just you and the machine.  Your hands and brain putting the thread and needle to work to create something magical that can’t be duplicated. 

Ruler work can also be seriously fulfilling, and there’s no limit to the  
amount of different designs you can create with straight lines. (collaboration quilt
for Janome)
Free motion quilting on a customer’s quilt (Valerie M.)

Free motion quilting on a customer’s quilt (Sarah J.) 
that was donated to a local charity fundraiser.

If you have any preconceived notions about long arm quilting, I would really encourage you to re-think them.  All it took was one time for me to know it was something that I would want to do for the rest of my life, and it’s really nice to have a break from piecing your own quilts to see the awesome talents your long arm clients have and the diversity of their work.  I never cease to be amazed by the quilts my customers bring me, and dreaming up designs to put into their quilts really challenges you to think outside the box.  I’m so glad I’ve started my FMQ long arm journey, and I really relish every moment I spend doing what I love.  


Posted on

Creating bags with no pattern (or making it up as you go)

For roughly the last week, I have been working on this duffle bag after I received my first shipment of Tula Pink fabrics.  I am absolutely NUTS about this fabric designer.  Her use of color is insane, and her patterns are awesomely fun.  I’ve had a duffle bag on my to do list for over a year now, and it was high time I kicked into high gear.
I browsed tons of websites looking for patterns for duffle bags, watching tutorials, and looking up travel bags on Pinterest.  I didn’t like any of the patterns, they all seemed either really juvenile, dorky looking, too small, or just not finished enough.  
So I made a list of all my “must haves” and decided to write my own pattern.  I had all my fabric out and ready to go, and got to work in my sketchbook drawing out measurements and the order of construction steps.  Turns out I didn’t even so much as cut a piece of fabric until 2 days later.  If you haven’t ever written a pattern before, you might take for granted how much time, trial and error, and re-writing goes into it.  
The project took me about 5 days start to finish (my husband’s family was in town for the weekend–I may have been able to shave one day off if I worked all the way through).  
The one thing I just really was not satisfied with was that I did not put any interfacing in the zipper panel that goes in the top.  In the picture, I have two huge sacks of fabric shoved inside to keep the middle from drooping.  I’m pretty confident that adding the interfacing would fix that.  Maybe there will be a duffle bag 2, but I’m thinking about naming this bag “The Body Bag”.  I could literally fit all three of our dogs inside and still zip it up (Border collie and 2 heelers).
This bag has all over free-motion quilting in four different thread colors, a three-section elasticized pocket on the interior, a 3-section pocket for shampoo, conditioner, body wash, another smaller elasticized pocket, and another 3-section pocket.  The exterior has two zipper pockets (one on each end), and 4 exterior pockets.  And enough room to pack for a week and a half without needing anything.  Those were my requirements, so I guess if the middle is a little saggy, I’ll get over it!