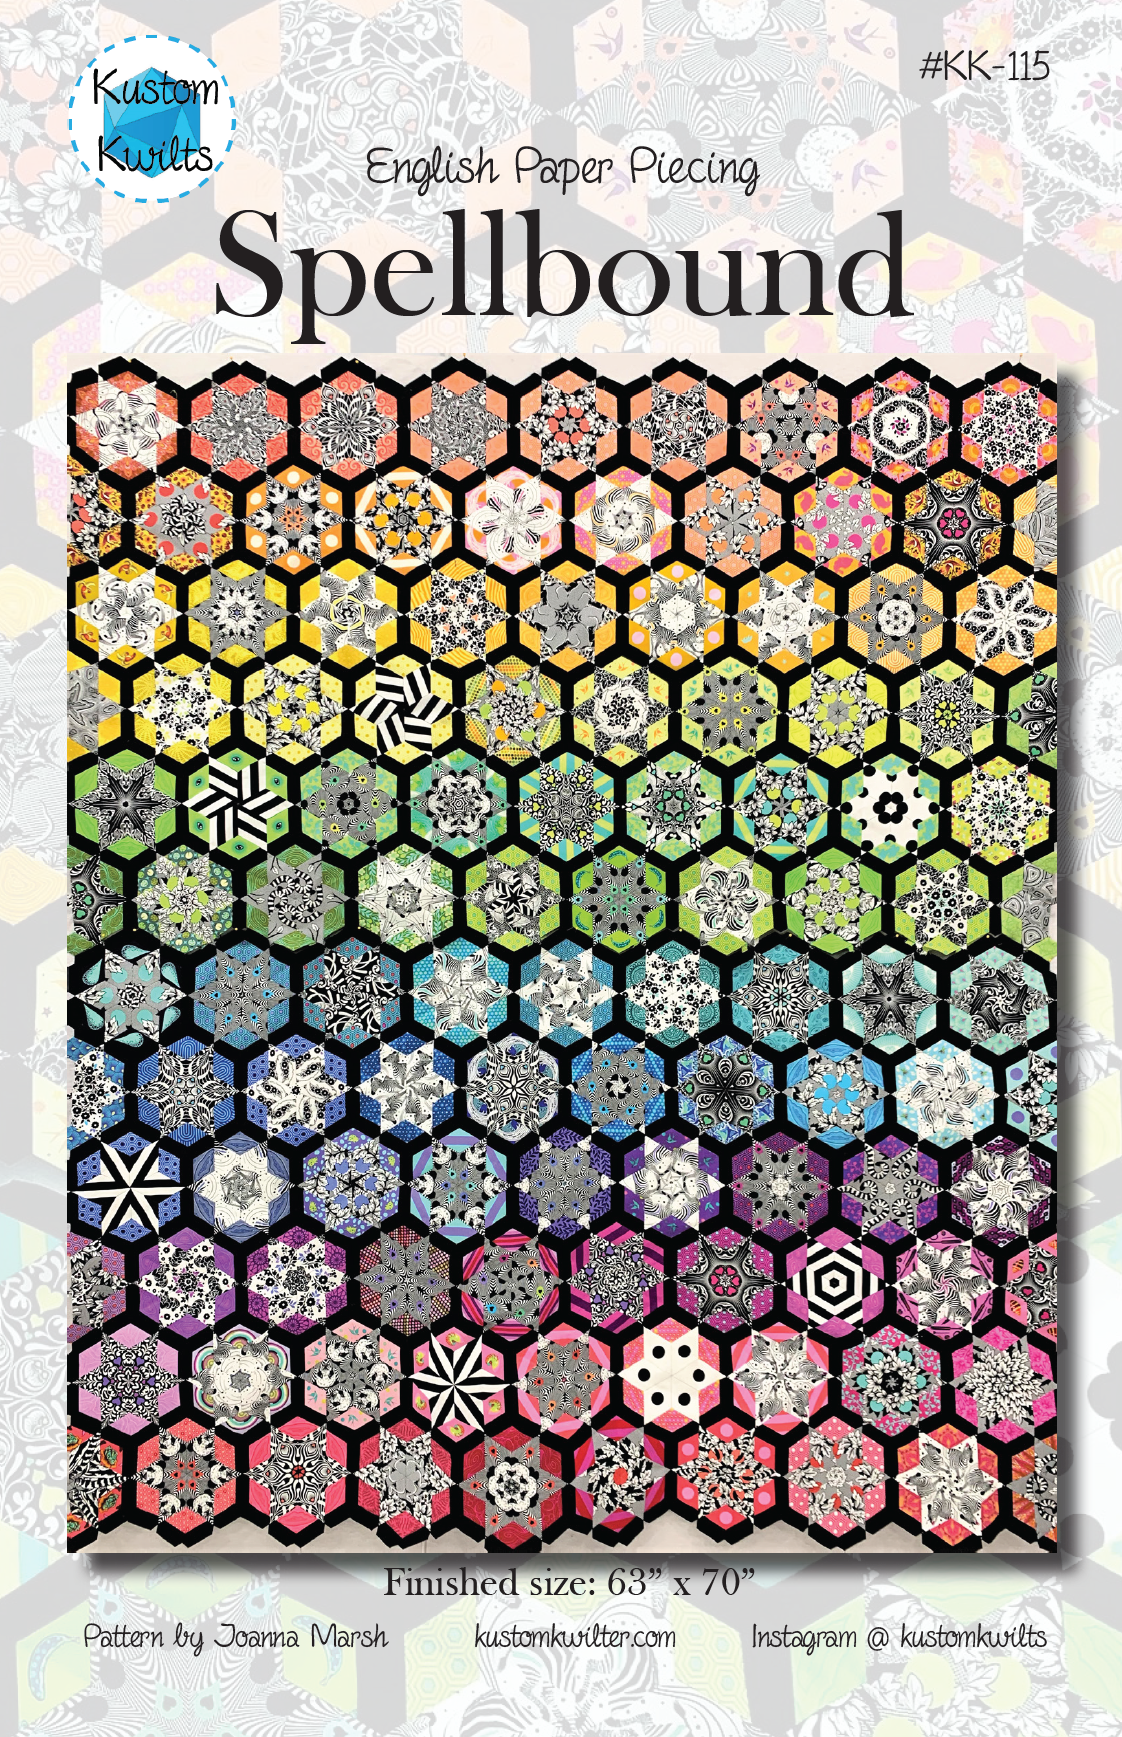
My labor of love (aside from longarming) this year has been the Spellbound EPP pattern! When Tula Pink released her black and white line called Linework, I knew I wanted to make something really special with it. I love black and white fabrics and adding a pop of color to them really sets them apart. I’ve had a blast on this journey picking the fabrics and fussy cutting different elements of each fabric to make it shine. The Spellbound quilt pattern will be available this Friday, October 29!
The Spellbound EPP quilt is a fun and unique English Paper Piecing Pattern. The simple, yet bold design allows you to build your sewing and quilting skills, while still providing a big impact. Try this pattern with solids or stripes for a modern take. Fabrics requirements are calculated using solids so you have a starting point for how much fabric you may need for the quilt, along with backing construction methods for each. This pattern is great for your favorite fabrics to really make them shine! Fussy cutting your fabrics will make this quilt the star of the show. Fabrics used for the cover quilt are Tula Pink Linework for the center stars and various Tula Pink fabric lines for the surrounding outer stars. Kona cotton Black was used for the stretched hexagons that outline each star set.
PDF Pattern includes
Instant download of the pattern with the option to print and cut out the cutting templates.
This option does not include the EPP paper set, but does include full size images of the paper pieces within the pattern.
Detailed coloring/planning sheet.
Helpful cutting instructions and detailed piecing diagrams.
The finished size is Throw – 63″ x 70″.
Skill level is intermediate, and does require some basic knowledge of English paper piecing. The pattern has step-by-step instructions with pictures to guide you through.
Instructions for assembling the quilt backing.
The listing does not include the actual quilts in the photos.
Pattern assumes the quilter has basic knowledge of piecing and quilting.
Full Kit includes
8.5″ x 5.5″ booklet pattern includes a coloring page and fabric amounts required (basic calculations with solids–fussy cutting will require adjustments).
A physical paper pattern, template and paper set that requires shipping – ONLY AVAILABLE TO addresses within the US and Canada.
Detailed coloring/planning sheet.
Helpful cutting instructions and detailed piecing diagrams.
The finished size is Throw – 63″ x 70″.
Skill level is intermediate, and does require some basic knowledge of English paper piecing. The pattern has step-by-step instructions with pictures to guide you through.
Instructions for assembling the quilt backing.
Complete set of English Paper Piecing papers to finish the quilt
Complete set of three acrylic fussy cutting templates with 3/8″ seam allowance.
The listing does not include the actual quilts in the photos.
Pattern assumes the quilter has basic knowledge of piecing and quilting.
Printed Pattern and Template Set includes
8.5″ x 5.5″ booklet pattern includes a coloring page and fabric amounts required (basic calculations with solids–fussy cutting will require adjustments).
A physical paper pattern and acrylic template set that requires shipping – ONLY AVAILABLE TO addresses within the US and Canada.
Detailed coloring/planning sheet.
Helpful cutting instructions and detailed piecing diagrams.
The finished size is Throw – 63″ x 70″.
Skill level is intermediate, and does require some basic knowledge of English paper piecing. The pattern has step-by-step instructions with pictures to guide you through.
Instructions for assembling the quilt backing.
Complete set of three acrylic fussy cutting templates with 3/8″ seam allowance.
This option does not include the EPP paper set (does include full size images of the paper pieces within the pattern).
The listing does not include the actual quilts in the photos.
Pattern assumes the quilter has basic knowledge of piecing and quilting.
PREORDER – Complete Papers Set Only includes
Complete set of English Paper Piecing papers to finish the quilt – Ideal if you purchased the pattern already.
These are not currently in stock, but will be ordered as they are purchased and will ship within 7-10 days.
The purchase of this pattern is limited to one person per pattern, and should not be copied or distributed. Items made from this pattern may be sold on a small scale. Please credit the pattern design as Kustom Kwilts Patterns.
Today is the Hurricane quilt pattern Release Day! And I love to celebrate pattern releases with a sale, so you can get the Hurricane quilt pattern on sale through 8/10/2021 and use the code HURRICANE for 20% off everything else in my shop. You’ll want to keep reading until the end because there are kits, too! Also, there are some sweet free patterns in there too, if you haven’t checked them out!
Today is Cabin Fever Release Day! I’m so excited to share this modern log cabin quilt with you today, as it’s a design I planned out about two years ago. It’s always difficult to be patient waiting for this day! The PDF and print versions are now available :)–and a limited amount of kits.
I’m stoked to finally introduce to you the Trippy Triangles Quilt pattern! This quilt has been a pet project of mine for the last year (and then some). From picking just the right fabrics–I changed my fabrics several times before I finally got with it stitching–to fussy cutting, etc. and I’ve loved every minute of it. I’m currently working on another version and planning yet another with some fun fussy cutting 🙂
The thing with EPP
Here’s the thing with English Paper Piecing: It’s an obsession of mine. Aside from longarm quilting (which I do almost all day), EPP is my favorite way to pass the time. I always have a little EPP kit in my purse so that if I’m caught waiting at the doctor’s office, or getting my car inspected, or whatever, I always have a little something to keep me busy AND productive. I hate wasting so much time on my phone when I could be sewing something, right!? It’s such a convenient way to pack a little sewing kit and get things done when you otherwise couldn’t.
If you’ve spent any amount of time on my blog or Instagram, you know by now that I LOVE sewing and quilting. SO much so that I like to have a travel-friendly project I can take with me, whether it’s in the car, waiting at the doctor’s office, taking my daughter to the dentist, etc., to help pass the time. While English paper piecing is fun, it is much slower than powering up your sewing machine and zipping through a few seams. There’s something meditative about it that helps the craziness of the world to fade away for just a moment and let you appreciate the thoughtfulness of a stitch. English paper piecing appealed to me first when I was still an ag teacher. A lot of times, I’d be on a school bus with kids and nothing to do for hours while we traveled to judging contest OR I’d be stuck in a hotel room at night, not able to go to sleep and wishing for something productive to do. So I started dabbling in EPP. My husband bought me the La Passacaglia kit (Pattern by Willyne Hammerstein) for my birthday and I was totally hooked. I want to take the time to share my favorite English Paper Piecing supplies and tips in the video below.
Have you guys seen Sheri of Whole Circle Studio’s newest pattern? It’s called the Typecast of Characters, and it’s an amazingly fun English Paper Piecing pattern that lets you create the entire alphabet and customize it to your heart’s desire. You can snag your copy of the pattern guide and paper packs here.
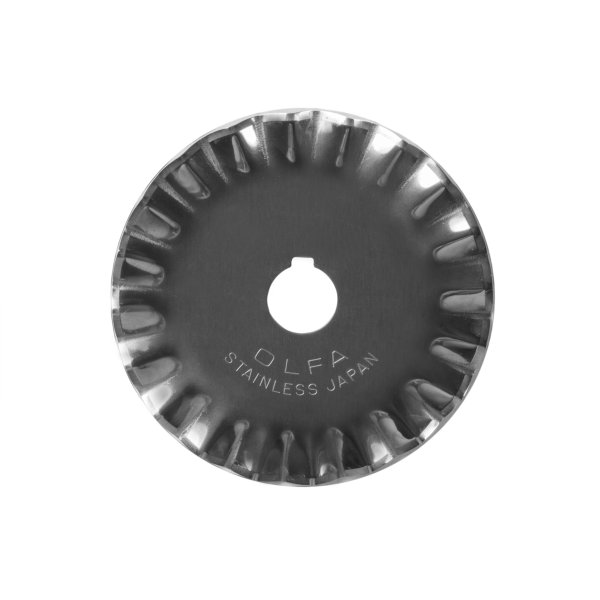
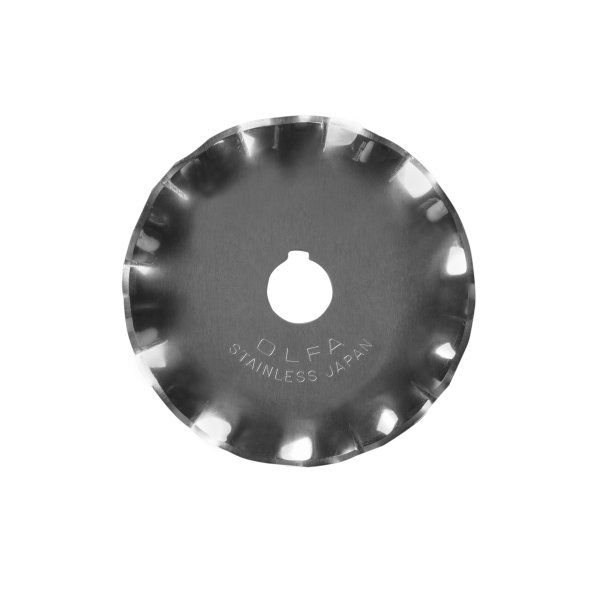
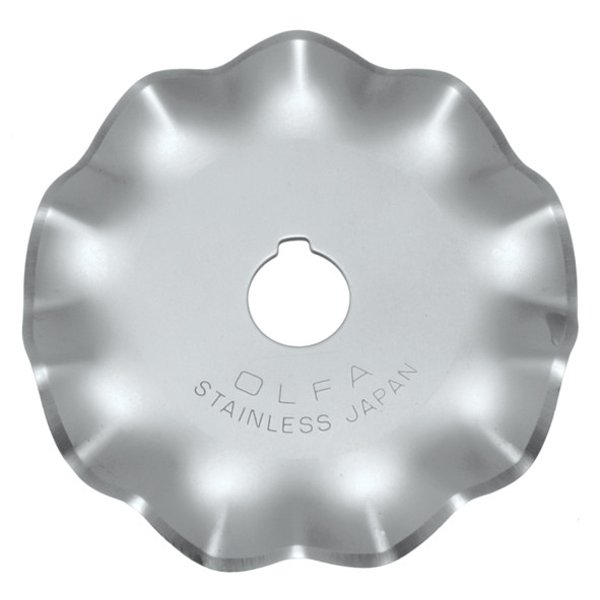
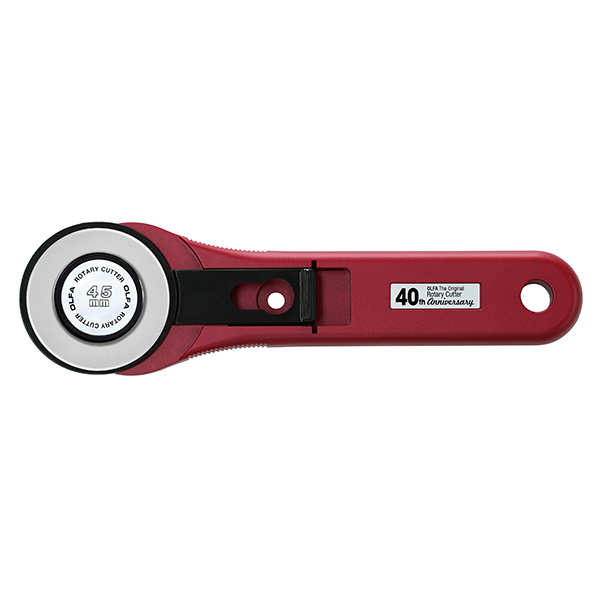
OLFA is celebrating their 40th Anniversary this year and has teamed up with Aurifil to create the Slice and Stitch Challenge! I was asked to be part of the challenge, and I’m so excited to included in this talented group of makers, showing you how to use handy tools to create things you’ll love :). I don’t know about you, but if you sneak into my sewing room, you’re sure to find several OLFA tools (and cutting mats) and LOTS of yummy Aurifil thread. Some of my favorite (and quite possibly underappreciated) tools are specialty rotary cutter blades. You can (carefully) pop one of these blades into your regular rotary cutter and quickly achieve a decorative finish that will look like it took you forever to cut…but that can be our little secret! I also just LOVE the new OLFA RUBY rotary cutter…I use it daily (photos below are from OLFA’s website). For the Slice and Stitch challenge, I saw those decorative blades paired with Aurifloss and knew immediately I just had to make a zip pouch!
Pinking blade
Scallop blade
Wave blade
Ruby Rotary Cutter
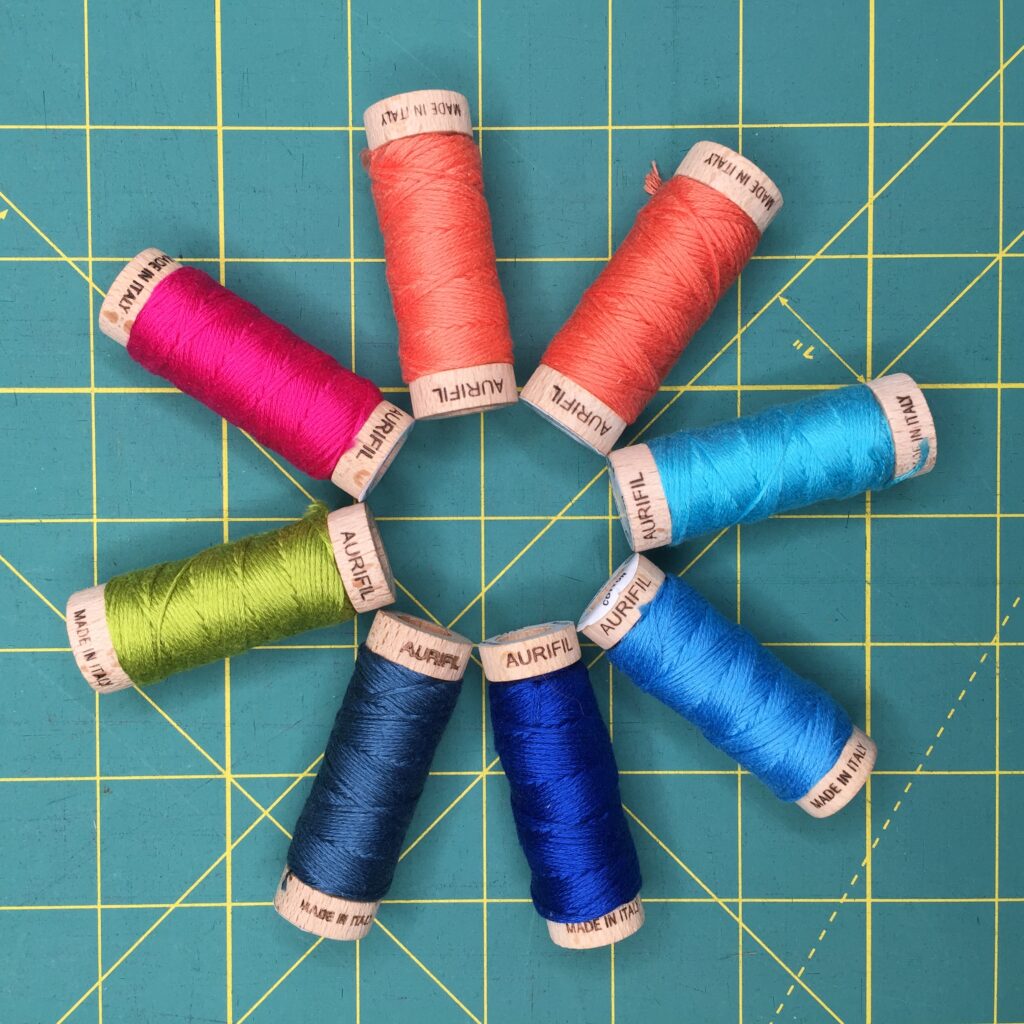
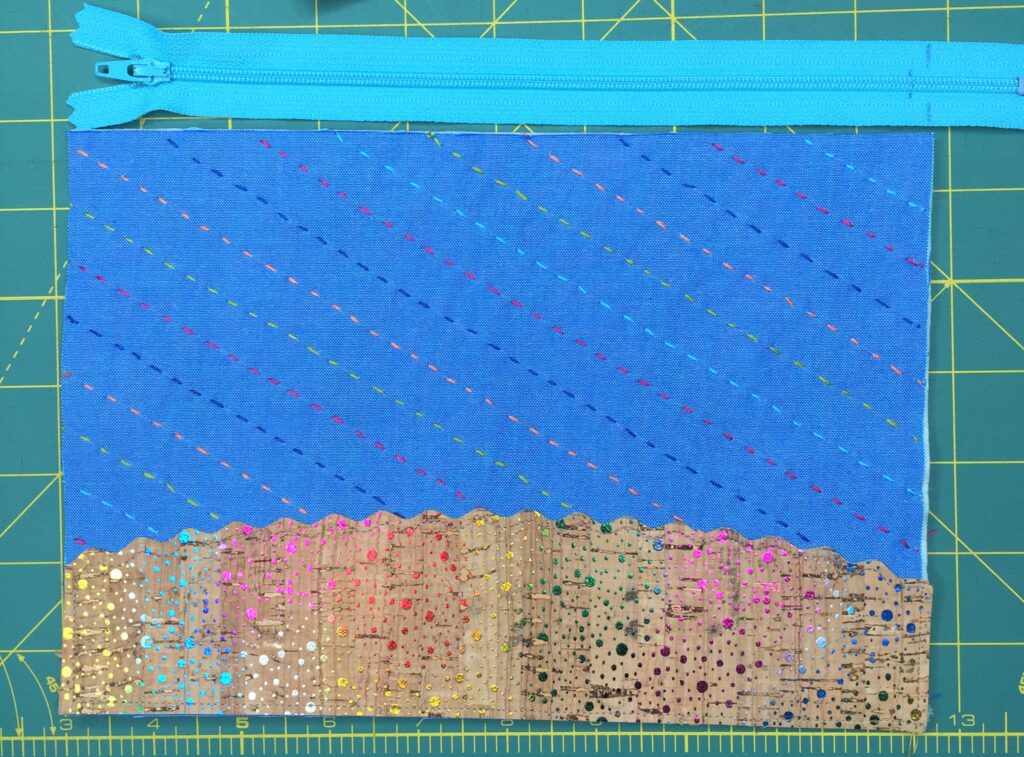
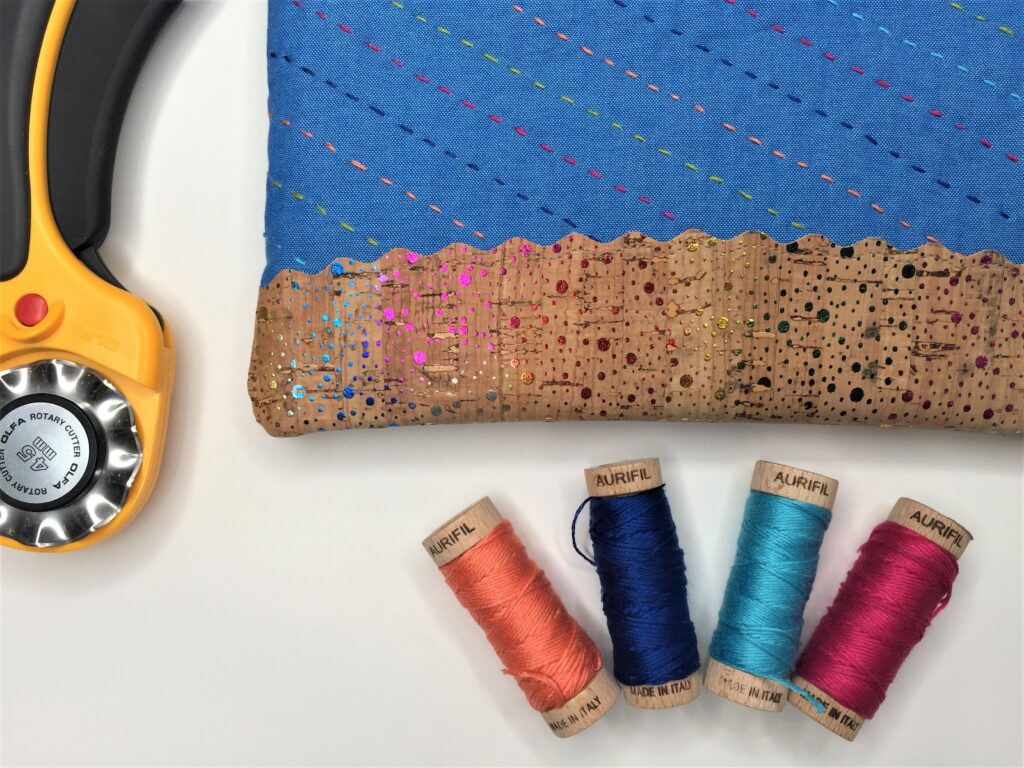
You can see the dreamy Aurifloss colors I chose for the hand quilting on my zip pouch. Love those blues with a punch of bright colors! Let’s get moving and start sewing up your own zip pouch!
Aurifloss in your favorite colors (I used #1320 Bright teal, 2225 Salmon, 2220 Light salmon, 4020 Fucshia, 5005 Bright turquoise, 2735 Medium blue, 1147 Leaf green, and 4644 Smoke blue)
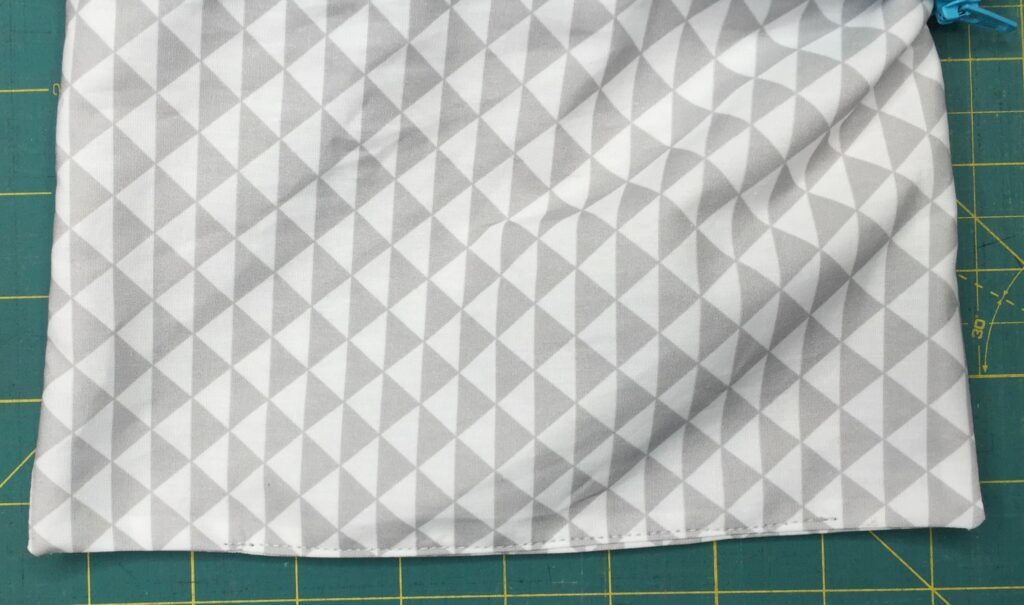
To begin, you’ll need to take the two exterior pieces of fabric cut at 6.5″ x 9.5″ and center each one on top of a piece of batting. Use a Hera marker or chalk pencil to mark your hand quilting lines, then hand quilt a pattern or random stitches onto each exterior piece. I like to make my stitches about 1/4″ in length, and spaced the same distance apart.
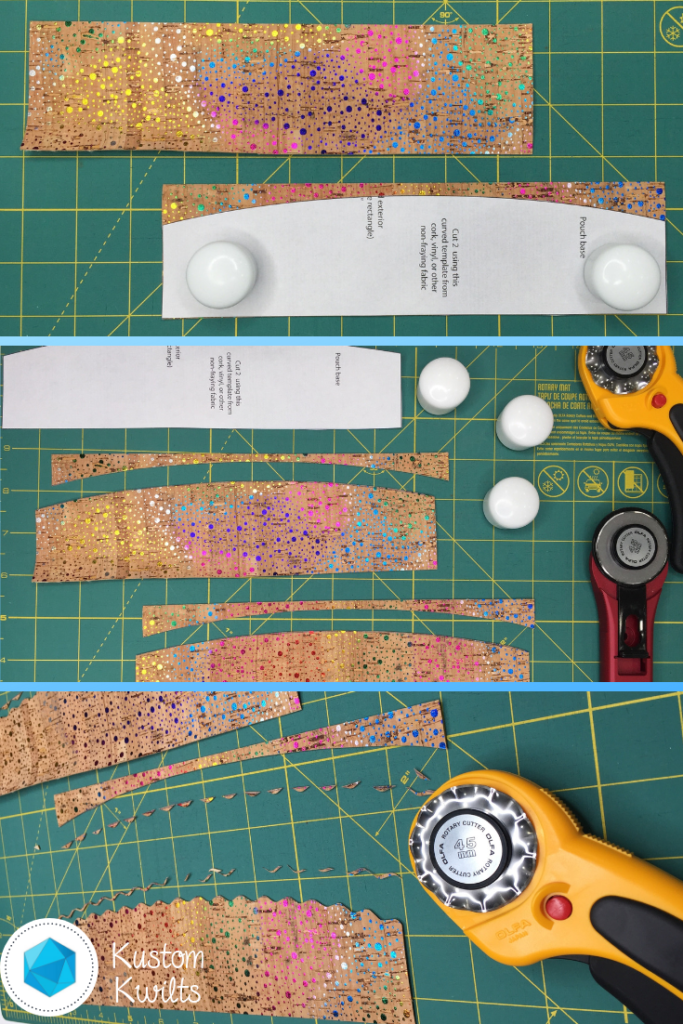
Grab your template:
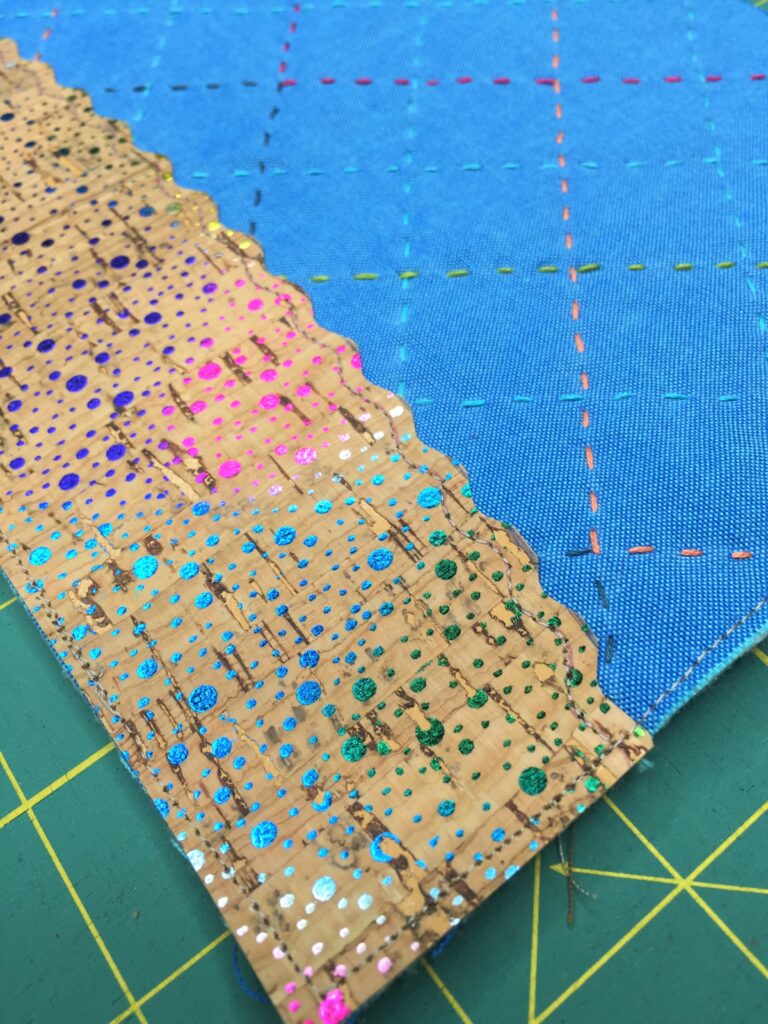
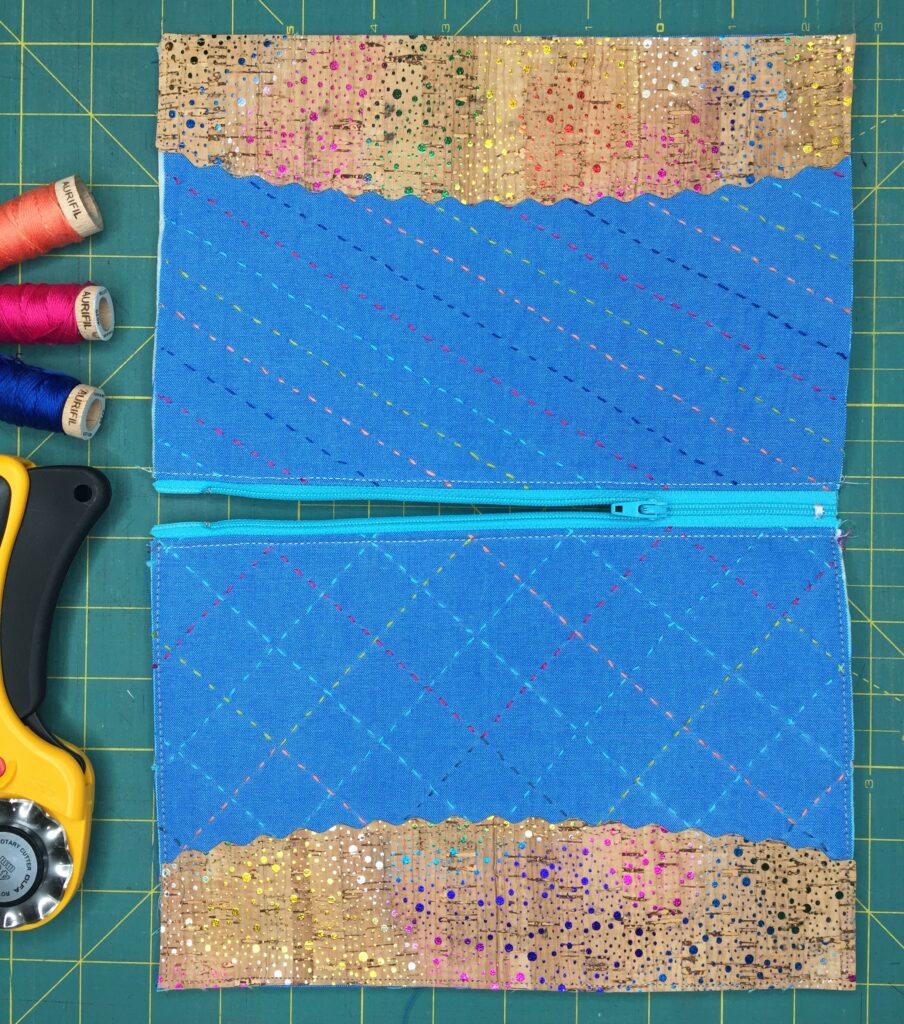
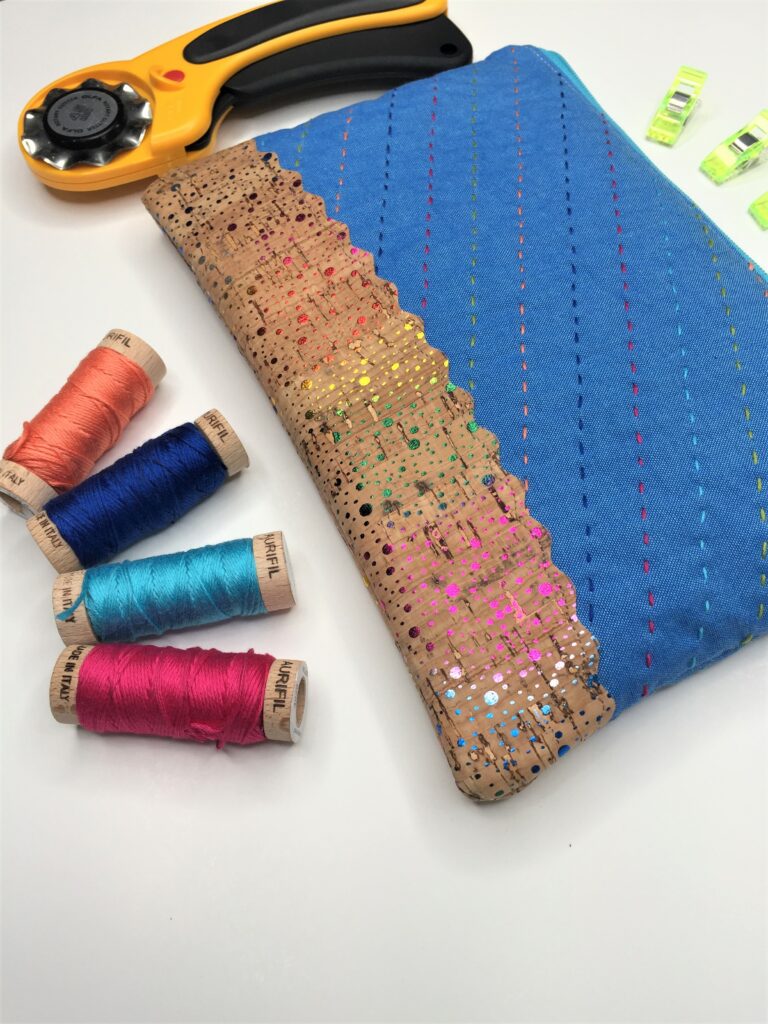
Now you’ll take the cork pieces, and the bottom portion of the template printed from your supply list and line the template up along the bottom 9.5″ of the cork. Use a standard OLFA 45 mm Rotary blade to trim along the curved edge. I used my OLFA Ruby Rotary Cutter for this part. Once you’ve trimmed the curved portion, take the Wave Rotary blade and trim just along the curved edge to leave a cute wavy edge.
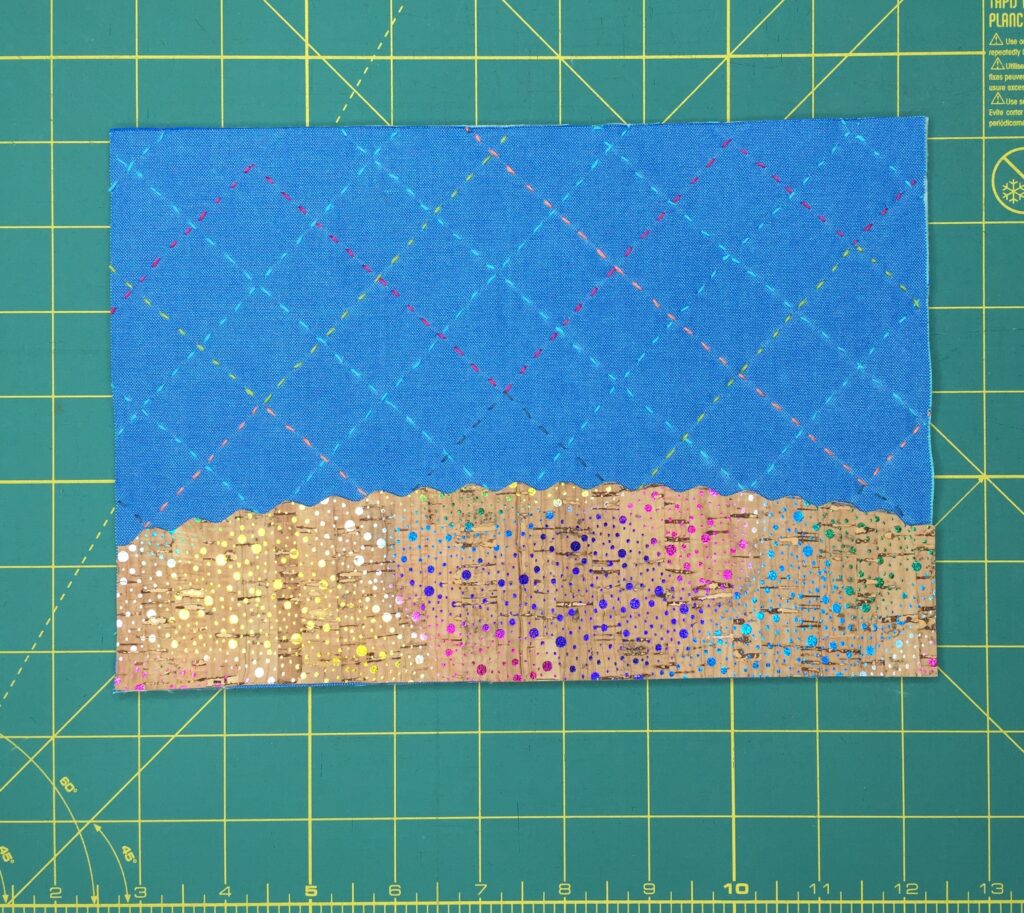
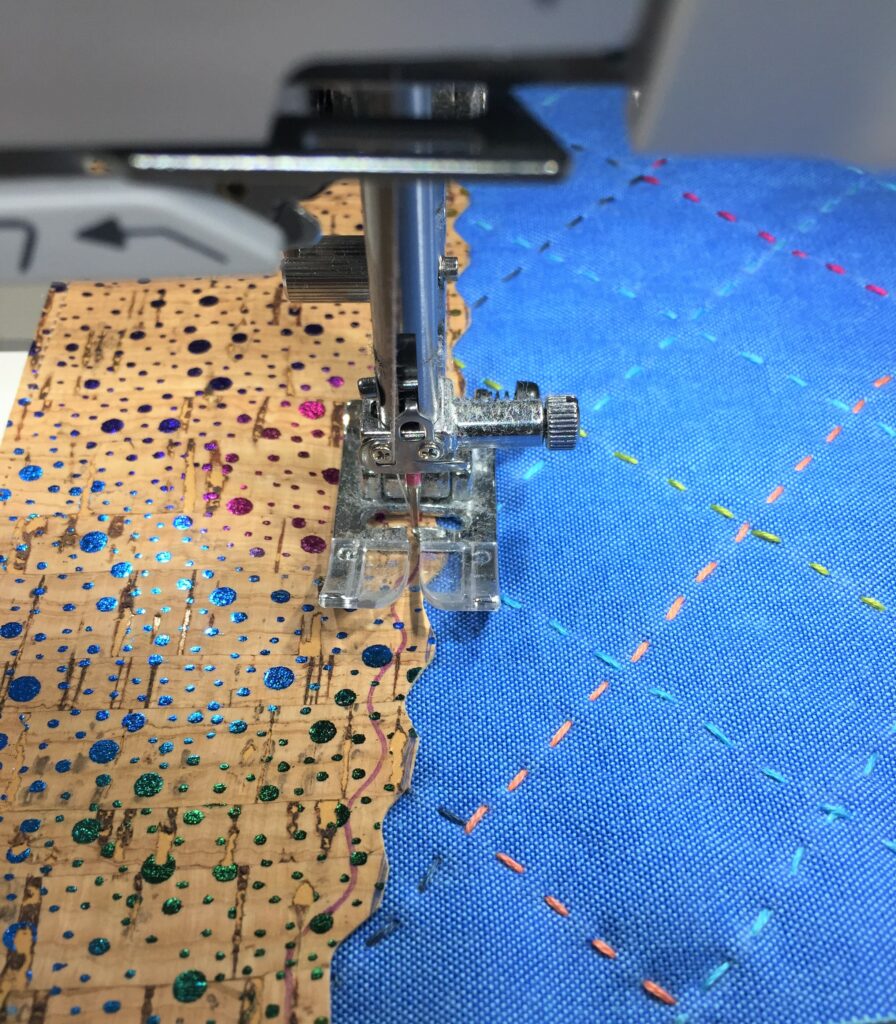
Take one of the quilted exterior pieces and place the decorative cork on the bottom 9.5″ edge. Use clips to hold in place, or use some wash away hem tape to secure. At this point, I like to take an air erasable marker and echo the line of the wave just below the wavy edge of the cork – about 1/8″ from the curvy edge – as a stitching guide. Take this piece to the sewing machine and topstitch along the guideline you drew with a coordinating thread. Then stitch around the remaining edges of the cork, about 1/8″ away from the raw edge to secure it in place. Don’t worry — the cork won’t fray, so it’s great for special decorative finishes with the OLFA rotary cutter!
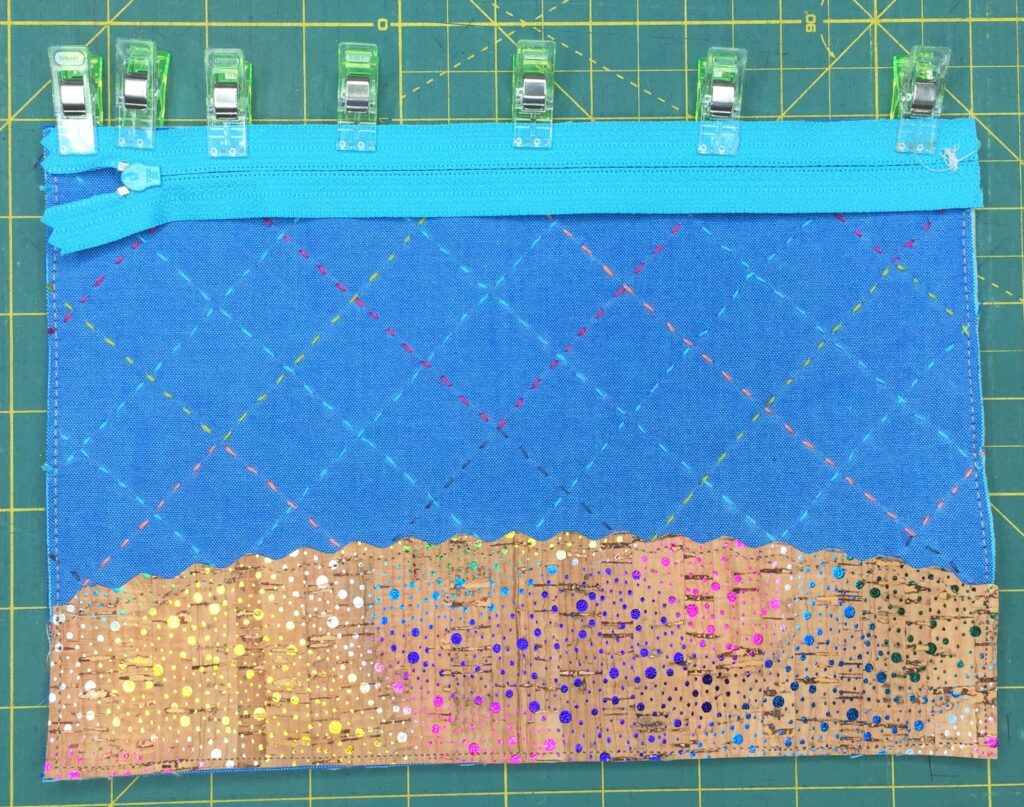
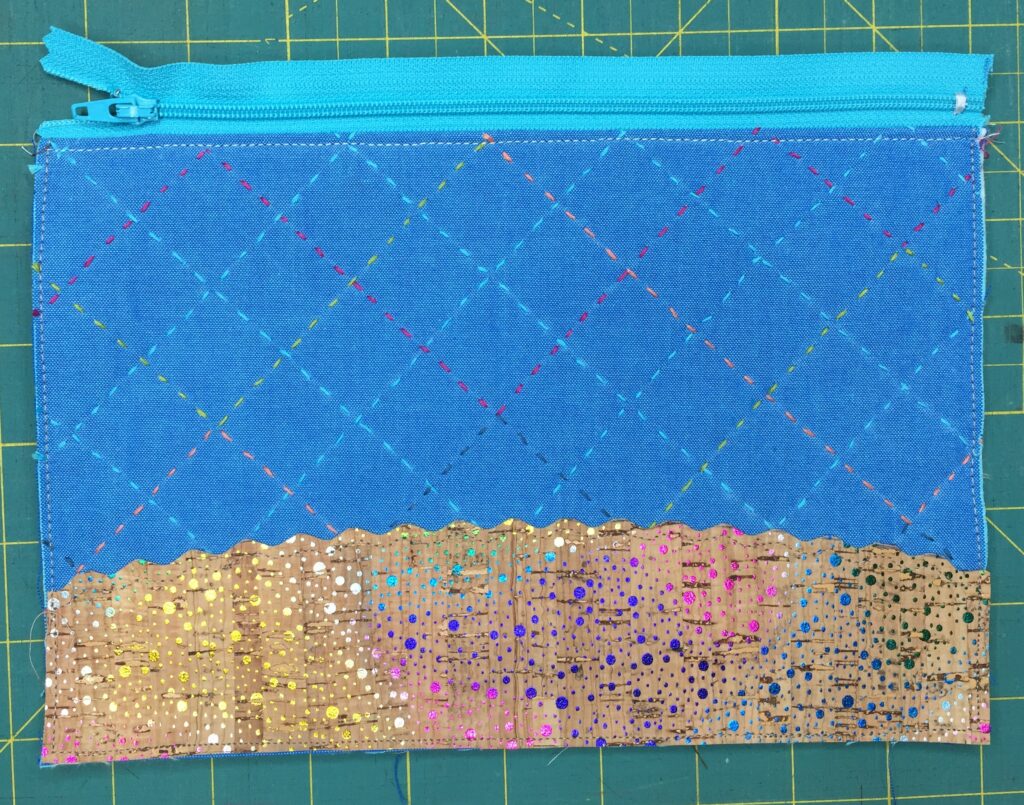
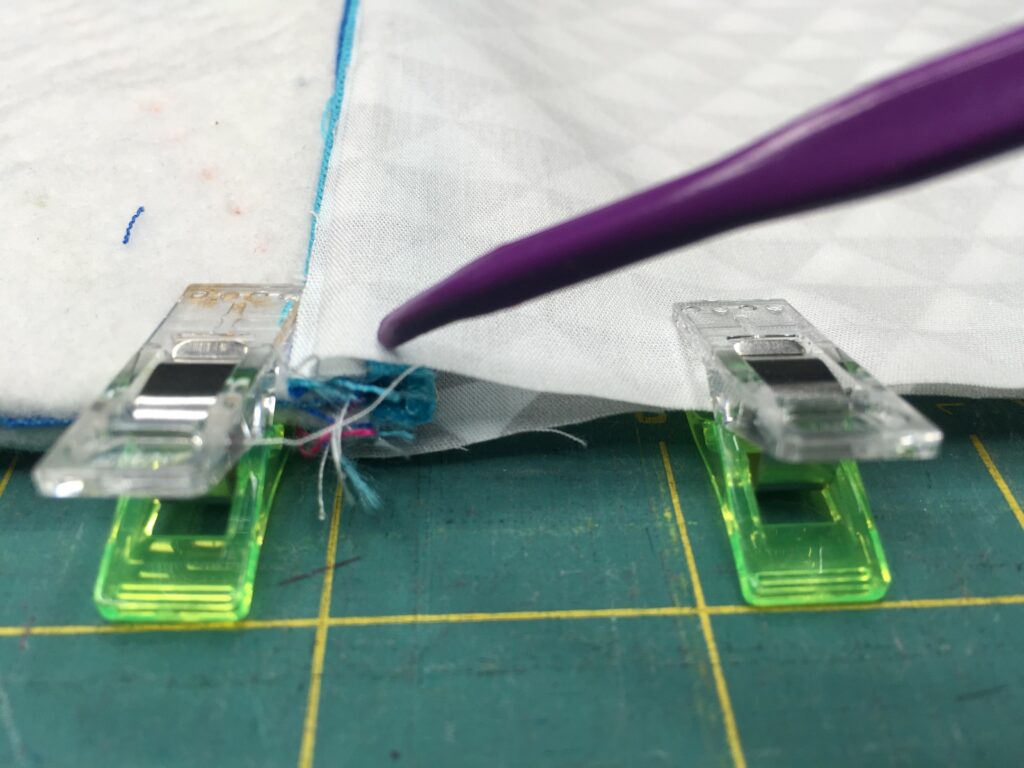
Take your zipper and place it lined up with the top edge of one exterior, as shown in the picture below. Mark the end of the zipper (the end with the metal stopper) where it meets the end of the right side of the fabric, then mark about 1/4″ in from that mark as well. Take the zipper to the sewing machine and use a zig zag stitch to sew a new zipper stop on the mark furthest in. Trim away the rest of the zipper on the outermost mark.
Install the zipper
I opted to quilt each exterior a little differently 🙂
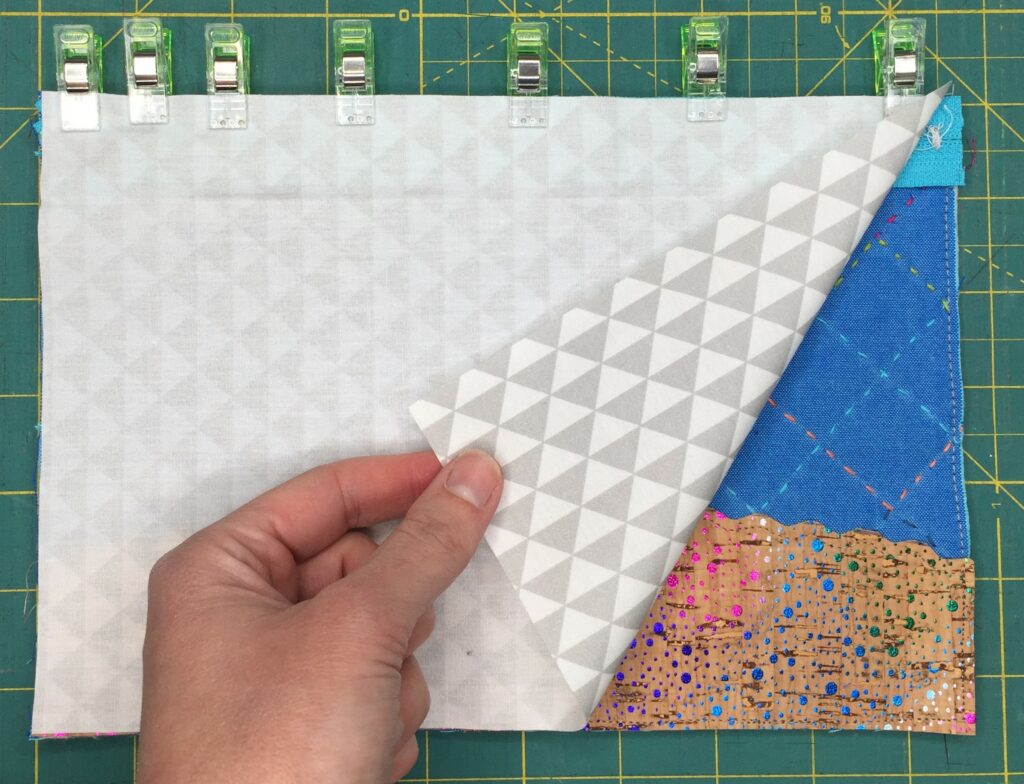
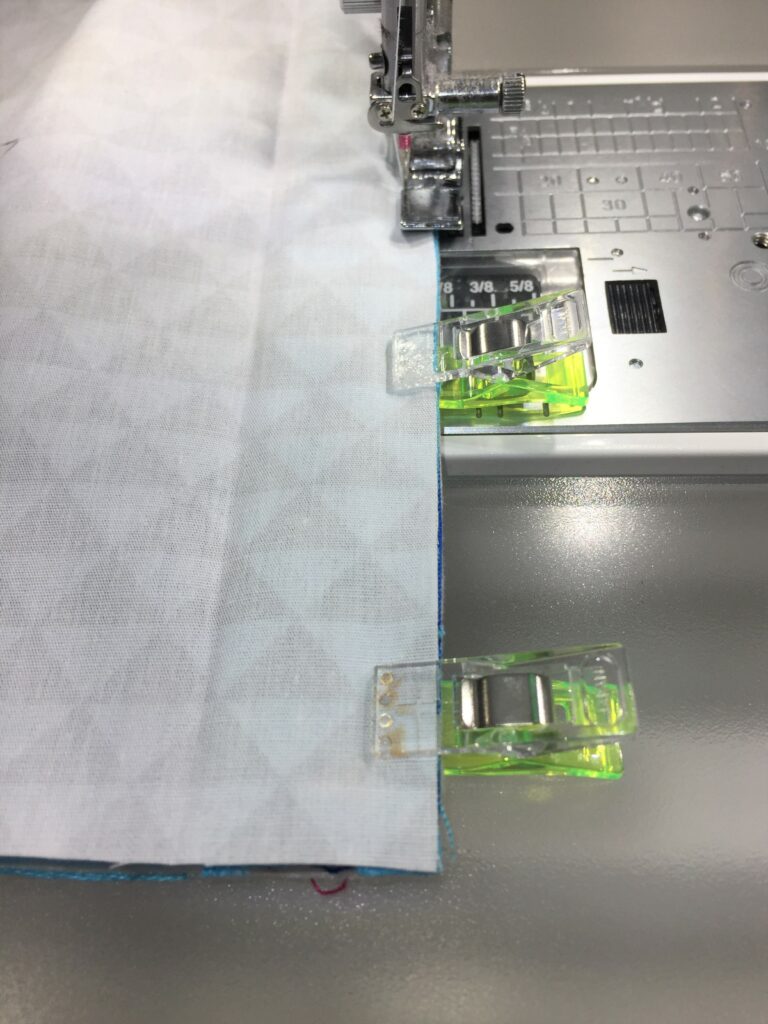
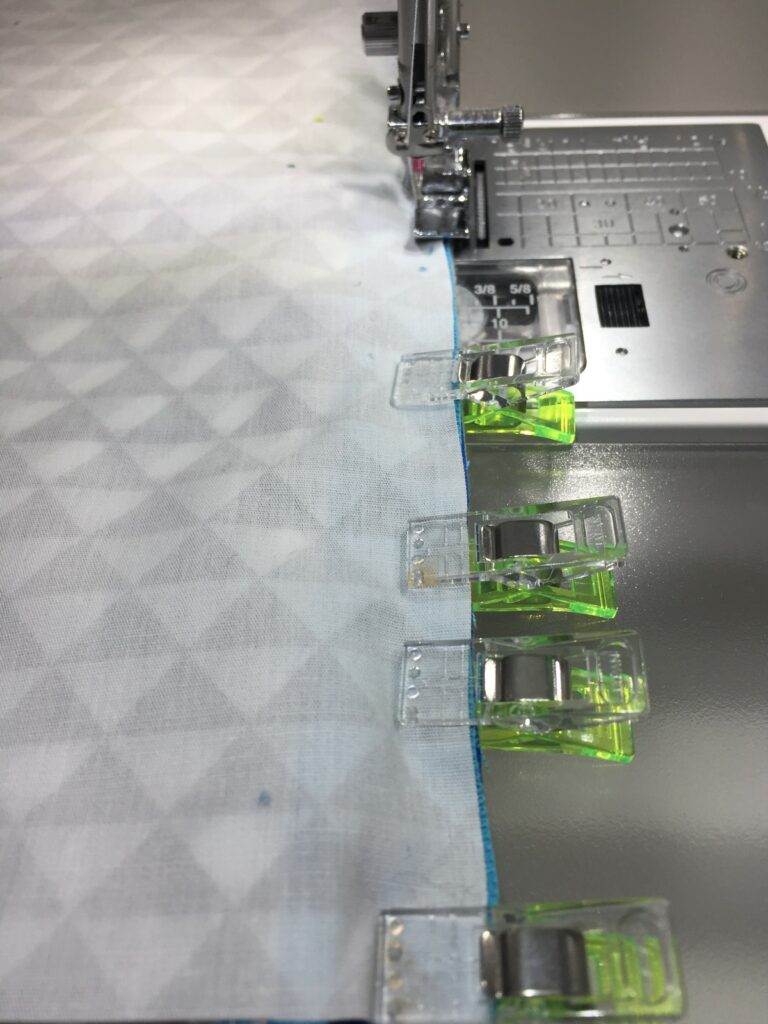
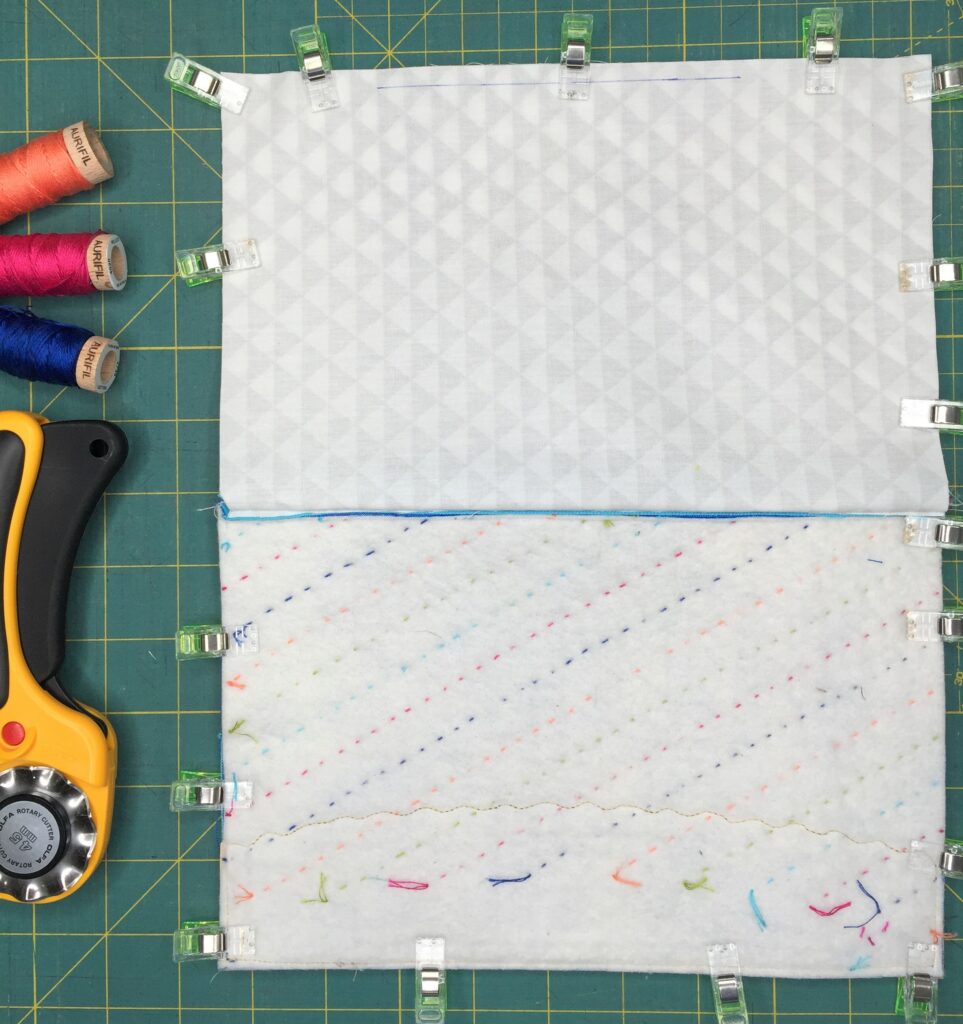
Take the newly trimmed down zipper and place it RSD on top of one side of the hand quilted exterior. Use binding clips to clip the zipper in place. Take one of the lining pieces and place it RSD on top of the zipper, the replace the clips to include all three layers. Use a zipper foot to sew through the three layers with a 1/4″ seam allowance, beginning at one end of the fabric and sewing to the opposite end, all the way to the edge of the fabric.
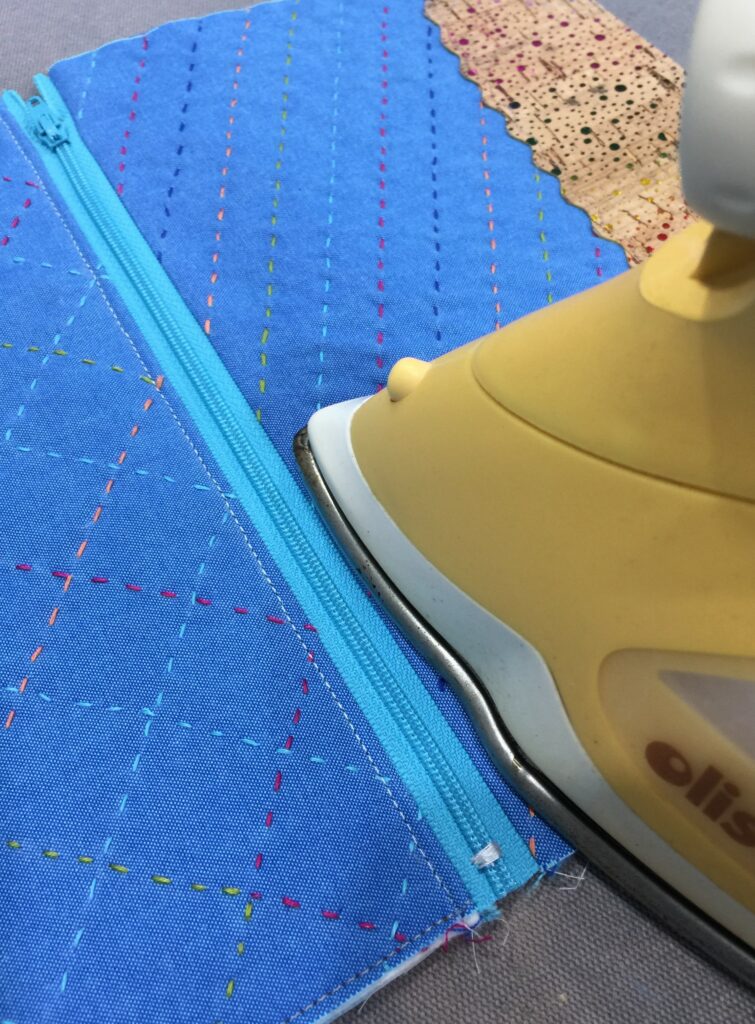
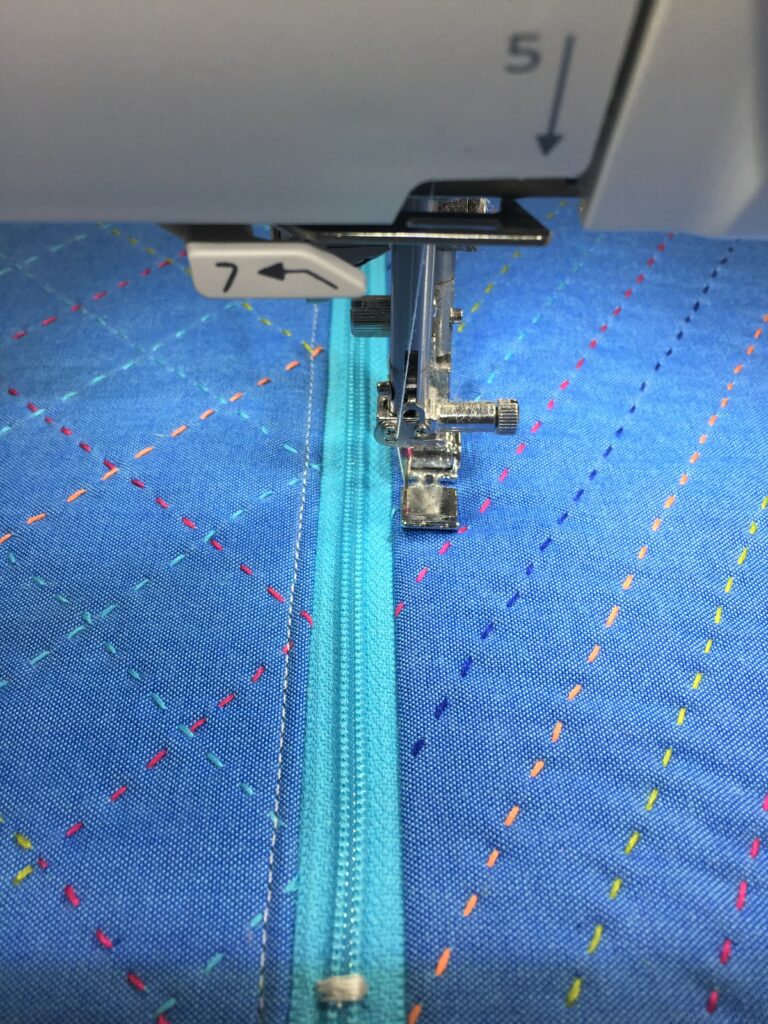
Press the lining and exterior away from the zipper with your iron, and topstitch 1/8″ away from the folded edge of the fabric.
Repeat the steps above with the remaining exterior and lining pieces.
Assembling the zip pouch
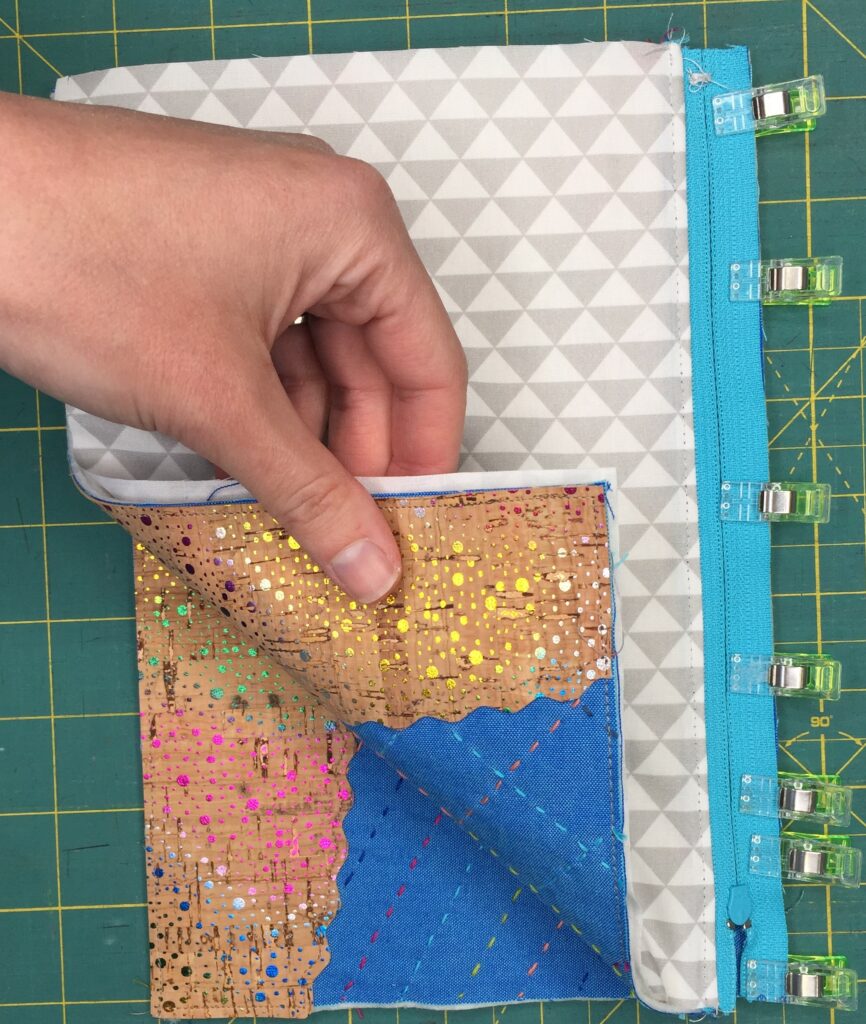
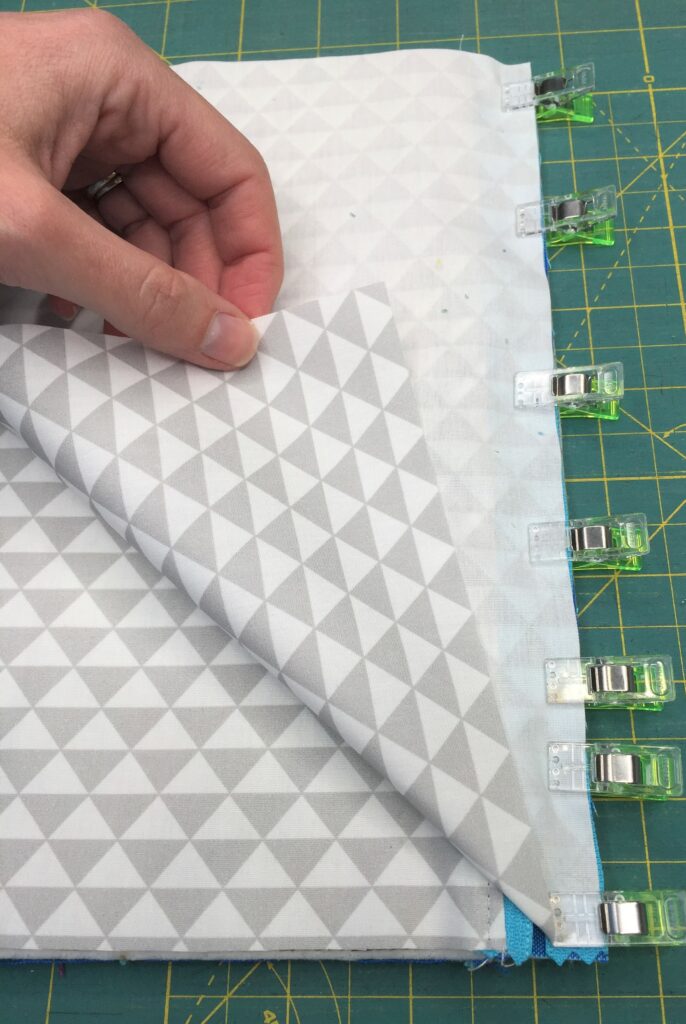
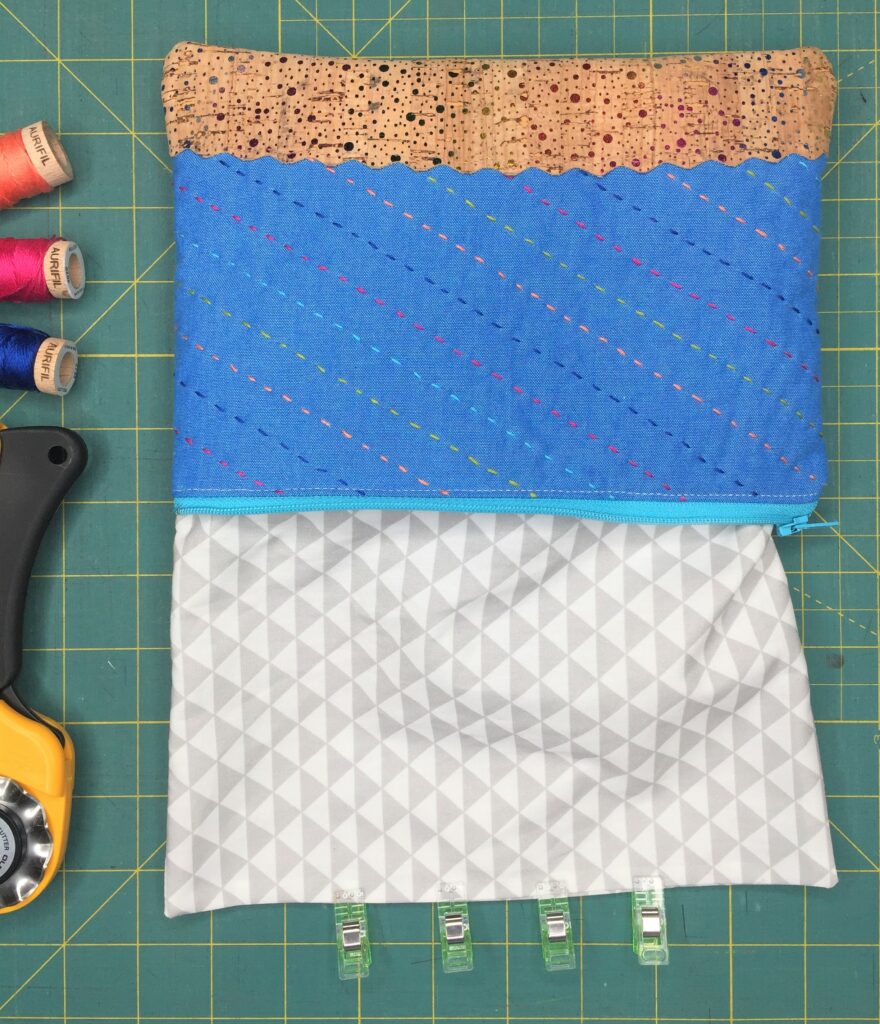
Open the zipper part way, then match the exteriors, placing them right sides together. Pull the linings together and match them, right sides together. Pin or clip in place, and mark about a 5″ opening along the bottom center of the lining to leave open in the next step. Pull the zipper pieces towards the lining, as shown below.
Sew all the way around the perimeter of the zipper pouch, leaving the 5″ opening unsewn. Clip the corners for crisp turning. Turn the zipper pouch right side out through the opening in the lining. You can use a turning tool for crisper turning, if needed. Fold the opening of the lining in 1/4″ and press. Clip in place. Topstitch the opening closed, then push the lining down inside the pouch.
And you’re done! Fill this pretty pouch up with all the sewing things you need on the go 🙂
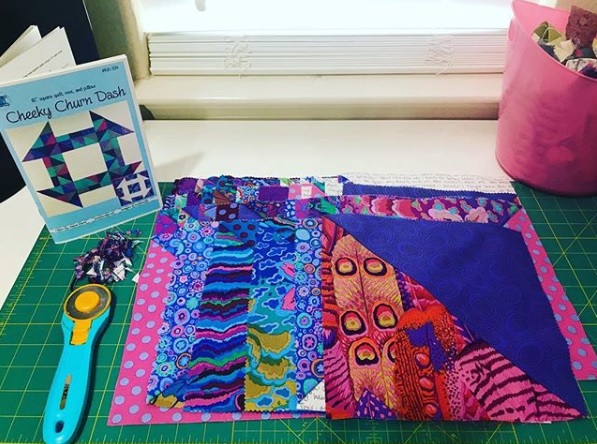
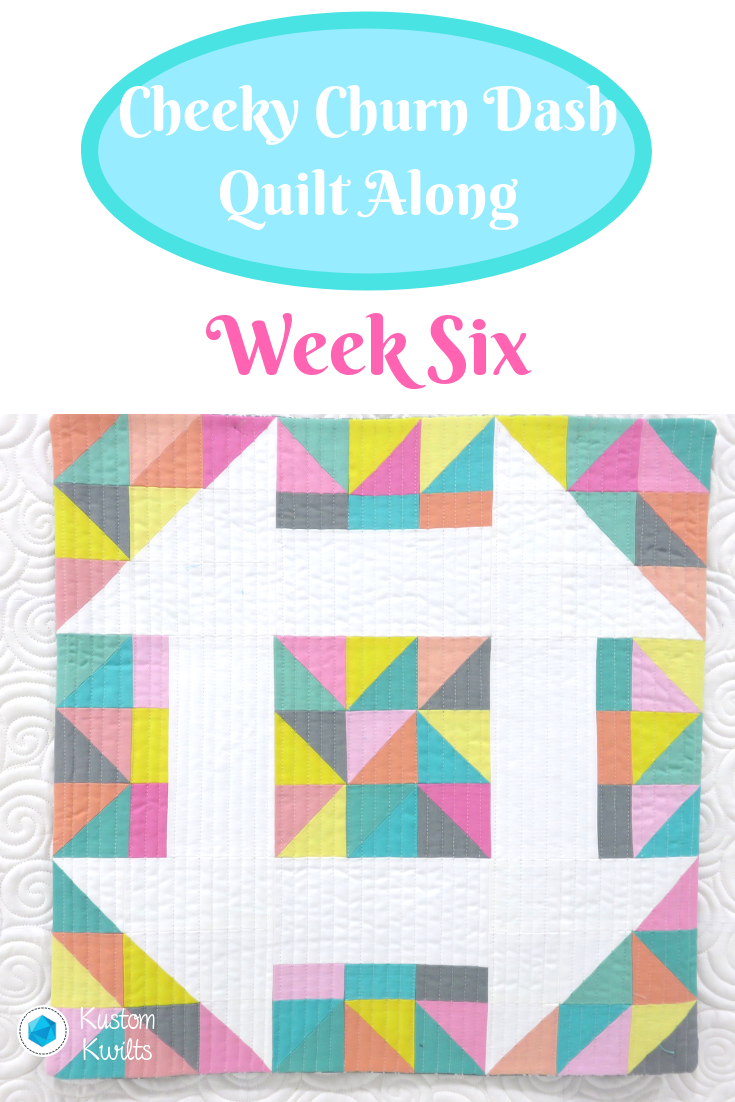
We’re moving right along into Week Six of the Cheeky Churn Dash Quilt Along! Head over to theOriginal QAL Postto review the details and schedule, if you need to.
A quick review of what we’ve done so far–scroll to the bottom of this page for links to each weekly post.
Congratulations to Erica M. for snagging the Week Four prize-a Quilter’s Planner from The Quilter’s Planner! This prize was sponsored by the awesome people at The Quilter’s Planner. These were Erica’s trimmed and squared up HSTs from Week Four:
Be sure to include the hashtag when you post to Instagram so everyone else can see what you’re up to, and if you’re in the US, you can enter to win prizes
Stay in the loop!
If you haven’t signed up for the weekly emails that will go out for the Quilt Along,sign up here. There might be some added info and bonus content for you as a little treat!
Alright, so here’s the breakdown for Week Six:
In Week Five, we assembled sections 1, 3, 7, and 9. Here’s the action list to complete for Week Six!
And here is where irritating elevator music starts playing until the start of Week Seven 😉 (Or, if you’re a mom, it might be Momma Shark da da da da….)
If you fell behind, go ahead and use this free week to catch up with us!
If you’re an overachiever–I see you there in the front with your quilt nearly done–You can work ahead, if you like. Just make sure you follow the original schedule (linked at the top of this post) so you have pictures to post to Instagram for the prizes.
This week, you can post a picture of anything Cheeky Churn Dash related on Instagram using the #cheekychurndashquiltalong hashtag. Be sure you post your IG picture with the hashtag before the start of Week Seven to qualify for this week’s prize. Week Six’s prize is sponsored byAurifil. The amazing folks at Aurifil are giving away a small spool thread set, and man…their thread is top notch. A huge thank you to Aurifil for sponsoring Week Six’s prize!
Next week, we’ll be assembling sections 2, 4, 6, and 8.
Cheeky Churn Dash Quilt Along Posts:
Week One– Introduce yourself and gather your fabrics