Posted on

Shopping for a Longarm-TIPS


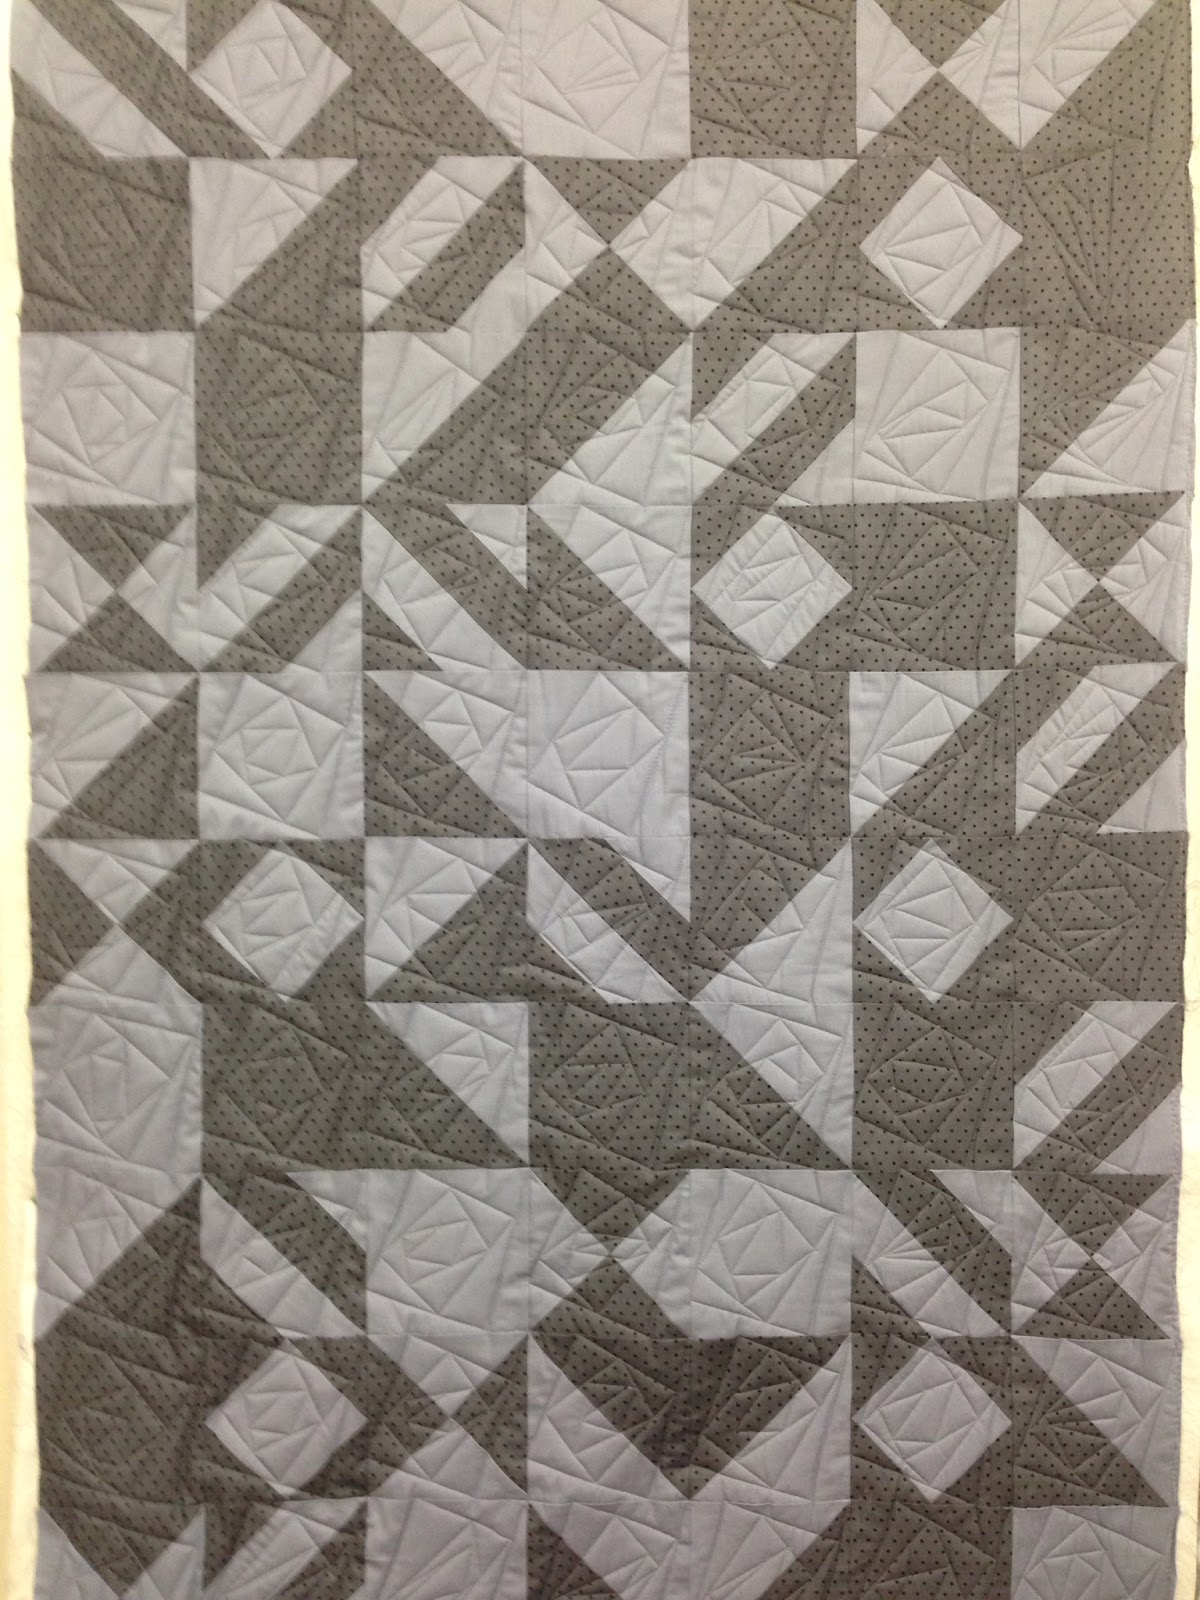
Almost a year ago, I was presented with an opportunity to try out a longarm.  I’m not really a traditional quilter, in the sense that my family didn’t pass sewing and quilting along through the generations.  I pretty much just jumped in head first and have been mostly figuring things out on my own.  


I had a preconceived notion that I didn’t like longarm quilters.  I did all my own quilting on a little domestic machine (even King sized quilt!), and kind of scoffed at the idea of anything else.  My first time on a Sweet Sixteen Handiquilter really opened my eyes.  Here are the perks:
1.  NO MORE BASTING on the floor with safety pins. 
     That should be enough to get anyone’s attention.  
2.  And while you do still need to press your tops and backs prior to loading your            quilts, you don’t have to press the hell out of them like you would when hand basting,              since the roller bars keep your fabric fairly taut.  
3.  No more quilt wrestling.
     If you are quilting on a domestic machine to take the place of your arm workout, you
     may want to look into lifting weights.  There won’t be anymore tugging and rearranging 
     and rolling and re-rolling your quilt to fit under the 11″ (or less) throat of your domestic.
4.  SPEED!  
     Since most longarm machines are industrial machines, the stitches per minute is so much
     Faster than a domestic could ever dream of being.  
5.  Ease of quilting
      It’s much easier to plan your stitches, use rulers, channel locks, and other quilting
      tools to make your work easier.  Your quilt is flat and easy to work with, as opposed to
      being rolled up and squished.

So why am I writing this post?  
If you don’t own a longarm, there are lots of issues with using one.  

If you rent time on a community machine, the tension on the bobbin case may need to be adjusted every time you start to quilt (which could be the case anyway, depending on what thread you use).  

The machine height may not be right for you.  If the frame has adjustable capabilities, then no worries, but most of the time, these machines are set at one height and you have to deal with it.  Every quilt I did made me feel like the Hunchback of Notre Dame when I was finished from stooping over so much.  I was sure that if I didn’t purchase my own machine soon that I would develop a hump back!

Then there is the matter of your tools and supplies.  Hauling them around.  Constantly.  I needed a pack mule just to get all my thread, batting, rulers, etc. from point A to point B.  Seriously a pain in the butt.  This highly contributed to me wanting my own machine.

Drive time, machine availability (being at the mercy of open calendar days).  Okay–so if you are just quilting for yourself–no big deal.  But if you start taking client quilts, this is a problem.  If you aren’t able to finish a job in the time you reserve the machine for, you have to take your quilt off the frame and re-load it another time.  No me gusta.  

Basically, I wanted to be spoiled and have a machine at my beck and call.  Since I work a full time job aside from sewing and quilting, availability is a high priority for me.  I want to be able to wake up at 5 AM, crank up the longarm and get in 2 hours of quilting before I go to work.  And if I want to, I would like to quilt until midnight, walk to my bed and go to sleep.  And since I have a full time job, I have the financial means to do this.  

So, above are all the reasons I felt made sense to me to get my own machine.  I knew what things I wanted from a machine.  I knew what I liked and what I hated about the machine I quilted on.


Here are considerations you should think about before making the financial commitment of buying your own longarm (in my opinion):
1.  Set a budget and stick to it.
     Know what you can afford and what you can’t.  Don’t try out a machine you can’t afford.
     Be okay with the amount you’re going to spend.  If you aren’t, keep renting!

2.  Make a list of must haves.
     If you’ve tried other machines, you’ll know what you love and can’t live without.  Make 
     Sure the machine you purchase has EVERYTHING you can’t live without, or has the
     capability to add it later (which most of them do).  
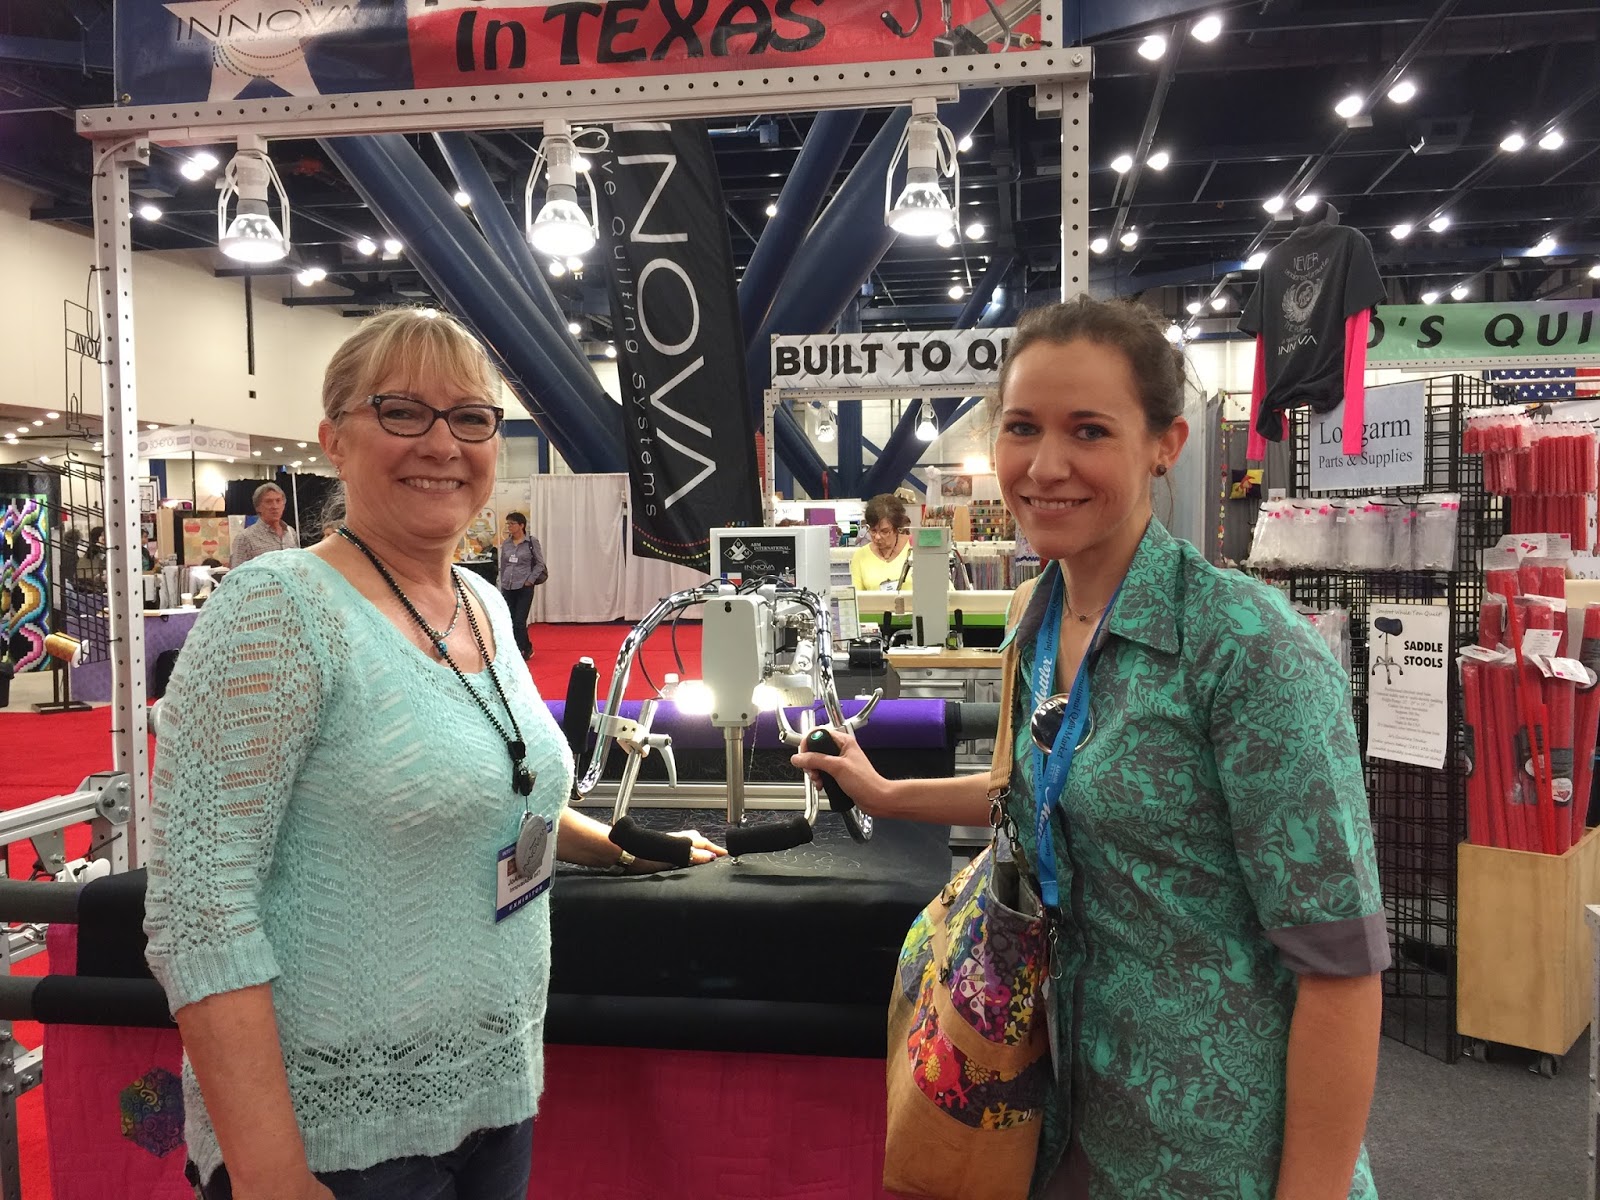
3.  Find a venue where you can try lots of brands at the same time.
      Quilt market.  Just about every longarm manufacturer is represented at Quilt market.  
     Go.  Play.  Try all the machines.  Try them again.  It will be easy for you to cross some 
     brands off your list immediately, and you can narrow down your search between just a 
     few machines.  Then try them all again.  And again.  

4.  Make notes each time you try a machine.
     Write down your experiences.  If you are having issues with a machine at a huge venue
     like quilt market, chances are the machine is going to be nothing but trouble for you at 
     home.  If the manufacturer doesn’t bring a top notch machine to showcase, the product
     you purchase won’t be any better.  

5.  Make notes on the frame.
     The frame can be just as important as the machine that sits on it.  Some have hydraulics
     that allow you to adjust the height at the push of a button.  

6.  Ask LOTS of questions.
     Now is the time to ask the vendors.  Ask questions until you are confident that you have 
     all the answers you want and need.

7.  Ask about customer service/upkeep/troubleshooting.
     Will someone be able to come to your house?  Do they have a phone hotline?  What are 
     the hours it’s available?  Web chat?  Will you be able to deal with someone local?  How
    much will a service call in person cost you?  What is the amount of time you’ll have to 
    wait if you have a serious problem?  Is the customer service phone line outsourced, or will 
     you be able to talk to someone in your country?

8.  Ask for the BEST possible deal. 
     The price may be set, but you won’t know unless you try.  Quilt market may be the best 
     place for you to get a show special.  Ask for discounts.  Ask if they sell refurbished machi-
     nes at a discounted rate.  

9.  Training/delivery/setup
     Does the manufacturer provide delivery and installation?  Do you have to pay separately
     for that ?  Is there any kind of training or orientation offered for the machine?

10.  Think about the ability to sell your machine.
     (Should you ever have to…).  You want to have the option to sell your machine.  Even if
     you aren’t interested in computerized programs (which can cost as much, if not more,
     than the machine and frame), other people might be.  Try to purchase a machine that
     has the capability to add this later.  Who knows?  You may want it yourself!

11.  Research before you go.
      Do as much online research as you can.  This will save you a lot of time prior to being at         the venue.

12.  Know about space requirements.
       Not just of the machine, but the frame.  Ask about different frame lengths, various 
       throat depths of different models.  

13.  Ask how long before you’ll get your machine.
       For some reason, I thought I would be loading my longarm up at quilt market and 
       driving it home.  LOL.  4-6 weeks before potential delivery.  That may just be the time
       it takes for the manufacturer I bought from, but ASK.

I’m sure there are lots of other questions and things to ask, but these were the main considerations that I had.  I went to quilt market knowing exactly what I needed and wanted, and what things were not important to me.  Number 1 on my list was to stick to a budget, which I did not do.  I had every intention of buying a much cheaper machine, but when I tried it out, the thread broke several times, and then the machine froze.  It was worth it to me to spend more after thinking about dealing with those problems constantly.  

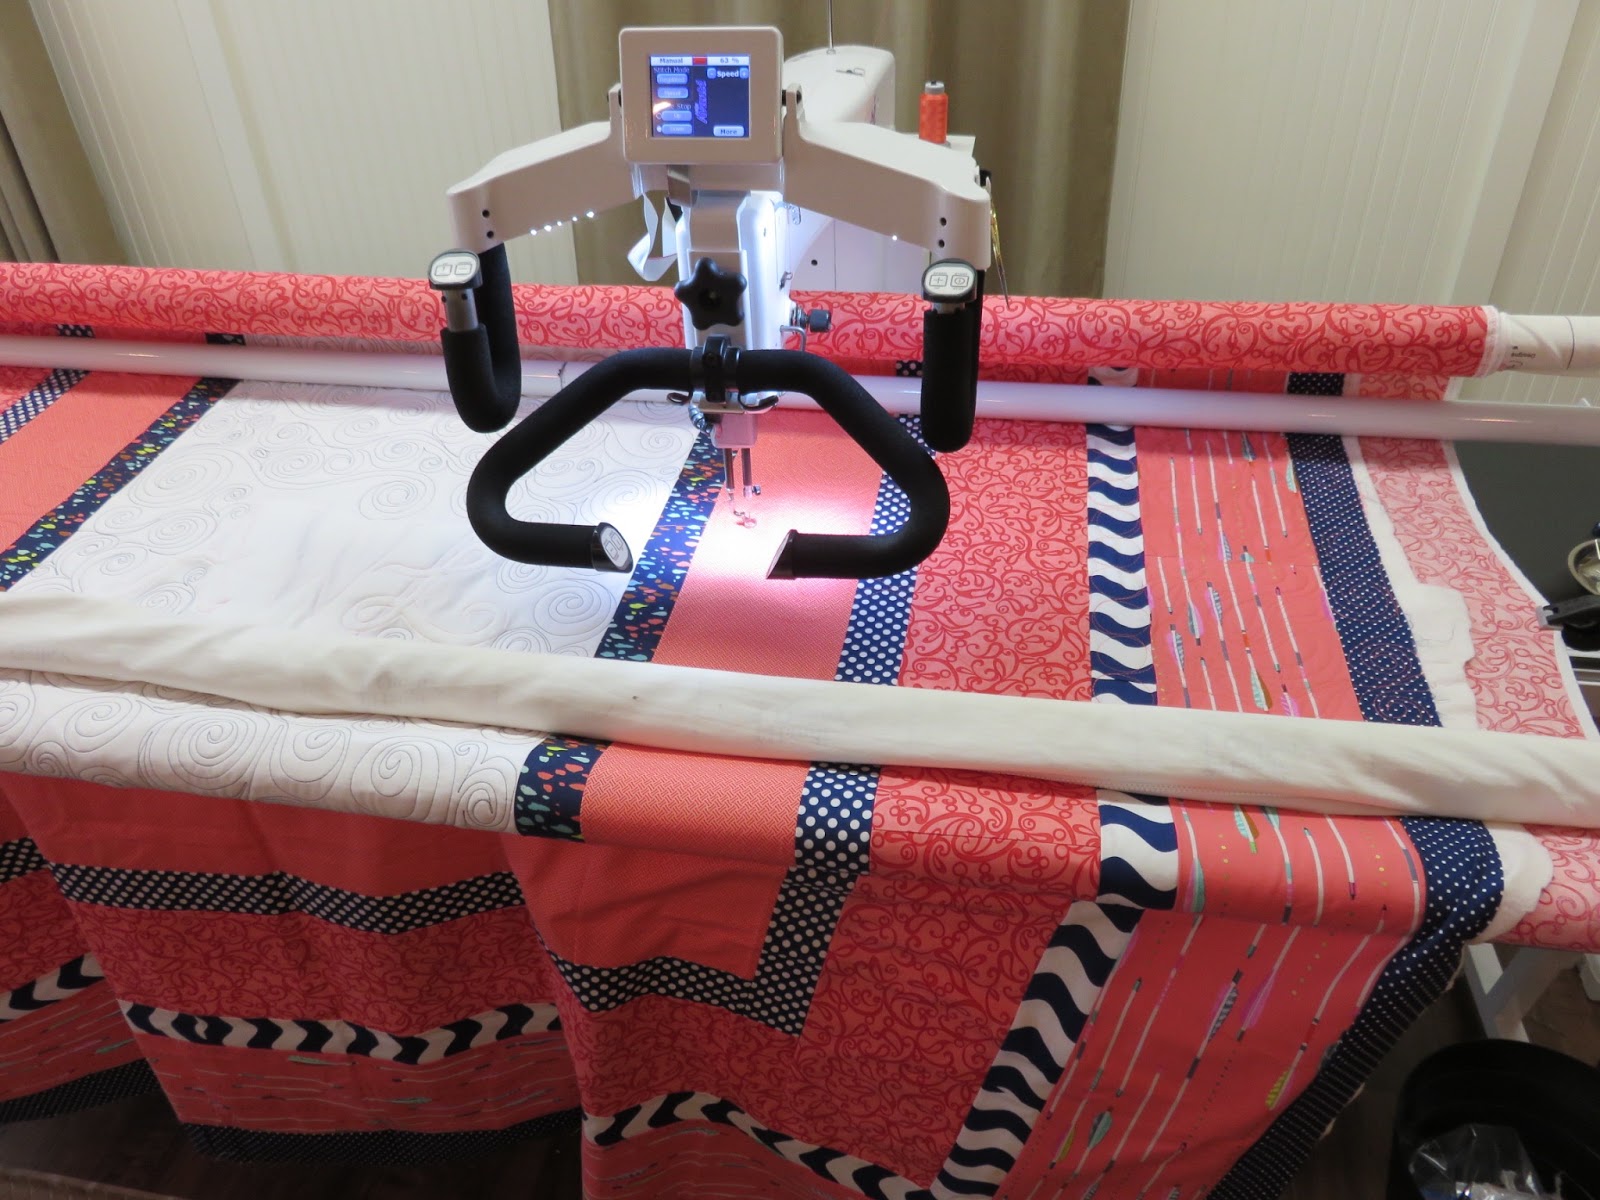
I ended up purchasing an Innova-22″ machine on a 12′ frame.  One thing I didn’t quite understand was that most of the people who own Innova’s rave about the “Lightning Stitch” stitch regulator (that comes with a whopping $4000 price tag).  I opted to not add that option, but may add it later.  The Innova machines come standard with, from what I understand, a lesser version of this stitch regulator.  I just couldn’t justify a 4 grand price tag on an upgraded stitch regulator (I stitch mostly in manual mode–but for those who stitch mostly in regulated…)  I will say…this machine stitches like a dream and I can’t wait to get that sucker in my house.  

Best of luck to you on your search for your personal longarm quilting machine!


Posted on

My first quilt market


International Quilt Market Website
Visit the link above for credential requirements, hotels. dates, etc.  

My first longarm purchase at Quilt Market


I would consider myself fairly new to the sewing/quilting industry, especially compared to others who were brought up around sewing and related activities.  I’m in my 4th year of sewing/quilting/etc., and hadn’t really considered attending quilt market or quilt festival until this year.  

I still have never gone to festival-the portion that is open to the general public-but I did get to go to market this year.  It just made sense that I needed to go and try to network or build some mutually beneficial relationships with other people in the industry.

Here are some tips for those of you who are first time visitors to Quilt Market:

1.  Have a plan-for maps, routes, restaurants, lodging, parking.

     I used to live in Houston, so I didn’t worry too much about maps, restaurants, lodging.  But all of those things are extremely important.  On my first trip to QuiltCon, my hotel room was miles from the convention center, and I learned not to make that mistake again.  Most of the fun, after-hours things take place at the center of it all, and if you aren’t staying close to the convention center, you probably will miss out–or at least spend more time driving back and forth than you’d like.  If it isn’t an area you’re familiar with, take advantage of the local restaurants and partake of the awesome food.  Parking is extremely important!!!  This year, the George R. Brown had lots of construction.  And it’s downtown.  I made sure my hotel had guaranteed parking reserved at no additional cost, and I was able to walk to the convention center.  Otherwise, you will be looking at mandatory valet fees, or at the very least–valet/parking fees just to park at your hotel.  I find it somewhat ironic that when I lived in Houston, I had no interest in attending Quilt market or festival.  

2.  Have a plan-contacts & exhibits:

      I printed out the map of the convention floor and the list of exhibitors.  I went through and hi-lighted every booth/exhibitor I thought I may want to visit with so I didn’t waste time walking aimlessly through the whole thing.  It also made it really simple for me to remember what my goals were.  I really, really wanted to meet Tula Pink…that was my first destination 🙂

Tula meet up 🙂


3.  Register in advance.  Make sure you have all the required documentation–and if you don’t, leave yourself plenty of time to get those things in order.

4.  Reserve your hotel WAY in advance.

      Especially if you want to get a special rate for market.  Most of those rooms that are blocked out book up quickly, and the hotels with rooms adjacent to convention usually fill up also.  Just plan ahead.  

5.  Business cards.  

      Memorable, simple, all your contact info.  I printed up fresh ones from Vista Print that really were just my name in huge letters with small contact info.  No flowery add ons.  Just simple and bold.  You may want something different, but I wanted mine to be versatile since I planned on talking to several different people.  

I also got to meet Lindsey Marsh from Sew To Grow.  We have the same last name, so we’re holding up business cards/badges.


6.  Know what your goals are.

      In my case, my two main goals were networking and purchasing a longarm (which I will discuss in a separate post).  I wanted to try every longarm that was represented at market, and I did that.  I took notes on every machine and what I liked and didn’t like, price points, etc.  I was able to make a decision in 24 hours and make the purchase.  I will say I was a little nervous at the networking…I didn’t do as much as I should have, and I will know what to do more next year when I attend.  I wasn’t prepared.  When I went to people who’s work I admire so much, I couldn’t manage to find my speech and ended up sounding like a doofus.  I didn’t have clearly defined in my head specific things I could do to benefit some of the people I wanted to network with, and so was at a loss when I went to talk to them.    

7.  Make sure you have enough time to meet your goals.
   
      I only had about a day and a half to get everything done that I needed to.  Don’t over do it, and make sure you make the most of your time.  

8.  If you go for networking purposes:
    
      DON’T interrupt an exhibitor who is trying to sell their goods.  If you are solely going for an introduction, wait until that exhibitor is not busy–I would recommend at the opening or closing times of market, or on Sunday evening–to introduce yourself.  You won’t make any friends cutting off a potential sale for that person.  The exhibitors are there to make sales to retailers.  If you are trying to get work from designers, make something from their fabric, or products that you can wear to show you use it already.

9.  Take a notebook and something to put business cards in

      You will want to have something handy to write down notes or contact info from other people, and somewhere handy to keep business cards you’ve exchanged.

10.  Networking follow-up:

        If you go to make business relationships, you should send a follow-up email after market and festival are over.  This shows that you are serious about what was discussed, and that you really want to work with said person.  Do it in a timely manner so the person still remembers you.  It doesn’t have to be anything fancy, but you should at the very least remind them what was discussed, how you can help them business-wise, and your contact info again.  If you have a photo gallery on your website, also include a link to that so they can see your work.  

11.  Have fun and appreciate the hard work that goes into it!

Until Next time,
Joanna

Posted on

Scrappy Trip Quilt Project with the San Antonio MQG


Have you ever felt sort of isolated in this “hobby” (or lifestyle to be more accurate) that we call quilting?  I had recently discovered modern quilting and realized there was this whole other world of people that were just like me.  I’m sure we’ve all had a point in our lives where we thought Joann’s and Hobby Lobby were the only places you could buy fabric…I went through this phase for probably the first year and a half that I was discovering sewing (disastrous, I know!).  Once my eyes were opened (along with my pocket book), I needed to connect with other people that felt there was something more than just traditional quilting and subdued fabric.  

I found the San Antonio Modern Quilt Guild really by accident when I was trying to register for QuiltCon 2015.   I immediately joined and have missed just a handful of meetings due to my “real job”, but the experience has been nothing short of life changing.  I have made friends and contacts that have enriched my life so much.

We followed the tutorial posted on Quiltville’s blog here: Quiltville’s blog 
You should check it out if you’re interested in making your own Scrappy Trip quilt–the instructions are very well written and easy to follow.

Some of the guild members have started the journey of the “scrappy trip along”.  It’s really a cool technique to learn, and since we all have a bit of a competitive nature, there are prizes involved and a schedule for block completion.   

Somewhere along the way…I got caught up and ended up with 100 completed blocks.  

This was my starting point when I began cutting 2.5″ wide strips to arrange into blocks.  I obviously like very bright, saturated colors 🙂

My only plan for arrangement was to alternate bright, lighter colors with dark, duller colors.  I wanted a very busy, random quilt when I was done with it.

I think the scrappy trip quilt is an awesome project when you are feeling less than inspired and maybe lost your sew-jo, but need to find it.  Especially if you are doing a random arrangement, where you allow the fabrics to just do their own thing and speak for themselves.  It can be a relaxing project to just piece without thinking and enjoy the results and the process involved.  (It is kind of a lengthy process!)

These are some of my finished blocks (before sewn into the quilt, they measure 12.5″ x 12.5″), and I just love the brightness of them.  

And this is the first layout I set prior to piecing my quilt top.  So many times, we face difficult decisions with all the “favorite” fabrics we buy and not having fabrics to coordinate with them. In the scrappy trip, anything goes, and you don’t have to concern yourself with that.  

I ended up with 100 completed blocks…I kind of got wrapped up in the cutting strips, sewing together, cutting, seam ripping, sewing process and forgot that my intention was not to make a king sized quilt…My final layout was a 9 x 10 layout with the finished top measuring 120″ wide x 108″ long.  This was perfect for our bed since we have a little bit of a problem with cover thievery, and allowed for enough of a drop on both sides that neither my husband nor I end up without covers in the middle of the night.  I had 10 blocks leftover and pieced them all together in a 2 x 5 arrangement.  Then I cut them in half in the center of the middle block so they each measured 25″ x 31″.  I put batting behind each one and quilted these so we would have semi-matching pillow shams.  

I will say that I wanted to go nuts quilting this.  But with those super busy fabrics, I knew the quilting wouldn’t really be showcased, so any intricacy would be lost on anyone but me.  I went ahead and did some cool swirls that took me much longer than I should have spent, but I really had fun with it.  If you’re a beginner quilter, this would be a great project to really push your quilting skills, because any mistakes you make won’t show like a sore thumb.  


So, if you’re in the market for a pretty low stress project that you don’t have to think about, grab some scraps and get started on your own scrappy trip!  Enjoy the process and you’ll love the end product.  

I’m excited to show this at our November guild meeting when everyone will showcase their own scrappy trips and share their results.  

Until next time!
Joanna


Posted on

I wish I may, I wish I might…Part 2


As promised, I’m continuing the story of our shop journey.  You’ll have to forgive me, but I’m choosing to tell you through pictures more than writing, this go around.   These pictures probably range from 2-4 months, and were in the hottest part of the summer.  The last picture in this post shows the part most important to me–my framed sewing room!!!  I’ll update more as we get more finished, but for now, there is a little more progress done than is shown in that last picture.  All that is really left is finishing the drywall, painting, installing lights and electrical outlets.  We also wanted to do a really cool epoxy on the floor, but still kicking around ideas for that.  

Brady and our brother-in-law Scott

When I posted this picture on social media, lots of people thought
these were rolls of batting, and not insulation 😉

Insulation is up and starting on the walls
The exterior of the mostly finished shop
This is the beginning of my little framed sewing room.  
Pretty much after day one of working on it
(Brady and his dad)

Posted on

I wish I may, I wish I might…


Have the sewing room I dream of TONIGHT!  Not really.  I wish is right.  Soon enough, though.

If you’ve read my previous post about painting over tacky wall paper, then you know my husband and I live in a pretty budget friendly house (that’s code for–NO ROOM for anything).  So, a little over a year ago, we started building our dream workshop to house our hobbies.  Brady drew up a big metal building and then we planned to frame off 1/4 of it on the interior to make that my sewing/quilting “studio”.  My awesome father-in-law got involved and literally has done more than my husband and I combined.  

The shop is basically done, and Brady has been working on my sewing room for the last 6 months.  

 This was the first picture I took of when we 
were prepping the foundation.  
After our huge delivery of fill dirt–I think it 
was something like 9 truck loads full.
After spreading the fill dirt…

I really don’t remember what this step was. 
 Something about keeping moisture in with the plastic…

And then, the magical day when the concrete was poured!
I wish I could go back in time and tell myself we were no
where near close to being done, like I thought we were…


My father-in-law, brother-in-law, and husband worked 
on putting the beams up for the building.

Next week, I’ll share pictures of the next step progress.  I will say that from the start of these pictures, through the one above took roughly 6 months.  It would have taken probably days, had we hired a crew of people to come out and do everything for us, but that isn’t the route we took.  Even though it’s much more time consuming, it really saved us a lot of money.

Posted on

Longarming Apron-Tools of the trade


If you use a long arm quilting machine, you probably have noticed that it isn’t always easy to keep your most valued tools at hand while working.  I know this was an issue I had, as I currently rent time on a community machine and couldn’t just keep my items laying around wherever I pleased.  

I used to be big into making aprons, but since I took up sewing…my cooking time has long diminished.  The need for aprons in my household had kind of gone away, until I realized a sewing apron would really solve a lot of my problems.  

I had written a pattern for a simple pocketed apron a few years ago and tweaked a few things to make sure it would accommodate my needs.  Plus…Alison Glass’s Ex Libris fabric had just come out and I had to have something showing off that wonderful panel print.  I really wish that I had bought an entire bolt of that color way of the corsage print, because I can’t seem to find more of it anywhere.  When I adjusted my pattern, the bottom patchwork section of the apron had been a complementary strip of fabric–so I just added in the extra 1/4″ seam allowances for the little squares and pieced them to go with the center.  The pocket on the front of the apron is actually 3 pockets, which easily contain my seam ripper, scissors, and a water soluble marking pin.  The top flap that folds down on the body of the apron is where I slip my needle for burying threads so I always have it handy.  

If you have a spare apron laying around, you wouldn’t even need to make a special one for quilting.  I really love mine, and it has seriously uncomplicated my life in the quilting room.  Instead of wasting time searching for my scissors or seam ripper, I know where everything is and they’re always within reach.  

I know I’m surely not the first person to do this, but I hadn’t seen other quilters suggest this, so I thought I would put it out there.  If you can’t tell, I’ve got a serious Alison Glass fabric love going on.


Posted on

15 Minutes of Play with VFW


This past July (2015), Sew-lebrity Victoria Findlay Wolfe visited our guild for a trunk show and two days of workshops.  This was the first workshop I had ever really had the time or opportunity to take by one of the more “known” teachers/quilters/designers, and it was a blast!  Some of the other members in the SAMQG have taken lots of classes with other “sew-lebrities” and said that the VFW workshops were some of the most fun and they really got a lot out of them.  I really learned a lot, and had not tried VFW’s technique of “made” fabric.  


Let me just start by saying that I am not an improv kind of girl.  Starting the “made” fabric was actually really a lot of work, and it took some time to get it out of my head that “made” fabric did not have to be some planned, geometric masterpiece.  The more you wing it, the better it looks, in my opinion.  VFW’s basic teaching is to create your “made” fabric and then cut down to manageable sizes to piece with.  

In the class, I started with a triangle template and trimmed my pieces down to size.  Then I had planned on cutting some solids from the same template to use with my made fabrics so they didn’t just get lost in an all made-fabric quilt.

Please forgive the less than gorgeous carpet background on this pic…

The really great thing about VFW’s techinque is that you can really use it with any quilt pattern, just by swapping your made fabric in place of the other fabric.  It can really do wonders and add interest to your quilt, along with color, texture, etc.  It is really freeing to sit and work on a project without any real plan or direction, and have your made-fabric as the result.  

Another thing Victoria teaches is that you don’t have to have tons of time to sit and work on something, and you should practice “15 minutes of play” to create your made fabric.  Basically, 15 minutes a day will get you a lot of progress over a few days.  

This technique is a great scrap buster, and Victoria’s motto is that anything goes!  I like to kind of divide my scraps up and get rid of the muted, subdued colors, so that when I’m blindly grabbing from my scrap bag to create made-fabric, I end up with an assortment of saturated colors and patterns that work well together.  These small pieces below were my made fabric trimmed down using VFW Quilts’ 1″ square template.  

I haven’t quite decided what I’m going to do with these, but they are really fun for a stress reliever…or even when you feel like you’ve lost your sewing mojo.  It’s a quick project that you don’t have to think about, but you’re still making progress and getting something done, as many of us feel the need to do.  

I would highly recommend taking ANY workshop from Victoria, and I think her techniques are great for those of us with  jobs aside from sewing, or with children, etc.  You can still make time to be a maker, even if you have other deadlines looming and kids and a husband/wife to feed.   This workshop was definitely money well spent and Victoria is such a sweet person with lots to share!

She’s also awesome enough to take lots of pictures with her workshop attendees 🙂


Posted on

Something in the water…


There must be something in the water…or maybe I’m just at that season in my life where the wedding showers have ended and baby showers are now the reigning social event!  That being said, there’s nothing I love more than designing and putting together cute baby quilts.  Let’s face it…quilts are very time consuming.  BUT if you do small ones, they take significantly less time, and are loved the same!  It’s really fun to play around with layout and quilt design when you know the process will be quick and fun and you’ll learn something from the quilt you create.  I recently did a quilt for a baby boy with all gray fabric, and really loved the mother-to-be’s registry choices.  I could tell that she had very modern taste and would probably be okay with me throwing something together that was a little Libs Elliott inspired.


This was such a fun quilt to put together, and even more fun to quilt a little ruler work into the design.

And a quilt for a baby girl (with more more color), that I designed by changing up the typical chevron design slightly.  

Challenge yourself to play with color and design and sew up a quick baby quilt for a friend or family member.  It is a gift that they’ll love, and probably cherish for many years to come. It’s also a great gift if you use two layers of dense batting and the quilt can also be used as a playmat. 

Posted on

Using Kraft Tex in projects


I have always had a love for branching out and trying new things! I really love quilting adn sewing with leather and other leather-type prodcuts to see what kind of finish they will have.  I think products made with a combination of high quality quilting cotton and leathers and faux leathers have such a great impact as finished products.  Below are samples of some purses that I made with Kraft-Tex.  
Tula Pink Plume and Parisville patchwork purse with Stone Kraft-Tex

Alison Glass Ex Libris purse with Natural Kraft-Tex


One issue that comes up with making things from quilted leathers or faux leathers is that they typically can’t be thrown into the washing machine with little care.  This creates a problem when you’re constructing fashionable diaper bags with leather that REALLY need to be washed.  

A possible solution that I’ve found is called Kraft-Tex, produced by C&T Publishing.  

Kraft-Tex used to be available in just “Natural”, which mimics the color of veg-tanned leather.  C&T publishing now offers multiple color options, including “stone”, which is pictured above.  

So you might be thinking right now…hmmm…I wonder if Joanna is getting anything from C&T Publishing for featuring their products on her blog.  NOPE!  I just really like this product, and I know I was a little intimidated about first working with Kraft-Tex.  But YOU shouldn’t be!  I have some great tips for you if you’ve never worked with this stuff before to make your life a little easier.

Tip #1
Once you sew a hole in this, it’s there forever (think oil cloth).  Use a smaller needle, and space your stitches a little further away from each other to prevent unsightly stitches.

Tip #2
Kraft-Tex is easier to work with if you pre-wash it.  It isn’t necessary, but I really like the look and feel of it after I’ve washed it.  And I wash and dry mine 3 times before I touch it with the sewing machine.  Washing and drying gives the Kraft-Tex a lovely texture that looks similar to that of worn leather.

Tip #3
After I wash and dry my Kraft-Tex (I throw it in with other loads of laundry I’m doing.  You don’t have to worry about Kraft-Tex bleeding on anything.), I iron it with steam.  This will help (along with washing it) to soften it up a little and make it easier to work with.

Tip #4
Kraft-Tex doesn’t really have a right vs. wrong side.  But you will want to make sure you keep using the same side as your “right” side.  Before I cut my pieces out of the Kraft-Tex, I stick a post it to the side I select as my “right” side.  And I do this again to the pieces I cut so I am able to keep it straight.

Tip #5
Kraft-Tex does NOT fray!  (Go ahead, do a little happy dance.)  This makes it really enjoyable to work with.  

Tip #6
You can also use permanent markers on your Kraft-Tex to create really awesome designs (If you’re partial to doodling!).  I would recommend heat setting any marks that you make with your iron (without steam) prior to getting wet again.  

Tip #7
For the most part, Kraft-Tex wipes clean and is really versatile.  It’s easy to get dirt from wear and tear off.

Tip #8
Dying.  You can darken it with natural dyes or synthetic.  

Basically, I think Kraft-Tex is awesome.  It really makes other colorful fabrics shine and sets your products apart from others.  It’s a great product to consider, and even better when it is a fraction of the cost of real leather (with a consistent look and supply source).  

There are a wealth of projects, and if you search “Kraft-Tex”  on Pinterest.  You can create awesome stationary, make up bags, purses, and pretty much anything else you can think of, so try it out! Search Kraft-Tex Projects on Pinterest


Posted on 1 Comment

My Millefiori


You can probably tell that I like to dabble in all things quilty.  Last summer, I decided that I wanted to conquer English Paper Piecing.  What I didn’t realize at the time was that EPP is extremely addictive because you can take it anywhere…it’s easy to do on the couch while watching tv, great for road trips (when you aren’t driving), and can also be done at social gatherings.  

When people hear “EPP” or English paper piecing, many probably envision little hexagons, endearingly called “hexies” pieced together with traditional or reproduction fabrics that may end up looking a little dated.  I’m not crazy about that look, but I LOVE Willyne Hammerstein’s book Millefiori Quilts.  (And now there’s a second book to follow the first.)  In the first book, one quilt pattern in particular caught my eye–the “La Passacaglia”.  It combines pentagons, triangles, diamonds, and other shapes to create a myriad of rosettes that are breathtaking.  I will say there is a slight drawback if you are using the practice of fussy-cutting (positioning your templates on specific motifs on the fabric to create another design), and that is using fabric yardage inefficiently.  But you’ll be making scraps for other projects as you go, so really, it’s a win-win!  

Here are a couple of pictures of some of my completed rosettes.

These all show really great examples of using fussy-cutting with your epp. I really can’t wait 
to finally finish my quilt top.  I have all the pieces sewn together for the standard design by Hammerstein, but didn’t like the fact that I would be chopping several rosettes in half to square up the top.  So I opted to fill in the rest of the quilt to be even with the rosettes that stick out…the quilt top is really pretty small when you consider how much time and cutting goes into it.  

I laid out my quilt top on a piece of foam board and pinned it so it wouldn’t shift, then used the paper pieces to fill in around the edges.  I probably should really look into documenting the layout better than I did, but for now I just have some pictures on my phone.  I’ll share those with you once I have completed and know the layout works, so if you want to do the same thing you can!  

I started this project in December 2014 and finished Hammerstein’s layout in September 2015.  I’m not sure when I’ll finish the fill-in part, but hopefully it’s soon, because I am dying to quilt this thing!  

If you’re looking for other pictures of some really awesome La Passacaglia quilts, you should check out the following Instagram users: @kamiemurdock, @lilabellelane, @izy_sewbusy to name just a few.  You can also search the hashtag #lapassacaglia for some really inspiring pictures!