Posted on

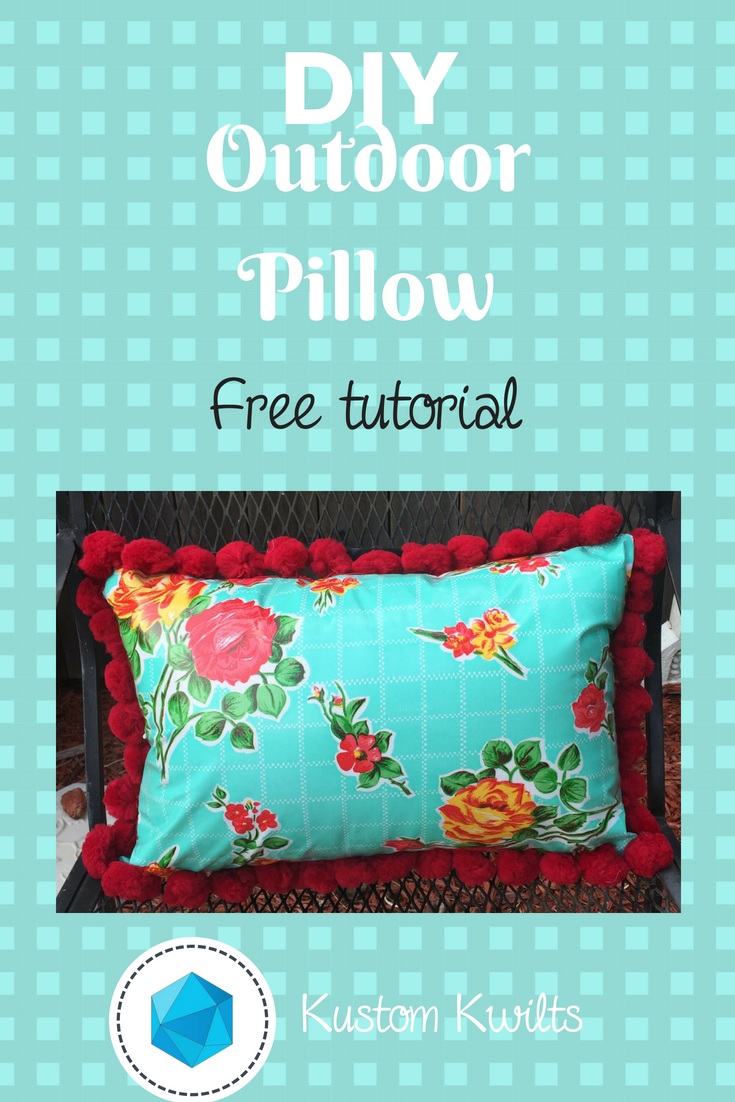
DIY Outdoor Pillow free tutorial

A pillow with red and yellow flowers on it.


DIY Outdoor Pillow tutorial

Are you looking for a way to brighten up your patio with some fun home dec pillows?  Make your own DIY outdoor pillow with this quick and easy tutorial to create a super cute oilcloth pillow with pom pom trim, and give your deck a cheery look!  I used my Janome Horizon Memory Craft 9400QCP and the Janome Ultra Glide Needle Plate and Ultra Glide Foot to stitch up this oilcloth pillow.  Start sewing with some new fabrics and try out a new foot attachment that will take your sewing projects to the next level. The Ultra Glide Needle Plate and Ultra Glide Foot set is perfect for working with fabrics that might not smoothly feed under the standard foot A, such as oilcloth and laminated cotton.  Also, check out my previous post on TOP TIPS FOR SEWING WITH OILCLOTH.  This is a great tutorial for beginners, and will take approximately 4 hours from start to finish.  The finished pillow size is 12″ x 18″.

Supplies: Sewing machine, Janome Ultra-Glide foot and Ultra Glide Needle Plate (Teflon foot for all other sewing machine brands), Zipper foot (Foot E for Janome), Needle, Pre-wound bobbin.

Fabric/notions required:

  • Circle Template printed at 100% and cut out
  • 1 yard Aqua Rose gall oilcloth (Fabric A) sub cut into:
    • (2) 6-3/4†x 19†(zippered back of pillow)
    • (1) 13†x 19†(front of pillow)
  • 3 yds. Jumbo Pom Pom Trim/ball fringe
  • 40 wt. Black sewing thread (or white for less contrast)
  • 20†zipper
  • 12†x 18†Weather proof pillow form/Outdoor pillow form
  • Marking pen
  • Rotary cutter/ruler/mat
  • Binding clips
  • Scissors
A collage of four photos showing how to make a quilt.
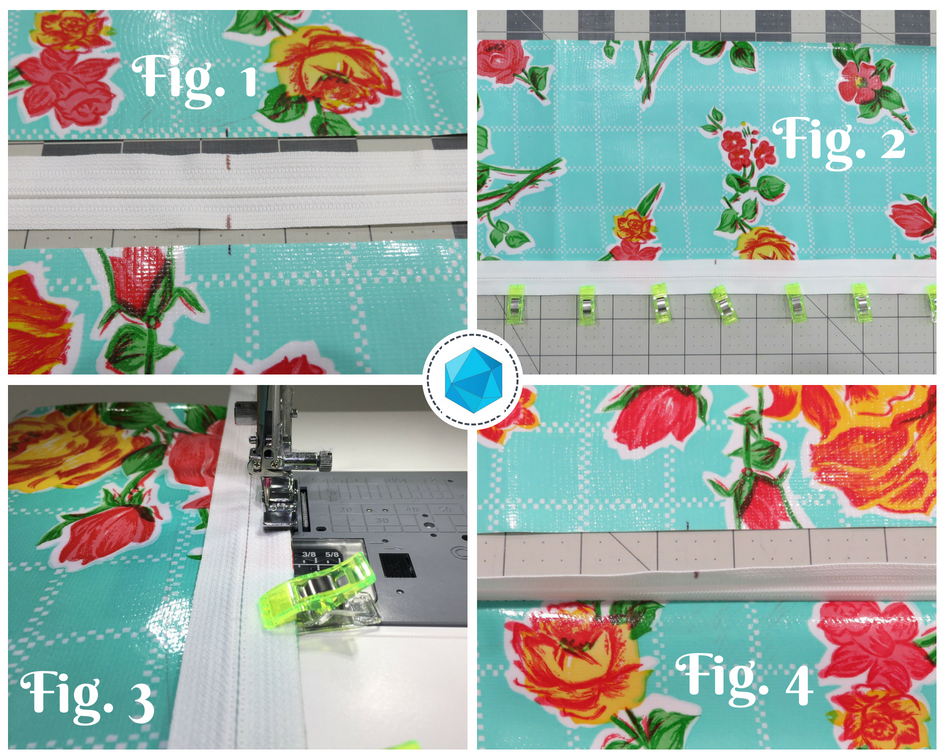
Figures 1-4

Prepare the back of the pillow and install the zipper

  1. Take the two 6-3/4†x 19†pieces of Fabric A and measure and mark the center of one 19†edge. Take the 20†zipper and measure and mark the center on both edges of the zipper tape (see figure 1).

Tip:  Use binding clips instead of pins when working with oilcloth.  The fabric does not heal when holes are made in the oilcloth.  Any holes made in the oilcloth will be permanent.  Also, use a slightly longer stitch length to minimize the amount of puncture holes made in the fabric when sewing.  Typically, adjusting the stitch length from the standard 2.4 to 3.0 is a good adjustment.  The raw edges of oilcloth don’t fray, so there isn’t a need to finish raw edges as there would be with a regular woven fabric.    

  1. Place one of the 6-3/4†x 19†pieces of fabric A RSU and align the zipper tape with the 19†raw edge, matching the marked centers of the zipper and the pillow back. The zipper and the fabric should be RST (see figure 2).  Use binding clips to secure the zipper in place.
  2. Remove the standard needle plate from the MC9400 and install the Ultra Glide Needle Plate. Using this needle plate with the Ultra Glide Foot will keep the oilcloth gliding smoothly under the presser foot.  Select a zipper sewing stitch to move the needle position to the left.  Lengthen the stitch length to 3.0.  Attach zipper foot E to the presser foot and sew the zipper to the fabric A with a 1/4″ seam allowance (see figure 3).  Finger press the seam allowance of the zipper away from the zipper teeth, under the oilcloth.  Fold the remaining edge of the zipper over (see figure 4).
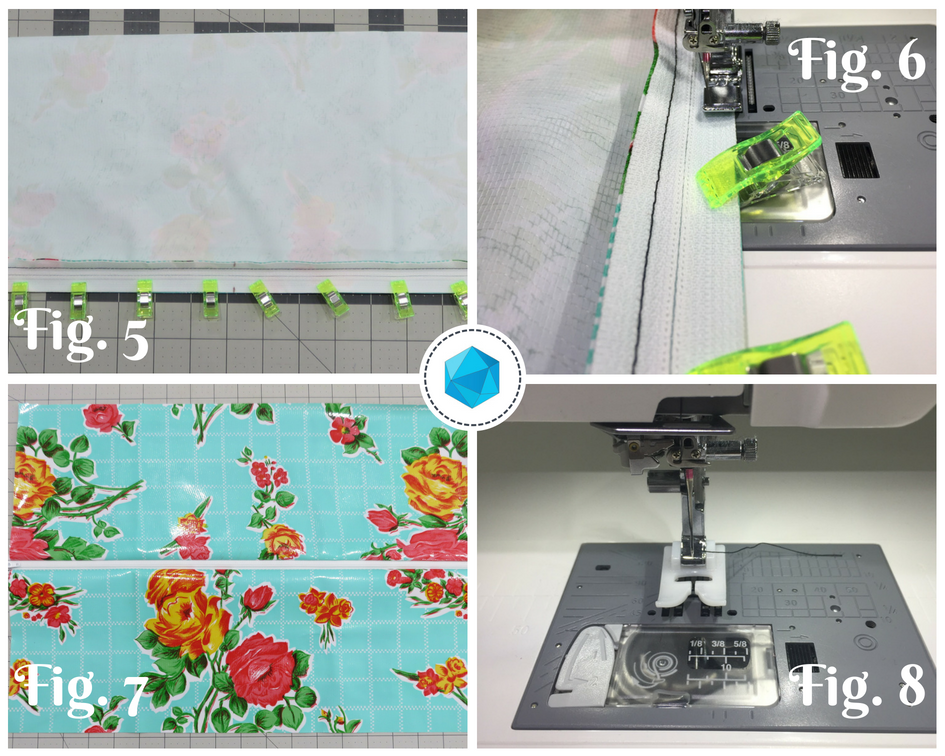
  3. Place the remaining 6-3/4†x 19†piece of fabric A RSU. Take the remaining side of the zipper tape and match the marks on the zipper tape edge and the pillow back edge, with the zipper right side down.  Line up the raw edges and clip in place with binding clips (see figure 5).  Sew the zipper in place with a 1/4†seam allowance (see figure 6).
  4. Once again, finger press the zipper tape seam allowance away from the zipper teeth so it is under the oilcloth pieces (see figure 7).
  5. Remove the zipper foot E from the presser foot and attach the Janome Ultra Glide Foot to the presser foot (see figure 8).
    A collage of photos showing how to use the sewing machine.
    Figures 5-8

    Topstitch 1/8†away from the folded edge of the oilcloth (see figure 9).

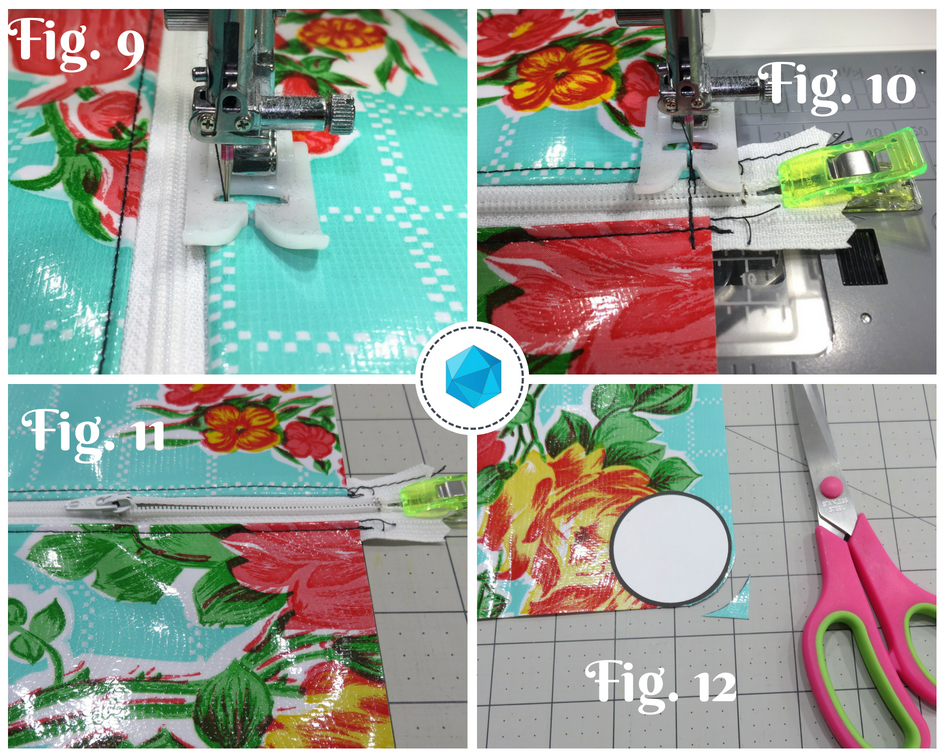
  6. Select stitch #1 from the utility menu. Move the zipper head towards the middle of the zipper tape (see figure 11).  Use a binding clip to keep the ends of the zipper together.  Sew a few stitches and then backstitch to connect the zipper ends, about 1/8†away from the edge of the oilcloth fabric (see figure 10).  This will act as a zipper stop until the front and back of the pillow are sewn together.  Keep the zipper unzipped at least half way.

Round the corners and baste the pom pom trim

  1. Take the circle template that you printed and cut out, and place it with the edges touching the corner edges of the pillow. Trace around the curved edge of the circle with a marking pen.
  2. Cut the edge to round the corner (see figure 12).

    A collage of photos showing how to use the sewing machine.
    Figures 9-12
  3. Repeat steps 8 and 9 with the remaining corners of the back of the pillow and the four corners of the front of the pillow.
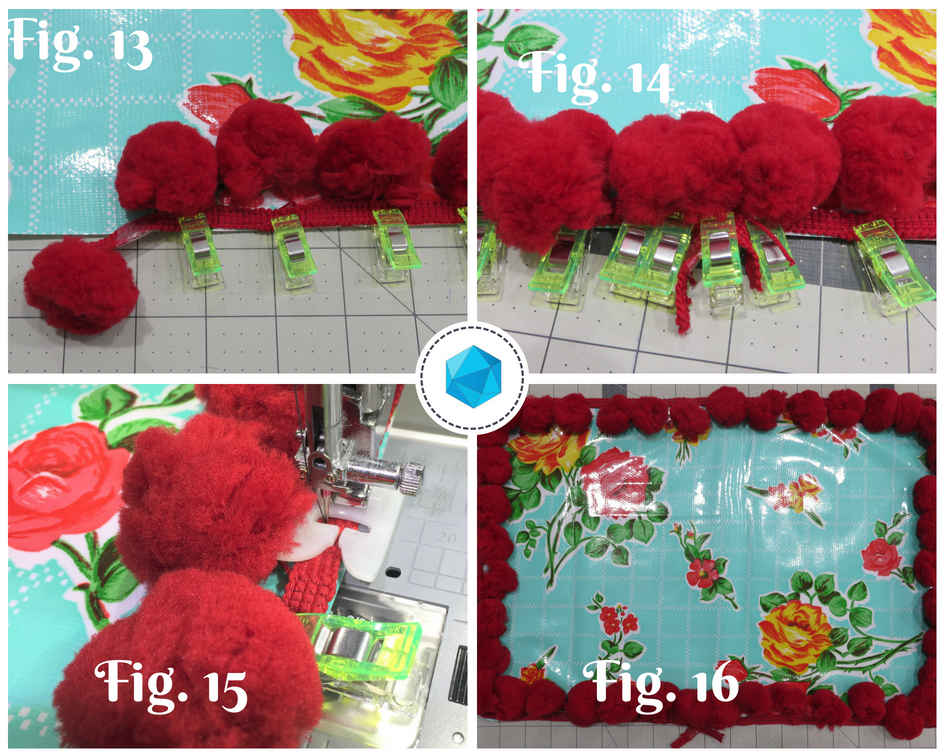
  4. Set aside the zippered back of the pillow. Take the 13†x 19†piece for the pillow front and the jumbo pom pom trim. Place the pillow front RSU.  Starting in the middle of one of the 19†edges of the pillow front, align the edge of the trim with the edge of the oilcloth.  Trail the end of the trim off the edge of the pillow by 2-3 inches figure (see figure 13).  The pom poms should be pointing inward towards the center of the pillow front.
  5. Align the edge of the trim and the edge of the pillow front all the way around the perimeter of the pillow. When you reach the point you started the trim at, overlap the trim and trail the end off by 2-3 inches, as you did to start (see figure 14). If the jumbo poms overlap, carefully trim one or two away to decrease the bulk.  Use binding clips to clip the trim in place.
  6. Move the needle position to the left. Lengthen the stitch length to 5.0 for a basting stitch. Baste the trim in place with a 1/8â€-1/4†seam allowance (see figure 15). 

Sew the pillow together and finish

  1. Place the basted pillow front RSU (see figure 16).

    A collage of photos showing how to use the sewing machine.
    Figures 13-16
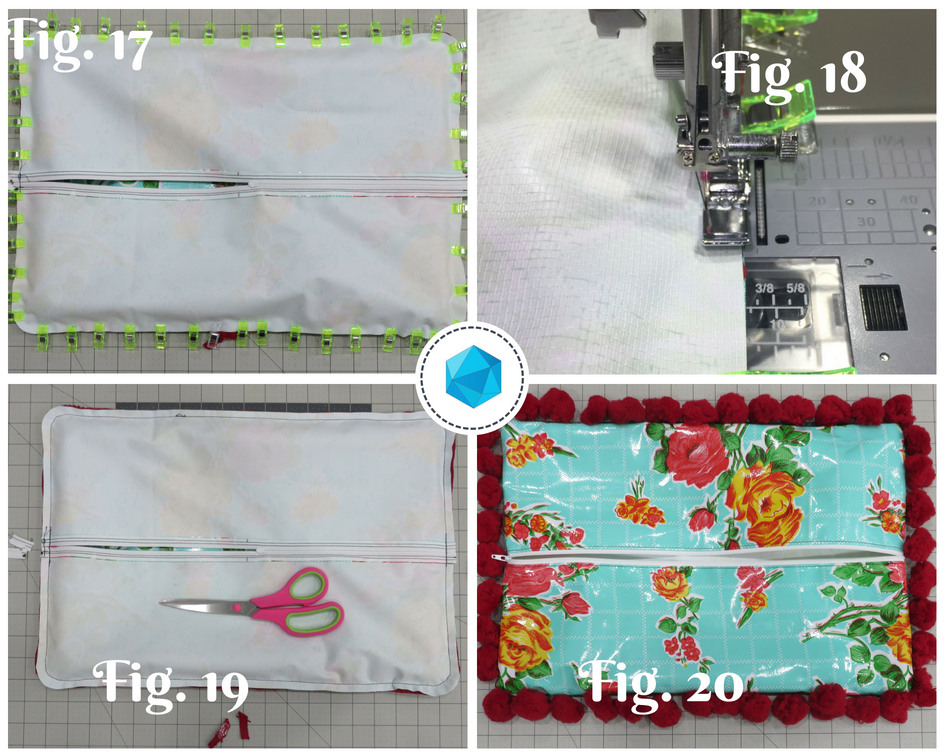
  2. Place the zippered back of the pillow right side down on top of the pillow front (see figure 17). Line up all the edges and make sure the pom poms are all facing in towards the center of the pillow. Double check to be sure the zipper is unzipped at least half way.  Use binding clips to secure all the edges together.
  3. Remove the Ultra Glide Foot and attach the zipper foot E to the presser foot. Keep the needle position moved to the left, as if you were sewing a zipper. Sew around the perimeter of the pillow using a 1/4†seam allowance (see figure 18).  Double check that none of the pom poms are getting caught in the seam allowance while you are sewing.
  4. Use a pair of scissors to trim away the excess ends of the zipper so the ends are flush with the pillow edges (see figure 19).
  5. Turn the pillow right side out and carefully push out all the curved edges (see figure 20).

    A collage of photos showing how to use the sewing machine.
    Figures 17-20

Tip:  Oilcloth has little to no stretch, unlike cotton fabrics you might be used to working with.  A zipper closure helps to keep seams sewn together versus using an envelope closure.  Be careful to not stretch the fabric when inserting the pillow form.  For a fully weather-resistant pillow, you can opt to sew this pillow without the ball fringe trim.

  1. Insert the 12†x 18†pillow form and use to liven up your patio!
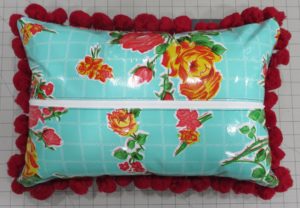
    A pillow with red flowers and blue squares on it
    Finished Pillow!

    Now get out there and party with your new DIY outdoor pillow 😉

Posted on 1 Comment

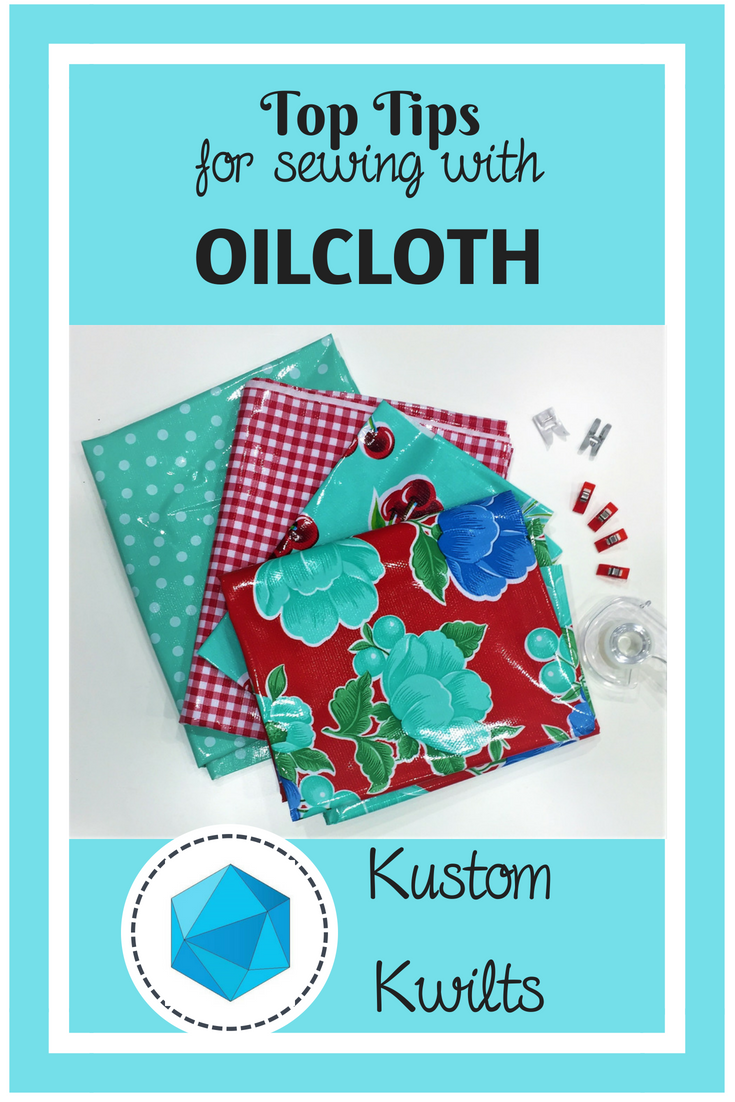
Top Tips for Sewing with Oilcoth

A close up of three different fabric swatches


So I know what you’re thinking…this blog is called “Kustom Kwilts”…what gives with the oilcloth?

There are so many skills in sewing and quilting that can be transferred to other things-garments, bags, household and decor items.  If you can sew a straight line, there are so many other amazing things you could be creating if you’re willing to do a little exploring.  I just released my new Mamacita Tote pattern, which is a perfect fit for using quilting cotton AND alternative fabrics!  The pattern suggests using oilcloth for the lining, and I don’t want to leave you hanging on how to do that (you can also use quilting cotton).  I love to quilt, but I also adore sewing clothing and bags.  I hope I can share some of that love with you!

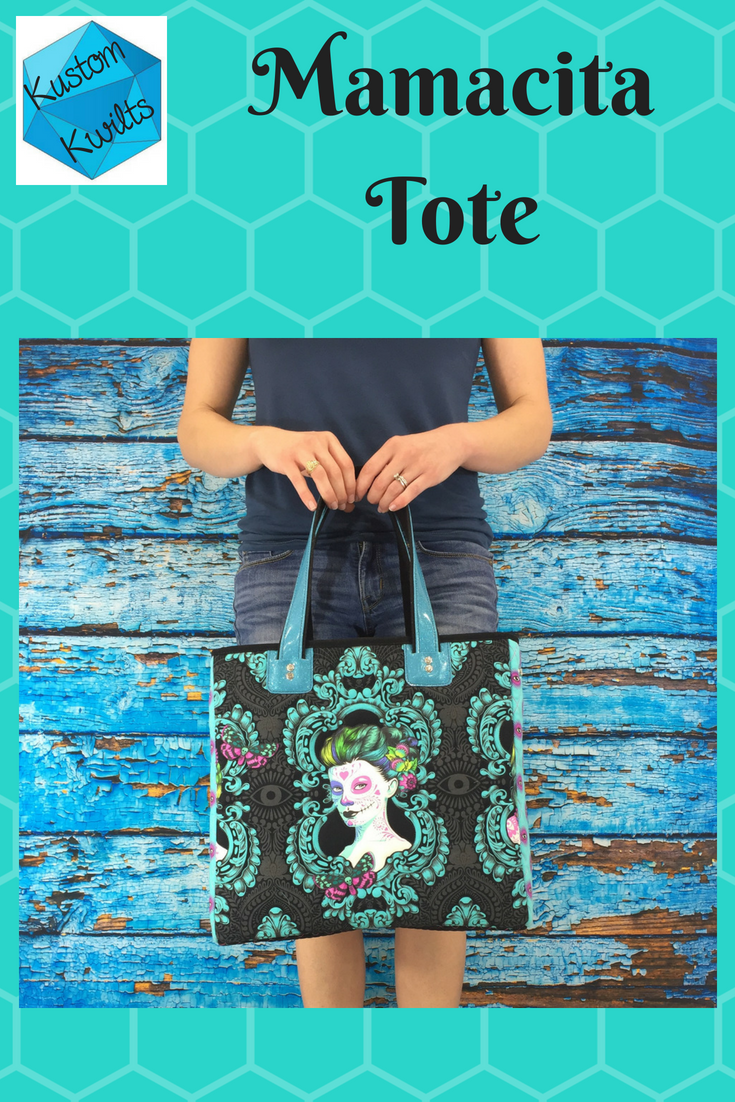
A woman is holding onto a bag with a picture of a girl.
Mamacita Tote in Quilting Cotton

What do I mean by alternative fabrics??  I’m talking about vinyl, leather, faux leather, and one of my personal favorites, OILCLOTH.  I’d love it if you were willing to read on and open yourself up to some great new possibilities for yourself!

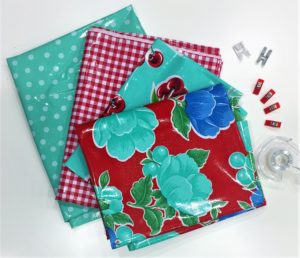
A table with some fabric and some clips
Some of my favorite oilcloth prints 🙂

Let me break it down for you:  A lot of the things you need to know about oilcloth also goes for other vinyl fabrics and faux leathers.  Here are some things you need to know before buying your first yard of oilcloth–

  • It’s water resistant/doesn’t absorb water.
  • It’s relatively inexpensive.
  •  It is super-duper easy to clean.  All you need is a wet paper towel and you can wipe off pretty much anything.
  •  It doesn’t fray.
  •  It’s more stable than quilting cotton, so most of the time it doesn’t need extra interfacing when used in bags.
  • When you use it as a purse lining, it wipes clean and is SO easy to maintain!

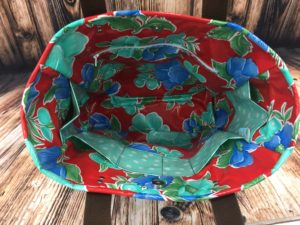
    A close up of the inside of a bag
    Mamacita Tote with an Oilcloth lining

I’m sure I’m leaving a few important things out, but these things alone are pretty fantastic.  There are some things you’ll want to know about sewing with oilcloth and what you want to do a little differently than if you were sewing with regular quilting cotton.

Here are my Top Tips for sewing with OILCLOTH~

  • Don’t ever use an iron to get the wrinkles out!  You will melt the fabric, and more than likely ruin your iron.  I like to either use a blow dryer on low heat to relax wrinkles , or lay the fabric out in the sun on a flat surface for a few hours (I live in Texas, so sometimes it doesn’t take long!)
  • The holes your needle makes in the fabric are permanent.  That means you want to use a longer stitch length (somewhere around 3.5) so you have less perforations in the fabric.  If you’re using a teeny tiny stitch length, your needle is making a ton of holes that’s making your fabric weaker.
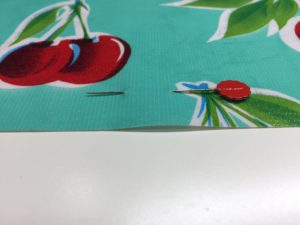
  • Don’t use sewing pins!  The holes they make will be permanent.  When securing oilcloth, use clips instead of pins.

    A close up of the cherries on a table
    Pins and oilcloth are a big No-No!  Don’t do it!
  • Use a Teflon or non-stick sewing foot to help the oilcloth slide under your foot with ease.  If you don’t have a Teflon foot, you can also stick a piece of satin scotch tape under your sewing foot, and that will help ease the fabric instead of sticking to it.  You can also use tissue paper between the presser foot and the oilcloth, then tear it away when you’re done.
  • Since oilcloth is a little thicker than cotton, try using a slightly larger needle, like one suited for leather or denim.  If you try a smaller needle and it works okay for you, stick with it–because that means the holes the needle makes will be smaller :).

I buy all of my oilcloth at Jack’s Country Store (not an affiliate link).  It seems like an unlikely place to get it, but it’s a pretty fun site, and they have tons of options and cheap shipping.  Are you ready to try it?  Go ahead, be brave!  I have a total oilcloth addiction now, and it’s so easy to work with.  I’d love it if you gave it a go and shared with me how you used oilcloth in your next sewing project!  Happy sewing 🙂

Posted on

It’s finally here! The Mamacita Tote Pattern Release!!!

A woman holding onto a black bag with a picture of a woman on it.


Today is the official release day for the Mamacita Tote Pattern!  Hip hip hooray!!!  I’d love to tell you the story behind this pattern and why it’s so dear to me.

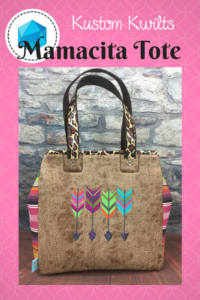
A brown bag with three arrows on it
Mamacita Tote with Serape

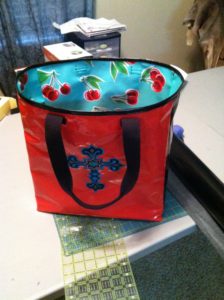
When I first started sewing, I loved to make things that were useful (that still applies today).  I love the feeling I get when I plan a project and sewing that last stitch, and the overwhelming feeling of pride I get when I know I made something that I love (or someone else will love).  I loved quilting, but I loved making bags even more.  I used to be an agriculture science teacher, so my purses were always getting filthy from being at stock shows and around livestock all the time.  I did some research on fabrics that were easy to clean, and I came across oilcloth.  Long story short, oilcloth is a wonderful fabric that doesn’t fray, wipes clean, and, in my experience, has a ridiculously long life.  So I’m going to show you my very first go at what evolved into today’s Mamacita Tote:

A red bag with cherries on it sitting on top of a table.
My very first oilcloth bag

It isn’t exactly swoon worthy, but I loved it.  I used this bag for about a week before I realized the importance of interfacing and stabilizer in a bag this size, and made from all oilcloth.  It didn’t stand up on its own and was pretty floppy.  Also, when you sew with oilcloth, the holes made by the needle are permanent.  That means if you don’t lengthen your stitches, you’ll get lots of perforations that will weaken the fabric.  Hence, sewing the straps directly to the oilcloth where all the weight will be stressing the fabric = terrible idea.  I still have this bag in my sewing room and love to bring it out and see how far my design has come since January 2013.  That’s right.  This pattern has been FIVE YEARS in the making.

I needed a better way to attach the straps and I wanted a more stable, sturdy bag.  So another year of trying out different things and I came up with using large drapery grommets as the strap attachments.  I really loved this, but after I got a package of grommets from the manufacturer and they were all cracked from shipping, it was time to rethink using them.  I couldn’t risk having one break and then go through the hassle of replacing them all the time.  Quality supplies are my top priority.

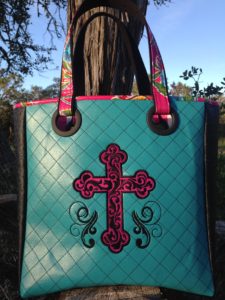
A cross on the front of a purse.
The second generation Mamacita Loca bag

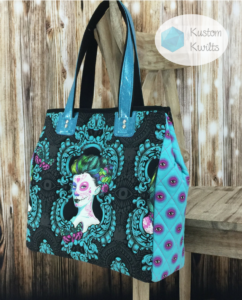
I really like embroidering the vinyl or quilting it (or both!) and adding unique embellishments to make each bag unique.  Late in 2017, I have the absolute best version of this bag that I could dream of.  I’ve made over 200 of these bags, and even sell custom Mamacitas on Etsy.  They have an updated strap attachment that is stylish and functional, and I love the look of them.  I recently made my favorite Mamacita Tote EVER from Tula Pink’s latest line- De La Luna in quilting cotton.  Although I really like using oilcloth for the lining since it’s so easy to clean, I love the bright and vibrant colors in Tula’s line, so I’ll sacrifice the wipability for that, and just try really hard to keep my 1.5 year old from spilling her milk in it 😉

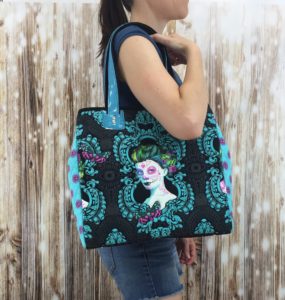
A woman holding onto a bag with a picture of a lady on it
Mamacita Tote in De La Luna

The Mamacita Tote has been my ultimate labor of love, and I know this pattern by heart.  I love that the lining keeps me organized with all the pockets, and that I can still be stylish or trendy with my fabrics.  Every time I make one, I remember how much I’ve grown as a sewist and how much I’ve learned from all my trial and error and fearlessness as a novel sewer.  I’d love to see your take on the Mamacita Tote and I hope you’ll share your creations with me (use the hashtag #mamacitatote or tag me @kustomkwilts) so I can see the amazing work you’ve done!

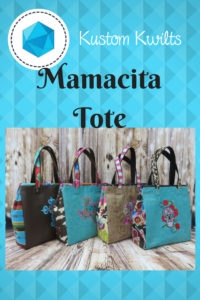
A group of bags that are sitting on the ground.
Embroidered Mamacita Totes