Posted on

Retro Groove Quilt Pattern

A poster of a room with a chair and table.

Today is the Retro Groove Quilt pattern release day! And you know I love nothing more than to have a little sale when I drop a new pattern…You can get the Retro Groove quilt pattern on sale through 5/16/2021 aaaaaand use the code GROOVY for 20% off everything else in my shop. Don’t forget to check out the free patterns, too.

A blue and purple background with the words " groovy 2 0 % off regular price store wide ".

Retro Groove Pattern Features

The Retro Groove quilt pattern features five different options, including baby, throw, twin, queen, and king sizes.  The Retro Groove pattern is fantastic for showcasing big, bold prints or using up those solids and tone on tone prints.  Retro Groove has some easy curves and I’ve made some supplemental videos that you’ll get access to when you purchase the pattern that walk you through each and every step. Here are some other fun things you get with the pattern:

  • Full size templates
  • An awesome coloring page and fabric amounts required for each size.
  • Backing assembly instructions for each size of Retro Groove are included. You don’t have to worry about doing any quilt math for your backings!
  • Colorful, easy to read diagrams and written instructions.
  • Detailed cutting diagrams AND a cutting checklist are included for ease of use.
  • Supplemental video to accompany the cutting chart.
  • Supplemental video that walks you through assembling a block & sewing curves, step-by-step.
  • The finished size options include the following:
    • Baby 54″ x 54″
    • Throw 63″ x 81″
    • Twin 72″ x 90″
    • Queen 90″ x 108″
    • King 117″ x 117″
  • Skill level is confident beginner to intermediate. If you haven’t sewn curves before, I would recommend stitching up a practice block with some scrap fabric before cutting into your gooooood fabric. The video and pattern steps will walk you through the curves.

Tester Retro Groove pics

The Retro Groove pattern testers came up with some amazing versions of this quilt. I can’t wait for you to see how versatile and all around awesome they are!

I’m so excited to see what you’ll come up with for your version of Retro Groove! I’ve been itching to make another version with some really big prints that are hard to use in other quilts with smaller blocks. You can see in Margo’s tester quilt that big prints look pretty awesome in those squiggly curves! Don’t forget to share your makes (I want to see those fabric pulls too!) on Instagram with #retrogroovequilt . Happy sewing!! -Joanna

Posted on 6 Comments

Cheeky Churn Dash Quilt Along – Official Post

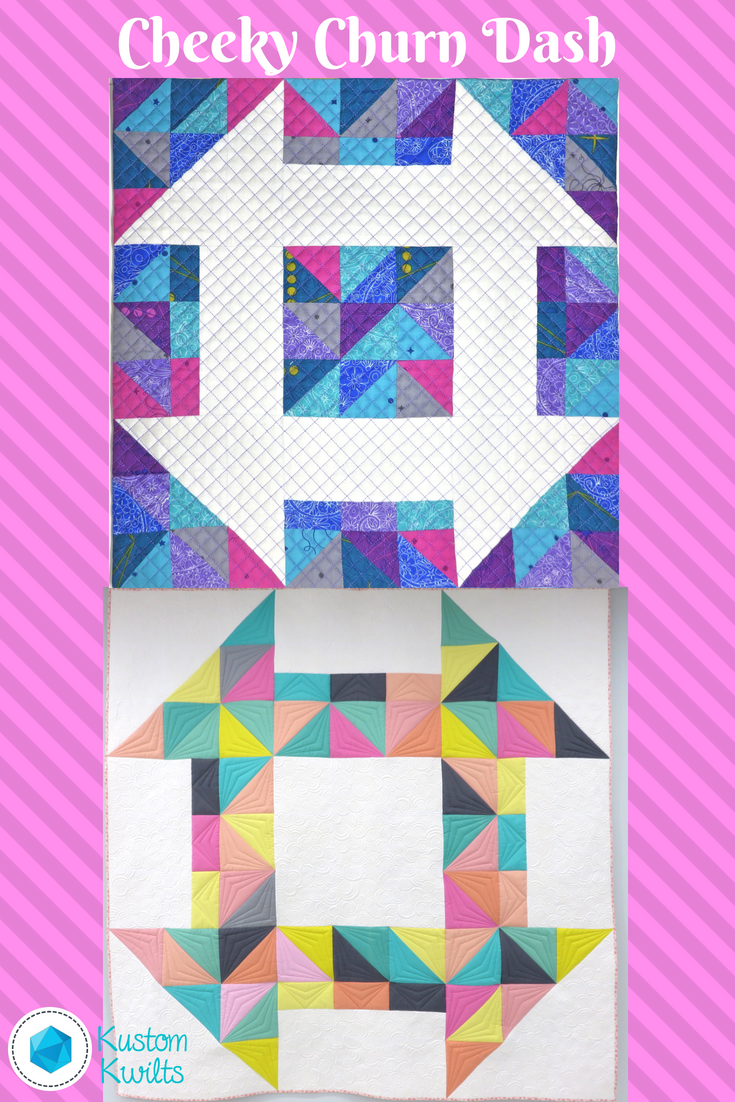
A quilt with colorful squares and triangles on it.


I’m so excited to announce the Cheeky Churn Dash Quilt Along!

I’ve been wanting to host a quilt along for a long time now, and I thought the Cheeky Churn Dash would be the perfect pattern to make!  You can RSVP for the quilt along to sign up for weekly updates and get insider tips and tricks with bonus material.  I love quilting, but it’s so much more fun to make a quilt with a fun group, right?

DATES

September 15, 2018 – November 16, 2018

Why join a quilt along?

I don’t know about you, but sometimes when I start a project, I need a little more motivation to finish.  Sewing with a group of quilters and sharing our progress together will give you inspiration and answer any questions you might have while making your quilt.  I like to know when I make a pattern that I’m going to have some help, and quilt alongs are a great way to get that support!  This quilt along will take place on Instagram using the hashtag #cheekychurndashquiltalong.  Use this hashtag when you post your weekly progress so others can see your awesome progress (and you’ll be able to see what everyone else is doing)!

Also, you might be thinking…good grief.  This is right at the beginning of the school year?  Why???  I know.  I was a high school teacher in my past life.  I get it.  I planned this quilt along with that in mind–I know everyone has busy schedules.  There’s a catch up week included in the quilt along, and I’ve divided the steps up into very doable tasks, even if you have a very limited schedule.

The Cheeky Churn Dash Quilt

You can click over to the original Cheeky Churn Dash Post to read more about it and my inspiration for making this quilt.  I just finished making another Cheeky Churn Dash with Alison Glass Sun Print 2018, and I’m loving the gem tone colors in that one!  This pattern is great for showing off your favorite fabric collections or going purely scrappy.

A quilt with colorful squares and triangles on it.

Not sure you have the skills to make this quilt?

That’s a question I used to ask myself all the time when I started quilting.  If you are able to sew a consistent 1/4″ seam allowance and cut your fabrics fairly accurately, you’ll be fine!  And if you aren’t comfortable with those things, you’ll never learn if you don’t try.  6 years ago, I didn’t even know how to thread a needle, much less use a rotary cutter!  Quilt alongs provide great community for asking questions and discovering new tips and tricks you might not have known before.

What will you learn?

You’ll get to practice your 1/4″ seam allowance AND I’m going to show you Beth Helfter’s Accordian Sewn HSTâ„¢ method for sewing half-square triangles.  It is an absolutely BRILLIANT technique that you’ll find yourself wondering how you ever did without.  You can always use your preferred method of piecing HSTs, as well.  You’ll also get tons of inspiration from other participants in the quilt along.

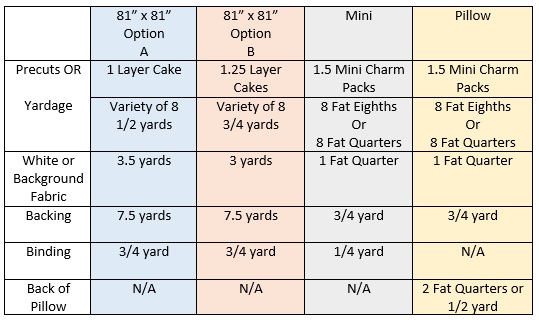
What will you need?

Fabric Discount!

Jennifer at Knotted Threads on Etsy has joined in the Quilt Along fun to bring all Cheeky Churn Dash QAL participants a 10% discount on fabrics purchased from her shop!  She has a great selection of current and modern fabrics, so you’ll want to take advantage of this :)  Use the coupon code: CHEEKYCHURNDASH at checkout.

Schedule September 15-November 16, 2018

September 15-21 Week One:

RSVP for the quilt along, gather your pattern, fabrics, and materials and introduce yourself using the hashtag #cheekychurndashquiltalong.  I’ll be randomly picking one winner from week one (you have to post on instagram with the hashtag) to win an awesome prize!

September 22-28 Week Two:

Starch fabrics if needed (you won’t need to do this if you plan on using Beth Helfter’s Accordian Sewn HSTâ„¢ Method.  Cut all fabric according to the option you are making.

September 29-October 5 Week Three:  

Draw one diagonal line on the backs of the squares we’ll be using to make half-square triangles if using the Accordian Sewn HSTâ„¢ Method.  Assemble the half-square triangles and press.

October 6-12 Week Four:  

Square up the half-square triangles to 9.5″ square for the quilt size and 2.5″ square for the mini and pillow sizes.

October 13-19 Week Five:

Assemble sections 1, 3, 7, and 9.

October 20-26 Week Six:

Catch up week if you’re behind!

October 27-November 2 Week Seven: 

Assemble sections 2, 4, 6, and 8

November 3-9 Week Eight:

Assemble section 5

November 10-16 Week Nine:

Sew the quilt top together!

Location

This Quilt Along will take place primarily on Instagram, so be sure to follow along on Instagram and use

#cheekychurndashquiltalong

to participate!  Instagram now lets you follow hashtags, so you can get inspiration and encouragement from everyone participating.  Don’t worry if you don’t have Instagram.  There will also be weekly blog posts with photos and tips, and be sure to sign up for the quilt along e-mail updates! (Just a note–there’s a double opt in for the updates, so be sure to check your spam folder, and add me to your address book to make sure you get the updates)

JOIN THE QUILT ALONG UPDATES!

Rules

There aren’t many rules for this quilt along, unless you want to be considered for giveaway prizes.

There will also be some awesome giveaways sprinkled throughout the quilt along, so be sure you post one picture to your Instagram account of that week’s progress before the next week’s starting date in order to qualify for prizes (see the schedule above for specific dates).

There will be one grand prize winner at the end of the quilt along for one lucky person who completed and posted their quilt top (must be the 81″ x 81″ version) by November 16, 2018.  You’re still in the running for the grand prize, even if you missed posting throughout the quilt along, so long as you post your finished quilt top to your Instagram account by November 16.

The giveaway prizes are only for US participants and cannot be shipped outside the US.  Sorry!

Thank you for joining in the fun, and I can’t wait to start sewing with you!  I’ll see you in the quilt along!

-Joanna

Posted on 2 Comments

Wonky Logs Quilt Release!

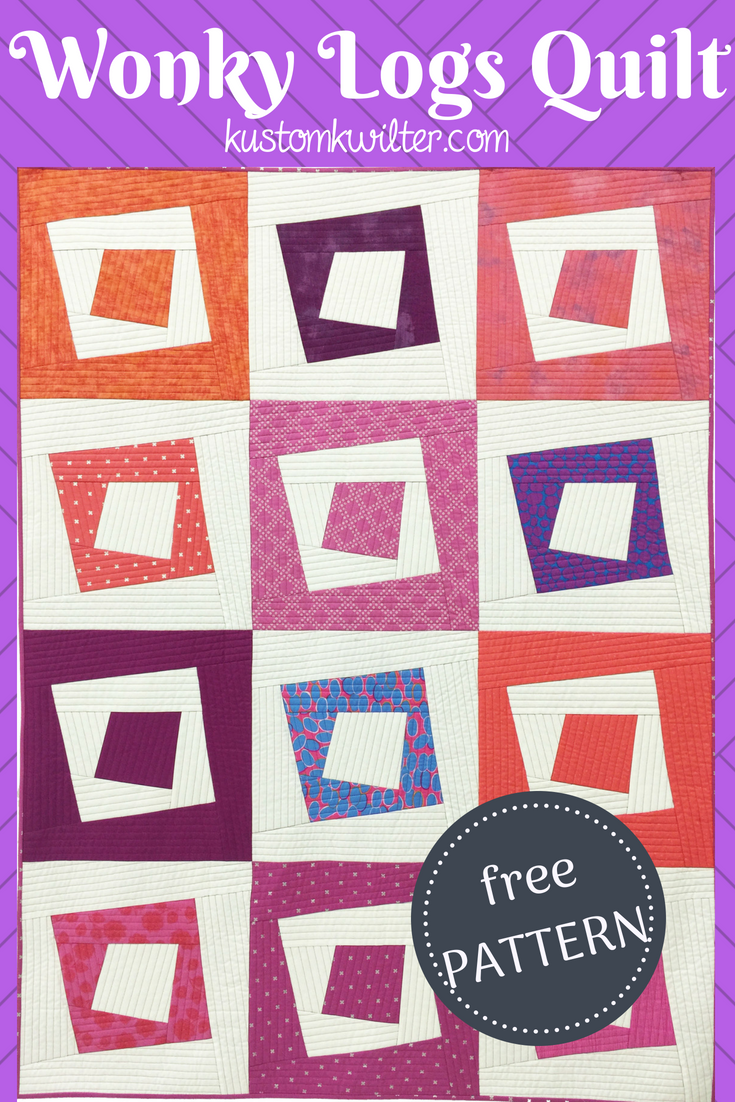
A quilt with squares in the middle of it.


Who loves free quilt patterns??  I do!  Today is the release day for the Wonky Logs Quilt Pattern (if you subscribe to my newsletter, you got access early!), and I can’t wait to share it with you!

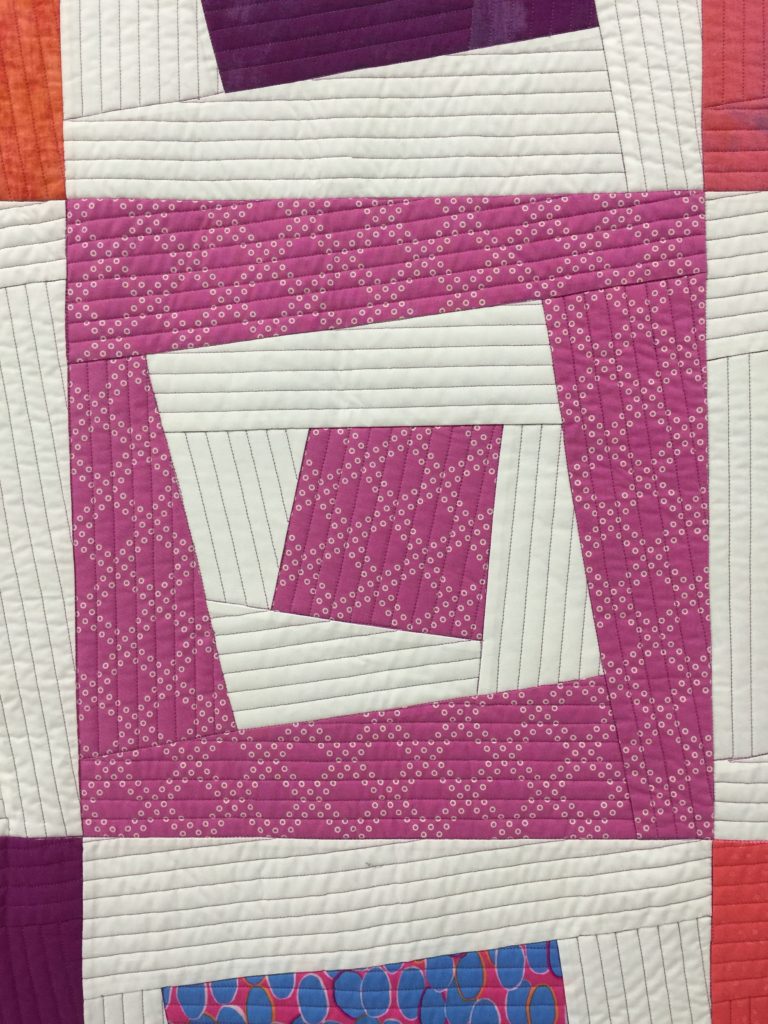
A close up of the wonky logs quilt pattern
Wonky Logs Quilt Pattern

I don’t know about you, but when I started sewing a few years ago, I had absolutely zero intention of ever making clothing.  The thought of doing so actually made me break out into a cold sweat.  (I promise I’m getting to the quilt–hang in there for just a hot minute!)  I can still remember sitting on my mom and dad’s bed, worrying over a dress pattern that my mom desperately wanted to make for me.  We (I say we, but I was mostly there for moral support 😉 had managed to cut the pattern pieces out of the flimsy tissue paper, and pinned it to the fabric that was destined to be the dress.  I honestly can’t recall what happened after that, but I don’t think were able to finish it.  I remember the feeling of frustration and not understanding the horribly written pattern that was intended for beginners.  It was even more frustrating because my Mamaw was an excellent seamstress, and my mom didn’t inherit those skills, or really want to.  Her calling is gardening and home making, and she does it all perfectly.  My point in telling you this story is that it left me with a bad taste in my mouth for sewing.  I didn’t attempt any kind of sewing related feat, with the exception of cross stitch, for the next 20 years.

A close up of the square quilt pattern
Some angled straight line quilting on my Wonky Logs Quilt

Fast forward 20 years, and I’ve gotten the basic knowledge down of quilting.  I joined a modern quilt guild and went on a retreat where many of the members were making their first (or second or third) garments.  I decided they could have it and waited another couple of years before finally sewing my very first School House Tunic by Sew Liberated.  It wasn’t pretty, but I wore it with so much pride, you’d have thought it was Chanel (the pattern is great–it wasn’t pretty because my fabric choices were A-W-F-U-L).  That feeling of accomplishment and pride–isn’t that what we all get when we complete a new challenging project?  I want to encourage you to broaden your horizons and challenge yourself to take on the sewing tasks you think you’re not good enough for.  That’s how I felt with garments.  And now I am obsessed with sewing my own clothing and clothing for my daughter and husband.  I’d like to help you get there.

Okay, that was a long intro, but I needed to tell you WHY I wrote the Wonky Logs Quilt pattern.  It’s free.  It’s fat quarter friendly!  It’s a quilt pattern you can put together with your serger.

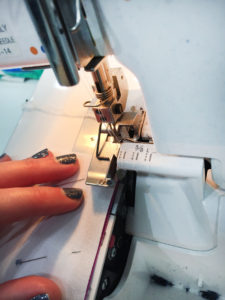
A person using a sewing machine to sew fabric.
Bust out your serger!

WHAT???  Yup.  (Don’t run away just yet–you can piece it with your sewing machine too)  If you don’t have a serger, no worries.  You can still use the pattern with a traditional sewing machine and a 1/4″ seam allowance just like normal.  If you DO have a serger, and it’s sitting in the corner of your closet with old raincoats and Halloween decorations, then it’s time to pull that puppy out and dust it off.  Give it a little cleaning, find the manual and give it some oil, if necessary.  Think of this quilt pattern as your gateway pattern to garments.  You can still have fun picking out your fabrics and making a really gorgeous quilt, but you can do it while getting to know your serger a little better.  Starting to work with “wovens” with your serger will take a lot of the intimidation out of it because your fabrics won’t be stretchy like knits are.  I’ll be posting more on some fun garment construction and sharing some tips with you along the way, but for now–grab your free copy of the Wonky Logs quilt pattern and gather your fabric and have fun!!!

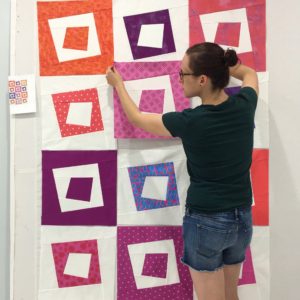
A woman is standing in front of a wall with squares on it.
Picking your fabrics is half the fun!

Posted on

RJR What Shade Are You? Blog Hop

A quilt that is made of blue and purple fabric.


What Shade Are You? Blog hop

Hi!  I’m Joanna Marsh from Kustom Kwilts.  I live in the Texas Hill Country with my husband and baby girl.  I have been so captivated by all of the #whatshadeareyou projects and the RJR Cotton Supreme Solids, and I’m so excited to share mine with you on the RJR blog today–The Dreamer’s Star Quilt!  You can check out my instagram @kustomkwilts to see what I’m up to.  I’m so excited to be featured on the RJR blog today with their amazing cotton supreme solids!  Check out the What Shade Are You? posts for some amazing inspiration here.

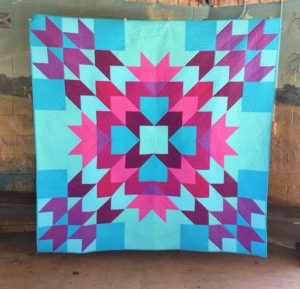
A quilt that is made of blue and purple fabric.
Dreamer’s Star Quilt in RJR Cotton Supreme Solids

A little background on what brought me to quilting: In my previous career, I was a high school agriculture science teacher.  My principal’s secretary was a quilter, and I mentioned to her that I was interested in starting to sew.  I remember her telling me the secret to quilting was a consistent quarter inch seam allowance–and that as long as I remembered that, I’d be okay!  I found a beginner’s quilting book in my teacher mailbox one morning with a sweet note of encouragement from Donna Jo (principal’s secretary), and that was how my sewing journey began.  Both of my grandmothers were amazing seamstresses, but I had never learned to sew from them.  One thing I’ve learned about the sewing community is that it’s full of people who want to share their love of the craft with others, and I love being part of such a giving community!

In 2016, I left my teaching job and committed to sewing and quilting full time.  At my 9-5 job (really more like 5-9), I would find myself thinking about sewing in spare moments.  The Dreamer’s Star Quilt is a quilt I drew while dreaming of doing the thing I love as a career, and I knew I wanted to use my favorite pattern for the What shade are you project.  The design reminds me of the toy kaleidoscopes that produce different images just by turning the end, and how the images can be so bold and impactful.  I love quilts that have a large central design and aren’t necessarily block based.   I also remembered that when I started quilting, I struggled with selecting lots of fabrics to coordinate within a quilt, and I wanted a design that would look great with a two-color scheme, but could also make a big impact with lots of colors.  This is the original quilt that I used Michael Miller’s painter’s canvas with.

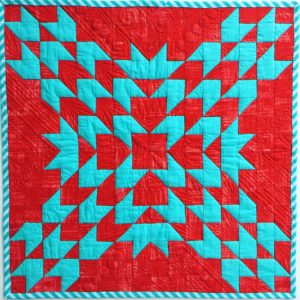
A red and blue quilt with a pattern of arrows.
Dreamer’s Star Mini Quilt

I knew that the Dreamer’s Star Quilt would just glow with RJR Cotton Supreme Solids, and wanted to use colors that would reflect the gorgeous sunsets that we sometimes see out in the Texas Hill Country.

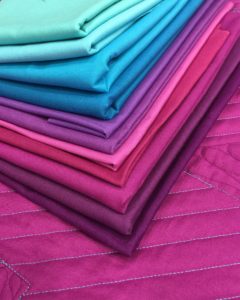
A stack of folded fabric in different colors.
RJR Cotton Supreme Solids

There are so many amazing colors to choose from and I went with 11 of my absolute favorites:

292-Turks and Caicos

279-Purple Haze

274-Riviera

317-Jacaranda

391-Robin’s Egg

328-Bora Bora

422-Plum

371-Melody

333-Bougainvillea

287-Raging Ruby

378-Lilac Festival.

A close up of different colored fabrics on the floor
Look at those yummy colors!

While I was browsing through the color card, I couldn’t help but chuckle to myself about the clever names of the colors.  Some of my color selections might tell you that I’m ready to take a vacation 😉

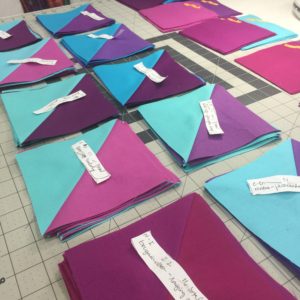
Piecing the quilt together was a breeze with lots of simple half-square triangles and chain piecing.

A group of folded paper books on top of each other.
I love these color combos!

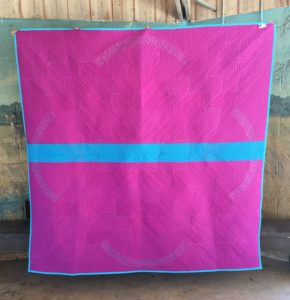
I love to use several shades of similar colors to create a little depth and dimensions to a quilt.  For the backing I used Bougainvillea with a strip of Bora Bora down the middle, and Turks and Caicos for the binding. I loved seeing all the colors melt together, but still be distinctly different, just as in a sunset.

A pink and blue blanket sitting on top of a wooden floor.
Bougainvillea with a strip of Bora Bora really make the quilt back glow.

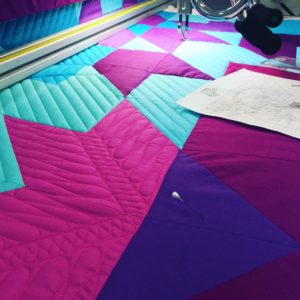
Once the top was completed, I loaded it on my longarm and quilted some simple straight lines with rulers and added some free motion accents in coordinating Glide threads.

A quilt being made on the sewing machine.
Quilting the quilt

I love using Quilter’s Dream Wool to keep the quilt lightweight–remember, I live in Texas–but still let the quilting pop.  I had a lot of fun getting some pictures at the Cibolo Wilderness Trail in Boerne, Texas.  It was an absolutely gorgeous day and my husband and mom were my professional quilt holders.

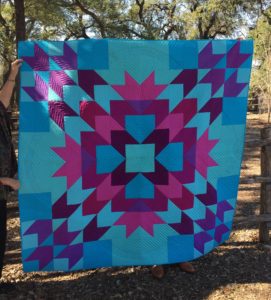
A quilt hanging up in the woods

Check out other versions of the Dreamer’s Star on Instagram with #dreamersstarquilt and you can pick up your copy of the pattern here.  The pattern comes with three different size options, and the color combinations you could choose are limitless!  I had so much fun making this quilt and drooling over the Cotton Supreme Solids.  Thanks for joining me in this quilting adventure, and a huge thank you to RJR for allowing me to participate and for the inspiration they bring with the #whatshadeareyou blog hop!

Quilt Details:

Pattern: ‘Dreamer’s Star’ by Kustom Kwilts

Fabrics: RJR Cotton Supreme Solids (full list above)

Backing: Bougainvillea and Bora Bora RJR Cotton Supreme Solids

Binding: Turks and Caicos RJR Cotton Supreme Solids

Quilting: Long arm quilted by Joanna Marsh of Kustom Kwilts

Finished Size: Approx. 80″ x 80″

Posted on

Love Patchwork and Quilting Issue 48!

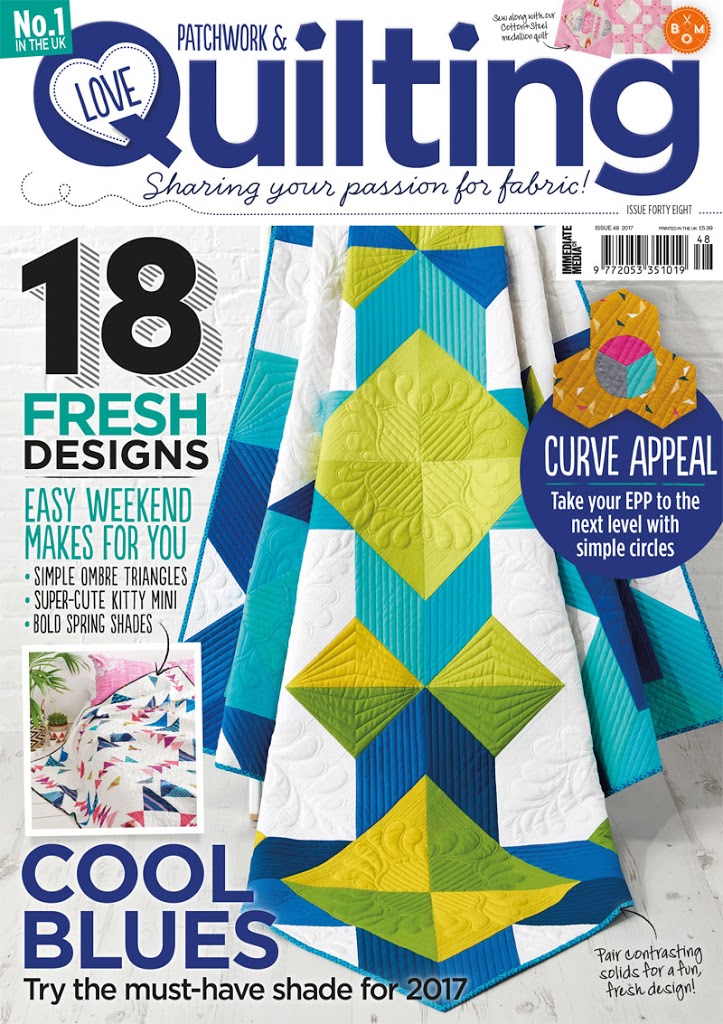
A magazine cover with different designs on it.


A magazine cover with different designs on it.
photo provided by Love Patchwork and Quilting
fabric for quilt provided by Robert Kaufman Fabrics

Have any of you ever made a goal so outrageous that you don’t ever really even consider it to be a possibility?  You might still work towards that goal, but the hopes that it will come to fruition aren’t there.  That’s exactly how I feel about this post. I always looked at the quilts and projects in this magazine and was blown away by the talent and variety.  I’m BEYOND excited (so excited I’m yelling in all caps!) to say that this quilt I submitted to Love Patchwork and Quilting Magazine made the cover!  When I started sewing a few years ago, I joined the San Antonio Modern Quilt Guild, and someone mentioned that LP& Q was the only magazine they bought.  So I jumped on that train.  I had never heard of it, because I was very new to quilting, let alone sewing.  I was tired of the traditional color palettes that are represented in other quilting magazines.  It was definitely love at first sight, and I subscribed to it immediately.  (And ask for it for Christmas every year!)

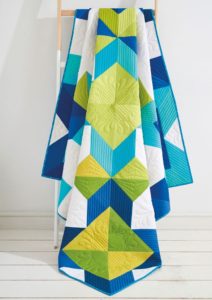
A quilt that is made of blue and green squares.
photo provided by Love Patchwork and Quilting
fabric for quilt provided by Robert Kaufman Fabrics

I’m super excited about the photography of this quilt!  I’ve never had a quilt professionally “shot” before, so it is thrilling to see the results (and know that I have a lot to learn when it comes to my own quilt photography 😉

This quilt is something I worked really hard on, and for a long time.  I am so thankful to the amazing people at Robert Kaufman Fabrics for providing the Kona Cotton Solids that were used to make the cover quilt, and for the opportunity from LP&Q to share my quilt!

I did some custom quilting and a little bit of ruler work on the longarm to finish off the quilt.  I hope you’ll check out the quilt in issue 48 of Love Patchwork and Quilting!  Thanks for letting me share my happy news with you 🙂