Posted on 2 Comments

Quilting Tips – How to plan your quilting designs

A patriotic quilt is displayed on the cover of a book.


Happy 4th of July!  I hope you’re getting to enjoy family and friends and all the great festivities that the 4th brings!  In my neck of the woods, it’s hotter than Hades and we haven’t had a decent rain shower since March, so we may not be enjoying tons of fireworks this evening…we’re definitely praying for the little rain shower than is a minor possibility tonight.  Now lets talk quilting tips and how to tackle planning your quilting design!

I recently got to quilt an American Wave Quilt (pattern by Lisa Moore of Quilts with a Twist) for my mother-in-law and thought it would be a good opportunity to share some of my quilting tips for adding texture and movement to your quilt tops and planning your overall quilting design.  Even though I love bright colors and modern-traditional quilt designs, I have a great appreciation for traditional colors and patriotic quilts.  Some of the first quilts I made when I was learning to sew were with traditional, warm colors and American designs.  I’m using this quilt to talk about the 8 things I usually think about before I start quilting, but these tips can be applied to any quilt top.

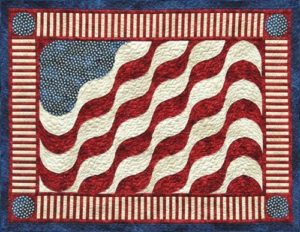
My MIL didn’t follow the pattern exactly as shown below, but this is the original pattern, by Lisa Moore, pictured below.  If you’re interested in purchasing the pattern, you can grab a PDF copy at Quilts with a Twist (this is not an affiliate link, I’m just crediting the original designer in case you want to purchase the pattern).
A quilt with an american flag design on it.
American Wave Quilt Pattern by Lisa Moore – Photo from Quilts with a Twist Pattern Page

Here are my top quilting tips for devising your quilting plan:

  1.  Consider the quilting as a design element of your quilt.
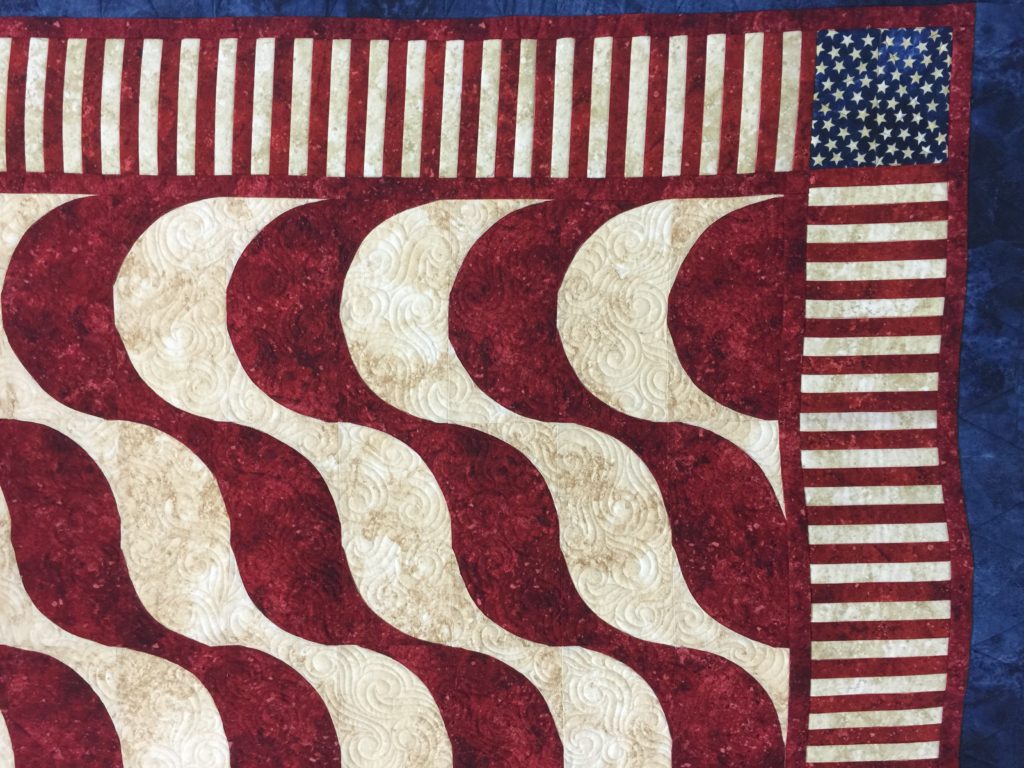
    When you get a quilt top completed that has so much work put into it–much as this one does–it’s important to consider the quilting as another design element and not an afterthought.  In my opinion, a basic meander or other edge to edge can take away from the overall impact of the quilt.Since our goal was to enhance the movement already present in the piecing, we decided to stitch in the ditch, quilt swirly waves, add some stars to go with the theme, and quilt piano keys on the striped fabric border.

    A close up of the quilt pattern
    SID and swirly waves
  2. Examine the layout of the quilt and follow the lines in the quilt to enhance the design.This quilt design already shows lots of movement in the piecing.  I opted to stitch in the ditch on the waves and within the different fabric colors, I quilted swirly waves.  Another great quilting motif would have been to echo the wavy lines within the quilt to complement the already wavy lines.The red and white striped fabric wasn’t exactly stitched in the ditch (SID), since it was one piece of fabric and not pieced stripes, but I followed the lines of the colors and did a faux SID to make it appear that it was pieced.
  3. Consider thread color.
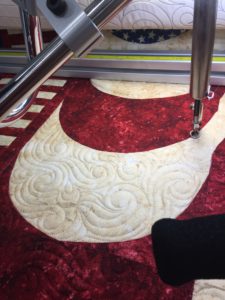
    I used three different thread colors on this quilt–red, cream, and blue.  I matched the thread colors to the fabrics I was quilting and changed them often.  This isn’t always necessary, but it’s important to consider before you stick with just one thread color for the entirety of the quilt.  If you want the quilting to really pop, then using just one of those colors–like cream would be a great idea.  The cream will blend into the cream colored fabrics, but contrast highly against the darker values of the red and blue.

    A machine cutting fabric with a large circle.
    Blending thread

    Ask yourself — Do I want my quilting to blend or POP?  If your goal is great subtle quilting, then select your thread colors to blend or melt into the fabric.  If your goal is high contrast quilting that will POP against your fabric, select thread colors that contrast with the fabric.
    Also, if you’re a beginning quilter, matching your thread colors to your fabric colors will help conceal any minor mistakes you might make.  This is a great confidence building technique to get you started on your quilting journey!

  4. What color is your backing?
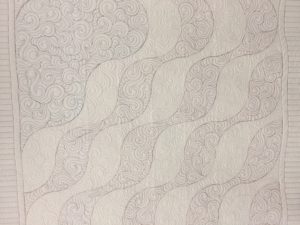
    Some people prefer the quilting to blend into the backing, but in this case, the red and blue threads really pop on the cream colored muslin that was used for the backing.  It’s a good idea to think about your backing and what the quilting will look like on the back prior to starting quilting.

    A close up of the fabric for a mattress.
    Backing
  5. Look at your borders (if there are borders).
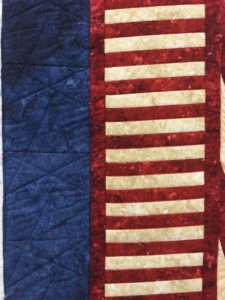
    So there were two “borders” on this quilt top.  The outer border was a dark navy blue, and the inner border was the red and white striped fabric.  I quilted stars that connected to each other in navy blue thread on the outer border and the faux SID on the striped fabric.  It’s a little difficult to see because of the thread matching, but it’s there :).  Select quilting motifs that will complement your border designs.

    A close up of the american flag quilt
    Border designs
  6. Think about the theme of the quilt.
    In this case, the theme is pretty straightforward.  It’s obviously a patriotic themed quilt, so think about designs that go with that theme.  Stars, stripes, waves, etc. would all be good choices to go with this quilt top.  maybe you have a quilt top that has cats on it, and the cats are made from triangles–you could quilt triangle motifs in the borders, or a ball of yarn, or little mice.  Stars probably wouldn’t be a good choice to go with a cat quilt, so you’d want to pick something in theme with the quilt top.
  7. Evaluate the purpose of the quilt. 
    This will help you decide the density of quilting that is appropriate and what type of batting you may want to use.  If it’s a quilt that’s going to be a wall hanging, you’d probably want to use a stiffer batting, or maybe double batt with a puffy top like wool.  If the quilt is intended to be used often, you might select a poly-cotton blend  or 100% cotton-something that would stand up to being washed and laundered frequently.The batting you select might also dictate how far apart the quilting can be.  If you buy packaged batting, it will usually tell you how far apart the quilting lines can be (example-up to 8″ apart).  Keep in mind the denser the quilting, the stiffer it will feel.  A looser quilted quilt will be softer and drape better than a heavily quilted one.
  8. Stitch in the ditch might be a lot of work, but the payoff is worth it.
    I’m a big fan of SID.  I haven’t ever quilted a quilt with stitch in the ditch and regretted it, but there have been instances where I didn’t do it and wished I had.  It gives the overall quilt a more finished look (in my opinion), and a very polished look.

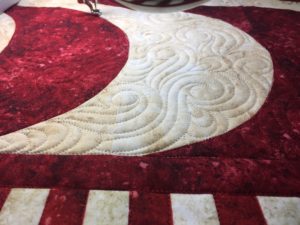
    A red and white quilt with a large moon on it.
    SID detail

    The overall idea is to think of your quilting plan and how it will affect the overall impact of your finished quilt.  These 8 tips are small things you can consider that will really impact your finished quilt.  I hope these tips are helpful in planning your next quilting project!  Have a safe and happy 4th, and happy quilting 🙂

Posted on

Ice Cream, You Scream Quilt FREE PATTERN

A cake stand with cupcakes on it and a microphone


Who wants a free Ice Cream, You Scream Quilt Pattern?  Well today is your lucky day!!!

You have to check out this adorable fabric line Michael Miller Fabrics just released. The line is called Ice Cream, You Scream and the colors are everything!  Also, there’s this border print that is just dying to be put in a quilt (or made into a little girl’s skirt!!), and nearly makes me swoon!  I got a chance to get my hands on this fabric to design a quilt for the release, and I’m not gonna lie…I spent a few hours just playing with the fabric and coordinating Cotton Couture.  It features sweet ice cream cones, sundaes, and the best stripes.  It reminded me of the 4th of July and ice cream socials and everything pure in the world.  The best part is, Michael Miller Fabrics is offering this pattern as a freebie–you can get your own PDF pattern download from their website.

A cake stand with cupcakes on it and a microphone
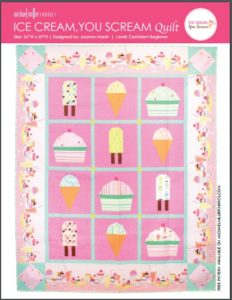
Ice Cream, You Scream Quilt – Picture from Michael Miller Fabrics website

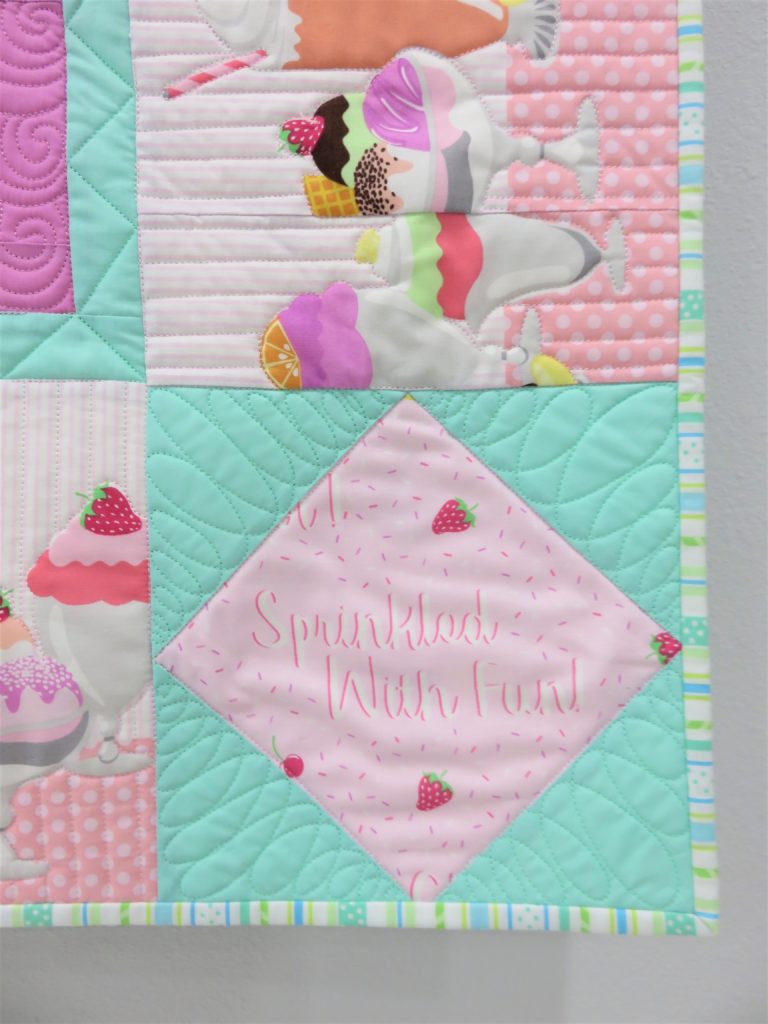
The pattern is for “confident beginners”, which just means you need a general knowledge of foundation paper piecing and fussy cutting.  I fussy cut the border pieces so the ice cream sundaes were centered along the center of the borders, and the cornerstones in the border were fussy cut to showcase the cute little ice cream phrases on the fabric.

I had a blast designing and piecing the quilt.  I had even more fun quilting it!  I used Glide thread (from Hab+Dash) and Quilter’s Dream batting in the quilt.  I used a few different colors of thread and matched them to the different fabrics.  Most of the quilting was handguided free motion quilting, with the assistance of straight rulers for the grids.

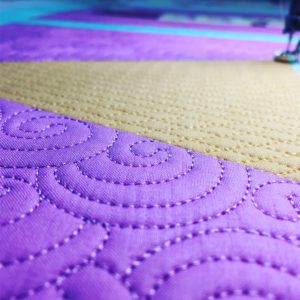
A close up of the quilting on a purple quilt
Ice Cream Cone Quilting
A close up of the quilt with cupcakes on it
Cornerstone block quilting

I’d love to see what you do with the pattern–the foundation paper piecing blocks are pretty quick to sew up.  Just remember to shorten your stitch length (I like to use 1.5) so the paper is perforated enough to tear away easily and print your paper piecing templates at 100%.  Then add your sashing and borders and voila!  Don’t forget to grab your free copy, and check out the pattern (pictured below).  Happy sewing!!!

A cake stand with cupcakes on it and a microphone
Ice Cream, You Scream Quilt

Posted on

Quilting Leslie’s Kaffe Fassett Quilt

A colorful striped pattern is shown in this image.


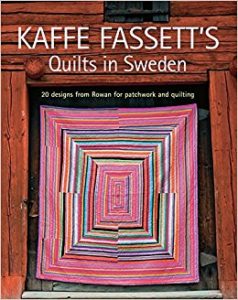
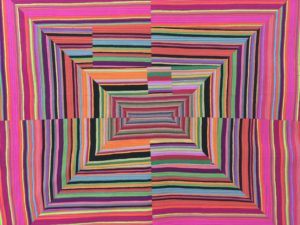
Man, oh man!  I had the honor of quilting this awesome Kaffe Fassett quilt by Leslie Tucker Jenison.  Leslie pieced her quilt based on Kaffe Fassett’s quilt pattern from the book Quilts in Sweden (pictured below-photo from amazon.com), using his fabric.  Leslie also pieced the backing using some awesome linen and polka dots.

A book cover with a picture of a quilt.

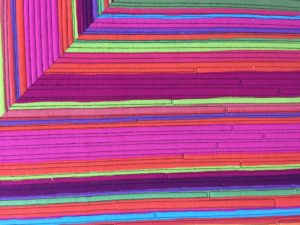
Leslie had requested some straight line quilting to follow the lines of the fabric pattern–I loved that idea.  Quilting a quilt like this using a concentric design can be a challenge on the longarm, and you sometimes end up advancing and rolling back the quilt on the frame back and forth, back and forth, back and forth, (did I say back and forth already?) etc.  To avoid doing that ONE MILLION times, I connected some of the lines, and I really liked the outcome of the quilting look.

A colorful wall with many different colored strips.
Quilting close up

The lines of this fabric are so amazingly deceptive and provide the illusion that this was painstakingly pieced.  I love the wonky look of the finished quilt and really found the design brilliant!  I have been wanting to do a stripe study (kind of like how some people do color or quilt block studies) for so long, and this made me move that up my priority list.  Someday soon I’ll start that project.

The thread used was Magnifico in black and batting was Quilter’s Dream Orient with Quilter’s Dream Wool layered beneath the quilt top.  This was quilted using electric channel locks on my Innova longarm (hand guided), and those electric channel locks make all the difference.  I recently upgraded and had those installed from the basic manual channel locks that come on the machine.

The difference is this:

Manual channel locks:

  1. walk to the back of the machine and engage the channel lock
  2. quilt a straight line
  3. stop the machine
  4. walk to the back of the machine and disengage the channel lock
  5. walk to the front of the machine and move to new point
  6. repeat 1-5 over and again

Electric channel locks:

  1. Push remote button from front of machine to engage channel lock
  2. Quilt a straight line
  3. stop the machine
  4. push remote button from front of machine to disengage channel lock
  5. move needle to new point
  6. repeat 1-5 as needed (and your legs are breathing a huge sigh of relief from all that walking you just saved yourself)

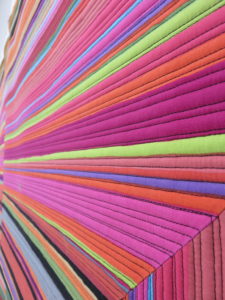
I digress.  Here’s some more amazing eye candy from Leslie’s quilt.

A colorful painting of an abstract design.
Leslie’s Kaffe Quilt
A close up of many different colored papers
Angled close up

If you’re interested in purchasing the book, you can check it out here on Amazon.


Posted on

San Antonio Modern Quilt Guild Mini Quilt Show

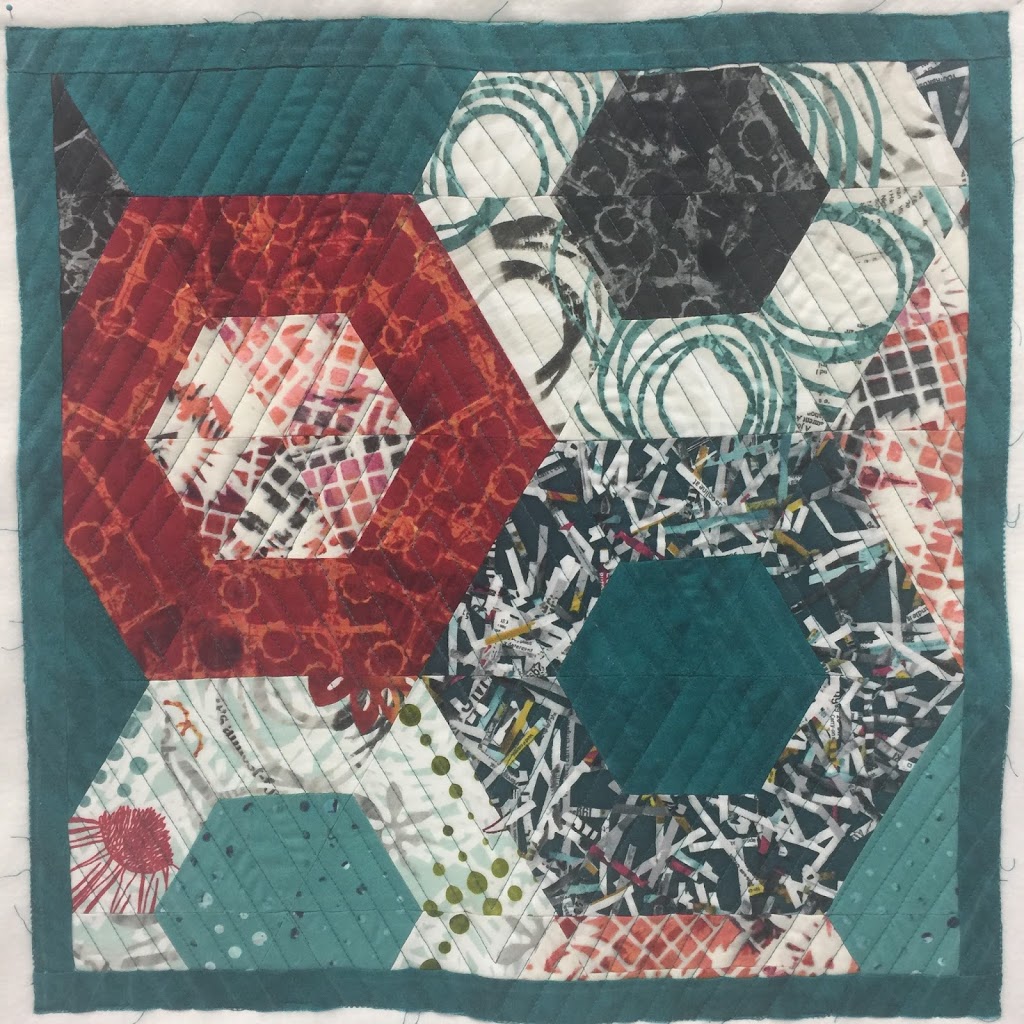
A small quilt with different colored hexagons on it


The guild I belong to recently held a mini quilt show/silent auction, where the members were challenged to make modern mini quilts measuring 16″ square to show and raise awareness for modern quilting and invite people to ask questions about what our guild does.  The event was graciously hosted by Sew Special Quilts in San Antonio, where they provided space for us to show the quilts and have our meeting after hours.  They were so awesome and have a great selection of quilting and sewing supplies, so if you’re in need and in the area, please show them some love!  

I already posted about the mini quilt I made two weeks ago (the double wedding ring mini quilt), but I wanted to share the other two quilts I worked on, in collaboration with Debra–a fellow member of the guild.  
The first quilt I quilted was pieced by Debra from yet another guild member’s inaugural fabric line (Leslie Tucker Jenison-Urban Artifacts by RJR Fabrics).  It’s a great design and awesome way to showcase a variety of great fabrics.  For this quilt, I just quilted some simple contrasting straight lines.  I think the fabrics and design of the mini are more prone to show better when the quilting design is simple.
A small quilt with different colored hexagons on it
Pieced by Debra B, fabric-Urban Artifacts by Leslie Tucker Jenison
pardon the not-square appearing mini.  It really was square, but I forgot to smooth that wrinkle before I snapped this picture.  This was right after quilting and mini was not yet bound. 
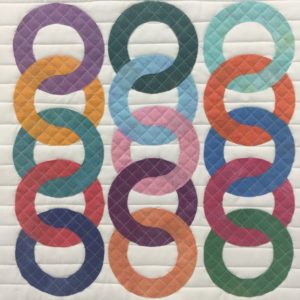
The second quilt I quilted was also in collaboration with Debra.  Debra hand cut each charm square from a Grunge charm pack and fused the fabrics to the background.  I thought this was a super cool quilt pattern to use and has the illusion that all the circles are connected.  For this one I wanted to do something to make the circles stand out from the background, so I quilted a smaller grid on the fused circles and then did some straight line quilting on the background fabric.  
A colorful quilt with many circles in the middle.
Mini Quilt “pieced” by Debra B. using Grunge fabrics
We had a really great night and the event was so much fun.  It isn’t often that everyone in our guild participates in “Sew and Tell”, and we had a lot of members participate in this.  Seeing the range of everyone’s quilting interests and what their personal specialty is was a treat.  

Posted on

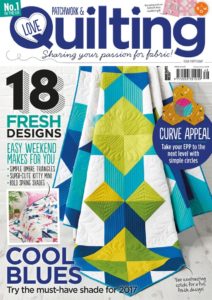
Love Patchwork and Quilting Issue 48!

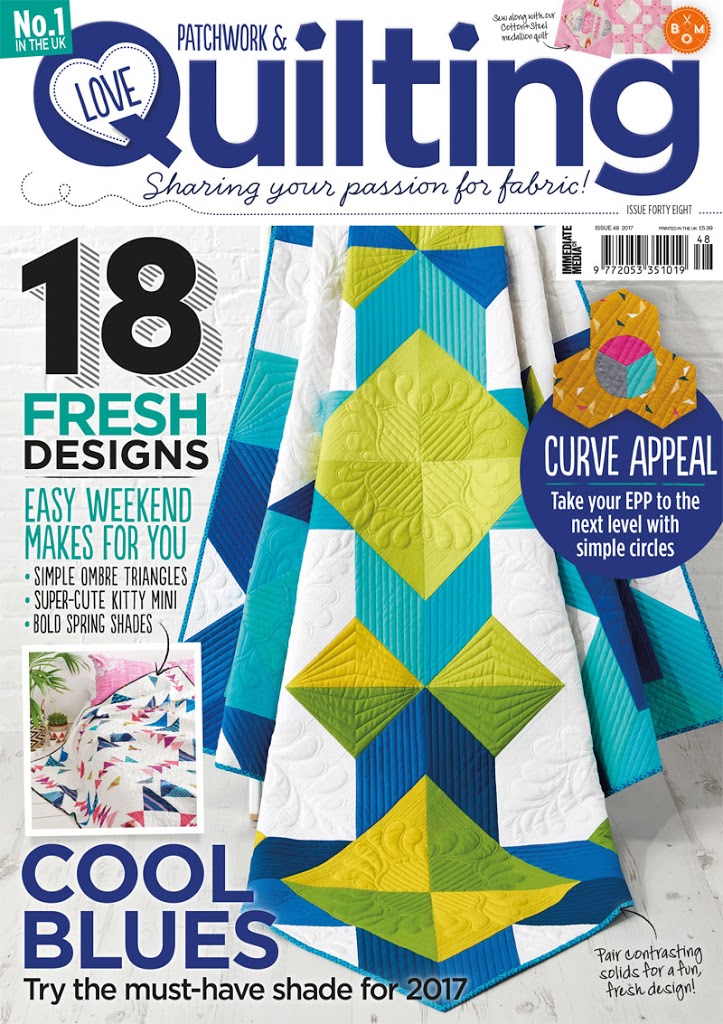
A magazine cover with different designs on it.


A magazine cover with different designs on it.
photo provided by Love Patchwork and Quilting
fabric for quilt provided by Robert Kaufman Fabrics

Have any of you ever made a goal so outrageous that you don’t ever really even consider it to be a possibility?  You might still work towards that goal, but the hopes that it will come to fruition aren’t there.  That’s exactly how I feel about this post. I always looked at the quilts and projects in this magazine and was blown away by the talent and variety.  I’m BEYOND excited (so excited I’m yelling in all caps!) to say that this quilt I submitted to Love Patchwork and Quilting Magazine made the cover!  When I started sewing a few years ago, I joined the San Antonio Modern Quilt Guild, and someone mentioned that LP& Q was the only magazine they bought.  So I jumped on that train.  I had never heard of it, because I was very new to quilting, let alone sewing.  I was tired of the traditional color palettes that are represented in other quilting magazines.  It was definitely love at first sight, and I subscribed to it immediately.  (And ask for it for Christmas every year!)

A quilt that is made of blue and green squares.
photo provided by Love Patchwork and Quilting
fabric for quilt provided by Robert Kaufman Fabrics

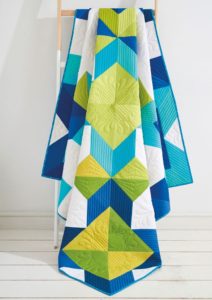
I’m super excited about the photography of this quilt!  I’ve never had a quilt professionally “shot” before, so it is thrilling to see the results (and know that I have a lot to learn when it comes to my own quilt photography 😉

This quilt is something I worked really hard on, and for a long time.  I am so thankful to the amazing people at Robert Kaufman Fabrics for providing the Kona Cotton Solids that were used to make the cover quilt, and for the opportunity from LP&Q to share my quilt!

I did some custom quilting and a little bit of ruler work on the longarm to finish off the quilt.  I hope you’ll check out the quilt in issue 48 of Love Patchwork and Quilting!  Thanks for letting me share my happy news with you 🙂

Posted on

Working with baby :)


Good morning!  I’m going to take a brief pause from the regularly scheduled program to be real for a minute…and fair warning…there is not much sewing talk in this blog post.  I want to talk about running a business while taking care of a baby.  

My husband and I are both SO extremely blessed to be able to work from home.  However, he does have to travel some.  Which means our usual schedule of passing the baby off to one another takes a break and I’m full time care giver for a short period of time.  Which is AWESOME.  There’s some sarcasm in that comment, but there is also 100% truth.  As I type this, I can hear my little girl baby talking through the baby monitor that’s perched a foot from me at all times when she isn’t on me.  I never thought I would say this, but it is music to my ears.  And while I may not get all 50 tasks on my daily to do list completed in 24 hours, I’m fine with dragging the incomplete tasks to the top of my list for the next day.  

I was very naive in thinking running a quilting business AND being daycare manager to my little one would be a piece of cake.  There are times when it’s trying and I’m not sure I’m going to make the deadlines I set for myself, but it always seems to work out.  I’m no expert in time management, but I’d like to share some of the things I’ve implemented to still be able to work a minimum of a 40 hour work week.

1.  Wake up at 3:30-4:00 AM…Luckily, (for now, anyway) baby girl sleeps in until 9:30.  That gives me about 5 hours of UNINTERUPTED work time.  Granted, I can’t always leave the house and walk out to the studio, but I can brainstorm and plan for upcoming projects, write invoices, and calculate estimates for customers.  

2.  NEVER sleep when the baby sleeps…If I got one piece of advice over and over again before and after I had this sweet baby, it was “Sleep when the baby sleeps”.  I will say, I don’t enjoy naps.  I lay there, thinking about how much time I am wasting not falling asleep and run through my list of things I could be getting done, instead of getting some shut-eye.  I try to make the most of every tiny nap she takes and bust my hump to get some quality work done.  And I can honestly say that was the worst advice I was given (that’s saying something!)

3.  Basically, it’s just more of one and two.  Early bed time for baby means more work time for me.  For some reason, I thought I had all these great tips on how to run a business and be a stay at home mom, but all it boils down to is making the most of your time while the baby doesn’t need you.  Also, don’t waste time on inconsequential tasks (IE makeup 😉 .  Unless there are appointments with real people that day.  Then, don’t skimp!

And finally, what do I really know???  My sweet little angel is only 4 months old.  I’m sure someone is reading this, shaking their head, and saying…well wait another week and we’ll see how that works out for you.  

So I’m going to end with…this parenting gig is much harder than anyone could ever explain.  And the hard work really hasn’t started for us.  So here’s to muscling through…and why do I want to add an emoji to every sentence I type (insert eye rolling emoji here)…?  Have a great week and hopefully I’ll have some sewing goodness to share next week!

Posted on

Red Heart Quilt – client quilt

A red heart made of strips of fabric.


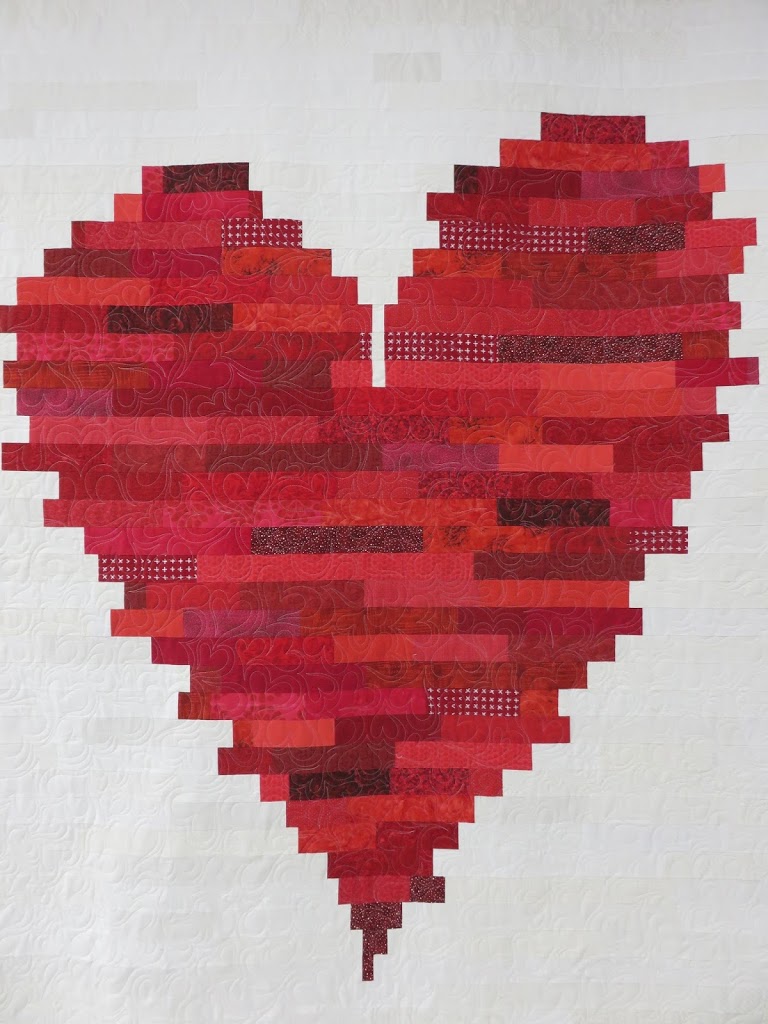
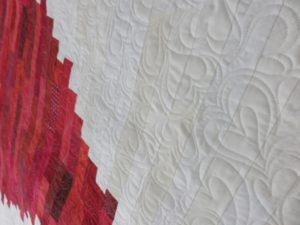
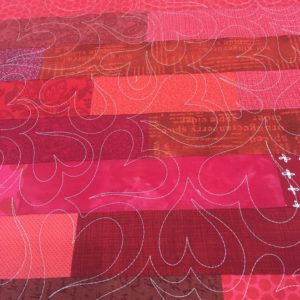
I recently had the privilege of quilting this gorgeous quilt for one of my clients.  The piecing is just gorgeous and the quilt was donated to a charity event/fundraiser.  I quilted the quilt with free motion hearts all over the top.  
A red heart made of strips of fabric.
Quilt Pieced by Debra B.

 This was such a joy to quilt–check out the close up of the free motion hearts 🙂

A close up of the quilting on a quilt

A close up of the fabric for a quilt

Posted on

Graffiti Quilting my Karlee Porter Panel

A colorful wall hanging with an abstract design.


I know I already posted about attending the Karlee Porter workshop that SAMQG hosted a few months ago–but I really need to post about this as well!  Karlee has some really awesome panels that she designed, and if you haven’t felt them in person, they are buttery soft.  This one is called “Explosion” (picture is from Karlee Porter’s website), and if you want one, click HERE to order your own!  And FYI, this one is ginormous!  

A colorful wall hanging with an abstract design.
“Explosion” printed tapestry designed by Karlee Porter (picture from Karlee’s website)


A close up of the floor with a roller on it
I love sewing and piecing and constructing quilt tops as much as the next person, but seriously…it is so awesome to load a quilt top and not worry about the hours, days, weeks it took to piece it.  Especially when you get to skip that part entirely.  There’s nothing better that just mindlessly losing yourself in a quilt while quilting.  This is my ultimate stress reliever.

A close up of the quilt with blue and white designs
A close up of the floor with different colors

A purple quilt with a bird on it.
The back of the quilt (Tula Pink wide back)

A close up of the quilted fabric on a quilt

I haven’t hung this one yet, as I haven’t bound the edges, but I will update this blog post once it’s finally finished.  

A close up of the quilted fabric on a bed.

Posted on 2 Comments

Quilting a “Letters from home” quilt


A couple of months ago, I had the awesome opportunity to quilt one of my customer’s “Letters from Home” quilt (pattern by Heather Givens/Crimson Tate).  Now, I have to preface this post by saying that I’m barely wetting my toes in the waters of custom quilting.  But I am super-duper proud of the quilting on this quilt.  I’m going to take you through the process.

I like Glide’s thread for a little pop of sheen on a quilt.  Plus, it quilts like a DREAM.  I selected a few different thread colors for the quilting on this quilt.  Mainly, I changed thread colors to help them blend with the fabrics they were quilting on for a more subtle pop.  I used Quilter’s Dream batting for this quilt, as I do with most of my client quilts.

Glide Threads selected

 Some people might have you believe that once the quilt was loaded and the threads picked out that the quilting just magically happened with a wave of their wand.  Here’s my dirty little secret:  This quilt sat on my frame for a week.  An entire WEEK.  I had sketched out at least a dozen ideas for quilting, and each morning I would go out to my studio, ready to attack.  But then I would end up standing there, staring at the quilt top.  I changed my mind so many times, and then decided on the most difficult (or most time consuming) design I had drawn up.

Beginning to mark and quilt the borders

So I broke out my water soluble marking pen and trusty ruler and started marking some guidelines for the quilting.  I did some straight line quilting on the borders after marking them, and then marked the rest of the quilt as I went.  Each pass on the longarm took me about an hour to mark with the ruler and pen.

More markings, filled in with some quilting
The thing about the design being quilted, is that it isn’t complicated.  It’s just a bunch of straight lines and loops, but the way they are put together really leaves you with a huge impact.  
I have a black light on my longarm and seriously think it is SO cool.  This shows the texture a little better.

I really wanted to focus on the texture on this quilt, and so I chose to stitch in the ditch around the envelopes and the focal fabrics so they would pop out more.  My client selected Japanese import fabrics from Bunny Designs (out of Austin, TX), with a backing out of an adorable cupcake pattern (see the first photo in the post).  The attention to detail and her impeccable piecing made this quilt one of my all time favorites to quilt.  The quilt pattern by Crimson Tate is SO cute, and an ingenious way to showcase focal fabrics.

So, aside from me just talking about how much I loved this quilt, my other point is that sometimes it isn’t second nature to just come up with quilting designs out of thin air.  And it’s okay if the quilt has to sit on your frame for a week while you change your mind a hundred times about the quilting design (as long as your client has allowed you to do so!).  And while it is my favorite thing ever for a client to say–I want custom quilting, and the design is up to you–it can also be the most challenging (and rewarding) part of my job.  I think this is a great way to grow your skill set and think about how many different ways there are to quilt a quilt.  (Quilt construction and fabric selection by Debra Barnes)

Posted on

I left my REAL job to quilt! My two cents…


Up until this past June, I was a full time teacher for 9 years (or all of my professional career, post college).  I’m not going to give you an earful about my experiences, but I will tell you that I taught agriculture science and was the FFA sponsor.  Also, not going into the details of that…I could talk for hours about what that job entails.  But I’m not going to.  

I am going to say that I think teachers are not supported in what they do (by lots of people).  I’m not going to be specific, but I will say that it only took 9 short years for me to become burned out.  In a job that I originally thought I would never tire of.  I loved my kids.  I loved them so much that I called them MY kids.  Years after they graduate, I still have many contact me around the holidays, when they are home from the military or just texting me to say hi (When you’re an FFA sponsor-all the kids have your phone number in case of emergencies with their livestock projects).  I’ve cried over sadness my kids have suffered, prayed for them, been happy with their successes, and some of them have impacted my life in ways that I can’t begin to describe.  I think there truly is no other profession where you become so invested in the lives of other people’s children that you are emotionally torn to shreds over decisions to move, accept another job, or leave the classroom entirely.  (With FFA, you keep the same kids all 4 years of high school.)

That being said, I also think there are few careers where a person (in this pay grade) is criticized so much.  And called/texted at all hours of the day, night, and in between.  The expectation is that you are 100% devoted to that job 100% of the time.  Or that’s how I felt, at least.    

I made the decision to leave teaching (for now, at least) because I was truly unhappy.  I stuck it out for roughly 2.5 years of being unhappy.  I know that being happy isn’t everything, but I think your job shouldn’t make a miserable, bitter person out of you.  The only times I felt happy was when I was with family or when I was sewing.  I’m not going to talk about the MANY factors of what made me unhappy, but there was a limitless supply.  I did still love the kids, and that was one of the few reasons I stayed.  This post was originally going to be about what I do now-the custom sewing for others, longarm quilting, creating, making, etc. but I feel like that almost cheapens the decision I made to leave the classroom.  When I’m alone in my sewing room with the machines humming around me, or the music turned up as loud as it will go, my mind will frequently travel to the kids I spent so much time with.  I wonder about the choices they are making on a daily basis, if I even made any difference being with them in the classroom, and I hope for them and their futures.  I think about all the hardships those kids endured through high school, losing loved ones, being mistreated by parents, and all the other hard things kids go through.    

I don’t really know where I was going with this, just felt the need to get this off my chest.  And most days when I’m walking the short 20 yard walk to my sewing room to go to work, I have a smile on my face.  I’m not a miserable person to come home to anymore.  I’m able to spend quality time with my family.  I know that for now, I’ve made the right decision.  Just my two cents.