Posted on

English Paper Piecing – Double wedding ring style!

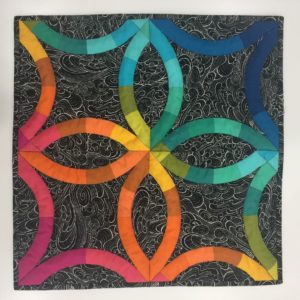
A picture of a quilt with the same pattern as it.


Good morning!  So many milestones going on in our household this week–our little girl turned 6 months last week (How has it already been half a year???) I celebrated my first mother’s day, started the baby on her first solid foods, and it’s my husband’s birthday this week.  Needless to say, it’s been super busy, and I feel like I’ve been to the grocery store almost every day this week.  Do they give frequent flier miles for multiple grocery store trips in one day?  I should also mention we live 12 miles from the nearest grocery store…  I’m sure you can relate to the feeling that you’re flying by the seat of your pants on household chores and checklists.  Laundry, dishes, etc., etc., but I wouldn’t trade it for the world!

One of the many reasons I love English Paper Piecing is the opportunity to slow down and enjoy the process of hand sewing.  I also love combining multiple parts of the sewing and design process and planning out a project from start to finish.  There is something so satisfying in making something completely from start to finish…even if it sometimes feels like you’re recreating the wheel.  

A picture of a quilt with the same pattern as it.


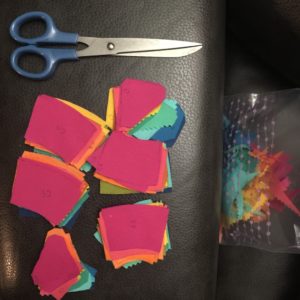
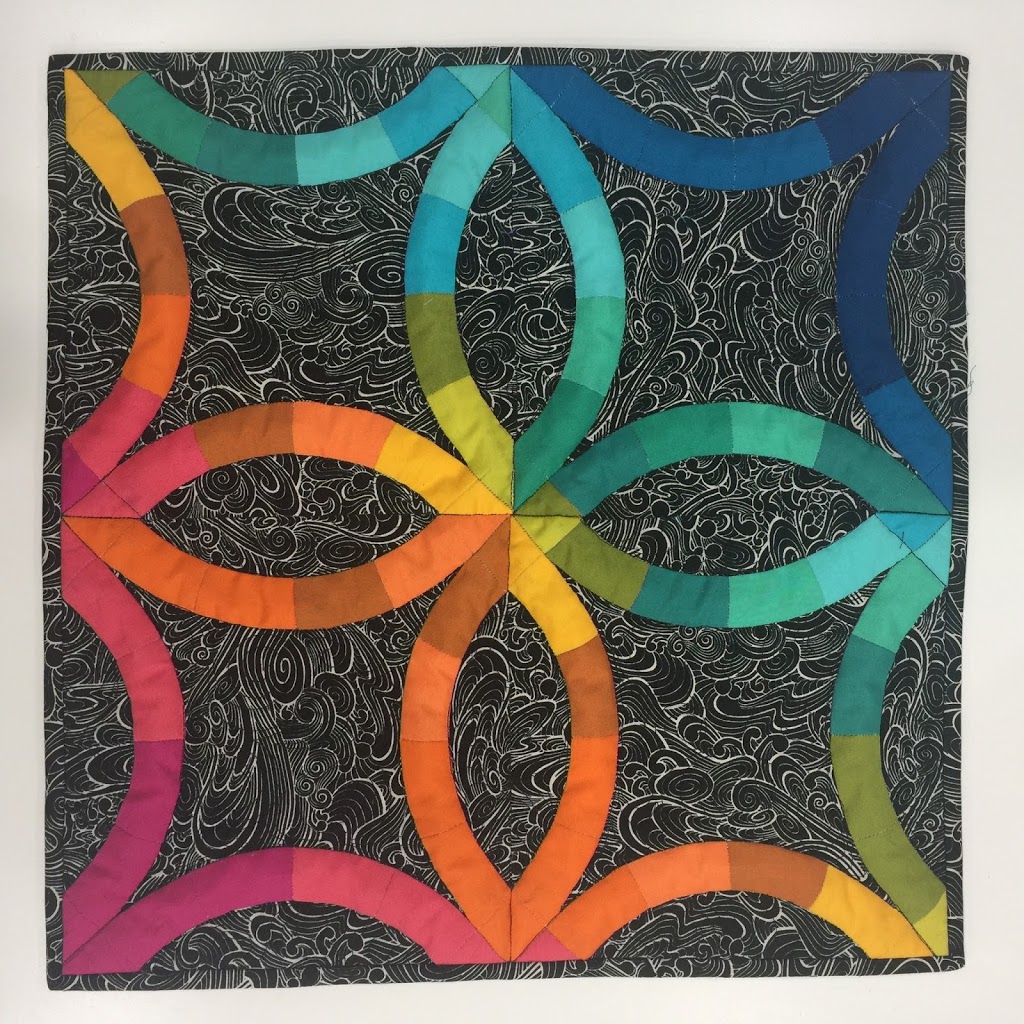
I started by sitting down with my EQ7 software and designing a mini quilt for our local Modern Quilt Guild.  We recently had our first silent auction event and mini quilt show (SO FUN!).  Then I printed templates onto cardstock for the EPP pieces and started thinking about my fabrics.  I had a great charm pack of Kaufman Kona Cotton Solids that I had been holding onto for over a year, and thought this would be a great opportunity to use it.  I traced and cut out my fabrics, and then had to pause when I selected my background fabric. 

A table with scissors and some paper cut outs


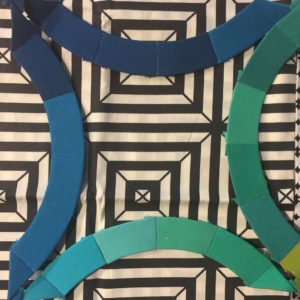
I knew I didn’t want white, and I really like the effect black and white patterned fabrics have with solids.  So I auditioned a few different fabric choices–I really thought I wanted to go with a black and white stripe, but I opted for a more solid-reading print instead.  I pieced together a few of the DWR pieces and then placed them on top of my background fabric choices.  Pictured below is what I thought I was going to go with, but I instead selected a Tula Pink True Colors black and white print.  Because…Tula!!!

A black and white pattern with blue, green, and turquoise colored paper.

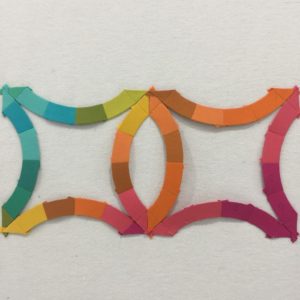
From the basic design in EQ7 (They already have the blocks drawn up…I just sized them to fit my needs), printing the cardstock, then cutting the fabrics, I got to take a breath and piece in my leisure time.  HA.  Leisure time…You know what I mean.  The semi-quiet moments in the house when my hair wasn’t on fire 😉

A colorful paper strip with a pattern of circles.

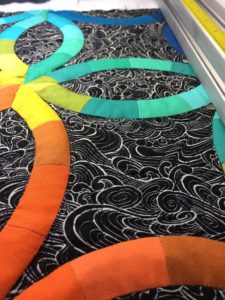
Then I loaded the mini on my longarm and did some simple stitch in the ditch around the wedding rings and some loopy swirl combos on the black and white background that blend nicely.  It may seem kind of dumb to longarm a mini quilt, since you need a little bit more backing fabric than you would if you were to quilt it on a domestic, but I figured I paid for that huge machine and I’m going to get my money’s worth!  Plus, I had just taken a fresh quilt off of the frame, and I had to take advantage of it before I loaded my next quilt.  It made for a slightly quicker finish than if I’d done it on the domestic sewing machine.
A close up of the floor with colorful circles on it

I was thrilled with the results, and playing with the color gradation and high-contrast background was really a lot of fun.  But mostly, I was able to really enjoy the process and each step along the way.  I don’t know about you, but from the day I started sewing, I’ve always eyed the double wedding ring quilts.  I’m not sure I have the patience at this point in my life to see a full-sized quilt through, so this mini quilt was the perfect opportunity for me to cross a DWR quilt off my quilting bucket list.  I had also never taken the time to hand piece curves before, but it wasn’t as bad as I thought it might be.  Really, I had built it up to be this super scary moment, when all you really need to do is take a little extra time and carefully mark the centers of each EPP piece prior to piecing it, and make sure you line the centers up while adjusting the curves.  

I hope your sewing adventures take you somewhere awesome this week, and try to slow down and enjoy the process behind what you’re doing.  I know I really enjoy the projects where I can slow down a bit and take a break from the hustle and bustle of life.  Happy sewing friends!

Posted on

Longarm quilting a double wedding ring quilt


How many times have you looked at a quilt top and been totally stumped on how you would quilt it?  I feel like this is a skill that really is developed over time and trial and error.  I’ll be the first to admit that my very first quilts–after quilting–didn’t really showcase the quilt pattern with the quilting as they could have.  My quilting designs made little sense and didn’t work with the existing pattern to make the quilt pop.  Basically, I was just quilting to get it done and keep all the layers together.  

It’s a little difficult to see the quilting, but it’s orange thread in squiggly lines…obviously my photography skills were lacking as well 😉  This was the first quilt I ever made, in October of 2011.  
I think that typically, for beginning quilters, the quilting is all about function.  It’s difficult enough to remember 1/4″ seam allowance, minding your bobbin so you aren’t sewing without thread, etc.  I know that I was just relieved to be finished, and I was very proud of the quilting at the time.  

Fast forward 5 years, and quilting is now my favorite part.  I’m enamored with the process of evaluating a quilt top, selecting batting, figuring out what quilting design will best display the awesomeness of the quilt pattern.  I know that I still have a long way to go, and I pour over Instagram, Pinterest, blogs, books, etc. to find every piece of information and inspiration I can get before I start planning to quilt a quilt.  

I recently had the opportunity to quilt my first Double Wedding Ring quilt.  My client’s quilt was pieced entirely by her grandmother (prior to her passing) from vintage fabrics and feed sacks.  It was the greatest honor to be trusted with a family heirloom.  I used plastic overlays to audition different quilting designs, and finally came up with a combination of a few simple designs that I felt would work well together and really make the quilt pop.  

This was actually the first row that I quilted with a feather.  I hated them and ripped them all out and started over.  

I stewed over the newly blank quilt after ripping the first row out and finally re-started.  

I was very pleased with the outcome and can’t wait until I can return it to the customer.  
Here is the full quilt:

I love the finished look of ruler work with free motion quilting.  I think the structure really works well with the free-flowing quilting and I can’t wait to play around with this some more.  I can’t wait to see where my work is in another 5 years…