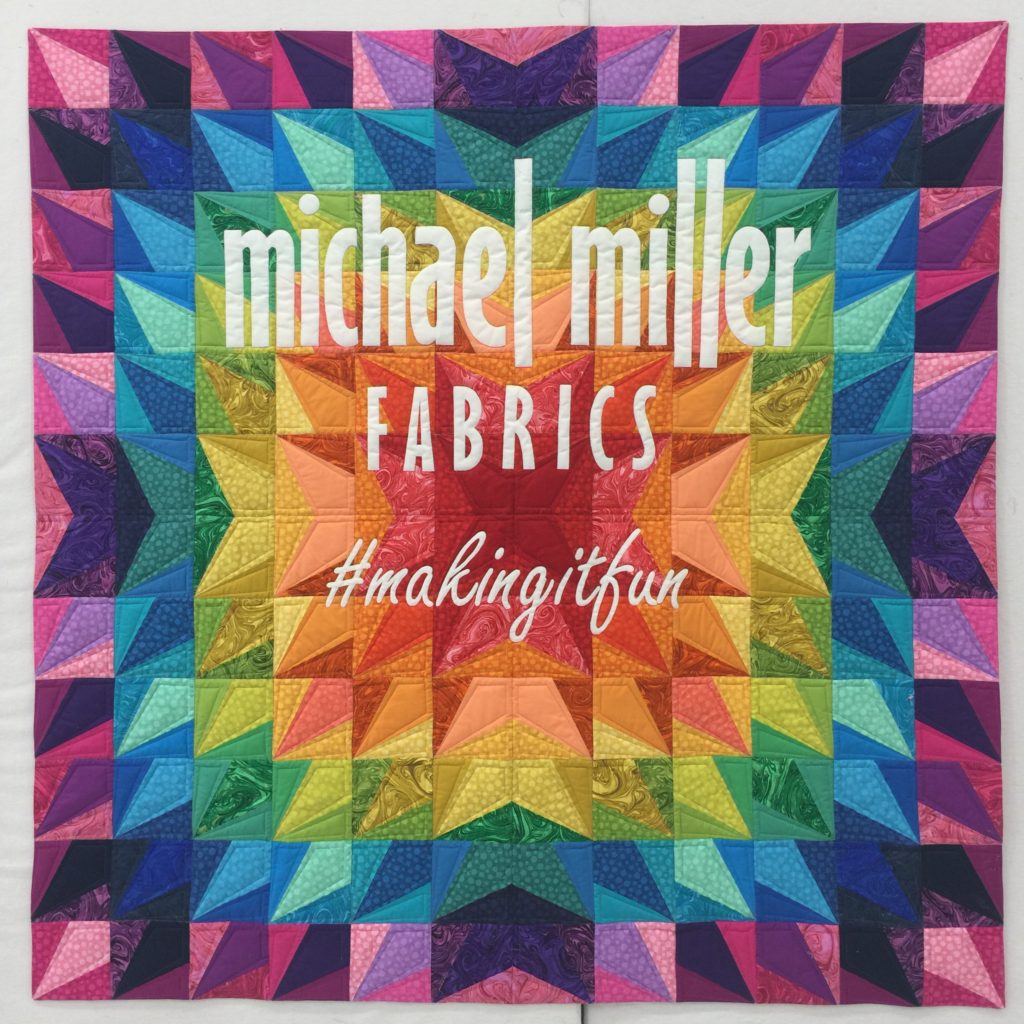
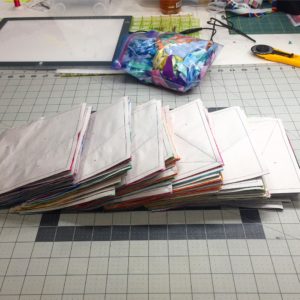
Guys!!! I’m so excited to finally be able to share my project for the Michael Miller Spring Quilt Market booth. They sent me fat quarters of their new has dot blenders and their marbled fabrics, along with some coordinating Cotton Couture solids and told me to make something fun and rainbow-y! Is that a dream assignment, or what?? I narrowed it down to 48 unique fabrics that I wanted to use in the quilt, and lined them up:
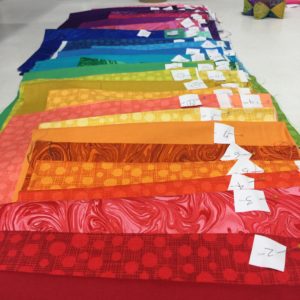
I numbered them and then numbered the design I had mocked up in EQ8, but it was starting to get a little crazy. I ended up having to make a smaller swatch card because some of the fabrics were so similar in color and shade that I was starting to go cross-eyed flipping through that stack.
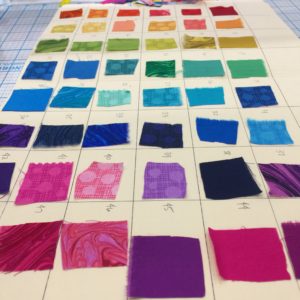
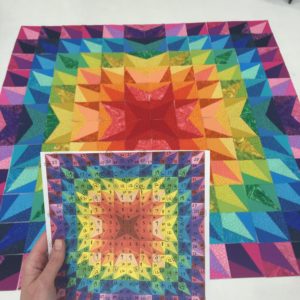
I very rarely make swatch cards, but I found it to be very necessary with this quilt. I designed a foundation paper piecing block in EQ8 and then rotated it slightly to complete the design. The piecing went really quickly and I just needed to double check that I had the correct fabric for each block before I started sewing. I’ll admit, there was a good amount of seam ripping to be had with this one!
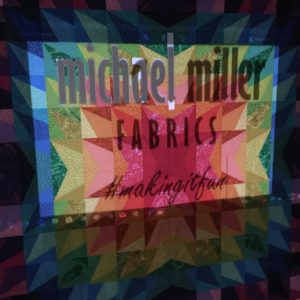
I used my new Daylight Company light box to help with the foundation paper piecing, and I really love how thin and lightweight the unit is. I had a very bulky, cumbersome light box in the past and recently upgraded to this one. It’s been such a nice treat to have one that doesn’t take up all of my cutting mat. I also used Adobe Illustrator to help design the applique text in the right size and fonts, then tiled the pages to make a huge pattern. I hand cut each letter and symbol out, then used the paper as a template to trace onto the white fabric for the applique. I used Misty Fuse on the backside of the white Cotton Couture and then cut out each letter. It was pretty time and labor intensive, but I love how it turned out.
I did come up with a slight problem in getting the applique on straight, centered, and spaced equally. Usually, I would just use a big window and tape the quilt in place or trace where the letters needed to be, but I decided to buy a cheap portable projector and project the original applique design onto the quilt while it hung, and then I positioned the letters in place with a small amount of glue from an Elmer’s glue stick. Once they were in position, I lightly fused them into place and then took the quilt top to my Janome MC9400 to complete the applique blanket stitching around each individual letter (that took about a day and a half!).
Once I finished the applique, it was time to throw it on the longarm for quilting. I chose just a single layer of Quilter’s Dream Wool to maximize the quilting texture and also keep it fairly lightweight. Then I quilted some straight diagonal lines with rulers to finish it off. I opted to not bind the quilt traditionally, but I faced it to not take away from the overall punch of the quilt, and keep the focus on the applique. I really loved making this quilt and loved the new fabrics being released by Michael Miller Fabrics for Spring Quilt Market 2018. I can’t wait to get my hands on more of that fabric!