Posted on 2 Comments

Quilting a “Letters from home” quilt


A couple of months ago, I had the awesome opportunity to quilt one of my customer’s “Letters from Home” quilt (pattern by Heather Givens/Crimson Tate).  Now, I have to preface this post by saying that I’m barely wetting my toes in the waters of custom quilting.  But I am super-duper proud of the quilting on this quilt.  I’m going to take you through the process.

I like Glide’s thread for a little pop of sheen on a quilt.  Plus, it quilts like a DREAM.  I selected a few different thread colors for the quilting on this quilt.  Mainly, I changed thread colors to help them blend with the fabrics they were quilting on for a more subtle pop.  I used Quilter’s Dream batting for this quilt, as I do with most of my client quilts.

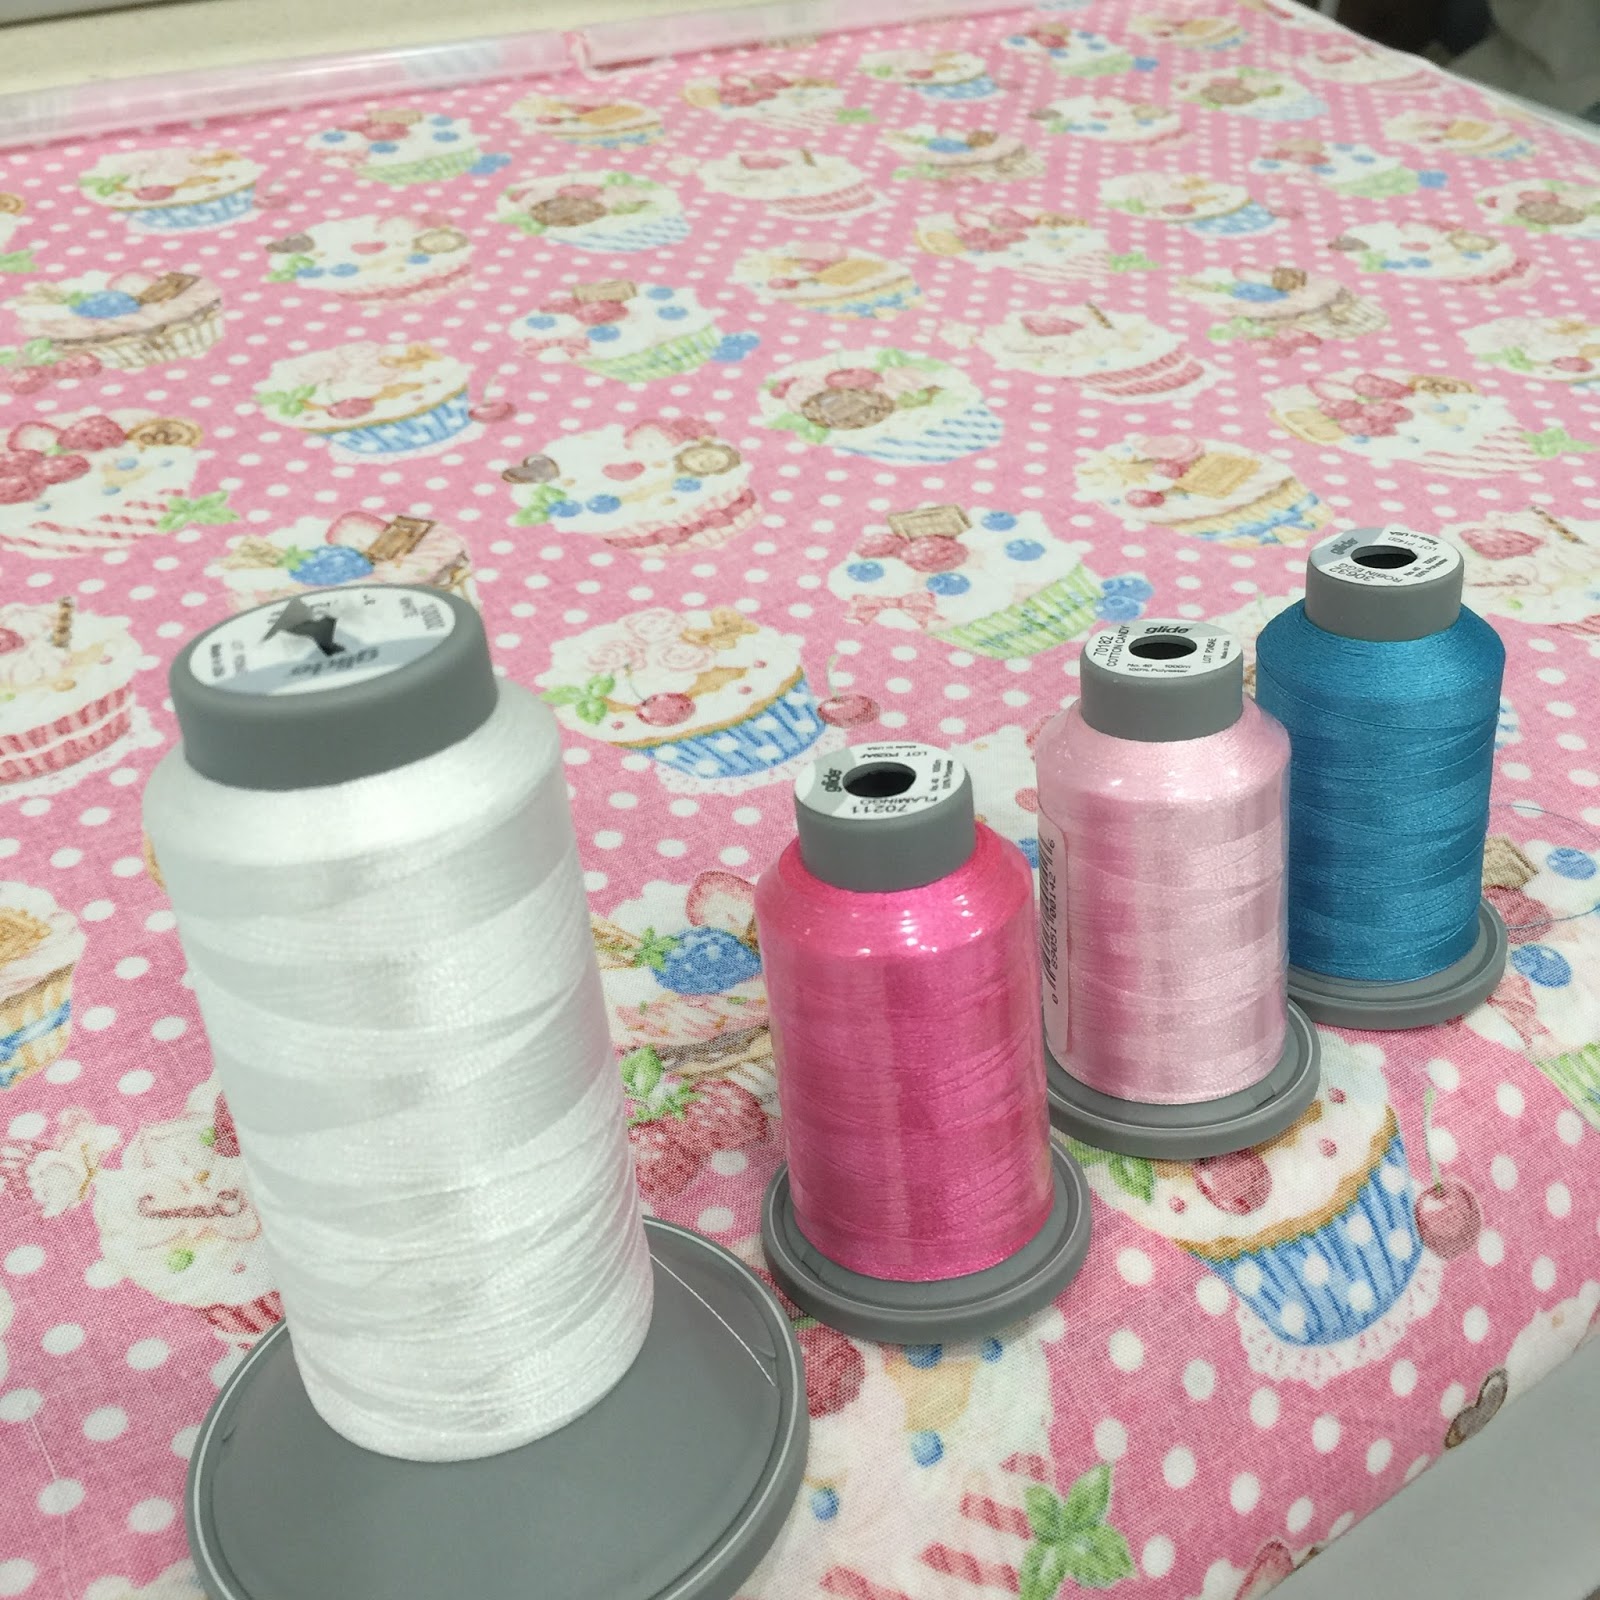
Glide Threads selected

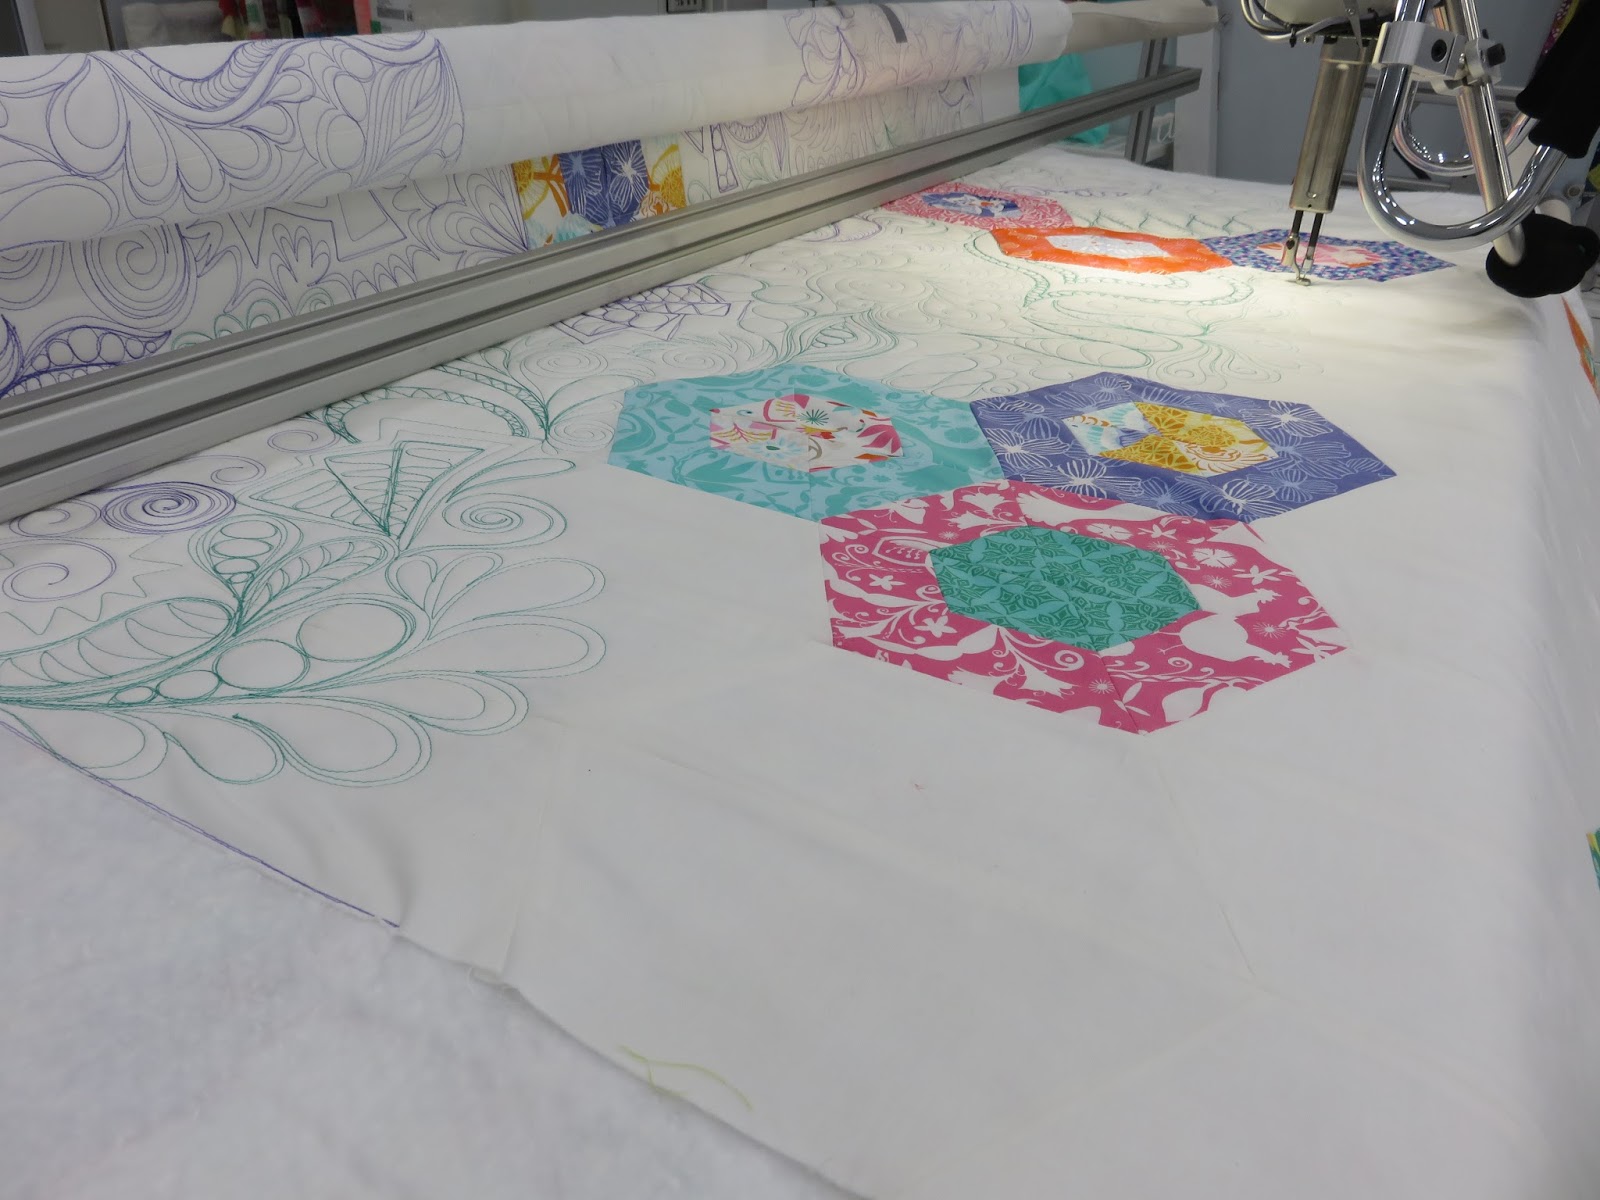
 Some people might have you believe that once the quilt was loaded and the threads picked out that the quilting just magically happened with a wave of their wand.  Here’s my dirty little secret:  This quilt sat on my frame for a week.  An entire WEEK.  I had sketched out at least a dozen ideas for quilting, and each morning I would go out to my studio, ready to attack.  But then I would end up standing there, staring at the quilt top.  I changed my mind so many times, and then decided on the most difficult (or most time consuming) design I had drawn up.

Beginning to mark and quilt the borders

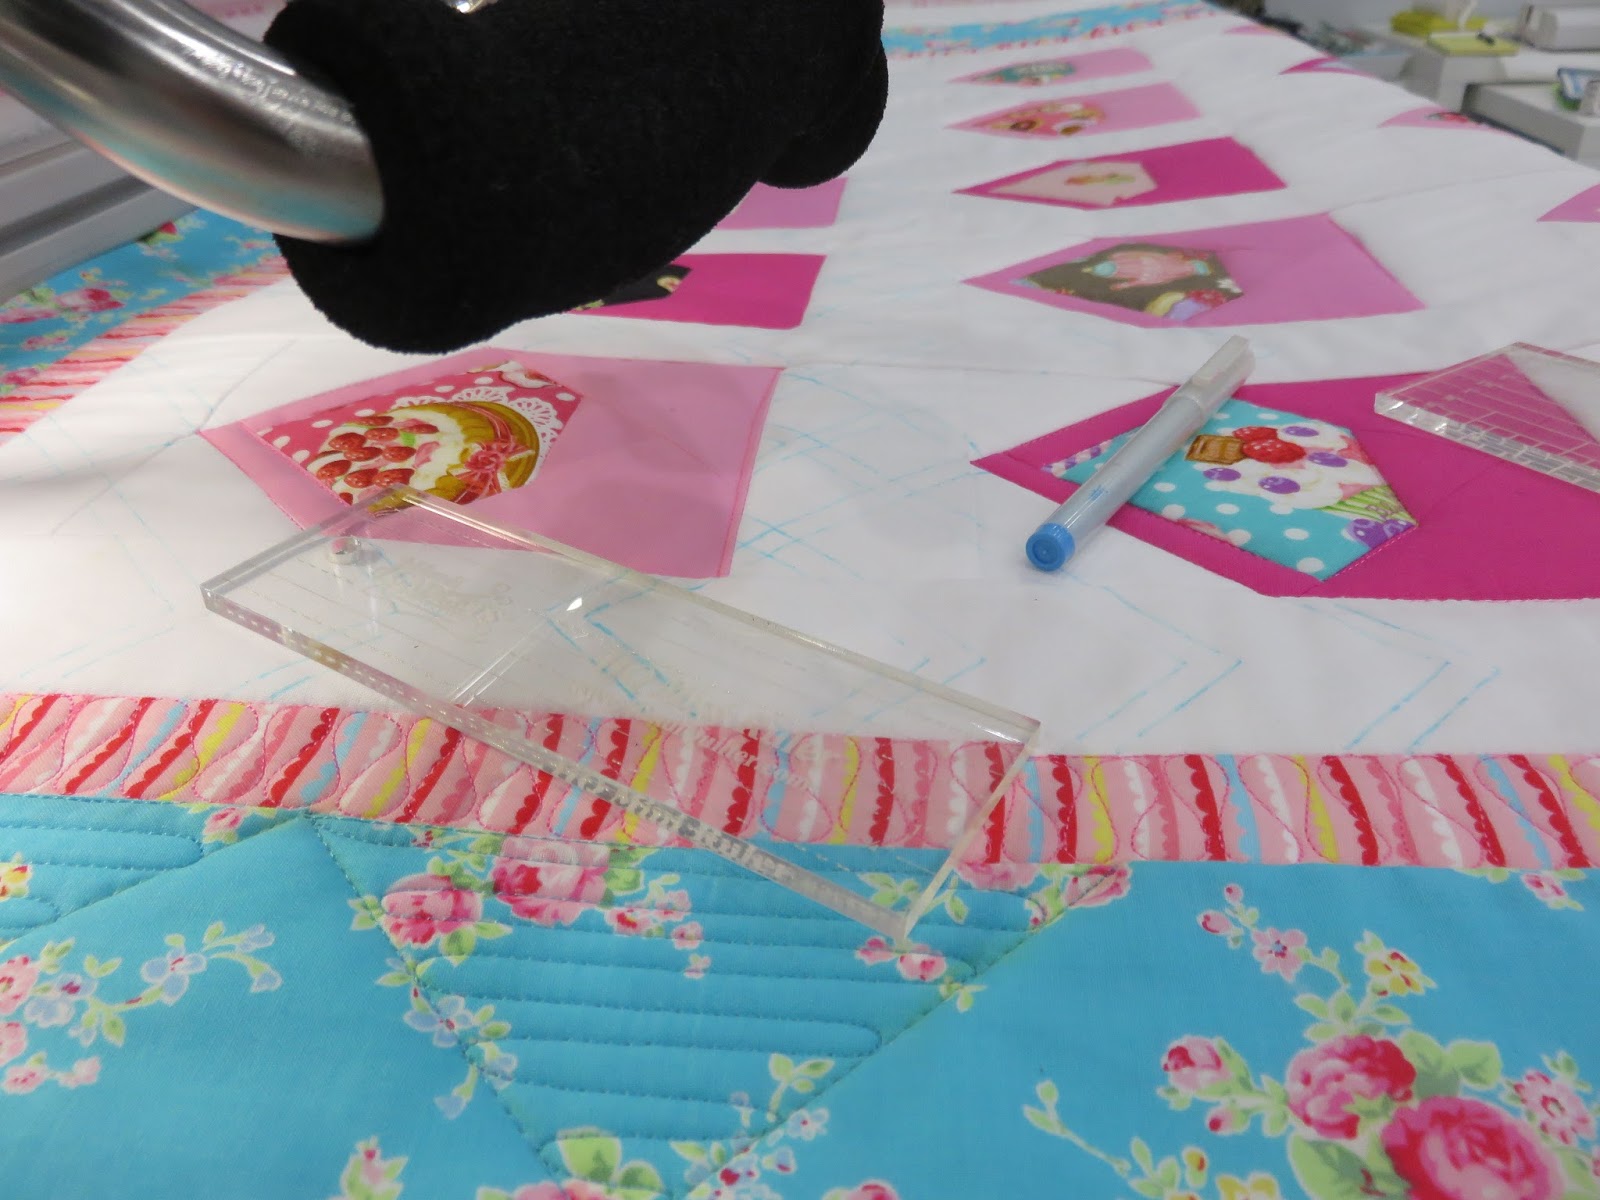
So I broke out my water soluble marking pen and trusty ruler and started marking some guidelines for the quilting.  I did some straight line quilting on the borders after marking them, and then marked the rest of the quilt as I went.  Each pass on the longarm took me about an hour to mark with the ruler and pen.

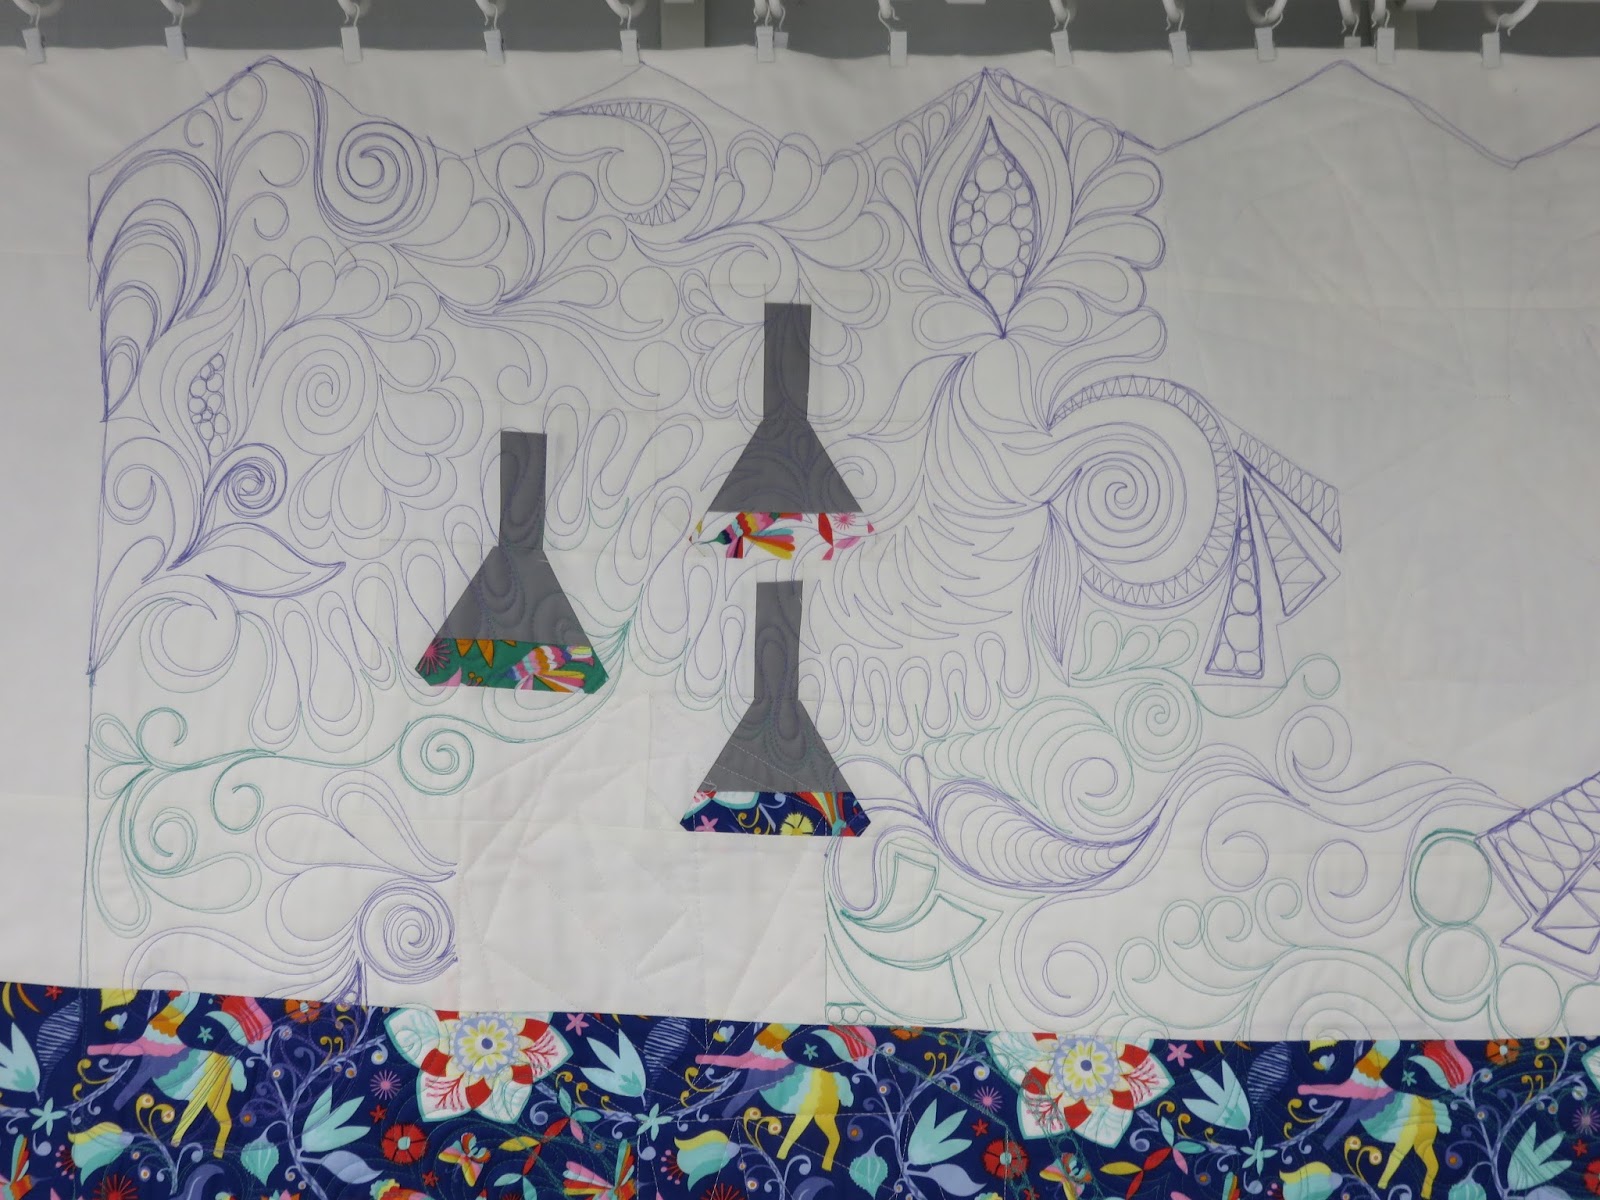
More markings, filled in with some quilting
The thing about the design being quilted, is that it isn’t complicated.  It’s just a bunch of straight lines and loops, but the way they are put together really leaves you with a huge impact.  
I have a black light on my longarm and seriously think it is SO cool.  This shows the texture a little better.

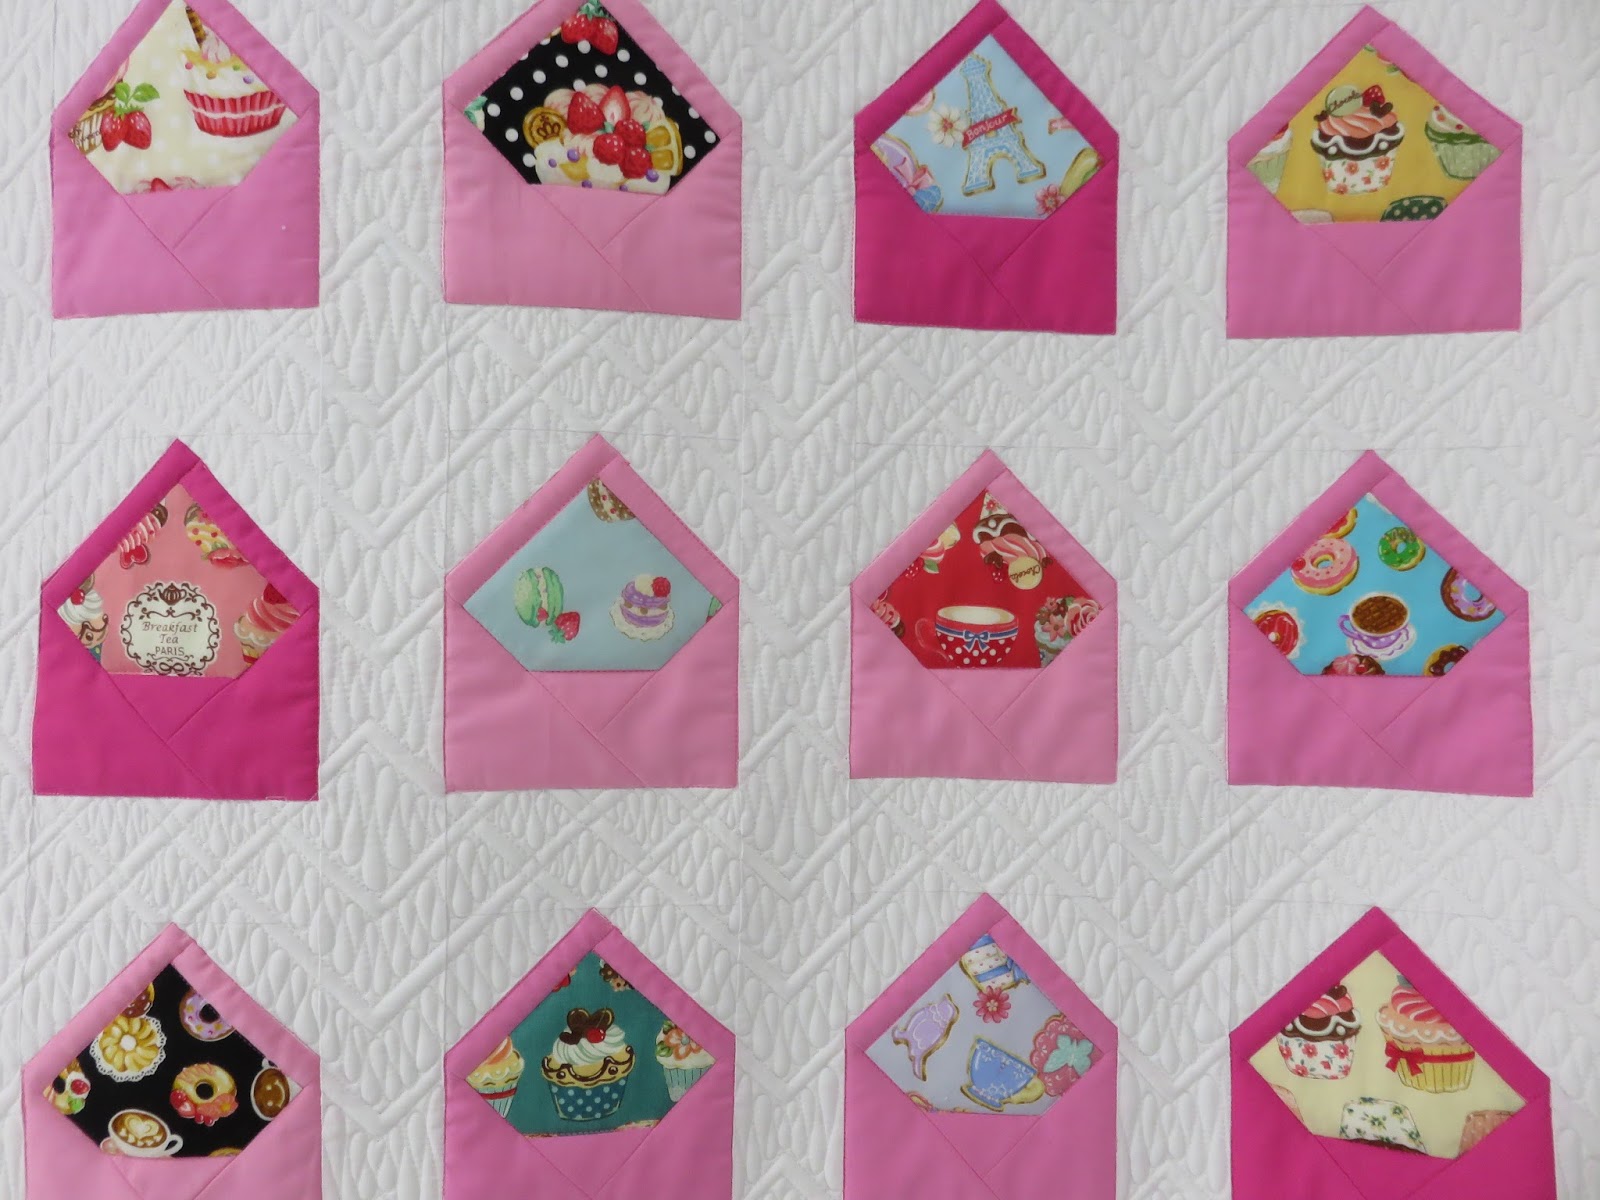
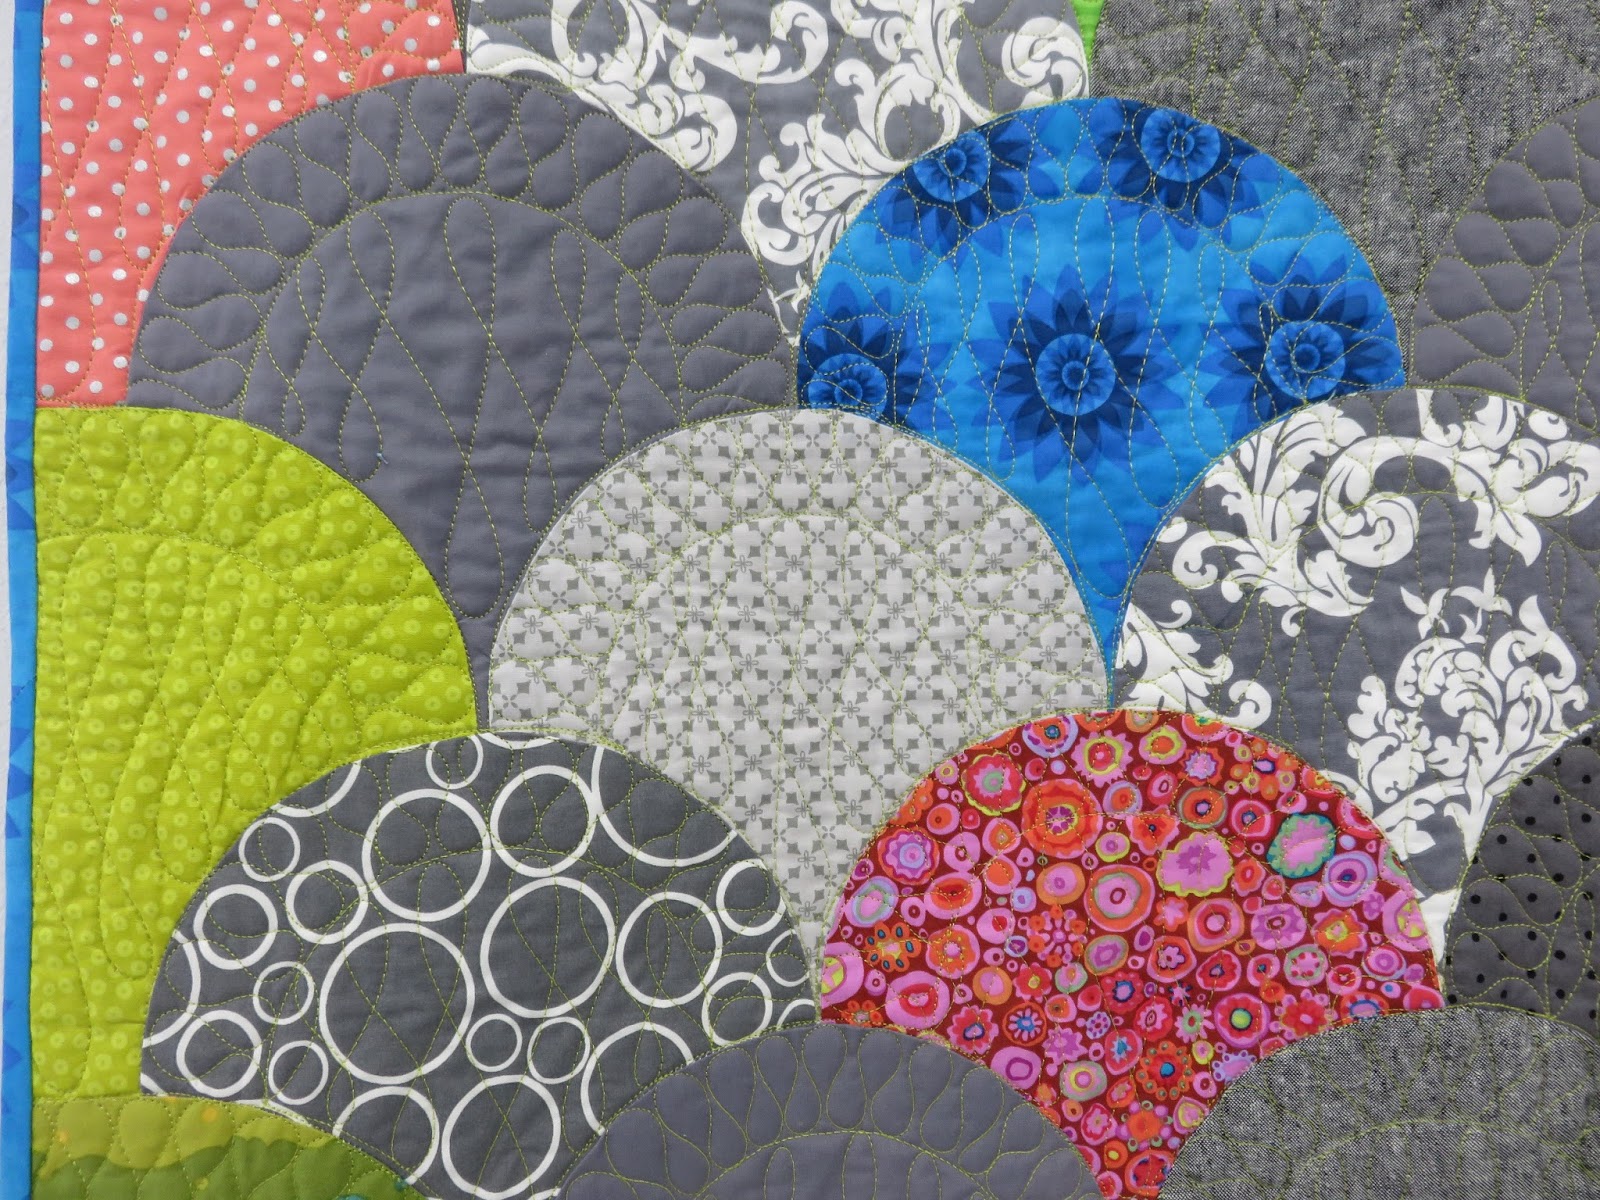
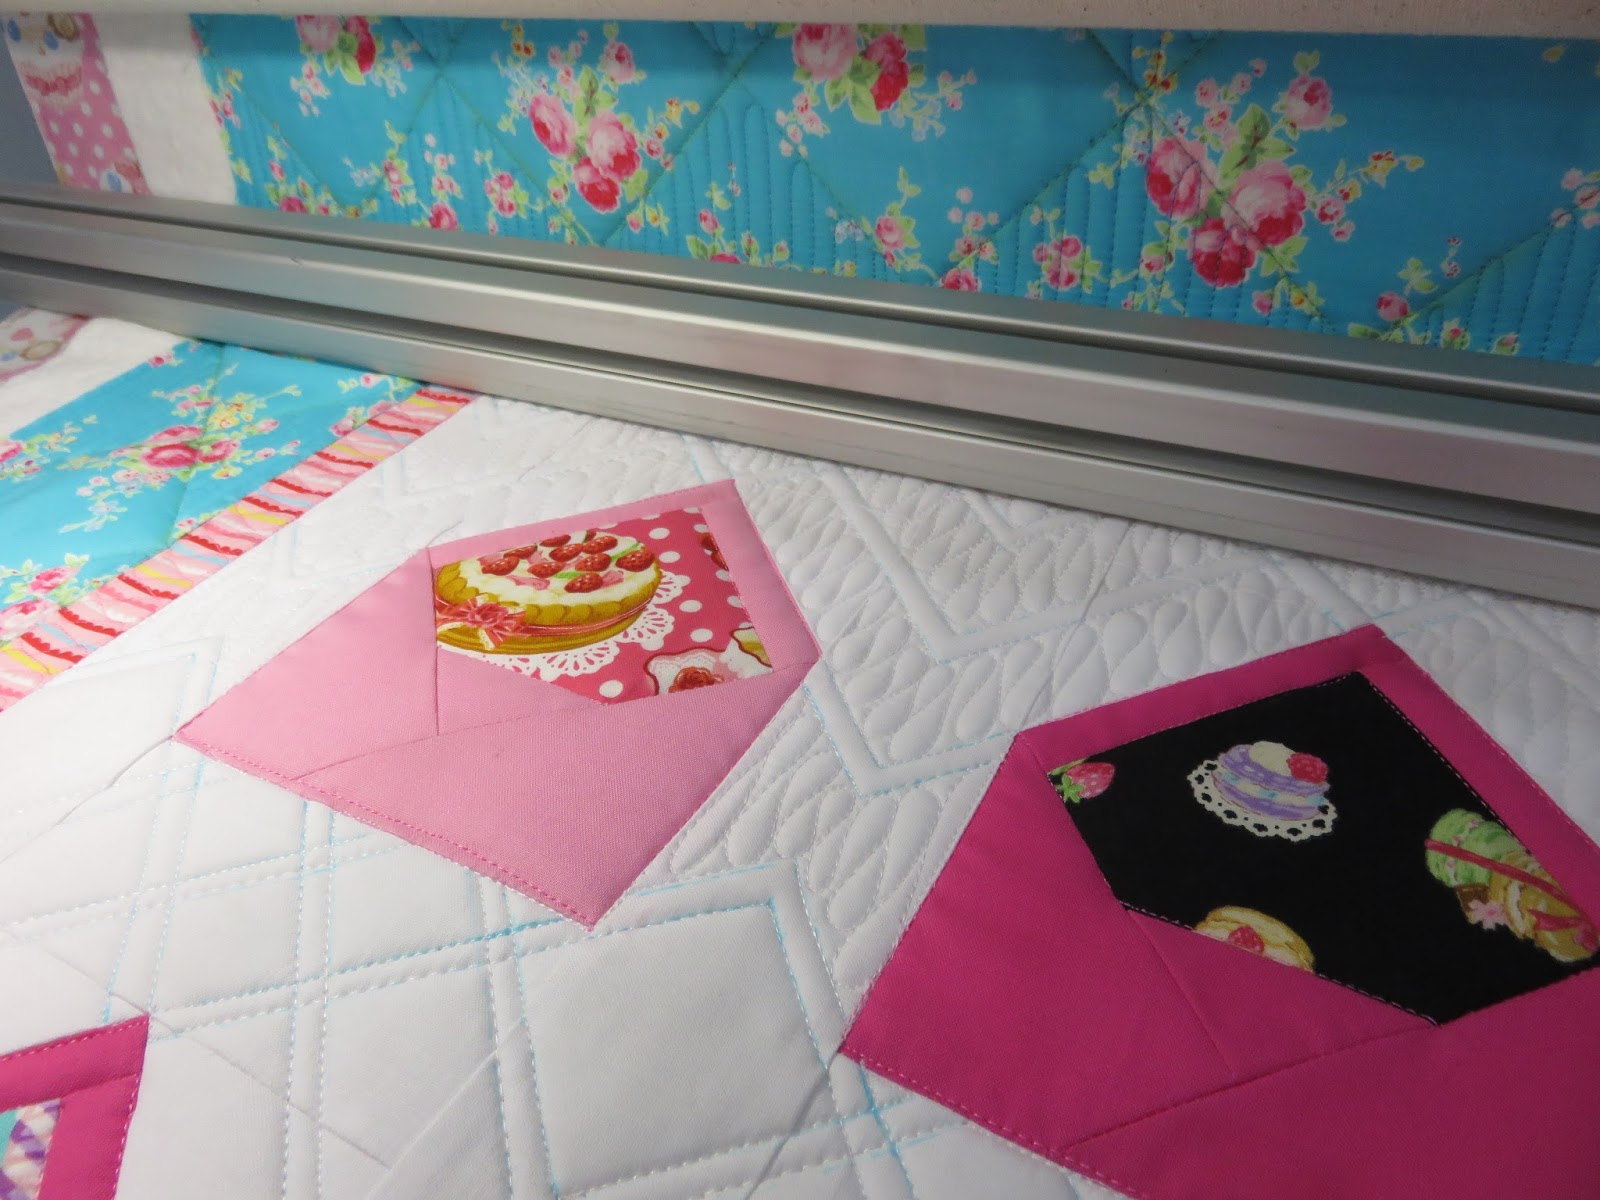
I really wanted to focus on the texture on this quilt, and so I chose to stitch in the ditch around the envelopes and the focal fabrics so they would pop out more.  My client selected Japanese import fabrics from Bunny Designs (out of Austin, TX), with a backing out of an adorable cupcake pattern (see the first photo in the post).  The attention to detail and her impeccable piecing made this quilt one of my all time favorites to quilt.  The quilt pattern by Crimson Tate is SO cute, and an ingenious way to showcase focal fabrics.

So, aside from me just talking about how much I loved this quilt, my other point is that sometimes it isn’t second nature to just come up with quilting designs out of thin air.  And it’s okay if the quilt has to sit on your frame for a week while you change your mind a hundred times about the quilting design (as long as your client has allowed you to do so!).  And while it is my favorite thing ever for a client to say–I want custom quilting, and the design is up to you–it can also be the most challenging (and rewarding) part of my job.  I think this is a great way to grow your skill set and think about how many different ways there are to quilt a quilt.  (Quilt construction and fabric selection by Debra Barnes)

Posted on

Science Class DayDreams


I am always blown away by the awesomeness of the quilts my clients bring me.  This one was especially fun to quilt…

I have a friend that I had the honor of quilting a special quilt for.  The pattern was JayBird Quilts “Science Fair” pattern in some gorgeous Kate Spain fabrics.  I’m not sure that I’ve had more fun quilting something with such a fun concept.  My client had discussed her thoughts about having the colored/patterned hexagons be quilting with straight lines and lots of structure (kind of like science class).  And the remaining white would be quilted like a daydream, rising up from the structure of the science class.  Such an ingenious idea for a quilting layout! 


So the bottom of the quilt, close to the clustered patterned fabrics, was quilted in a lighter thread than the top, with slightly less dense quilting.  The more white fabric there was, the denser the quilting got–and thread colors changed to get gradually darker towards the top as well.  

And the back of the quilt had beakers pieced into it.  Come on.  It doesn’t get any better than that! 

Posted on

My Finished Glam Clam Quilt


I am going to talk to you today about Latifah Saafir’s “Glam Clam” quilt pattern and my journey completing the quilt.  

I’m a member of the San Antonio Modern Quilt Guild, and we were fortunate enough to have Latifah Saafir do a trunk show AND teach 2 awesome workshops!  I was super excited…the clam shell style quilt has been on my quilting bucket list since I first started sewing, so this was a great excuse to get it done.  I immediately signed up for the workshop and picked my fabrics out after I got the pattern and templates.  I painstakingly cut out all of the pieces, labeled them, and organized them all into little ziplocs, until I would  attend the workshop.  I had the finished quilt in mind for a very special friend and was excited to gift her a really cool quilt.

About a week from the workshop date, my grandmother’s health was failing.  She passed away, and the funeral was scheduled for the same time as the workshop.  I missed the workshop and didn’t touch the pieces I’d cut for a few weeks after.  Once I started the quilt, I thought about my grandmother often.  I’m not crazy about piecing curves, but I must say that it was kind of a healing feeling to sit and sew without really thinking about anything.  It gave me a chance to think about relationships and friendships and how much people can impact your life.  

Quilting the finished top was even more fun that putting it together.  After doing a little bit of research, I found that many of the clam shell quilts are quilted with just an all over design, without much attention paid to the individual blocks.  I definitely didn’t want to just do edge-to-edge quilting.  

Latifah’s pattern is seriously so simple to follow, and her templates are to die for.  They are very mindful of how curved seams should be constructed, and here’s something even more awesome–NO PINS NEEDED!!!  I won’t lie…I didn’t believe that at first, but after sewing a couple together, I tried it without pins, and–life changing.

Here is a little more of the quilting–not really anything too difficult, but I felt it gave a better effect than an all over quilting design.  

Above is the top with no quilting or binding–I absolutely love how this quilt came together.  
And then this was the finished quilt after binding.  I shipped this beauty off to my friend in California and hope she uses it until the thing falls apart!  I must say, Latifah did an amazing job on the pattern and tutorial and I can’t wait to make my next Glam Clam quilt.