![]() |
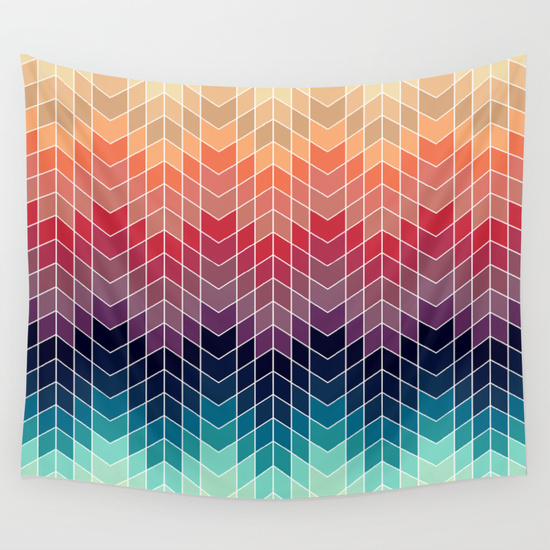
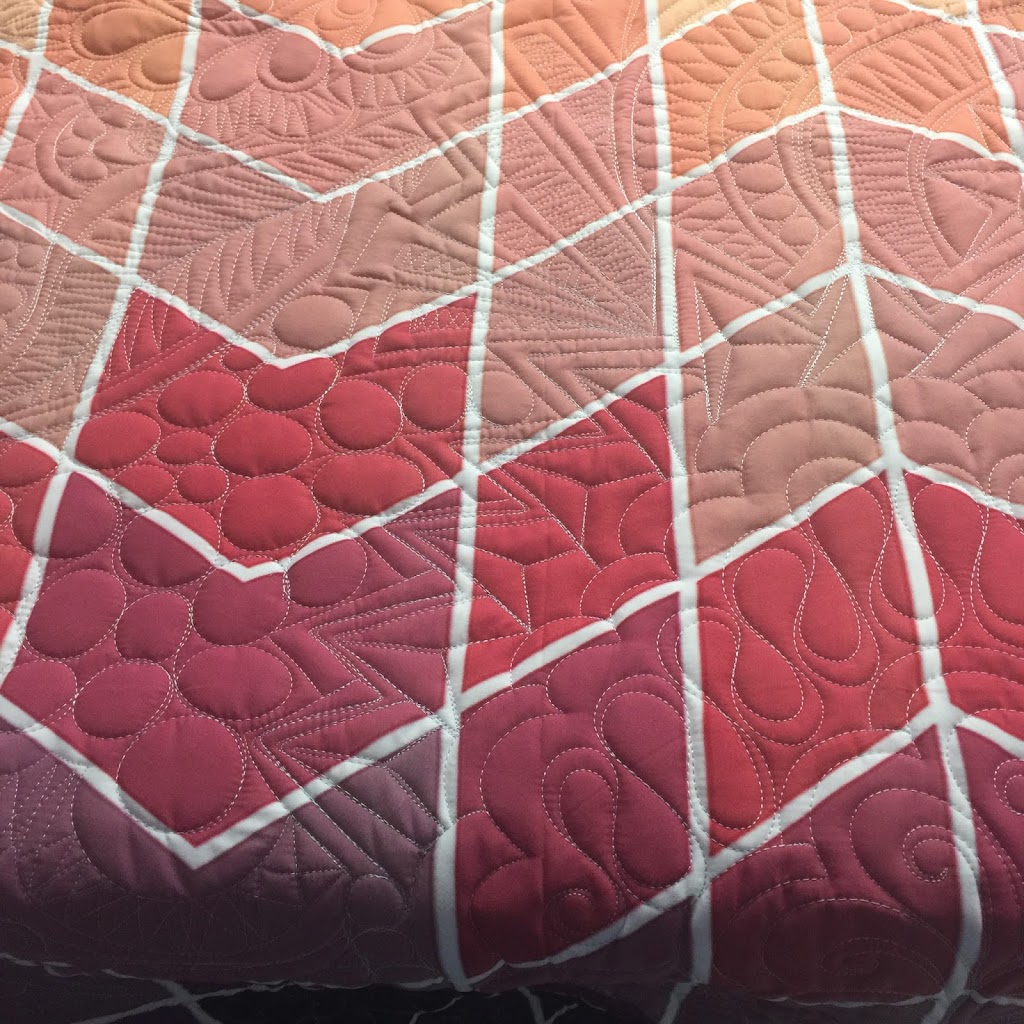
| "Explosion" printed tapestry designed by Karlee Porter (picture from Karlee's website) |

![]() |
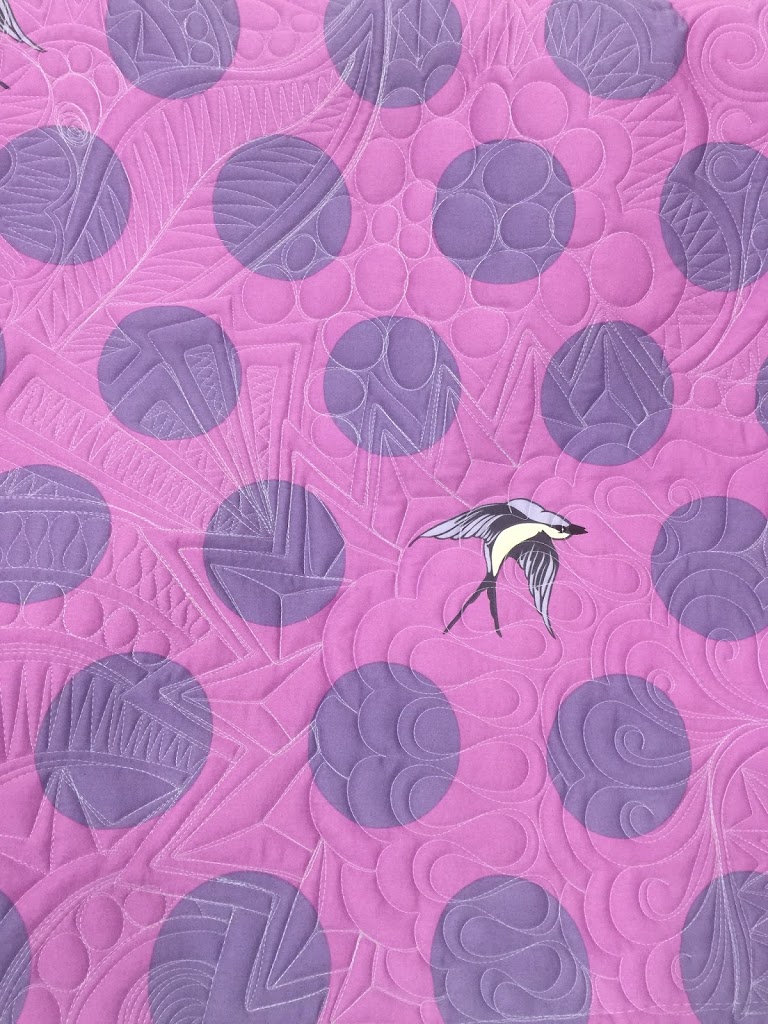
| The back of the quilt (Tula Pink wide back) |
Subheading
Subheading
Subheading
Over $125
Learn More
![]() |
| "Explosion" printed tapestry designed by Karlee Porter (picture from Karlee's website) |

![]() |
| The back of the quilt (Tula Pink wide back) |
Longarm Quilting – by kustomkwilts
How to quilt words with free motion
more Okay, so you just got an invite to a party--maybe it's a housewarming/baby shower/wedding shower/etc. You fill in the blank. This person is super special to you and you just want to give a gift that is really cool and not a lame bottle of wine they probably won't even like (I'm not a wine drinker ;). Aaaaaaand, you want to show off your fancy schmancy free motion quilting skills, amiright? Let's learn how to quilt words with free motion to make your text POP. I absolutely LOVE taking a baby name and using this technique to jazz it up a little and make a sweet wall hanging for when the parents bring their new babe home. I made a similar one for my daughter before she was born, but I incorporated a little embroidery into hers as well. The great thing about this gift is: It's quick and easy Even solid fabric will look good (and fancy) It's PERSONAL. Capitalized. You can use a name, phrase, initial, literally WHATEVER you want You probably already have the things on hand you need for this and don't have to run to the fabric store. Materials-What do you need? This is a super simple project. Unless you want to piece some fabric and get a little more intricate, all you need is some solid fabric. And, to be honest, this technique looks best with solids. Patterned fabrics will sometimes take away from the relief quilting, unless it's a really subtle pattern. I have a lot of LOUD, busy prints. So solids for the win for me! Solid fabric for the top or front of the wall hanging--I always make this piece a little bigger than I want my finished piece to end up so I can cut it down to size. Solid fabric (or a print) for the back of the wall hanging. This piece needs to measure 12" bigger on width and height. If your top fabric is 12" x 24", this piece needs to measure 24" x 36". Quilting thread that is at least slightly contrasting to your top fabric. Stencil made from your favorite font (you can also freehand whatever word you want) Erasable fabric marker (I like Frixion pens for this) Longarm needle Longarm or domestic sewing machine (whatever you have and are comfortable using for free motion quilting) 2 pieces of batting the same size as your backing fabric Binding fabric for the finish. Watch the tutorial on How to Quilt Words https://youtu.be/BnRFpYWASVA Give it a go! Now that you're an expert, give it a try! When I was a beginner quilter, I would buy some really cheap flat twin sheets and practice this kind of stuff on that. I built up my confidence a little on the cheap sheets and then wasn't so afraid to try it with good quality quilting cotton. Think of what a hit your gift will be at the next wedding shower when you give the happy couple a wall hanging with their new last name (if they are using the same last name :), or for whatever occasion, this can be personalized in so many ways. Be creative and have fun! And don't forget to spice up your free motion with themed shapes. For the "Summer" wall hanging, I threw in a few whimsical starfish here and there. Have fun and give it a shot! Happy sewing! -Joanna
Read more
Longarm Quilting – by kustomkwilts
Cupid's Arrow Pantograph
Cupid's arrow is a fast stitching edge to edge design that creates evenly distributed quilting with no backtracking. This is a great modern design that will coordinate with all your quilts!
Read more
Longarm Quilting – by kustomkwilts
Get your Graffiti Quilting on!
more https://youtu.be/vXTB15Hm_EU If you're ready to add another tool to your quilting arsenal, graffiti quilting is an awesome one to have. A few years ago (when I was prego with Gemma), Karlee Porter visited our guild to teach her Graffiti Quilting workshop. Also, I love Guns N Roses. I just saw them in concert a few days before this, so the shirt I bought there was getting some heavy use! Ever since I found Karlee, I've been a serious fan girl--so I jumped at the chance to take the class. I learned so much from that workshop and the techniques Karlee taught stuck with me and influence my personal quilting style. Karlee Porter and me in 2016 at her Graffiti Quilting workshop for SAMQG A SWEET DEAL Since COVID has busted into the room and ruined everyone's in person plans, now is the perfect time to sign up for Karlee's Graffiti Quilting Master Class ONLINE! July 1 registration opens, and the class is the cheapest you'll be able to get it for. So it's best to sign up early! Karlee has given me a coupon code to share with you for an additional $50 off KKGQ50 (good through Sep. 11, 2020). Seriously, this is the best deal ever. No travel expenses, you get to learn in your pajamas if you want, you don't even have to brush your hair--it's basically heaven on earth! Class starts September 12, 2020--keep reading for the full class details. I took some time out yesterday to play around and grabbed my favorite Glide Threads and some grey Kona cotton to do some Graffiti Quilting. I took some time lapse videos and combined them into a short little youtube video (top of the post). This video will give you a tiny glimpse into what you'll learn from Karlee. There is no instruction in my video--you'll get all of that from the Masterclass (and so much more). My fun Graffiti quilting practice from yesterday :) Graffiti Quilting Masterclass Details *EARLY BIRD TIERED PRICING! SAVE UP TO $75!!!*July: $325August: $350September: $375 In this class you'll receive:-Graffiti Quilting Vol. 2 Book-Graffiti Quilting Coloring Book-Zinger lapel scissor holder-Mini snip scissors courtesy of Famore Cutlery-A printed syllabus and schedule, list of supplies and recommendations-A comprehensive coupon book containing discounts and promotions from our amazing sponsors (see list below)-Homemade Caramels from Karlee's kitchen-Access to Private Facebook Group for the duration of the class, as well as at least 3 months after the 8 weeks have ended-First priority social media correspondence from Karlee for the duration of the class Sign up for the Class I can't say enough good things about Karlee and her teaching style. You can read all the details and sign up for her class here. Even though I quilt mostly on my longarm, I took this class using my domestic sewing machine. Here's part of what I created in class that day, with Karlee's expert guidance: My first Graffiti quilting in 2016 on my domestic sewing machine in Karlee's class This type of quilting is so freeing and fun--I know you'll love it. If you'd like to see some of the ways I've used graffiti quilting, you can check out these posts below: Graffiti Quilting Honest Fabric When I went to Karlee's workshop Charity Quilts for Pulse Have fun and go get your Graffiti Quilt on!!
Read more
Longarm Quilting – by kustomkwilts
Free motion quilting tutorial - How to quilt pebbles
Learn how to quilt this easy and fun pebble motif by varying the sizes of your pebbles for great texture and a river rock look!
Read more
Longarm Quilting – by kustomkwilts
How to quilt orange peels - free motion quilting tutorial
Learn how to quickly quilt orange peels with this tutorial.
Read more
Longarm Quilting – by kustomkwilts
Quilting feathered wreaths - free motion quilting tutorial
Learn how to quilt fun feathered wreaths on your quilts in this tutorial.
Read more
Longarm Quilting – by kustomkwilts
How to quilt a grid using rulers tutorial
Learn how to quilt a grid with rulers in this video tutorial.
Read more
Longarm Quilting – by kustomkwilts
Free motion quilting tutorial - pebbles and swirls
Pebbles can be tedious to quilt, but it goes faster when you mix swirls into the motif!
Read more
Longarm Quilting – by kustomkwilts
Free motion quilting tutorial - Echoed teardrops
Learn how to quilt echoed teardrops to create texture in this easy video tutorial.
Read more
Longarm Quilting – by kustomkwilts
How to quilt feathered swirls
Have you ever wanted to combine a couple of different quilting motifs, but didn't know where to start? In this video tutorial, you'll learn how to use feathers and swirls together to quilt feathered swirls! Learning how to quilt feathered swirls will give you another great tool for your quilting tool box and you'll be able to tackle that negative space in your quilt in no time at all! Video tutorial - how to quilt feathered swirls https://youtu.be/MBSbQyV8BPE more Using feathered swirls in you quilt Here are some examples of quilts I've used feathered swirls in. I'm showing my successes and not so successes in these, so you can see how these look in different quilts. Example quilts Antique quilt with feathered swirls This first quilt is an antique quilt that my lovely friend Amy picked up at an estate sale. It was in relatively good condition for being around 80 years old, and it needed a fairly dense all over. The feathered swirls work really well in this top because you can see the quilting, but you also see the quilt first and foremost. Modern quilt with feathered swirls This second quilt is a good example of a pattern that is pretty complex and has lots of prints. If I'd had more time, I would have custom quilted this one and used some straight lines and ruler work. You can see the quilting, but it tends to try to compete a little with the fabric and quilt pattern--and that's not usually the outcome I like to have. Live and learn, right!? Also, I used hot pink thread on this, and a blending thread--maybe a silver would have been a little more subtle. Now this third quilt is the jackpot. The background is a nice light solid, and the quilting motif does a good job of adding texture, but not overdoing it so much that you don't see the piecing work. My sweet friend Loretta pieced this darling elephant quilt as a baby gift. You can also scale up the design and make it larger so the quilts are more luscious and soft. And this fourth example is kind of a mix to me...the pattern is really busy and the fabrics are too. Straight lines would have been superb on this to help the quilt pattern stand out, but the client opted for this motif--which is okay!! She loved the look of it, and it does add a bit of a feminine touch to the quilt. The quilting can't really be seen in the center, but it is seen on the outer borders where the fabric is more low volume. Putting it into practice I hope you'll take a look at these quilts I've used feathered swirls on and take them into consideration when deciding to use feathered swirls. Think about the end product and what the complete quilt will look like. It is a really great fill when using solid fabrics, or filling the space in the background of a block. And it's perfect for an easy all over that you want to use to add texture. Have fun with it and go practice those feathered swirls! Other free motion quilting tutorials If you like feathered swirls, take a look at the basic components. I did some video tutorials of feathers and swirls separately that you might be interested in before trying this one out. You can see more videos at my youtube channel. Until next time, happy sewing!! -Joanna
Read more
Longarm Quilting – by kustomkwilts
How to quilt stacked swirls
Good Monday morning! I'm so excited to share a new video tutorial with you this morning. I just LOVE to quilt stacked swirls in the background of quilt blocks and in negative space. They create amazing texture and fill up a space without a lot of thought and concentration. This video will show you how to quilt stacked swirls and how to navigate to the spaces you want to quilt. more Quilting it I used Kona Cotton Splash (the Kona color of the year) and white Glide thread by Hab+Dash for high visibility quilting. Typically, I would use a blending thread color when quilting this in the background of a block. I like to use blending threads because I want the quilting to show, but not compete with the design and piecing of the quilt. Contrasting thread colors definitely have their place, and should be used with discretion. After all, this is YOUR quilt, and YOU should get to decide the thread colors, right!? Check it out :) I hope you'll take a quick look at this tutorial and see how easy it is to quilt this fill. Quilting round motifs is very simple and repetitive. These are easy to perfect with just a little practice, and you will probably find that you won't even have to doodle for very long before your swirls look great! How to quilt swirls video tutorial https://youtu.be/RYTFxdpWBis Quilts that I've used this fill on I thought I'd show some practical examples of quilts I've used this fill on so you can see it in context. Stacked swirls are a great way to add texture without drawing the viewers eye away from the focal point of the piecing on the quilt. Check out some of these quilts I quilted with stacked swirls: Cheeky Churn Dash This first quilt is my Cheeky Churn Dash quilt. It's a great quilt for using layer cakes or 10" precuts. If you want to really show off a fabric line, this is the perfect pattern for it! You can see that I really love to pair stacked swirls with simple ruler work. You can see the quilting but it doesn't stand there shouting, "HEY!!! Look at me and not the fabulous quilt!" As a pattern designer, I would hate for the actual quilt to not be seen for the quilting on it. We spend so much time piecing our quilts that time and thought really needs to go into planning the quilting motifs used. And as a longarm quilter, I love for my quilting to be seen, but not at the expense of the maker's work. It needs to be an equal relationship where both parts can be valued and appreciated. Cheeky Churn Dash Katelen's Applique Now below are a couple of pics of my dear friend Katelen P.'s quilt. Katelen is SO talented and creates these amazing appliqued animals. Quilting the stacked swirls behind her applique really makes the animals pop and helps them stay the focal point of the quilt. It's really important when picking quilt designs that you don't upstage the maker's work on the quilt. Quilting is there to help the quilt shine and not overpower it (that's just MY opinion ;). Dreamer's Star This is my Dreamer's Star quilt that I quilted stacked swirls in the background of. The swirls pair so nicely with a little ruler work to really show off the quilt design and the gorgeous fabrics used. Dreamer's Star Above is a close up of the stacked swirls. You can see how much texture it adds without taking away from the quilt design. One of my favorites!!! I hope you'll give this motif a try. Quilting stacked swirls is just a breeze, and I know you'll get in the groove of them in no time! Happy sewing!
Read more
Longarm Quilting – by kustomkwilts
Learn how to quilt swirls - video tutorial
Want to learn how to quilt swirls? This video tutorial will walk you through the ins and outs of how to quilt them!
Read more
Longarm Quilting – by kustomkwilts
How to quilt feathers - video tutorial
Learn how to quilt fun and easy feathers with a great video tutorial.
Read more
Longarm Quilting – by kustomkwilts
Honest Fabric Designs - Moroccan Tiles
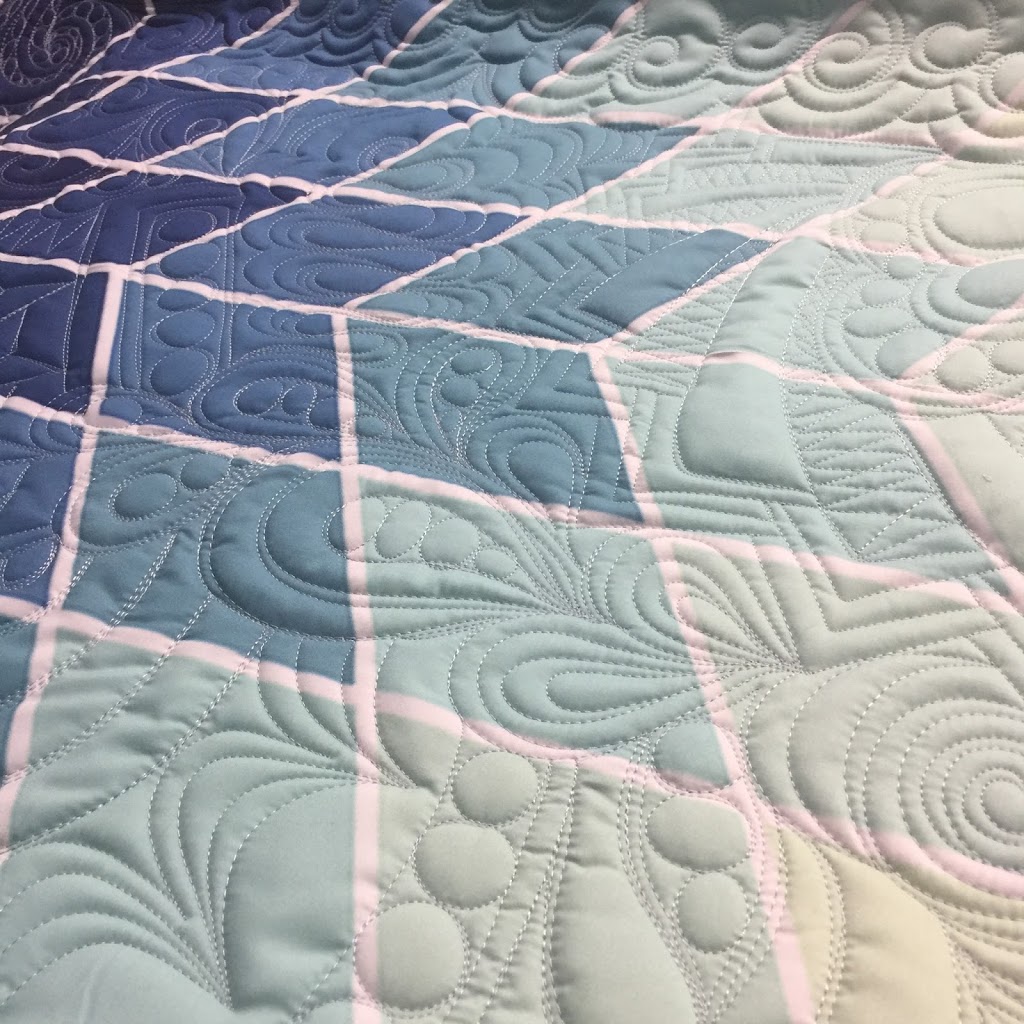
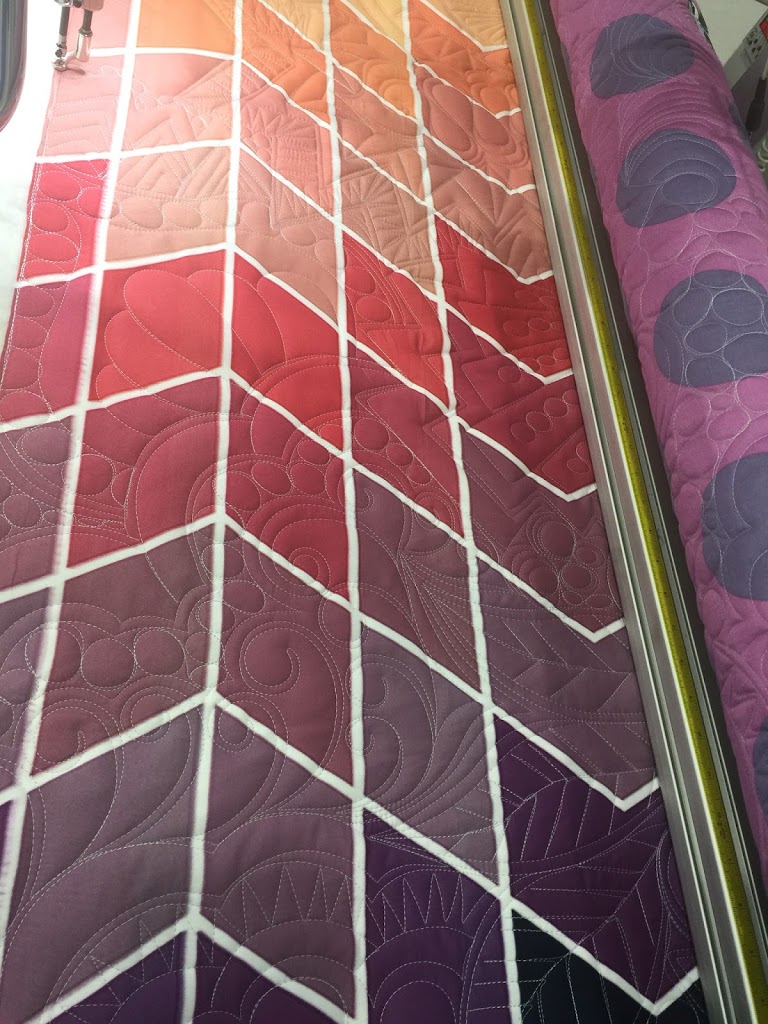
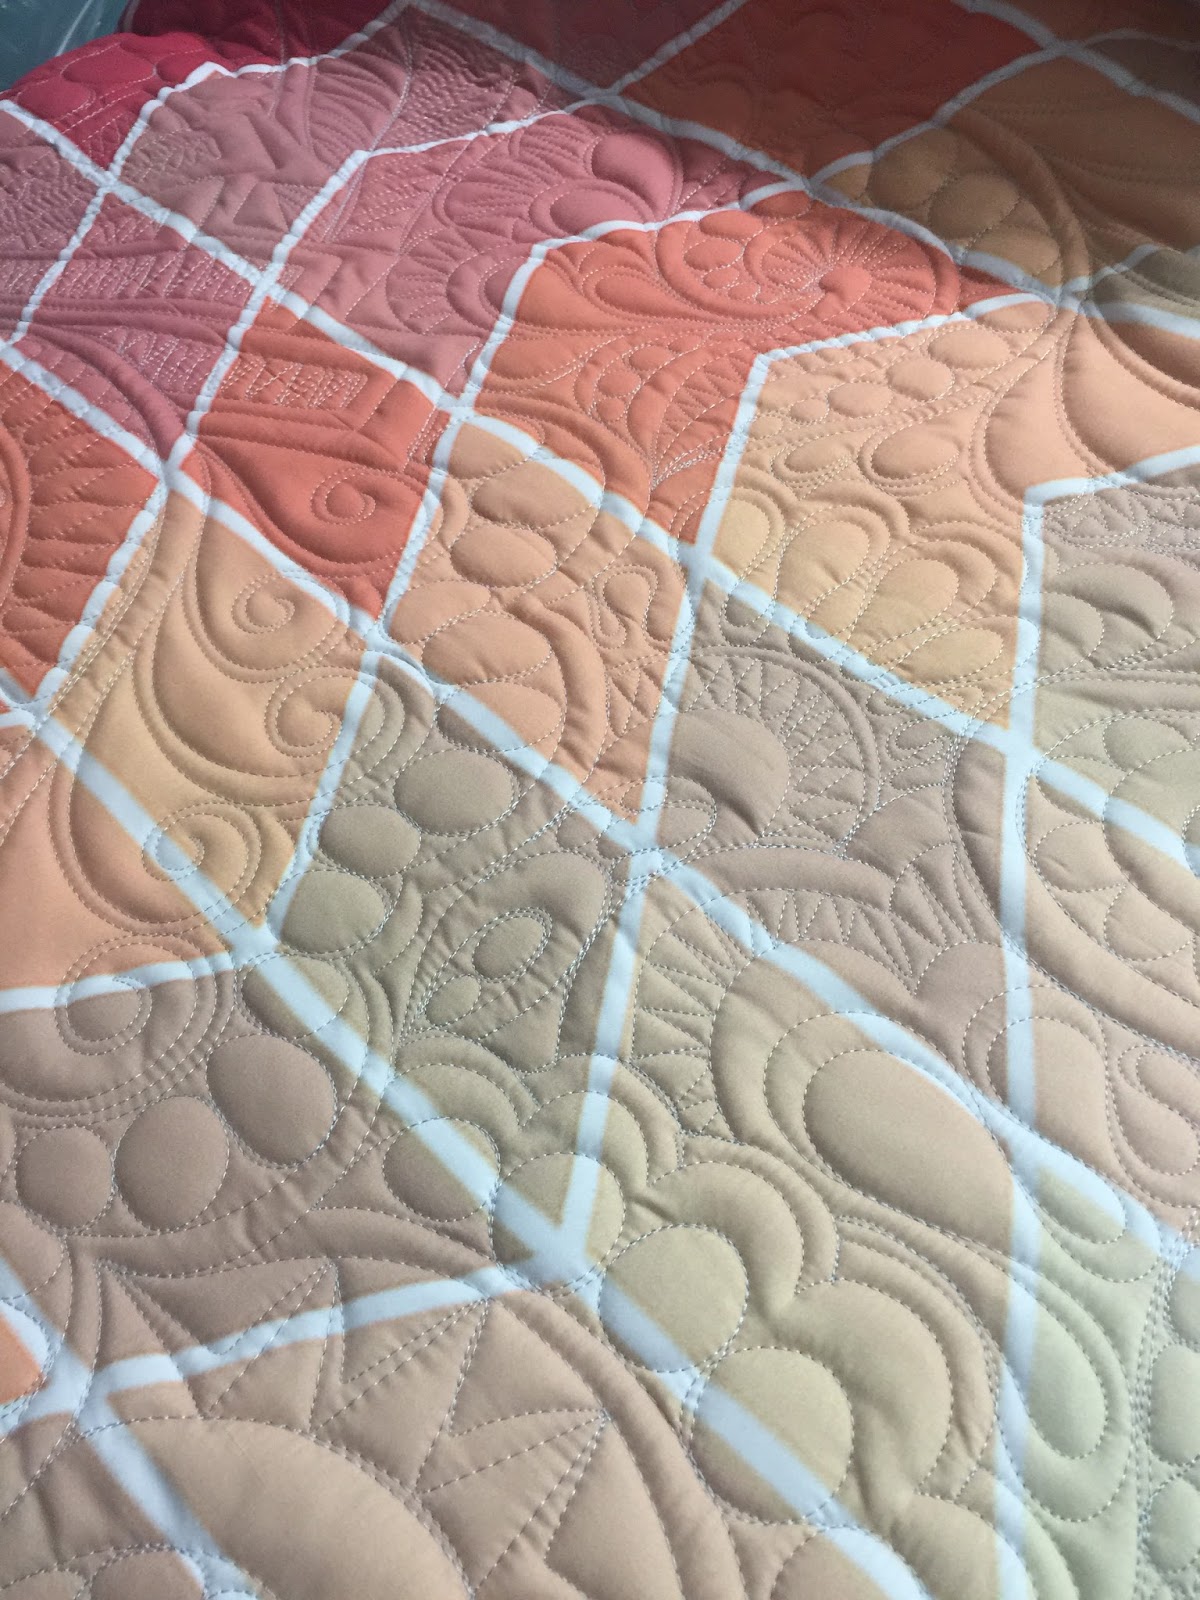
I'm so excited to finally share some news with you!! I've joined the fabulous designers at Honest Fabric to bring you some vibrant custom printed whole cloth quilt tops!! I know some people think piecing curves is a real bummer (it's really SO much fun!!). So if that's you--and you've been dying to get your hands on a Moroccan Tiles Quilt, you're in luck. You can head over to Honest Fabric and choose from 6 different color ways, in three different sizes. I;m so exited to finally share these Honest Fabric Designs with you! Honest Fabric - Moroccan Tiles wholecloth quilts There are 6 unique colorways for this design and I just LOVE how they turned out. Honest Fabric is having a sale through May 31 so you can pick up any of these awesome designs for 25% off with code 25off. A few months ago, I ordered some before I was a contributor from my friend Nelson Salsa. I picked up his "Tilt" design so I could try out some new quilting designs. I also bought Kwik Color Washed Diamonds by Karie Jewell, Fox Dreams and River Walk by Anne Sullivan. These designs are going to be so much fun to quilt up, and it takes the stress off and just lets me quilt without worrying about spending so much time piecing. All the designs I purchased from other Honest designers don't currently have patterns out to piece them, so I would otherwise miss out on having a piece of the great artwork from these designers. I'm really happy with the quality of the printed fabric that Honest Fabric delivers. The fabric is soft and supple and colorfast. I've quilted up one of Karlee Porter's designs that I purchased called Explosion. I did some graffiti style quilting on Karlee's whole cloth design and used Quilter's Dream Wool batting to really make the quilting POP. It was SO much fun to quilt, and I didn't have to worry about bulky seams or any of the piecing! It was heaven. Anyhow, I hope you'll check out some of the creative designs over at Honest Fabric. Take a break from piecing to quilt up some of these amazing printed quilt tops. Have fun, and happy sewing!
Read more
Longarm Quilting – by kustomkwilts
Binding on the Longarm
This is a quick and easy tutorial for how to bind a mini quilt on the longarm.
Read more
Longarm Quilting – by kustomkwilts
Inspired Free-Motion Quilting (and giveaway!)
This has been such a busy and exciting week for me! I had a little time away from sewing celebrating the Christmas season with our family (and our daycare was closed for almost two weeks--insert the screaming face emoji here ;). All joking aside, it was wonderful to get to spend so much time with the family and remember what's important in life! I hope you were able to rest, recharge, and be around the people you love. Photo courtesy of C&T Publishing One thing I'm super pumped about is Amanda Leins and Bill Volckening's new book Inspired Free-Motion Quilting. The book is described as "90 Antique designs reinterpreted for today's quilter". I do a lot of custom quilting, and this book is really inspirational, as far as brainstorming designs goes. There are pages of antique quilts with really amazing quilting designs, along with step-by-step instructions on how to execute and master each design. It's a great reference for seasoned quilters and beginners alike. I'm so excited to be a part of the Inspired Free-Motion Quilting blog hop and team up with Mandy Leins and C&T Publishing to give away one free PDF copy (that means the giveaway is open internationally!!!) of this awesome book! Read to the end for details on how to enter. As soon as I was able to flip through Inspired Free-Motion Quilting, two designs immediately caught my eye that I knew exactly what I wanted to use them for. My two favorite motifs from the book are "Double lines and orange peel" and "Echoed Crosshatch". I really enjoy making bags (in addition to the quilting I do), and I like to add a bit of decorative quilting to the exterior of the bag, if I'm able to. I had a new pattern I was really excited to try--The Gloss Cosmetic Bag by Sew Sweetness (Sara Lawson). The pattern is available with purchase of the Minikins Season 2 pattern bundle on Sara's site. This is a really great way to spice up some solid fabric--and solid colors show off the quilting with less distractions than prints. I cut the green linen-canvas fabric I had slightly larger than the pattern called for and quilted it prior to assembling the pattern. I loved the instructions and diagrams that are included with the book--they really leave no room for error, even if you're just starting out. I'm really thrilled with how impactful the design is that I selected from the book. I chose "Double Lines and Orange Peel" for a classic motif that would really look great on a cosmetic bag. I love the definition and texture it gives the solid--in what would otherwise be a really boring cosmetic bag. It's not as easy to see in the picture, but I opted to skip the orange peels on the patterned fabric on the bottom of the case, and only quilted the echoed crosshatch. I quilted the bag components on my longarm, but it would be easy to do this sort of quilting on a domestic. Just pop on a walking foot and measure out your straight lines, and follow the simple instructions for free-motion quilting the orange peels between the lines to finish up. I used a slightly contrasting thread color for a little pop, but I'm dying to make another in black canvas with black thread for subtle texture and style. Amanda and Bill do a fantastic job of sharing some amazing antique quilts and their in depth knowledge of how to reproduce the motifs, and I highly recommend Inspired Free-Motion Quilting as a must have reference for quilters! Make sure you read below to enter the giveaway, and check out the other blog hop participants' posts for more chances to win! January 7: C&T Publishing, Bill Volckening January 8: Amanda Murphy of Amanda Murphy Design, Kim Lapacek of Persimmon Dreams January 9: Teri Lucas, Lynn Harris, Debby Brown of Debby Brown Quilts January 10: Robin Koehler of NESTLINGS by Robin, Mary Abreu ofConfessions of a Craft Addict , Patty Murphy of Patty Murphy Handmade January 11: Joanna Marsh of Kustom Kwilts, and Amanda Leins of Mandalei Quilts Giveaway Details Here's what you came for!! C&T Publishing has so generously allowed me to give away one PDF copy of Inspired Free-Motion Quilting. All you need to do to enter is like my Instagram post and tag a friend in the comments OR leave a comment on THIS blog post telling me why you're excited to get a copy of this book! The giveaway is open internationally and will close Sunday, January 13, 2019 at 6:00 PM, CST. The winner will be notified by me soon thereafter. Good luck!!!
Read more
Longarm Quilting – by kustomkwilts
Quilting Tips - How to plan your quilting designs
Happy 4th of July! I hope you're getting to enjoy family and friends and all the great festivities that the 4th brings! In my neck of the woods, it's hotter than Hades and we haven't had a decent rain shower since March, so we may not be enjoying tons of fireworks this evening...we're definitely praying for the little rain shower than is a minor possibility tonight. Now lets talk quilting tips and how to tackle planning your quilting design!I recently got to quilt an American Wave Quilt (pattern by Lisa Moore of Quilts with a Twist) for my mother-in-law and thought it would be a good opportunity to share some of my quilting tips for adding texture and movement to your quilt tops and planning your overall quilting design. Even though I love bright colors and modern-traditional quilt designs, I have a great appreciation for traditional colors and patriotic quilts. Some of the first quilts I made when I was learning to sew were with traditional, warm colors and American designs. I'm using this quilt to talk about the 8 things I usually think about before I start quilting, but these tips can be applied to any quilt top.My MIL didn't follow the pattern exactly as shown below, but this is the original pattern, by Lisa Moore, pictured below. If you're interested in purchasing the pattern, you can grab a PDF copy at Quilts with a Twist (this is not an affiliate link, I'm just crediting the original designer in case you want to purchase the pattern).[caption id="attachment_1224" align="aligncenter" width="300"] American Wave Quilt Pattern by Lisa Moore - Photo from Quilts with a Twist Pattern Page[/caption]Here are my top quilting tips for devising your quilting plan: Consider the quilting as a design element of your quilt.When you get a quilt top completed that has so much work put into it--much as this one does--it's important to consider the quilting as another design element and not an afterthought. In my opinion, a basic meander or other edge to edge can take away from the overall impact of the quilt.Since our goal was to enhance the movement already present in the piecing, we decided to stitch in the ditch, quilt swirly waves, add some stars to go with the theme, and quilt piano keys on the striped fabric border.[caption id="attachment_1220" align="aligncenter" width="980"] SID and swirly waves[/caption] Examine the layout of the quilt and follow the lines in the quilt to enhance the design.This quilt design already shows lots of movement in the piecing. I opted to stitch in the ditch on the waves and within the different fabric colors, I quilted swirly waves. Another great quilting motif would have been to echo the wavy lines within the quilt to complement the already wavy lines.The red and white striped fabric wasn't exactly stitched in the ditch (SID), since it was one piece of fabric and not pieced stripes, but I followed the lines of the colors and did a faux SID to make it appear that it was pieced. Consider thread color.I used three different thread colors on this quilt--red, cream, and blue. I matched the thread colors to the fabrics I was quilting and changed them often. This isn't always necessary, but it's important to consider before you stick with just one thread color for the entirety of the quilt. If you want the quilting to really pop, then using just one of those colors--like cream would be a great idea. The cream will blend into the cream colored fabrics, but contrast highly against the darker values of the red and blue.[caption id="attachment_1226" align="aligncenter" width="225"] Blending thread[/caption]Ask yourself -- Do I want my quilting to blend or POP? If your goal is great subtle quilting, then select your thread colors to blend or melt into the fabric. If your goal is high contrast quilting that will POP against your fabric, select thread colors that contrast with the fabric.Also, if you're a beginning quilter, matching your thread colors to your fabric colors will help conceal any minor mistakes you might make. This is a great confidence building technique to get you started on your quilting journey! What color is your backing?Some people prefer the quilting to blend into the backing, but in this case, the red and blue threads really pop on the cream colored muslin that was used for the backing. It's a good idea to think about your backing and what the quilting will look like on the back prior to starting quilting.[caption id="attachment_1221" align="aligncenter" width="300"] Backing[/caption] Look at your borders (if there are borders).So there were two "borders" on this quilt top. The outer border was a dark navy blue, and the inner border was the red and white striped fabric. I quilted stars that connected to each other in navy blue thread on the outer border and the faux SID on the striped fabric. It's a little difficult to see because of the thread matching, but it's there :). Select quilting motifs that will complement your border designs.[caption id="attachment_1227" align="aligncenter" width="225"] Border designs[/caption] Think about the theme of the quilt.In this case, the theme is pretty straightforward. It's obviously a patriotic themed quilt, so think about designs that go with that theme. Stars, stripes, waves, etc. would all be good choices to go with this quilt top. maybe you have a quilt top that has cats on it, and the cats are made from triangles--you could quilt triangle motifs in the borders, or a ball of yarn, or little mice. Stars probably wouldn't be a good choice to go with a cat quilt, so you'd want to pick something in theme with the quilt top. Evaluate the purpose of the quilt.This will help you decide the density of quilting that is appropriate and what type of batting you may want to use. If it's a quilt that's going to be a wall hanging, you'd probably want to use a stiffer batting, or maybe double batt with a puffy top like wool. If the quilt is intended to be used often, you might select a poly-cotton blend or 100% cotton-something that would stand up to being washed and laundered frequently.The batting you select might also dictate how far apart the quilting can be. If you buy packaged batting, it will usually tell you how far apart the quilting lines can be (example-up to 8" apart). Keep in mind the denser the quilting, the stiffer it will feel. A looser quilted quilt will be softer and drape better than a heavily quilted one. Stitch in the ditch might be a lot of work, but the payoff is worth it.I'm a big fan of SID. I haven't ever quilted a quilt with stitch in the ditch and regretted it, but there have been instances where I didn't do it and wished I had. It gives the overall quilt a more finished look (in my opinion), and a very polished look.[caption id="attachment_1228" align="aligncenter" width="300"] SID detail[/caption]The overall idea is to think of your quilting plan and how it will affect the overall impact of your finished quilt. These 8 tips are small things you can consider that will really impact your finished quilt. I hope these tips are helpful in planning your next quilting project! Have a safe and happy 4th, and happy quilting :)
Read more
Longarm Quilting – by kustomkwilts
Free-Motion Framework book - Giveaway!
I am delighted to announce that I had the honor of contributing to Jen Eskridge's new book from CT Publishing called Free-Motion Framework. It's an amazing book that offers tips and tricks for really building your free motion quilting skills. There are so many amazing contributors (17, in fact!) in Jen's book, you've really gotta check it out! Keep on reading to the bottom for two separate chances to win![caption id="attachment_934" align="aligncenter" width="240"] Free-Motion Framework Book[/caption]Head over HERE to leave a comment to be entered in the giveaway! Jen will be announcing the winner on June 19th (entry closes June 18). Prizes include: Clover marking tools, Clover Wonderclips, HandiQuilter machine quilting rulers, and a couple of copies of the book! AND...For a second chance to win, I'm giving away a copy as well, courtesy of C&T Publishing! Head over to Instagram @kustomkwilts and enter for your chance to win a copy of the book by: Following my instagram account @kustomkwilts Liking the giveaway post Tag a friend! You must do all three to be entered to win! My giveaway will close Sunday, July 10 and I'll announce the winner Monday July 11, 2018. The giveaway hosted by me is closed. Congratulations to Marnie Anderson on winning a copy of the book!Free-Motion Framework launched at Spring Quilt Market this past May, and is available on Amazon now. Check it out here! The book includes ten designs that can be transferred to a whole cloth or a single piece of fabric as your quilting guide. I quilted two of the samples included in the book, and really loved how simple the process was for transferring the design to the fabric and then starting to plan your quilting ideas.[caption id="attachment_935" align="aligncenter" width="300"] One of my samples in Free-Motion Framework[/caption]Jen gives lovely suggestions for how to create your own designs and fill the area creatively. This book is a wonderful exercise in working out your quilting muscles and trying something new. The skills to be gained from this are limitless, but I found that it really helped me plan block based quilting designs much more efficiently and gave me some new ideas I hadn't tried before. I really like the idea of using hand guided free motion quilting in conjunction with some simple ruler work and straight lines.[caption id="attachment_939" align="aligncenter" width="300"] A peek at the corner of my other sample in the book[/caption]The picture above is the corner of another of my samples in the book. The designs provided in the book are so simple to use and provide a great study on symmetry in your whole cloth work. I can't wait to get my hands on a copy so I can quilt up some more of these quilts. Don't forget to follow the link in the second paragraph to comment for a chance to win some great prizes in this blog tour of Free-Motion Framework!Stop by each blog this week for a possible chance to win a copy ofFree-Motion Framework. (International winners, outside the USA, will receive a digital copy.) Monday | June 4 ReannaLily Designs (here!) C & T Publishing Tuesday | June 5 Joey's Quilting Co Helen Ernst Longarm Quilting Nancy Zieman Productions, LLC The Blog Thursday | June 7 Wise Craft Handmade Friday | June 8 Kustom Kwilts Living Water Quilter Seamingly Slawson Quilts – Susan Lawson
Read more
Longarm Quilting – by kustomkwilts
Making it Fun Quilt - Spring Quilt Market 2018
Guys!!! I'm so excited to finally be able to share my project for the Michael Miller Spring Quilt Market booth. They sent me fat quarters of their new has dot blenders and their marbled fabrics, along with some coordinating Cotton Couture solids and told me to make something fun and rainbow-y! Is that a dream assignment, or what?? I narrowed it down to 48 unique fabrics that I wanted to use in the quilt, and lined them up:[caption id="attachment_1047" align="aligncenter" width="300"] Holy cow!!! 48 different fabrics![/caption]I numbered them and then numbered the design I had mocked up in EQ8, but it was starting to get a little crazy. I ended up having to make a smaller swatch card because some of the fabrics were so similar in color and shade that I was starting to go cross-eyed flipping through that stack.[caption id="attachment_1046" align="aligncenter" width="300"] Swatch Card[/caption]I very rarely make swatch cards, but I found it to be very necessary with this quilt. I designed a foundation paper piecing block in EQ8 and then rotated it slightly to complete the design. The piecing went really quickly and I just needed to double check that I had the correct fabric for each block before I started sewing. I'll admit, there was a good amount of seam ripping to be had with this one![caption id="attachment_1049" align="aligncenter" width="300"] Foundation Paper Pieced Blocks stacked and ready to go![/caption]I used my new Daylight Company light box to help with the foundation paper piecing, and I really love how thin and lightweight the unit is. I had a very bulky, cumbersome light box in the past and recently upgraded to this one. It's been such a nice treat to have one that doesn't take up all of my cutting mat. I also used Adobe Illustrator to help design the applique text in the right size and fonts, then tiled the pages to make a huge pattern. I hand cut each letter and symbol out, then used the paper as a template to trace onto the white fabric for the applique. I used Misty Fuse on the backside of the white Cotton Couture and then cut out each letter. It was pretty time and labor intensive, but I love how it turned out.[caption id="attachment_1048" align="aligncenter" width="300"] My EQ layout compared to the quilt top, prior to adding applique[/caption]I did come up with a slight problem in getting the applique on straight, centered, and spaced equally. Usually, I would just use a big window and tape the quilt in place or trace where the letters needed to be, but I decided to buy a cheap portable projector and project the original applique design onto the quilt while it hung, and then I positioned the letters in place with a small amount of glue from an Elmer's glue stick. Once they were in position, I lightly fused them into place and then took the quilt top to my Janome MC9400 to complete the applique blanket stitching around each individual letter (that took about a day and a half!).[caption id="attachment_1050" align="aligncenter" width="300"] Using the portable projector to project my applique design onto the quilt[/caption]Once I finished the applique, it was time to throw it on the longarm for quilting. I chose just a single layer of Quilter's Dream Wool to maximize the quilting texture and also keep it fairly lightweight. Then I quilted some straight diagonal lines with rulers to finish it off. I opted to not bind the quilt traditionally, but I faced it to not take away from the overall punch of the quilt, and keep the focus on the applique. I really loved making this quilt and loved the new fabrics being released by Michael Miller Fabrics for Spring Quilt Market 2018. I can't wait to get my hands on more of that fabric![caption id="attachment_1051" align="alignnone" width="980"] Spring Quilt Market Quilt for Michael Miller[/caption]
Read more
Longarm Quilting – by kustomkwilts
Quilting applique and some modern maples
I just love some good free motion quilting! Last month, I quilted some amazing client quilts. One quilt was a BOM from a local quilt shop - Sew Special in San Antonio, TX, and another was pieced by Kasandra Lee from the SAMQG. The first quilt I mentioned was a quilt pieced by Katelen Postert that started as a traditional BOM using Moda's Grunge line. Katelen added her own special touch and added some amazing animal appliques to really make this quilt special. Katelen is so talented, and that mini-parade of wildlife strolling down the center of the quilt is just perfection![caption id="attachment_1035" align="aligncenter" width="300"] Katelen's Quilt[/caption]When I met with Katelen for her quilting consultation, we decided on some clean straight line quilting (not too dense), and outline the appliques with some stitch in the ditch and surround them with medium-sized swirls. I used Glide thread in a 50 wt. light teal color that matched the duck (along with a lighter cream color for the swirls), and used a single layer of Quilter's Dream Wool batting.[caption id="attachment_1034" align="aligncenter" width="300"] Duck Applique[/caption][caption id="attachment_1032" align="aligncenter" width="225"] Longarm View[/caption]I was so in love with Katelen's color choices and her addition of the applique was such an awesome touch. Here's a portion of the finished quilt with the applique. Bravo Katelen!!![caption id="attachment_1033" align="aligncenter" width="300"] Katelen's quilt[/caption]Kasandra's quilt was just as exciting for me to quilt. She did a great modern maple quilt with lots of negative space in a cool color palette.[caption id="attachment_1038" align="aligncenter" width="251"] Kasandra's Quilt[/caption]I did some diagonal straight line quilting within the maple leaves to follow the lines of the piecing, and then added some free flowing swirls to the background. The batting used was Quilter's Dream Orient for a functional, soft, and drapey quilt that will be useful in a hot climate.[caption id="attachment_1037" align="aligncenter" width="225"] Longarm View[/caption]And these are the free-flowing swirls I did in the negative space. This is truly one of my favorite fills to do, and so relaxing to get lost in![caption id="attachment_1036" align="aligncenter" width="225"] Swirls![/caption]I'm so happy I can share these quilts made by some very talented women. I love mixing a little free motion quilting with ruler work and I think it makes the quilt really stand out without being overly done. Hope you're getting to do some lovely sewing this week!
Read more
Longarm Quilting – by kustomkwilts
Ice Cream, You Scream Quilt FREE PATTERN
Who wants a free Ice Cream, You Scream Quilt Pattern? Well today is your lucky day!!!You have to check out this adorable fabric line Michael Miller Fabrics just released. The line is called Ice Cream, You Scream and the colors are everything! Also, there's this border print that is just dying to be put in a quilt (or made into a little girl's skirt!!), and nearly makes me swoon! I got a chance to get my hands on this fabric to design a quilt for the release, and I'm not gonna lie...I spent a few hours just playing with the fabric and coordinating Cotton Couture. It features sweet ice cream cones, sundaes, and the best stripes. It reminded me of the 4th of July and ice cream socials and everything pure in the world. The best part is, Michael Miller Fabrics is offering this pattern as a freebie--you can get your own PDF pattern download from their website.[caption id="attachment_944" align="aligncenter" width="881"] Ice Cream, You Scream Quilt - Picture from Michael Miller Fabrics website[/caption]The pattern is for "confident beginners", which just means you need a general knowledge of foundation paper piecing and fussy cutting. I fussy cut the border pieces so the ice cream sundaes were centered along the center of the borders, and the cornerstones in the border were fussy cut to showcase the cute little ice cream phrases on the fabric.I had a blast designing and piecing the quilt. I had even more fun quilting it! I used Glide thread (from Hab+Dash) and Quilter's Dream batting in the quilt. I used a few different colors of thread and matched them to the different fabrics. Most of the quilting was handguided free motion quilting, with the assistance of straight rulers for the grids.[caption id="attachment_946" align="aligncenter" width="348"] Ice Cream Cone Quilting[/caption][caption id="attachment_952" align="aligncenter" width="669"] Cornerstone block quilting[/caption]I'd love to see what you do with the pattern--the foundation paper piecing blocks are pretty quick to sew up. Just remember to shorten your stitch length (I like to use 1.5) so the paper is perforated enough to tear away easily and print your paper piecing templates at 100%. Then add your sashing and borders and voila! Don't forget to grab your free copy, and check out the pattern (pictured below). Happy sewing!!![caption id="attachment_953" align="aligncenter" width="232"] Ice Cream, You Scream Quilt[/caption]
Read more
Longarm Quilting – by kustomkwilts
Quilting Leslie's Kaffe Fassett Quilt
Man, oh man! I had the honor of quilting this awesome Kaffe Fassett quilt by Leslie Tucker Jenison. Leslie pieced her quilt based on Kaffe Fassett's quilt pattern from the book Quilts in Sweden (pictured below-photo from amazon.com), using his fabric. Leslie also pieced the backing using some awesome linen and polka dots.Leslie had requested some straight line quilting to follow the lines of the fabric pattern--I loved that idea. Quilting a quilt like this using a concentric design can be a challenge on the longarm, and you sometimes end up advancing and rolling back the quilt on the frame back and forth, back and forth, back and forth, (did I say back and forth already?) etc. To avoid doing that ONE MILLION times, I connected some of the lines, and I really liked the outcome of the quilting look.[caption id="attachment_926" align="aligncenter" width="469"] Quilting close up[/caption]The lines of this fabric are so amazingly deceptive and provide the illusion that this was painstakingly pieced. I love the wonky look of the finished quilt and really found the design brilliant! I have been wanting to do a stripe study (kind of like how some people do color or quilt block studies) for so long, and this made me move that up my priority list. Someday soon I'll start that project.The thread used was Magnifico in black and batting was Quilter's Dream Orient with Quilter's Dream Wool layered beneath the quilt top. This was quilted usingelectric channel locks on my Innova longarm (hand guided), and those electric channel locks make all the difference. I recently upgraded and had those installed from the basic manual channel locks that come on the machine.The difference is this:Manual channel locks: walk to the back of the machine and engage the channel lock quilt a straight line stop the machine walk to the back of the machine and disengage the channel lock walk to the front of the machine and move to new point repeat 1-5 over and again Electric channel locks: Push remote button from front of machine to engage channel lock Quilt a straight line stop the machine push remote button from front of machine to disengage channel lock move needle to new point repeat 1-5 as needed (and your legs are breathing a huge sigh of relief from all that walking you just saved yourself) I digress. Here's some more amazing eye candy from Leslie's quilt.[caption id="attachment_923" align="aligncenter" width="474"] Leslie's Kaffe Quilt[/caption][caption id="attachment_928" align="aligncenter" width="293"] Angled close up[/caption]If you're interested in purchasing the book, you can check it out here on Amazon.
Read more
Longarm Quilting – by kustomkwilts
RJR What Shade Are You? Blog Hop
What Shade Are You? Blog hopHi! I'm Joanna Marsh from Kustom Kwilts. I live in the Texas Hill Country with my husband and baby girl. I have been so captivated by all of the #whatshadeareyou projects and the RJR Cotton Supreme Solids, and I'm so excited to share mine with you on the RJR blog today--The Dreamer's Star Quilt! You can check out my instagram @kustomkwilts to see what I'm up to. I'm so excited to be featured on the RJR blog today with their amazing cotton supreme solids! Check out the What Shade Are You? posts for some amazing inspiration here.[caption id="attachment_763" align="aligncenter" width="300"] Dreamer's Star Quilt in RJR Cotton Supreme Solids[/caption]A little background on what brought me to quilting: In my previous career, I was a high school agriculture science teacher. My principal's secretary was a quilter, and I mentioned to her that I was interested in starting to sew. I remember her telling me the secret to quilting was a consistent quarter inch seam allowance--and that as long as I remembered that, I'd be okay! I found a beginner's quilting book in my teacher mailbox one morning with a sweet note of encouragement from Donna Jo (principal's secretary), and that was how my sewing journey began. Both of my grandmothers were amazing seamstresses, but I had never learned to sew from them. One thing I've learned about the sewing community is that it's full of people who want to share their love of the craft with others, and I love being part of such a giving community!In 2016, I left my teaching job and committed to sewing and quilting full time. At my 9-5 job (really more like 5-9), I would find myself thinking about sewing in spare moments. The Dreamer's Star Quilt is a quilt I drew while dreaming of doing the thing I love as a career, and I knew I wanted to use my favorite pattern for the What shade are you project. The design reminds me of the toy kaleidoscopes that produce different images just by turning the end, and how the images can be so bold and impactful. I love quilts that have a large central design and aren't necessarily block based. I also remembered that when I started quilting, I struggled with selecting lots of fabrics to coordinate within a quilt, and I wanted a design that would look great with a two-color scheme, but could also make a big impact with lots of colors. This is the original quilt that I used Michael Miller's painter's canvas with.[caption id="attachment_764" align="aligncenter" width="300"] Dreamer's Star Mini Quilt[/caption]I knew that the Dreamer's Star Quilt would just glow with RJR Cotton Supreme Solids, and wanted to use colors that would reflect the gorgeous sunsets that we sometimes see out in the Texas Hill Country.[caption id="attachment_765" align="aligncenter" width="240"] RJR Cotton Supreme Solids[/caption]There are so many amazing colors to choose from and I went with 11 of my absolute favorites:292-Turks and Caicos 279-Purple Haze 274-Riviera 317-Jacaranda 391-Robin's Egg 328-Bora Bora 422-Plum 371-Melody 333-Bougainvillea 287-Raging Ruby 378-Lilac Festival.[caption id="attachment_766" align="aligncenter" width="300"] Look at those yummy colors![/caption]While I was browsing through the color card, I couldn't help but chuckle to myself about the clever names of the colors. Some of my color selections might tell you that I'm ready to take a vacation ;)Piecing the quilt together was a breeze with lots of simple half-square triangles and chain piecing.[caption id="attachment_767" align="aligncenter" width="300"] I love these color combos![/caption]I love to use several shades of similar colors to create a little depth and dimensions to a quilt. For the backing I used Bougainvillea with a strip of Bora Bora down the middle, and Turks and Caicos for the binding. I loved seeing all the colors melt together, but still be distinctly different, just as in a sunset.[caption id="attachment_768" align="aligncenter" width="290"] Bougainvillea with a strip of Bora Bora really make the quilt back glow.[/caption]Once the top was completed, I loaded it on my longarm and quilted some simple straight lines with rulers and added some free motion accents in coordinating Glide threads.[caption id="attachment_769" align="aligncenter" width="300"] Quilting the quilt[/caption]I love using Quilter's Dream Wool to keep the quilt lightweight--remember, I live in Texas--but still let the quilting pop. I had a lot of fun getting some pictures at the Cibolo Wilderness Trail in Boerne, Texas. It was an absolutely gorgeous day and my husband and mom were my professional quilt holders.Check out other versions of the Dreamer's Star on Instagram with #dreamersstarquilt and you can pick up your copy of the pattern here. The pattern comes with three different size options, and the color combinations you could choose are limitless! I had so much fun making this quilt and drooling over the Cotton Supreme Solids. Thanks for joining me in this quilting adventure, and a huge thank you to RJR for allowing me to participate and for the inspiration they bring with the #whatshadeareyou blog hop!Quilt Details:Pattern: 'Dreamer's Star' by Kustom KwiltsFabrics: RJR Cotton Supreme Solids (full list above)Backing: Bougainvillea and Bora Bora RJR Cotton Supreme SolidsBinding: Turks and Caicos RJR Cotton Supreme SolidsQuilting: Long arm quilted by Joanna Marsh of Kustom KwiltsFinished Size: Approx. 80"³ x 80"³
Read more
Longarm Quilting – by kustomkwilts
Love Patchwork and Quilting Issue 48!
photo provided by Love Patchwork and Quiltingfabric for quilt provided by Robert Kaufman Fabrics Have any of you ever made a goal so outrageous that you don't ever really even consider it to be a possibility? You might still work towards that goal, but the hopes that it will come to fruition aren't there. That's exactly how I feel about this post. I always looked at the quilts and projects in this magazine and was blown away by the talent and variety. I'm BEYOND excited (so excited I'm yelling in all caps!) to say that this quilt I submitted to Love Patchwork and Quilting Magazine made the cover! When I started sewing a few years ago, I joined the San Antonio Modern Quilt Guild, and someone mentioned that LP& Q was the only magazine they bought. So I jumped on that train. I had never heard of it, because I was very new to quilting, let alone sewing. I was tired of the traditional color palettes that are represented in other quilting magazines. It was definitely love at first sight, and I subscribed to it immediately. (And ask for it for Christmas every year!) photo provided by Love Patchwork and Quiltingfabric for quilt provided by Robert Kaufman Fabrics I'm super excited about the photography of this quilt! I've never had a quilt professionally "shot" before, so it is thrilling to see the results (and know that I have a lot to learn when it comes to my own quilt photography ;)This quilt is something I worked really hard on, and for a long time. I am so thankful to the amazing people at Robert Kaufman Fabrics for providing the Kona Cotton Solids that were used to make the cover quilt, and for the opportunity from LP&Q to share my quilt! I did some custom quilting and a little bit of ruler work on the longarm to finish off the quilt. I hope you'll check out the quilt in issue 48 of Love Patchwork and Quilting! Thanks for letting me share my happy news with you :)
Read more
Longarm Quilting – by kustomkwilts
Red Heart Quilt - client quilt
I recently had the privilege of quilting this gorgeous quilt for one of my clients. The piecing is just gorgeous and the quilt was donated to a charity event/fundraiser. I quilted the quilt with free motion hearts all over the top. Quilt Pieced by Debra B. This was such a joy to quilt--check out the close up of the free motion hearts :)
Read more
Longarm Quilting – by kustomkwilts
Sewing for BABY part 2 with Anna Maria Horner fabrics
So there are really only 2 more items I wanted to talk about on this topic, then I promise, I will move on from the baby talk! Find the fabric for this projects HERE and the pattern for the Belle Baby Bag HEREDiaper bags. Are. Outrageously. Expensive. If you can sew, there is no excuse for buying a diaper bag (in my opinion). I spent weeks looking for the perfect diaper bag pattern, and low and behold...Alicia from Swoon Patterns is miraculously pregnant at the same time that I am!!! Which means she released a diaper bag pattern in the nick of time for me!!! I mean, not really for me. More for her, I'm sure. But I'll take it! My pile of Belle Baby Bag pieces cut and ready to go! So I adore the "Passage" in Pomegranate from AMH's Mod Corsage collection. Such vibrant colors. Seriously, pictures really don't do the print justice. I didn't want to pair the fabrics with a solid, so I went with some Michael Miller's Painter's Canvas in a blue-grey color. I feel like it really gave a little added texture and made the bag really POP. This is the shoulder strap for the bag--using Passage in pomegranate. You can't find a store bought diaper bag in fabrics this gorgeous. Won't happen. And then this is the nearly finished bag (I was waiting for the strap hardware to come in). The pattern is very well written (thank you Alicia!), and I couldn't be more happy with the fabric (thank you Anna Maria!!!). I'm not going to lie...I started carrying it as my purse as soon as I got the rest of the hardware in. It's going to be a great diaper bag--there are pockets everywhere, and there are even stroller clips (not shown in picture) that attach to the handle of the stroller. So there's the diaper bag. The last thing I'm going to gush about for the time being is the wall hanging I made for Gemma's room. If you haven't heard of Vanessa at Fabric Confetti, run--don't walk--to her website. Her embroidery-applique designs are awesome! I purchased the Elemenopea embroidery design package (it also comes with SVG files to load into your cutter). I was originally going to hand embroider "Gemma" onto a big wall hanging, but...ain't nobody got time for that! Find the embroidery files to purchase HERE on the Fabric Confetti website. Elemenopea Embroidery package-picture from the Fabric Confetti website So this comes in two different sizes (I swear--I didn't get paid anything to promote either of these products. I just love them. I purchased them both myself and didn't ask for any kind of payment from any designer mentioned in this post.) I bought the larger size. And yes, it is a bit pricey. But...so worth it. I embroidered/appliqued each letter in "Gemma" separately and cut them out so I could set them at wonky angles on the wall hanging. Note the reappearance of "Passage" in pomegranate! The solid fabric on the bottom portion of the letters and also seen in the border of the wall hanging is a shot cotton by Studio E. The prints in the top portion of the letters are all various prints from Mod Corsage. So this is the nearly finished project--loaded onto the longarm and being quilted. So these are just a few of the things I've made for the nursery, and I'm happy with the few items I did make...even though my original plan was to basically stress myself out to the point of no return by making crib sheets, changing pad covers, lots of baby clothes, etc. Nope. Didn't happen. :)
Read more
Longarm Quilting – by kustomkwilts
Sewing for BABY with Anna Maria Horner fabrics
As I said in my post a few weeks ago...we have a little girl on the way (I'm typing this in October, so I'm half way hoping she's already been born by the time this goes live!). My husband and I come from a long line of handmade people...my father in law made Gemma's crib and dresser, my mother in law hand painted baby blocks for her and even wove some handles on a wooden basket to keep the blocks in. So I wanted some other handmade items in the nursery too!When I first found out I was pregnant, I had all these grand illusions of what I wanted the nursery to look like. I was dreaming of a little girl. We found out that was the case, and I knew immediately I didn't want a sickening pepto pink bedroom for her. Pinterest was my BFF and I was pinning tons of color schemes and baby patterns. I decided to make a short list of things I knew I would have time to make prior to her arrival and planned them out. I started out with Alison Glass fabrics because I LOVE the saturated colors. But I couldn't pick a color scheme. So I moved on to AMH and fell in love with the Mod Corsage line and Fibs and Fables. I love how complex the colors are in Anna Maria's lines. The color schemes are very sophisticated, but they all manage to work with her other lines. So I'm just going to do a quick run through of the items I've made so far for sweet baby girl's room. Handmade burp cloths from cloth diapers and AMH Mod Corsage So this style isn't typical of the burp cloths I used to make and sell in my Etsy shop, but I think these will be much more absorbent. We shall see!!! At the very least, they'll be beautiful until they are snotted on and spit up on :) Get the tutorial HERE (and better yet, this tutorial is labeled for beginner sewing! Hour Baskets in Mod Corsage for baby organization And have you seen how expensive simple little organizing baskets are??? Enter the hour baskets by kelbysews. These literally took me 30 minutes from start to finish, and they hold the burp cloths like a champ. I think I made 6 of these, and I love them all! Get the pattern HERE Tummy time mat made with Mod Corsage and Fibs and Fables AND batting scraps And this ethereal print from Mod corsage with the bouquets...to die for. I wasn't sure what I was going to use this fabric for, but I knew I wanted it showcased. And I loved this dressmaker print from the AMH Fibs and Fables line. So I made a simple tummy time mat. Another great thing about making this was that I used up a TON of batting scraps that I didn't have any plan for. I quilted this mat pretty heavily, so I stacked the batting scraps 3 layers deep. This is the cushiest thing you could ever lay a baby on. And I love that I put those smaller batting scraps to good use. I squared it up after quilting, rounded the corners to give it a little more style, and bound it. It's small enough that I can roll it up and take to grandma's house or wherever but big enough that I don't have to worry about other people's dirty floors :) There's no pattern for this to link to, but it's basically just a whole cloth quilt with tons of batting scraps layered in between the two pieces of fabric--enough to make 3 layers thick with batting. Quilt as desired. Trim/square up into whatever shape you desire. I rounded the corners because I didn't want them square, and then I slapped some binding on that sucker. I did machine bind--in the event that this got pooped on or spit up on a ton and needed to be laundered a lot--so if you love hand binding as much as I do, you may want to rethink that!I'm going to make this a two part post to talk a little more in depth about the other items (so I can credit other people's designs). Continued to next week--when I will hopefully have this baby out of my body if I don't already!!!
Read more
Longarm Quilting – by kustomkwilts
Lemon Slice Picnic Blanket
This may seem a little redundant, seeing as how I already participated in Erin's blog hop for SewHome, BUT I had to talk about the really unique Picnic Blanket (Quilt) that I also had the opportunity to work on for the book. SewHome by Erin Schlosser, photo by C&T Publishing I can't stop thinking about how unique and practical the projects are in Erin Schlosser's new book. For real, y'all. I've bought fabric and supplies to make my top 6 favorite projects in the book (who knows when I'll have time to do it!!!). Lemon Slice Picnic Blanket, photo by C&T Publishing So, this is the Lemon Slice Picnic Blanket, and it is too cool for school! The ingenious part is that the backing is with laminated cotton--so you don't have to worry about getting grass stains on the back of it. Erin asked me to quilt this for the book, and it was so much fun to do. I just had to share this and, if I'm being honest, don't be surprised if there are more posts from Erin's book in the future.
Read more
Longarm Quilting – by kustomkwilts
Quilting a "Letters from home" quilt
A couple of months ago, I had the awesome opportunity to quilt one of my customer's "Letters from Home" quilt (pattern by Heather Givens/Crimson Tate). Now, I have to preface this post by saying that I'm barely wetting my toes in the waters of custom quilting. But I am super-duper proud of the quilting on this quilt. I'm going to take you through the process. I like Glide's thread for a little pop of sheen on a quilt. Plus, it quilts like a DREAM. I selected a few different thread colors for the quilting on this quilt. Mainly, I changed thread colors to help them blend with the fabrics they were quilting on for a more subtle pop. I used Quilter's Dream batting for this quilt, as I do with most of my client quilts. Glide Threads selected Some people might have you believe that once the quilt was loaded and the threads picked out that the quilting just magically happened with a wave of their wand. Here's my dirty little secret: This quilt sat on my frame for a week. An entire WEEK. I had sketched out at least a dozen ideas for quilting, and each morning I would go out to my studio, ready to attack. But then I would end up standing there, staring at the quilt top. I changed my mind so many times, and then decided on the most difficult (or most time consuming) design I had drawn up. Beginning to mark and quilt the borders So I broke out my water soluble marking pen and trusty ruler and started marking some guidelines for the quilting. I did some straight line quilting on the borders after marking them, and then marked the rest of the quilt as I went. Each pass on the longarm took me about an hour to mark with the ruler and pen. More markings, filled in with some quilting The thing about the design being quilted, is that it isn't complicated. It's just a bunch of straight lines and loops, but the way they are put together really leaves you with a huge impact. I have a black light on my longarm and seriously think it is SO cool. This shows the texture a little better. I really wanted to focus on the texture on this quilt, and so I chose to stitch in the ditch around the envelopes and the focal fabrics so they would pop out more. My client selected Japanese import fabrics from Bunny Designs (out of Austin, TX), with a backing out of an adorable cupcake pattern (see the first photo in the post). The attention to detail and her impeccable piecing made this quilt one of my all time favorites to quilt. The quilt pattern by Crimson Tate is SO cute, and an ingenious way to showcase focal fabrics. So, aside from me just talking about how much I loved this quilt, my other point is that sometimes it isn't second nature to just come up with quilting designs out of thin air. And it's okay if the quilt has to sit on your frame for a week while you change your mind a hundred times about the quilting design (as long as your client has allowed you to do so!). And while it is my favorite thing ever for a client to say--I want custom quilting, and the design is up to you--it can also be the most challenging (and rewarding) part of my job. I think this is a great way to grow your skill set and think about how many different ways there are to quilt a quilt. (Quilt construction and fabric selection by Debra Barnes)
Read more
Longarm Quilting – by kustomkwilts
Free Jelly Roll Quilt Tutorial!
If you've been looking for a way to use up those super cute jelly rolls you've acquired...I have a great jelly roll tutorial for you! It's free, and you can find it at the American Quilter's Society Blog, sponsored by Janome. Free Jelly Roll Quilt tutorial by Joanna Marsh I whipped up this quick tutorial using L's Modern Basics (in the warm colors) Sushi Roll. I absolutely love this fabric collection and plan on making one of these in the cool colorway too! Easy piecing with Janome's 1/4" piecing foot If your quarter inch seams aren't perfect, you can take your piecing skills to the next level with a 1/4" piecing foot that will give you perfect seams every time. This foot is everything when it comes to piecing!!! Up close and personal of the quilting And then finish your top off with some fun free motion quilting! Have fun with this free tutorial, and use up that fabric you've been hoarding for so long :)
Read more
Longarm Quilting – by kustomkwilts
Finding time to give back #quiltsforpulse
In the midst of tragedy, I am relieved that I belong to a group of people that goes out of their way to show love for others. The group I'm talking about is the Modern Quilt Guild. And even more specifically, the San Antonio chapter of the Modern Quilt Guild. The Orlando MQG organized collections to accept in progress quilts and completed quilts to show support and love for some of the people affected by the Pulse night club shooting. I hate that I'm even writing a post about this, because it's so disturbing the amount of violence we hear about on a daily basis on the news...but I want to focus on giving back and showing support for our fellow human beings. The SAMQG members are SO giving and generous with their fabric and time, that we've had a plethora of blocks constructed (most using the Heart pattern tutorial by Cluck Cluck Sew). A few charity sew-ins, and we've finished (I think) 5 quilts! I had the great opportunity to quilt a few of these, and wanted to discuss charity work in this industry. I've done a little bit of charity sewing in the past, but not really donated much of my time or resources prior to getting my longarm. And once I started donating my quilting, I kind of just rushed through the process, doing a stipple or some quick meandering design to get that top off my frame as quickly as I could. But one night, I started thinking about the recipients of these rushed through pieces I had worked on. Was I proud of the work I was doing on them? No. Absolutely not. I was just FINISHING THEM. There was nothing special or generous about what I was doing to add to the quilt. And maybe those recipients don't even look at the quilting. But it really got to me that I was doing about 2% of my best work on something that was supposed to be making someone happier. I decided to start doing my best work on every quilt top. Whether it was a paying customer or not. If I'm going to commit to working on something, why would I give anything less than my best? And besides, if you want to look at it from a really selfish angle, it's great practice and helps develop your skills even further. I really love the graffiti quilting style, and chose to do that on this quilt. These blocks were pieced together by so many different people, with such love and compassion in their hearts. It really does give me a little bit of hope for humanity.Anyway, my two cents for the day is to think about where your heart is when you decide to do charity work. If it's in your heart, put your best foot forward and really give all you have. Otherwise, what are you wasting your time for?
Read more
Longarm Quilting – by kustomkwilts
Gems in the Night Sky Quilt (Dear Jane-ISH Quilt)
I played with the quilt design for the Gems in the Night Sky Quilt in EQ7 for probably a week straight before I had my final layout the way I wanted it. I changed the background fabric, moved blocks around, completely deleted blocks, changed color arrangement, the list goes on and on. It's funny how after you're done with something, all the time you spent on it just kind of vanishes, and you don't think about the labor of love you put into it. This quilt. All the hearts. I had the awesome chance to design and make this quilt for Janome's brand new machine launch--the 9400. I'm not going to lie, this quilt took FOREVER. But packing it in a shipping box and saying goodbye forever was nearly as difficult as giving away your first born. And then I saw the picture of it on the Janome website once the machine was released, and it was like seeing photos of a long lost friend. And I might have squealed out loud at the top of my lungs :)So there were 81 blocks- with 9 different block constructions. At first glance it kind of looks like someone took a Dear Jane quilt and dumped a bucket of modern over it (which is fine with me!), but if you look a little closer, you will see the blocks are just made with alternating colors and arranged in a way that it deceives you into thinking there are a lot of different blocks in this quilt. This was pieced with the Michael Miller Cotton Couture bundle that's available at Janome dealers, and the background fabric is Anna Maria Horner's True colors- filigree in dusk. I think the combination is just dreamy. Sometimes I love the backs of quilts more than the front. I like to press my seams open to eliminate a lot of bulk when I quilt. And then it was quilted with Stitch in the ditch around the bright colors and heavily quilted on all of the AMH fabric. I had to keep this a secret for so long, that I nearly forgot about it once the machine was finally released. So I'm finally able to share and show my little labor of love.
Read more
Longarm Quilting – by kustomkwilts
Free Quilt Pattern Alert! Super easy I Spy Quilt pattern to ease your pain on long road trips with the kids
How many times have you been in the car, loaded up the kids to go to grandma's house, and heard that horrible, awful question...(queue the Jaws music)..."Are we there yet?" or better yet..."I'm Boooooooored." I Spy Quilt loaded up and ready to go! I know we're all super busy in the summer, and it makes finding time to sew pretty difficult. But now you have a great reason to bust out the sewing machine--you're going to cure the kids of their road trip boredom by making them an I Spy Quilt! All you really need are some random novelty prints or scraps--even seasonal fabrics are great for this. The great thing about this quilt is that NONE of the fabrics need to be cohesive for this to work. You have a print with elephants? Elves? Pirates? Cactus? Ballerinas? They're all perfect! The more random the assortment of your fabrics, the longer the kids will be staring at this quilt, absolutely stumped. Your layout can be totally random, too! I tried to lay my squares out from dark to light,but you can try grouping them by color, theme, etc. I had the privilege of teaming up with Janome to write this tutorial for American Quilter's Society. So follow this pretty little LINK and head over to get the skinny on how to put this awesome little lifesaver together! I quilted mine with some sweet little swirls that were fast and easy! Okay, so in all honesty, making this quilt won't be the end of you ever hearing those two comments from the back seat again, but what the heck! It's worth a shot isn't it? ;)
Read more
Longarm Quilting – by kustomkwilts
Love Patchwork & Quilting Nautical But Nice Quilt
So...There was this one time that I actually got to have a quilt in a magazine! I collaborated with Stephanie Kendron of Modern Sewciety on this gorgeous ombre nautical themed quilt for Love Patchwork & Quilting. I'm one of those people who already WAY over uses exclamation points. But just prepare yourself for this post, because my excitement was ridiculous!Seriously, pick up your copy of LP&Q-issue 36 (you can find it at Barnes and Noble), and you'll see my ugly mug in there :) So, normally, this would be a post discussing the design elements and collaboration process, but this was my first ever time to be in a magazine--so far ;) so I'm allowed to be a little excited, right?
Read more
Longarm Quilting – by kustomkwilts
Crayon Box! New free quilt pattern for Janome
I'm crazy about quilting, but I'm also really crazy about modern quilting. The colors, the patterns, the newness of it all just makes me love everything about it! Luckily, I got to create something with the curated Michael Miller Cotton Couture bundle available at local Janome dealers. It's bright, cheerful, and has the awesomely saturated colors you can't get anywhere but from Michael Miller Fabrics (and no, they aren't paying me to say that). Cotton couture is my favorite solid to work with right now, because it sews like BUTTER. I've even used it in some garments and loved the result. So if you're dying to see it, here's "Crayon Box": Crayon Box by Joanna Marsh You can find the full tutorial on the Janome website HERE and download the pattern for free! I had a blast creating this and playing with the colors! Use the hashtag #thecrayonboxquilt to share your creation. There's also a fun tutorial on how to do scrappy bindings in the free quilt pattern, just like in the picture below (and I just couldn't resist this Loominous Anna Maria Horner print for my backing): Scrappy binding tutorial And for quilting ideas, I did a super fun swirly motif. Swirly quilting So run and grab your free pattern and get sewing today :)
Read more
Longarm Quilting – by kustomkwilts
Dreamer's Star Quilt Pattern Release
It's been a little while since my last blog post, but I have been working on some really exciting things in my neck of the woods (and I haven't even been snowed in by the monster snow storm!)I am SO excited to be releasing my first independent quilt pattern! I absolutely ADORE geometric quilt patterns that pack a lot of punch and created this pattern that is available on Craftsy and in my Etsy shop. The pattern is an instant PDF download, so you can enjoy it immediately :) The pattern comes with instructions for 3 different sizes-a mini quilt, a 64" x 64", and a 80" x 80" quilt. One of my favorite things about this pattern is that if you aren't great at combining lots of patterns or colors, all this pattern needs is really 2 contrasting or 2 coordinating fabrics to work well. But if you're a little more adventurous, go for a scrappy look and be blown away! Here are a few samples of the Dreamer's Star Quilt Pattern: Dreamer's Star Quilt 64" x 64" made with Michael Miller Cotton Couture in Midnight and Lime Dreamer's Star Mini Quilt made in scrappy blacks and purples Dreamer's Star Mini Quilt made with Michael Miller Cotton Couture and Painter's Canvas I hope you'll check out this pattern that really packs a punch and when you make it, please use the hashtag #dreamersstarquilt and tag me on Instagram @kustomkwilts I SO look forward to what you'll make with this pattern :))Happy Quilting!
Read more
Longarm Quilting – by kustomkwilts
Scrappy Trip Quilt Project with the San Antonio MQG
Have you ever felt sort of isolated in this "hobby" (or lifestyle to be more accurate) that we call quilting? I had recently discovered modern quilting and realized there was this whole other world of people that were just like me. I'm sure we've all had a point in our lives where we thought Joann's and Hobby Lobby were the only places you could buy fabric...I went through this phase for probably the first year and a half that I was discovering sewing (disastrous, I know!). Once my eyes were opened (along with my pocket book), I needed to connect with other people that felt there was something more than just traditional quilting and subdued fabric. I found the San Antonio Modern Quilt Guild really by accident when I was trying to register for QuiltCon 2015. I immediately joined and have missed just a handful of meetings due to my "real job", but the experience has been nothing short of life changing. I have made friends and contacts that have enriched my life so much.We followed the tutorial posted on Quiltville's blog here: Quiltville's blog You should check it out if you're interested in making your own Scrappy Trip quilt--the instructions are very well written and easy to follow.Some of the guild members have started the journey of the "scrappy trip along". It's really a cool technique to learn, and since we all have a bit of a competitive nature, there are prizes involved and a schedule for block completion. Somewhere along the way...I got caught up and ended up with 100 completed blocks. This was my starting point when I began cutting 2.5" wide strips to arrange into blocks. I obviously like very bright, saturated colors :)My only plan for arrangement was to alternate bright, lighter colors with dark, duller colors. I wanted a very busy, random quilt when I was done with it.I think the scrappy trip quilt is an awesome project when you are feeling less than inspired and maybe lost your sew-jo, but need to find it. Especially if you are doing a random arrangement, where you allow the fabrics to just do their own thing and speak for themselves. It can be a relaxing project to just piece without thinking and enjoy the results and the process involved. (It is kind of a lengthy process!)These are some of my finished blocks (before sewn into the quilt, they measure 12.5" x 12.5"), and I just love the brightness of them. And this is the first layout I set prior to piecing my quilt top. So many times, we face difficult decisions with all the "favorite" fabrics we buy and not having fabrics to coordinate with them. In the scrappy trip, anything goes, and you don't have to concern yourself with that. I ended up with 100 completed blocks...I kind of got wrapped up in the cutting strips, sewing together, cutting, seam ripping, sewing process and forgot that my intention was not to make a king sized quilt...My final layout was a 9 x 10 layout with the finished top measuring 120" wide x 108" long. This was perfect for our bed since we have a little bit of a problem with cover thievery, and allowed for enough of a drop on both sides that neither my husband nor I end up without covers in the middle of the night. I had 10 blocks leftover and pieced them all together in a 2 x 5 arrangement. Then I cut them in half in the center of the middle block so they each measured 25" x 31". I put batting behind each one and quilted these so we would have semi-matching pillow shams. I will say that I wanted to go nuts quilting this. But with those super busy fabrics, I knew the quilting wouldn't really be showcased, so any intricacy would be lost on anyone but me. I went ahead and did some cool swirls that took me much longer than I should have spent, but I really had fun with it. If you're a beginner quilter, this would be a great project to really push your quilting skills, because any mistakes you make won't show like a sore thumb. So, if you're in the market for a pretty low stress project that you don't have to think about, grab some scraps and get started on your own scrappy trip! Enjoy the process and you'll love the end product. I'm excited to show this at our November guild meeting when everyone will showcase their own scrappy trips and share their results. Until next time!Joanna
Read more
Longarm Quilting – by kustomkwilts
My Millefiori
You can probably tell that I like to dabble in all things quilty. Last summer, I decided that I wanted to conquer English Paper Piecing. What I didn't realize at the time was that EPP is extremely addictive because you can take it anywhere...it's easy to do on the couch while watching tv, great for road trips (when you aren't driving), and can also be done at social gatherings. When people hear "EPP" or English paper piecing, many probably envision little hexagons, endearingly called "hexies" pieced together with traditional or reproduction fabrics that may end up looking a little dated. I'm not crazy about that look, but I LOVE Willyne Hammerstein's book Millefiori Quilts. (And now there's a second book to follow the first.) In the first book, one quilt pattern in particular caught my eye--the "La Passacaglia". It combines pentagons, triangles, diamonds, and other shapes to create a myriad of rosettes that are breathtaking. I will say there is a slight drawback if you are using the practice of fussy-cutting (positioning your templates on specific motifs on the fabric to create another design), and that is using fabric yardage inefficiently. But you'll be making scraps for other projects as you go, so really, it's a win-win! Here are a couple of pictures of some of my completed rosettes.These all show really great examples of using fussy-cutting with your epp. I really can't wait to finally finish my quilt top. I have all the pieces sewn together for the standard design by Hammerstein, but didn't like the fact that I would be chopping several rosettes in half to square up the top. So I opted to fill in the rest of the quilt to be even with the rosettes that stick out...the quilt top is really pretty small when you consider how much time and cutting goes into it. I laid out my quilt top on a piece of foam board and pinned it so it wouldn't shift, then used the paper pieces to fill in around the edges. I probably should really look into documenting the layout better than I did, but for now I just have some pictures on my phone. I'll share those with you once I have completed and know the layout works, so if you want to do the same thing you can! I started this project in December 2014 and finished Hammerstein's layout in September 2015. I'm not sure when I'll finish the fill-in part, but hopefully it's soon, because I am dying to quilt this thing! If you're looking for other pictures of some really awesome La Passacaglia quilts, you should check out the following Instagram users: @kamiemurdock, @lilabellelane, @izy_sewbusy to name just a few. You can also search the hashtag #lapassacaglia for some really inspiring pictures!
Read more
Be the first to know about new collections and exclusive offers.